Make Tea Towels from Fat Quarters: Free Sewing Tutorial
Learn how to make darling tea towels out of fat quarters that you have leftover from other sewing projects!

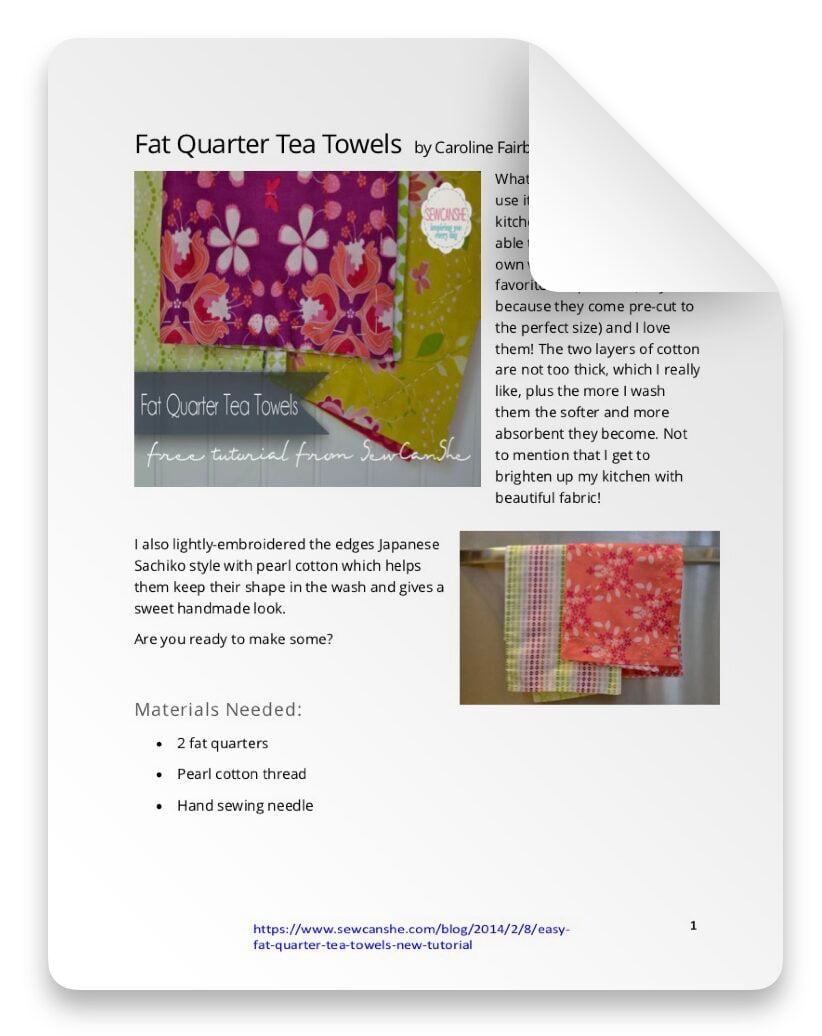
What’s a tea towel? Can you use it in your messy real-life kitchen? I think so. I made my own version using some of my favorite fat quarters (only because they come pre-cut to the perfect size) and I love them! The two layers of cotton are not too thick, which I really like, plus the more I wash them the softer and more absorbent they become. Not to mention that I get to brighten up my kitchen with beautiful fabric!
The blog post below is totally free to read, print, and sew! Just hit CTRL +P on your computer to print. There is an optional PDF download offered at the end of the post. Join our Sewing Bee Community for access to over 300 PDF patterns (including this one), live workshops, premium video courses, and more.

I also lightly-embroidered the edges Japanese Sachiko style with pearl cotton which helps them keep their shape in the wash and gives a sweet handmade look.
Are you ready to make some?


You’ll need two fat quarters and some pearl cotton for each tea towel. They are fast and easy so feel free to make a big stack all at once. These beautiful fabrics are the new Hothouse Flowers by Mo Bedell for Andover Fabrics. Aren’t they gorgeous??? I decided to use the pink and green colorway for these tea towels and save the blue and orange colorway for a little quilt (I think).


So pick two fat quarters for your first tea towel and place them right sides together on your cutting board. Make the selvages even…

And trim all the edges to make the fat quarters the same size all around. Cut off the selvages too.


Pin around the edges, and sew all the way around leaving about 3” open for turning.
Use a 3/8” seam allowance.


Clip the corners, turn right side out and press. Then stitch the opening closed close to the edge.

Make a whole bunch and get ready to embroider!


You all know I love pearl cotton. It’s just so much fun. For this project, thread a sharp embroidery needle with a long single strand and tie a knot at the end.

Take your first stitch, only going through one layer of fabric. You are going to bury the knot in the middle of the towel.

Pull the thread through to the end and gently tug at the knot until it pops into the middle. If it pops all the way out, no worries – that happens. Just try again.


Hand sew long stitches (this time all the way through on both sides of the towel) all the way around. Use the seam allowance on the inside of the towel as a guide to keep your stitching straight. You can feel it through the fabric.
When you get to the end of your thread, use your needle to tie a knot in your thread about 1/4” away from the towel. Take a last stitch through one layer only (kind of like the first stitch) and pop the knot to the center again. Pull the thread taut and cut, hiding the end on the inside.
Repeat with another strand of pearl cotton until you’ve sewn all the way around. Done!


If you want to make your stitching a little bit fancier, use a disappearing ink pen (like the Frixon) to mark a design around the edges. Here you see I used the bottom of a cup for curves and the corner of my ruler for a zig zag effect.

Then sew around them the same way, following your marking lines.

Happy Sewing!
FAT QUARTER TEA TOWELS PDF SEWING TUTORIAL
Purchase this pattern in PDF format! The PDF file contains all of the instructions, plus the step by step photos that have been reduced to fit the page nicely with no ads.
Download the file immediately and keep your confirmation email so you can download it again later. Free patterns must be downloaded within 30 days.
Disclosure: some of my posts contain affiliate links. If you purchase something through one of those links I may receive a small commission, so thank you for supporting SewCanShe when you shop! All of the opinions are my own and I only suggest products that I actually use. 🙂