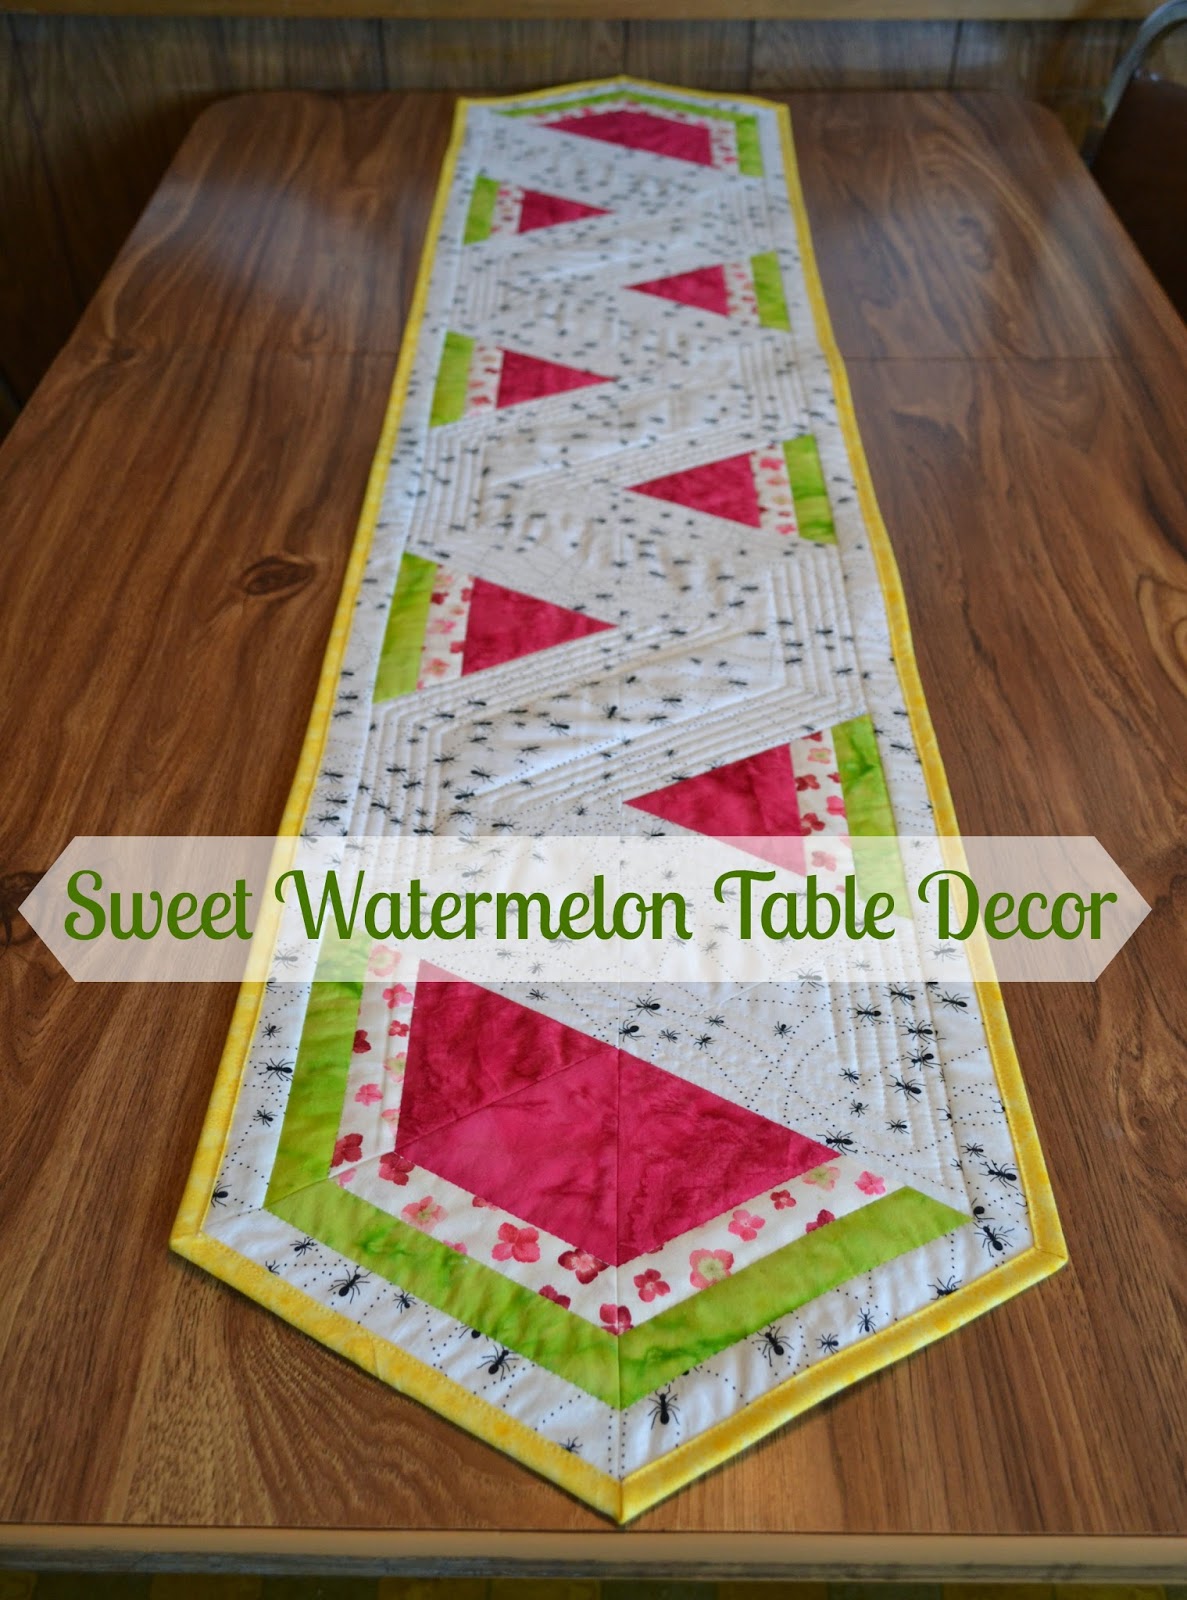
Lorna’s Free Watermelon Table Runner Pattern!
Hello all you quilty and crafty people!
Sew pleased to be Caroline’s guest today at SewCanShe!
I consider Caroline to be my number one source for all things sewn.
She’s friendly, fun and such a wonderful fountain of inspiration!
My name is Lorna, a modern quilter, designer and author of the Sew Fresh Quilts blog.
Today, I will be sharing the Sweet Watermelon Table Runner tutorial.
- Finished runner is approximately 60″ x 12″
- Fabric requirements are based on a 42” Width of Fabric and are for the bare minimum needed to complete this project and do not account for miscuts. These measurements are for the exact amount needed with absolutely no overage.
- All seams are sewn with right sides facing, using a ¼” seam.
- Press all seams open unless stated otherwise.
- Press all seams as you go.
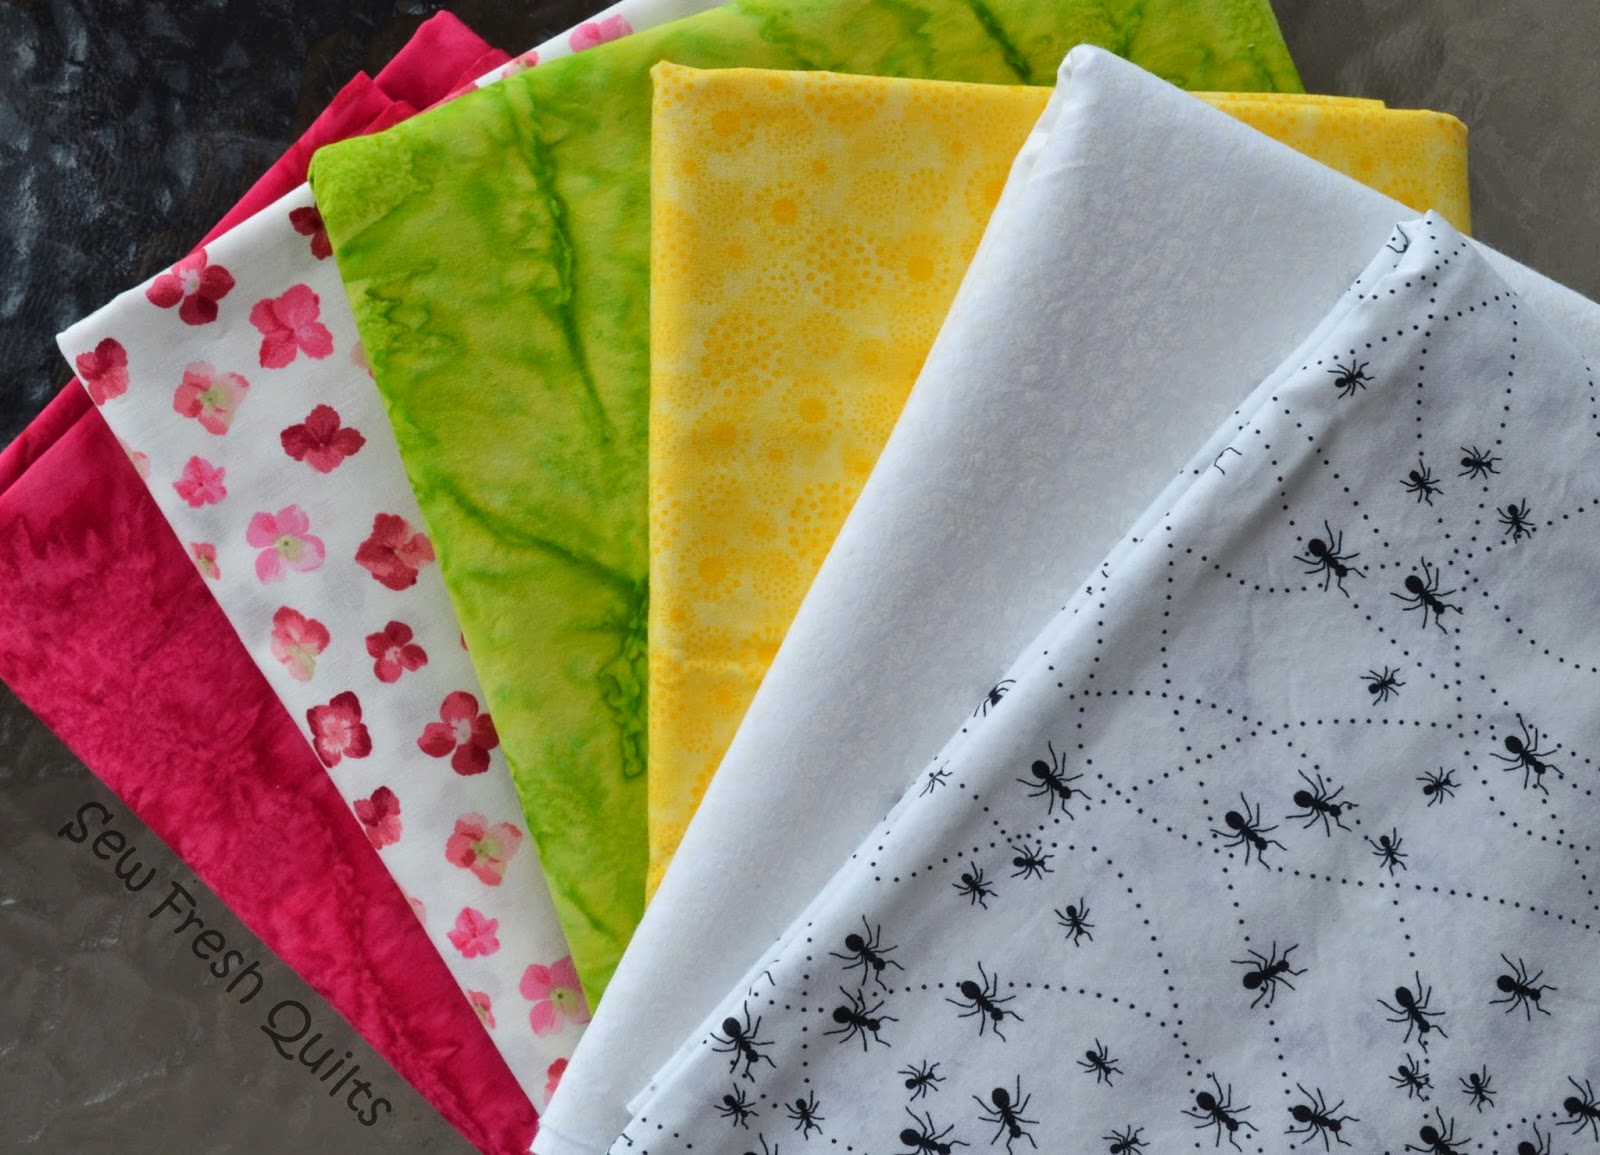
Runner Fabric Requirements
Red/pink Watermelon – 1/8 yard
Red/pink on white (small scale flower print) OR White plain – 1/8 yard
Green (rind fabric) – 1/8 yard
Background fabric (ants print) – 3/4 yard
Yellow (binding) – 1/4 yard
Backing to cover 65” x 18”
Quilt batting measuring 65” x 18”
Table Runner Cutting Instructions
Red/pink Watermelon fabric:
Cut (1) 4.5” WOF (Width of Fabric) strip
Subcut into (12) Equilateral Triangles (should get 12/strip) * See tutorial notes below *
Red/pink on white (small scale flower print) OR White plain fabric:
Cut (3) 1.5” WOF strips
Green (rind) fabric:
Cut (3) 1.5” WOF strips
Background fabric (ants print)
Cut (3) 6.5” WOF strips
Subcut into (22) Equilateral Triangles (should get 8/strip) * See tutorial notes below *
Cut (4) 1.5” WOF strips for the borders
AND Subcut (1) of the 1.5” strips into (4) pieces (approximately 10.5” long)
AND Subcut (1) of the 1.5” strips into (2) pieces (approximately 21” long)

Yellow (Binding) fabric:
Cut (4) 2.25” WOF strips
For a great tutorial on Cutting Equilateral Triangles go to https://sewfreshquilts.blogspot.ca/2014/01/equilateral-triangle-quilt-tutorial.html
For a great tutorial on Piecing Equilateral Triangles go to https://sewfreshquilts.blogspot.ca/2014/01/equilateral-triangle-quilt-tutorial_28.html
Table Runner Assembly Instructions
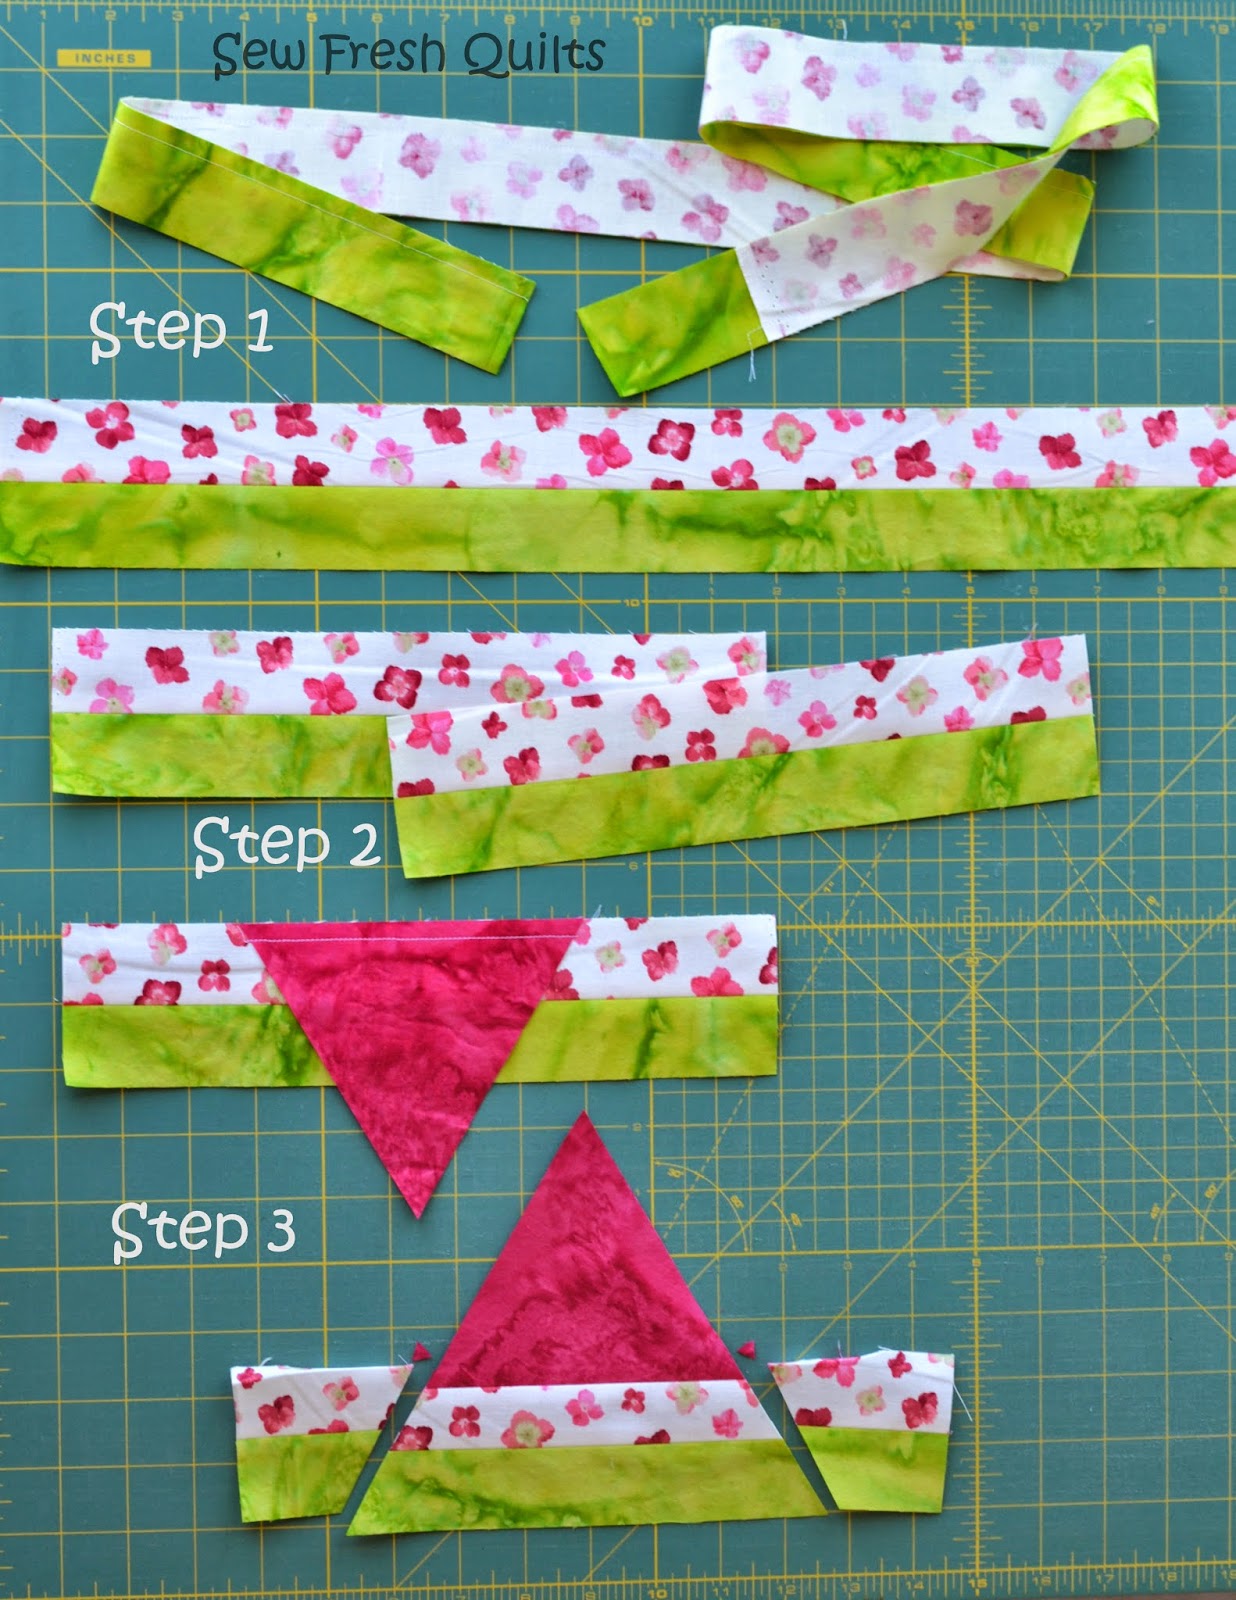
Step 1
Sew the Green Rind and Red/pink on white (small scale flower print) OR White plain together along the length and press open.
Step 2
Cut the Green & Red/pink on white (small scale flower print) OR White plain strip units into 4 pieces each (approximately 10” lengths).
Step 3
Sew these 10” lengths onto the bottoms of your Red/pink Watermelon triangles. And trim your triangles.
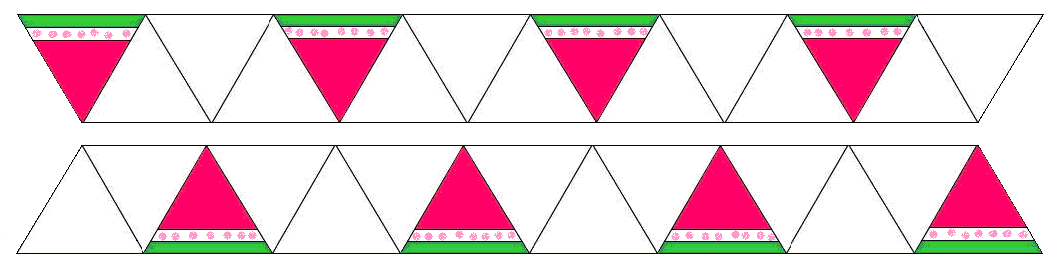
Step 4
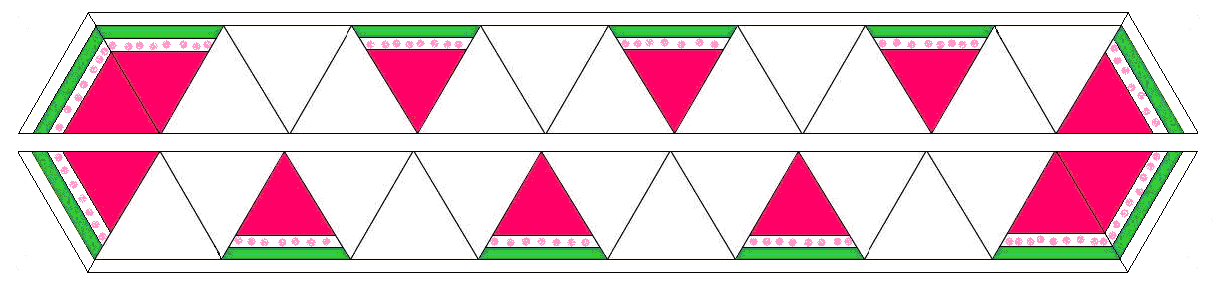
Set aside (4) of the watermelon pieces. Arrange your remaining triangles, as shown. And sew the triangles into two rows.
Step 5
Sew the (2) 21” strips of border fabric to the (2) full WOF border strips, end to end.
Step 6
When sewing on the borders, make sure to leave at least a 1” overhang on the ends. Sew the 10.5” border pieces on the ends of
the (4) watermelon triangles that were set aside in Step 4. Press seams open and trim as you did in Step 3. Sew the long borders on the sides of the rows. Press seams toward outside border on the long row pieces and trim as you did in Step 3.

Step 7
Sew the triangles onto the ends of the rows.
Step 8
Sew the two rows together to complete the top.

Step 9
Sandwich the Backing, Batting and Top. Baste. And quilt.
Step 10
Apply the binding. Enjoy!
Thank you to Caroline – and the readers of SewCanShe – for allowing me to share with you!
Comments and questions are encouraged.

This guest post was written by Lorna McMahon. On her website, you can learn from her creative process as she shares her love of modern quilting and immensely helpful content.
Lorna says, “It’s sew nice to meet you!”
Connect with me in the following ways!
Disclosure: some of my posts contain affiliate links. If you purchase something through one of those links I may receive a small commission, so thank you for supporting SewCanShe when you shop! All of the opinions are my own and I only suggest products that I actually use. 🙂