Easy Quilt Block Tutorial: The Variable Star (in a star)

|


PicMonkey Collage-18.jpg

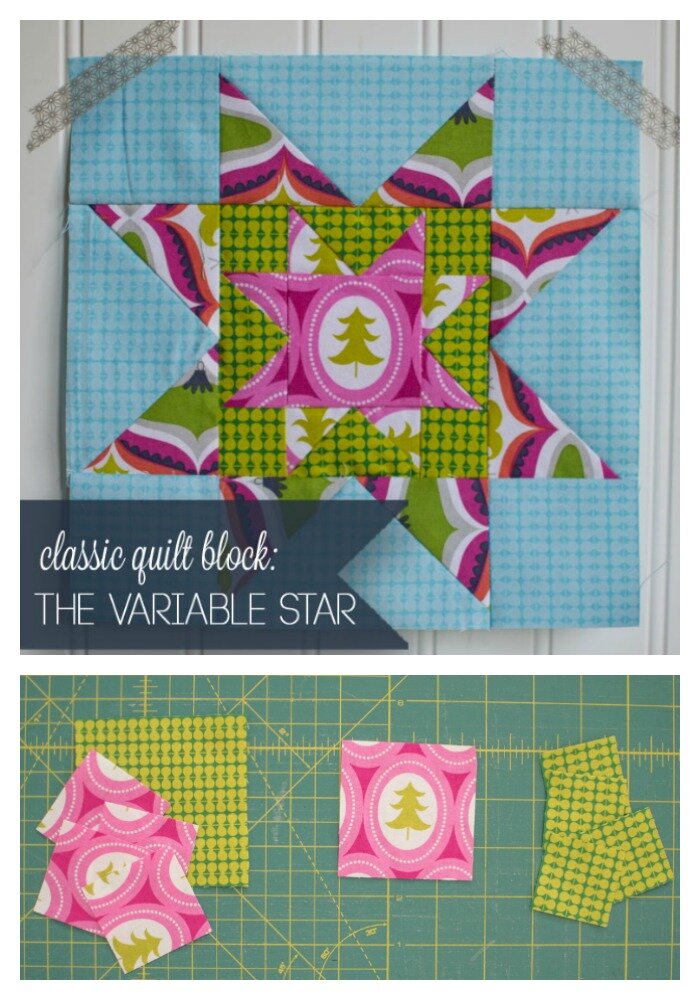
The Variable Star is an easy quilt block that has been around for over 100 years. It has also been called the Sawtooth Star and the Evening Star. This fun block lends itself to so many versions. Since the center is a square, you can fill that square with patchwork, fussy cut fabric, or more stars (like I did)!


_DSC0307.jpg

In this tutorial, I’m going to show you how to make a simple 4 1/2’’ (finished) Variable Star block. Then I’ll show you how to add to it to make a 9’’ Finished Star in a Star Block.

If you want to make a quilt with 6’’, 12’’, 24’’, and 48’’ sized stars, see my free Merry Stars Quilt Pattern!


_DSC0290.jpg

Tutorial for the first Variable Star block:

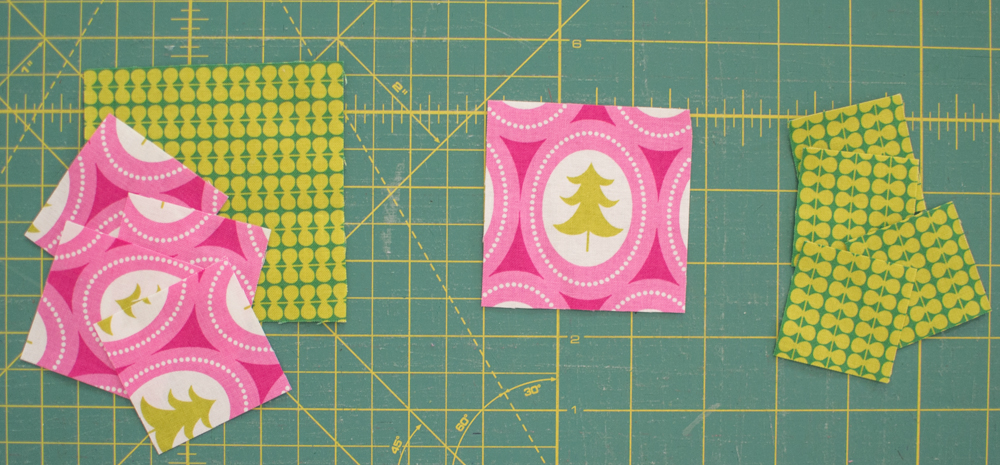
After planning from the largest to the smallest, we will sew the stars from the smallest to the largest. For my 4 1/2” Variable Star, I cut:

  • one 3 1/2” square and four 2” squares to use for flying geese units

  • one fussy-cut 2 3/4” square for the center

  • four 1 5/8” squares for the corners


_DSC0297.jpg

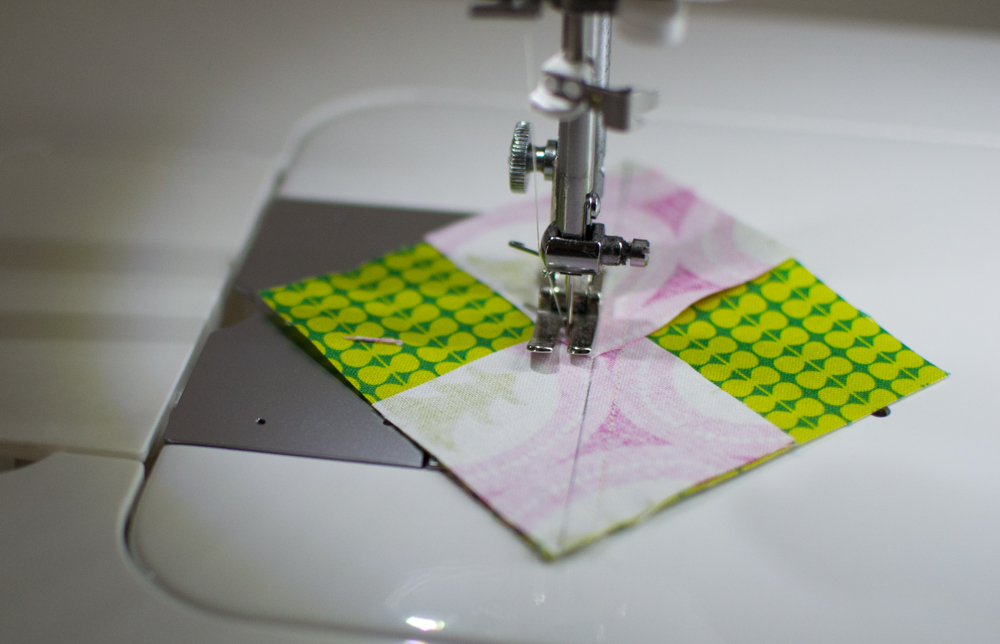
Use the first set of fabrics to make 4 flying geese units. We covered that in both the Dutchman’s Puzzle block tutorial and the Sailboat block tutorial, so I won’t go over it again.


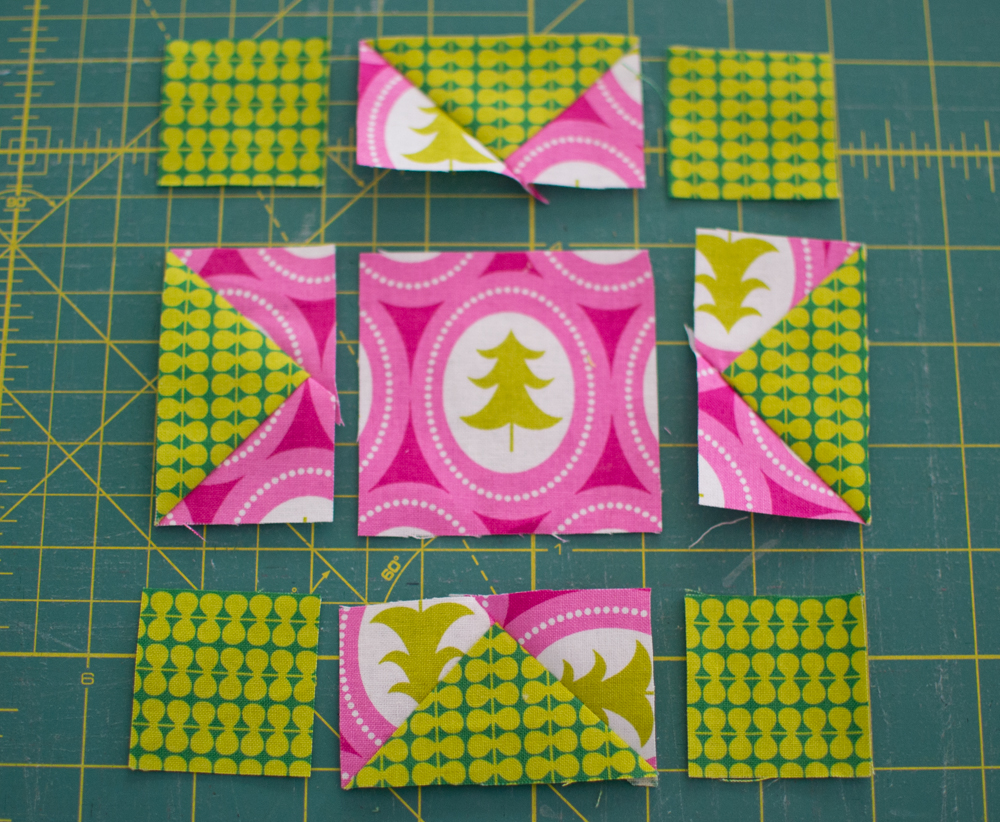
Arrange your flying geese units and cut squares in this 9-patch formation and sew them together. Squares into rows and then rows into a block. Easy peasy!


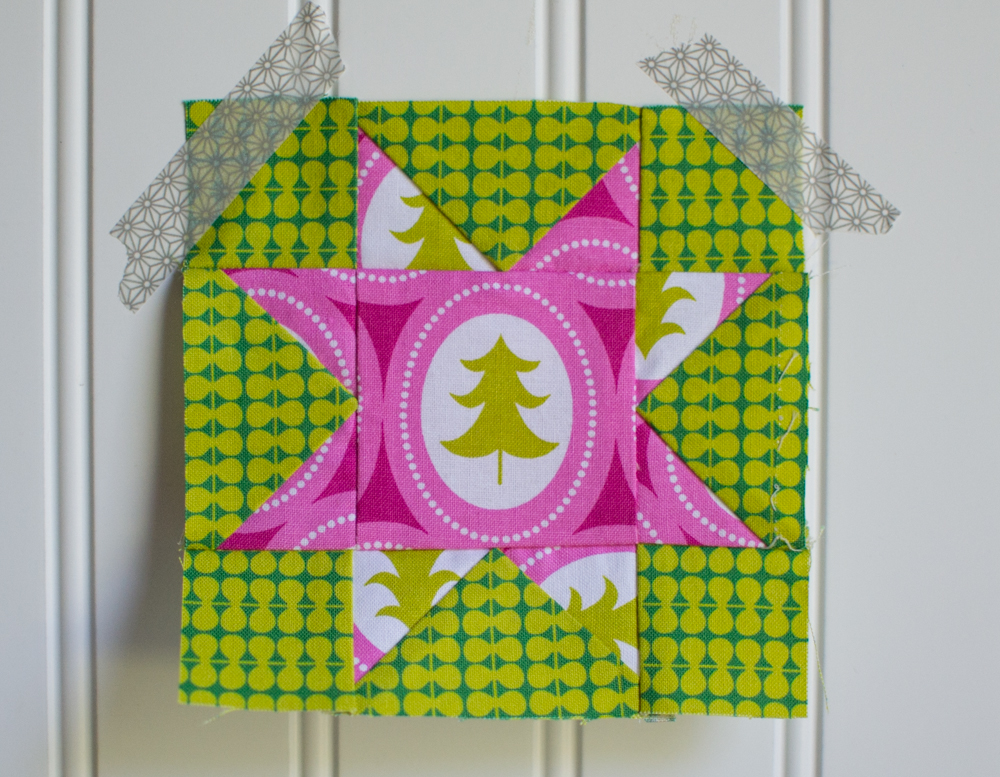
Tutorial for the Star-In-A-Star Block:

If you want to keep going with the star-in-a-star theme, make another Variable Star block using your first block as the center square. Since my first block would be 4 1/2” finished, I cut:

  • one 5 3/4” square and four 3 1/8” squares to use for flying geese units

  • four 2 3/4” squares for the corners


Make your flying geese units and then arrange the next star with the first star in the center. Sew it together.

If you love this easy quilt block tutorial, check out my Pinterest Board for more.

By the way, I have more fun flying geese sewing ideas here:

Happy Sewing!


1signature.jpg

Sharing is Caring!

Disclosure: some of my posts contain affiliate links. If you purchase something through one of those links I may receive a small commission, so thank you for supporting SewCanShe when you shop! All of the opinions are my own and I only suggest products that I actually use. 🙂

Similar Posts

13 Comments

  1. First of all those fabrics are gorgeous! Even if I don’t win, I will be purchasing some. I love the idea of the star within a star. I am envisioning a really cool bag with that block motif on the front. Can’t wait to get home and start sewing. Thanks for the great tutorial!
    Melissa

  2. Shelley Michel says:

    Beautiful!

    Once again, I ask for a printer-friendly version of these so we can print from mobile devices. I printed from my computer today, and the difference between just printing the article and printing the selection I made with just the instructions was 5 pages, and no one had commented yet. If I were printing this a week from now on a mobile device, it would easily be nearly 20 pages! Thanks so much for sharing your beautiful projects with us!!

    1. Hi Shelley! I’m glad you are enjoying this blog series.

      About your request… I’m sorry that I’m not a computer guru like you might think. I use squarespace as my platform and writing a blog post is about as difficult as writing an email. But then I have no idea how to make it printer friendly as you request.

      Here’s my suggestion… Copy and paste the pictures and text from the blog post into a word document. I tried it and it worked fine. Then you can adjust the size of the pictures until it fits into as few pages as you want (I got 6). And print.

      Good luck!

      Caroline

      1. Angelia L. says:

        Hello Caroline,
        I am not a computer guru either.
        I don’t know if this will help you and Shelley but here is a link to a website that I have used and love…and it is free.
        https://www.printfriendly.com/
        I don’t have a blog but I use it to print or make PDF files of tutorials/webpages from blogs. I can make any webpage into a PDF file. It is great because it automatically removes all the adds and other unnecessary stuff. I can also delete things that I don’t want before I print or save the file. I use Google Chrome and have a link on my tool bar. It is very easy to use.

        Angelia

        1. Shelley Michel says:

          Thanks for this info. I’ll have to see if it works from a mobile device.

      2. Shelley Michel says:

        When I print from my computer, it’s not an issue. But most of the time I’m printing from a mobile device, which prints it all.

        Is it possible to add these blocks to your Craftsy patterns?

  3. I absolutely love this! Could you post the size requirements for the blocks that you used to get to your 36" block? Thank you!

    1. Hi Marjorie,
      I mentioned it above, I used the app to calculate cutting instructions for a 4 1/2” block first. Then for a 9”, 18”, and 36” block. The block (finished size) will double each time. If you don’t have the BlockFab app or an iPhone to help you calculate, please post your request to our facebook group and we can help you there. 🙂

      Caroline

  4. Toby Thompson says:

    I just searched the Apple App Store for BlockFab and it wasn’t there. I followed the BlockFab link in your blog above and it took me to the BlockFab blog, but even their link to the Apple Store for the app doesn’t work. Has the app been discontinued?

  5. I have not been able to find the BlockFab app using my ipad. Any suggestions?

Leave a Reply

Your email address will not be published. Required fields are marked *