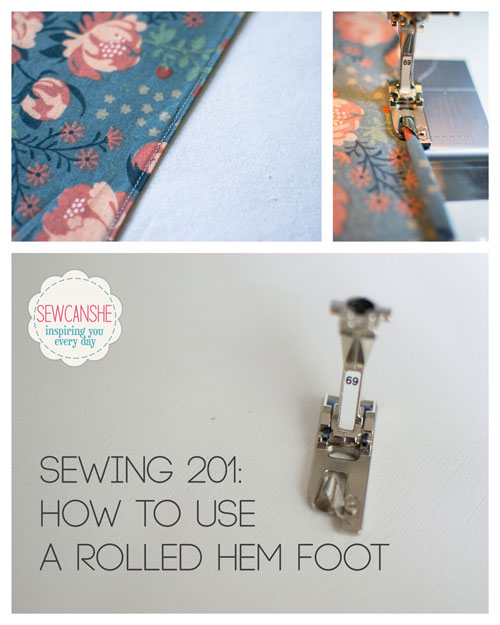
How to sew with a Rolled Hem Foot
I’ve been sewing with my rolled hem foot quite a bit lately, so I snapped a few photos to show you. In this blog post I’m going to share some tips and tricks to get this foot working for you. The rolled hem foot sews just that, a narrow rolled hem that’s pretty on scarves, blouses, dresses, or even curtains.
If you have a lot of hemming to do, this little tool might save you lots of time and effort. It has a little twirly part (called the curl) in front that rolls the fabric raw edge into a hem for you. I have an older Bernina, and it’s foot #69.
When deciding whether or not to use the rolled hem foot for your project, let the fabric guide you.
-
The rolled hem foot is best for lightweight fabrics such as voile, lawn, and chiffon.
-
It’s just not going to work on heavy fabrics such as canvas or denim.
-
If in doubt, cut a strip of fabric and test it out.
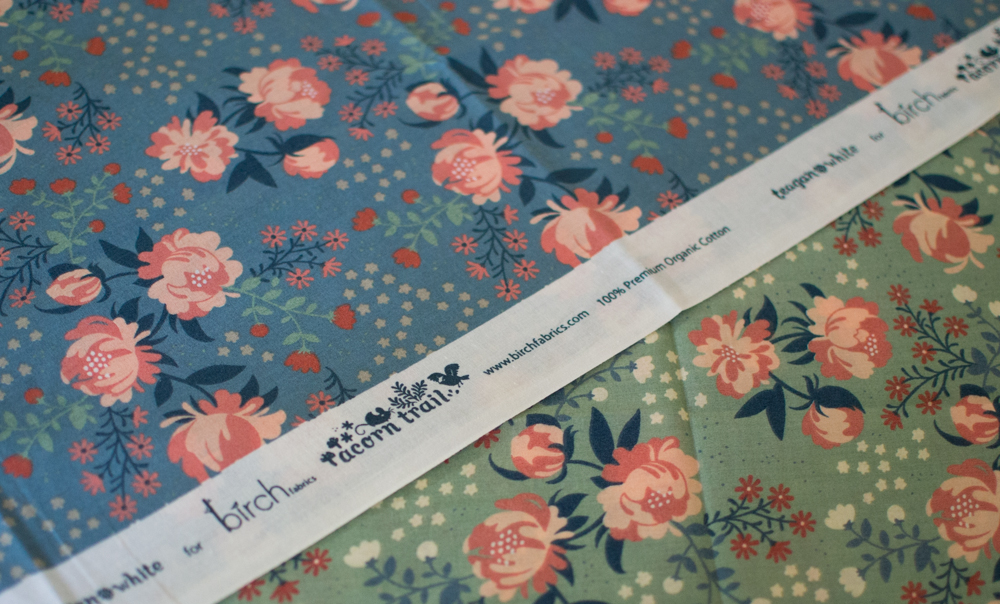
The fabric I’m sewing on in the pictures is organic cotton voile from Birch fabrics. It’s so lovely and lightweight – perfect for the rolled hem foot.
Before I start, I like to press a narrow hem to get the sewing machine started.
-
Start with a clean edge (cut with a rotary cutter, if possible)
-
Press to the wrong side 1/8”
-
Fold over 1/8” again and press
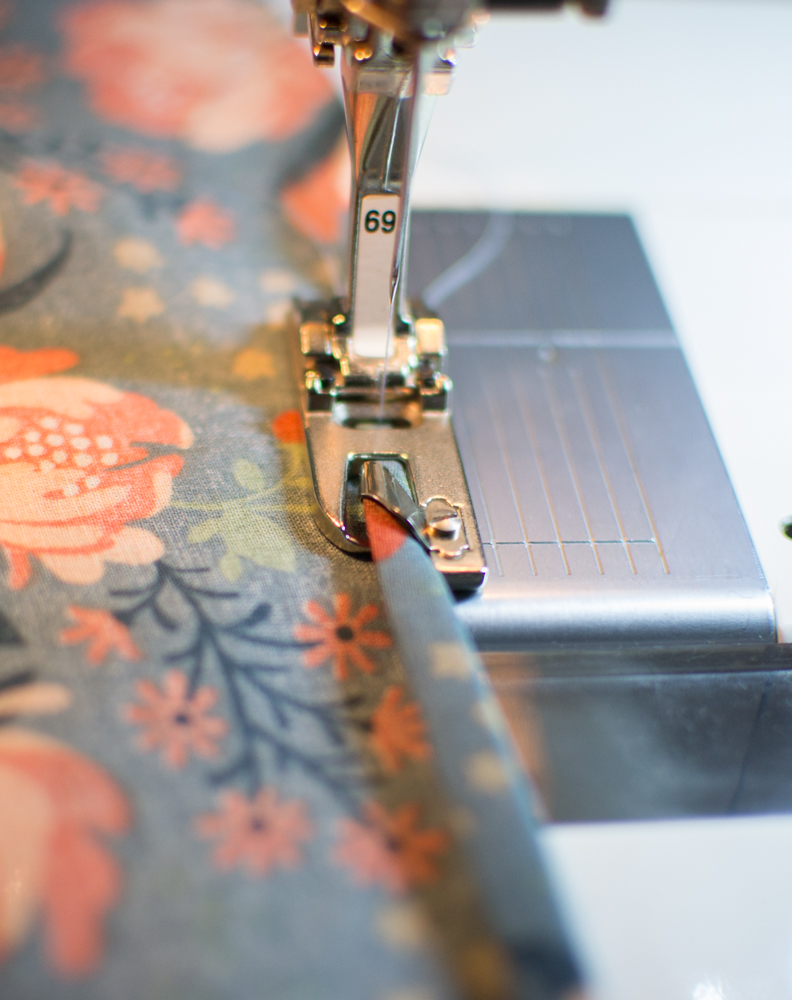
Place the pressed edge under the rolled hem foot and gently ease the raw edge inside the curl.
The trick is to feed enough fabric around the inside of the curl to create the hem, but not so much that it gets clogged and the fabric folds too many times.
If you don’t feed enough fabric into the foot, it won’t make the hem.
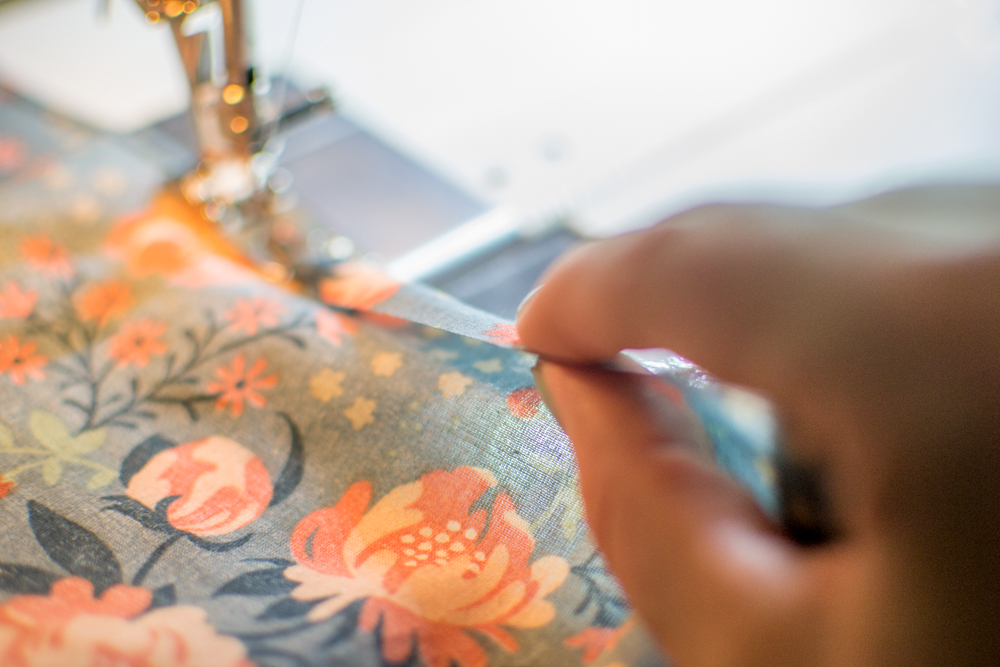
While feeding the fabric smoothly with your left hand, use your right hand turn the raw edge over 4” – 6” in front of the foot.
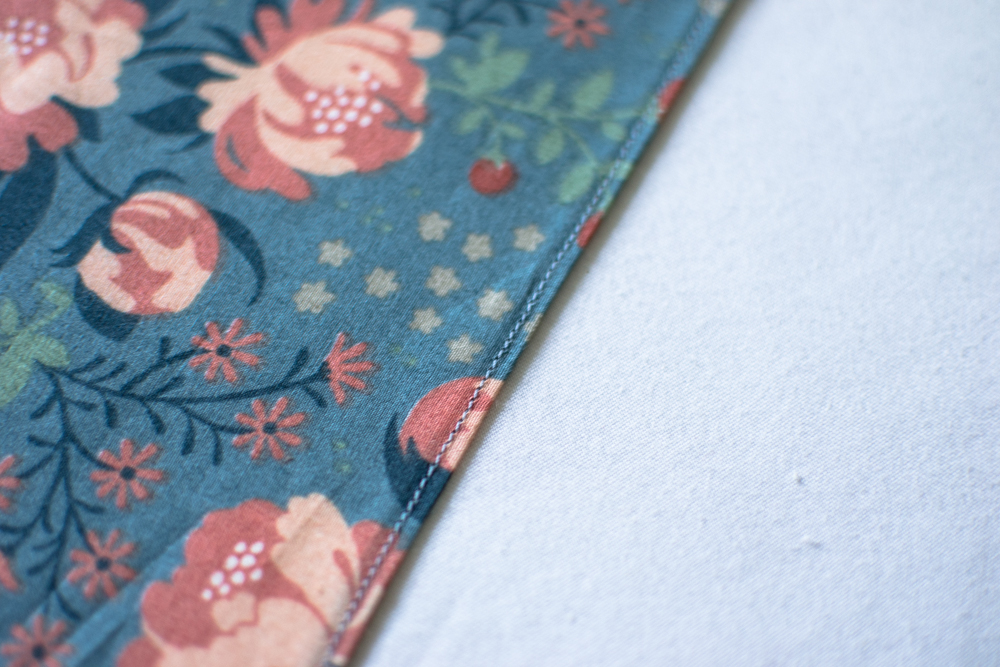
Here is the result! The project I was working on is an Easy Infinity Scarf.
You can also use the rolled hem foot with specialty stitches, such as the blind stitch to make a shell edge.
Let me know what you think in the comments, especially if you have more tips for us.
Happy sewing!
Disclosure: some of my posts contain affiliate links. If you purchase something through one of those links I may receive a small commission, so thank you for supporting SewCanShe when you shop! All of the opinions are my own and I only suggest products that I actually use. 🙂
Oh–I never thought of using a rolled hem foot with any stitch other than a straight stitch! That was definitely news to me. 🙂
Krista
Oh, perfect timing! My new machine came with one of these, & I need to use it this week. Thanks! I pinned it on 2 different boards so I dont lose it…
I had never even heard of a rolled hem foot, Caroline. Thanks so much for sharing this!
Beautiful! I have a heck of time with rolled hems. I took a sewing class a few years ago and the instructor advised using a little rub of glue stick on the "starter" narrow hem that you pressed to help keep it in place while you position the fabric and foot (since it’s too small for pins).
Instead of pressing twice, I cut a tiny piece of the corner at about a 45 degree angle and the fabric slides right in. I never had instruction on using this foot, so I figured out the best way for me. I use both the 5mm and the 3mm size. Yep, that’a a small rolled hem. I’ve used it for the edge of ruffles for my baby’s dresses. It looks so much better than a turned hem… dainty, for sure!
How easy is that!! I will have to check and see if I have one 🙂
I use this foot (6mm) all the time and love it! saves me so much time when i make curtains or envelope back pillows. Cannot imagine not having this foot.
I never knew you could use another stitch with this foot either! I have seen and tried, stitching the very beginning of the hem with the foot then feeding the hem through the rolled part with the first few stitches already sewn.Hope that makes sense. I have never ironed the hem first as I usually end up with slippery chiffons and knits so I find I have to hold the fabric more to the left of the foot to keep it lined up correctly and not feed in too much or too little. There is a learning curve with this foot so you need to practice with the type fabric you are using if you can. I read all the time as I can always learn something. I will try ironing the hem in the next time I use a cotton or cotton blend. I bet that does help alot! And I will try the blind hem too!
Caroline is there a way to use this foot to get around corners?
Pretty sure I have this foot in my sewing machine box. Thanks for this tutorial — maybe I’ll actually use it now!
What stitch is recommended for knits?
I’ve owned my Rolled Hem Pressure foot for at least 5 years and have never gotten the hang of it. Thanks for reminder of its great use and offering some great tips to get going.
I’ve always had trouble when I try use this foot to hem a skirt or dress. How do you connect the hem at the end? Does that make sense?
I think I know what you mean. I’ve never done that. But if I did, I would stop a few inches before my starting point, switch feet, and finish with the regular foot.
Good luck!
Caroline
I’ll keep trying with rolled hem foot – I think a bit of practice on scraps is the key here. Beginning of rolled hem is most difficult for me.
Thanks for this post.
I love the fabric in this tutorial it sort of matches with the suitcase tutorial I want to make but since I’m newbie beginner visual sewer I need to watch a video tutorial to sew it step by step
Ahhh, I have to iron first. Thank you!!
Thank you so much for this clear tutorial, I’m going to give it a try! Thanks also for the ‘shell edge’ tip!! Vikki 🙂
I’ m going shopping for an overcast presser foot and a rolled edge presser foot. Making men’s shirts and would have saved me a lot of work. Thanks for posting the info for gals like me who don’t know the more modern ways of doing things.
Thanks, this is a great tutorial! I’m just wondering how you deal with corners, as in making napkins?
Tia, Ann
Hi Ann! I’ve never used this foot for corners, but if I did I would sew right off the edge and then press and start over on the next side. By the way, I have a tutorial showing two ways that I’ve made cloth napkins here: https://www.sewcanshe.com/blog/2014/10/16/diy-cloth-napkins-the-regular-way-and-the-speed-way
Have fun!
any technique on using this on stretchy fabric? I have a hard time and couldn’t make it work
I’ve tried and tried and tried but I just can not master this foot at all. I’ve given up now 😢
Here on some of my thoughts on the rolled hem foot: under perfect conditions, it’s great. But—how, for example, do you deal with "curling" seam allowances into the spiral on the foot? How do you begin & end 90 degree corners, like on napkins? What if your edge has a slight curve, like on a skirt, how do you avoid tiny tucks or stretching the edge & creating an uneven hem line? If you’re going to go through the trouble of pressing in the creases, isn’t this totally defeating the purpose of the foot? I actually do like it – especially the 1/2 inch size, but I seldom have the perfect conditions to use it.
Hi Ann… you are right. The rolled hem foot only works well under perfect or near perfect conditions. Notice that in this tutorial I’m using it on a straight edged continuous loop (a scarf) made with lightweight cotton voile. Other applications are tricky and you have to decide if it would be simpler to hem using a more tried and true method. Thanks for your ideas!
Fabulous! Haven’t had this foot out in a long, long time. Think I’ll pull it out and look at it again.
I bought 2 little boxes of misc feet for a buck each at a thrift shop. I don’t know what they all do, but I know there’s a rolled hem in there.
I can make a rolled hem with the rolled hem foot BUT how do you turn a corner – say if you are making napkins. I would really appreciate knowing how to do this.
Pauline
perry94022 at hotmail dot com
yes! I too would LOVE to know this!
I find it easiest to START with a ‘handle’ (to help get the whole thing rolling)… Working on the wrong side of the fabric: for the first inch or so, fold over 1/8" and then again 1/8" … Then BASTE a few inches at a 45 degree angle to a corner… be SURE to leave several inches for a ‘tail’. Then holding on to the tail, place the little folded over part under the ‘rolled hem’ foot and lower your needle into the fabric…While holding onto that little tail (pulling just a bit from the back) wiggle the tiny fold into the curl… then while coaxing the fabric into a curl, simply stitch your cute little hem… [don’t forget to pull out your beginning basting stitches… corners???? well good luck with them.
I love using the rolled hem foot but have never found out what to do at the corners? Any advice – a tutorial would be great.
Pauline Ann Perry
Thanks for sharing that, I never knew how on earth people would be able to hem anything with that. Now that I’ve seen the photos it all makes sense. Well, I tried to feed the fabric into the curl part without pressing the edges, apparently that was my mistake. I will try that out over the weekend.
This is a great clear tutorial. Your results are lovely. But having sewn with the rolled hem foot as well as trying the Kenneth King Hem and the Threads baby hem, I find the latter two far easier than dealing with the rolled hem foot,particularly with bias and corners. So much easier and great results, IMO. I appreciate your excellent tute and efforts and thanks for that. There are other ways.
I have tried and tried to master this foot. My issue is when there is a seam. It’s fairly easy to make it work on a straight-away of fabric, but don’t introduce any seams or bias areas. Looks awful!
I used this foot several times and it just doesn’t work. On a straight hem (as in your picture) and on light cotton fabrics it works better. It doesn’t work well where the seams meet or when the hem is slightly curved or on chiffon. I also noticed on chiffon rolled hems of readymade dresses that the hem foot has missed several places. In a few words, it’s much easier for me to just use a regular foot. Thanks for the tutorial.
I love this, I always wanted to know how to use that foot.
I inherited many different kinds of feet and have no idea what they are used for.
Thank you
Crystal clear thank you….BUT I have another query, ive tried in vain to make simple stretchy dressed but the seems are never a success, holes from the needle are noticable, ive even tried stretch needles to no avail, it looks so simple on videos please help, many thanks and keep up the good easy to follow work
Holes in your knit fabric are usually caused by using sharp needles so make sure you use a ball-point (stretch) needle. It could also be the quality of the fabric. Try a good quality cotton/lycra blend fabric. I wrote this post with tips sewing knit fabrics: https://www.sewcanshe.com/blog/2015/8/22/tips-for-sewing-with-knit-fabrics
Good luck!
This is the best foot ever! i use it all the time! 🙂
How do you continue around a corner?
Good question. To work with a corner, you must sew off the edge and cut your threads. Then start again on the next side.
Hi, Thanks for the post, it has been very helpful. I’m still trying to master this tricky little foot and it has been quite frustrating. I make scarves and today suddenly my fabric won’t stay inside the curl of the foot so my sewing starts off straight and then suddenly veers to the right. End result – my hem does not fold over and the sewing is just outside the fold. I’m just wondering if there is a problem with the foot itself. I’ve tried googling this problem but can’t find any info. Any advice would be appreciated. Many thanks – Kim
Did you ever get help?
Thanks for this! There are so many specialty sewing feet, but I’m unsure how to use them all. Perhaps you could continue your Sewing 201 with mini tutorials on all the different specialty feet.
Hello dear,thanks for the lessons.I’ve seen this foot but didn’t know the use.I’m now okay and happy.
I love this post I had no idea you needed to press a 1/8 to start. Thank you, now I want to make scarves for my girls!
Do you have to iron around the entire project or just a to start the process?
Just for 1-2 inches to get it started.
Thank you so much for the sewing 201 (foot #69). I have the different feet but never use them.