My Pop-Up Sewing Project: How To Take Apart Camper Cushions to Make a Pattern

Remember the pop-up camper that I bought way back in April? And I swore that I was going to do a sewing makeover to it? Well, it’s July and I finally got started. With the deconstruction at least, lol.
For more fun projects like this, check out all my free sewing patterns.
Don’t get me wrong, we’ve been camping in it in the meanwhile. But I know it’s going to be lots more fun when I have all the new cushions, curtains, and matching quilts that I’m imagining.
I decided to start with the cushions.
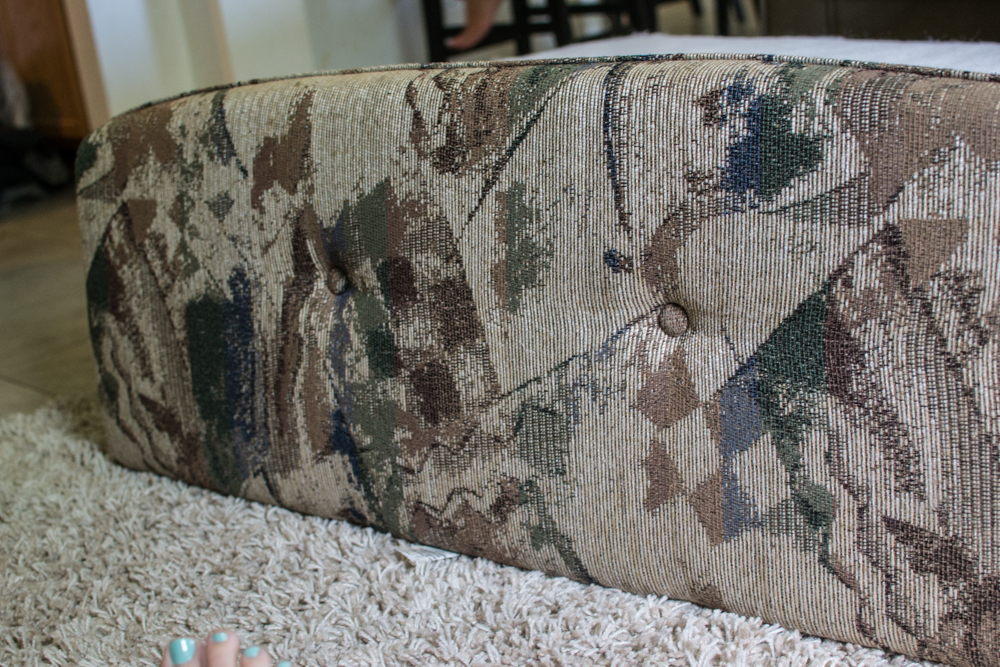
Can you see my toes?
The cushions were pretty ugly. There are six. Three are rectangular seat cushions and three have a slight arch like this one.
The seat bottom cushions are supposed to have little feet on them to keep them from sliding. Half of mine were missing. I got to play with the drill to remove these. Places online sell rubber speaker feet that I think will be a good replacement if I can’t find anything at my local hardware shop.

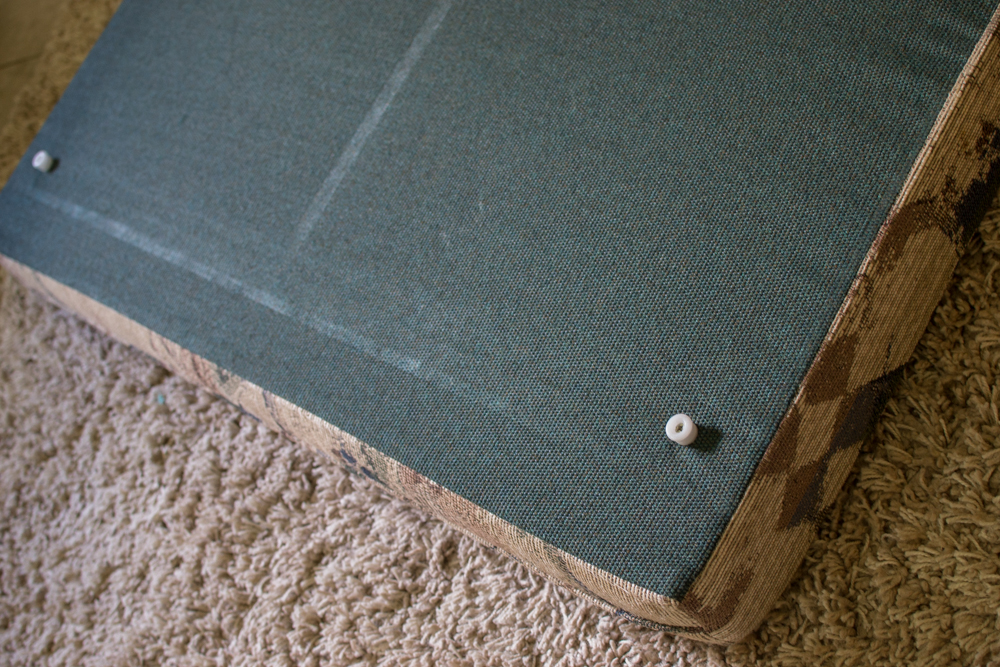
And even though those ugly covers had zippers they were on so tight I had to cut them off.
I guess I’m committed to this project now!
Check out what was underneath: plywood, foam, and batting. Even though the foam is a bit stained, it smells and feels fine so I’m going to keep it.

To make a pattern for the curved cushions, I laid a piece of scrap fabric over the two that are different and traced the edges.

Then I cut out my ‘pattern piece’ adding 1/2” seam allowance all the way around.
The sides are all either 3 1/2” or 4” deep and will be sewn from a continuous strip.

I didn’t make pattern pieces for the rectangular pieces but simply took measurements. Then I wrote lots of notes and made myself a layout diagram to make sure I waste as little fabric as possible.
This is so fun! And so far it is way easier than I expected.

Update: I finished! See how to sew camper cushion covers here.
xoxo,

Disclosure: some of my posts contain affiliate links. If you purchase something through one of those links I may receive a small commission, so thank you for supporting SewCanShe when you shop! All of the opinions are my own and I only suggest products that I actually use. 🙂