Monthly Mini Quilts for January – the Free Frienship Mini Quilt Pattern!
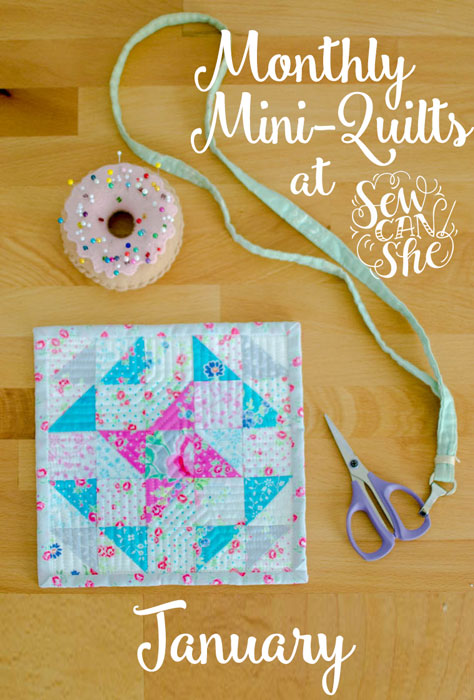

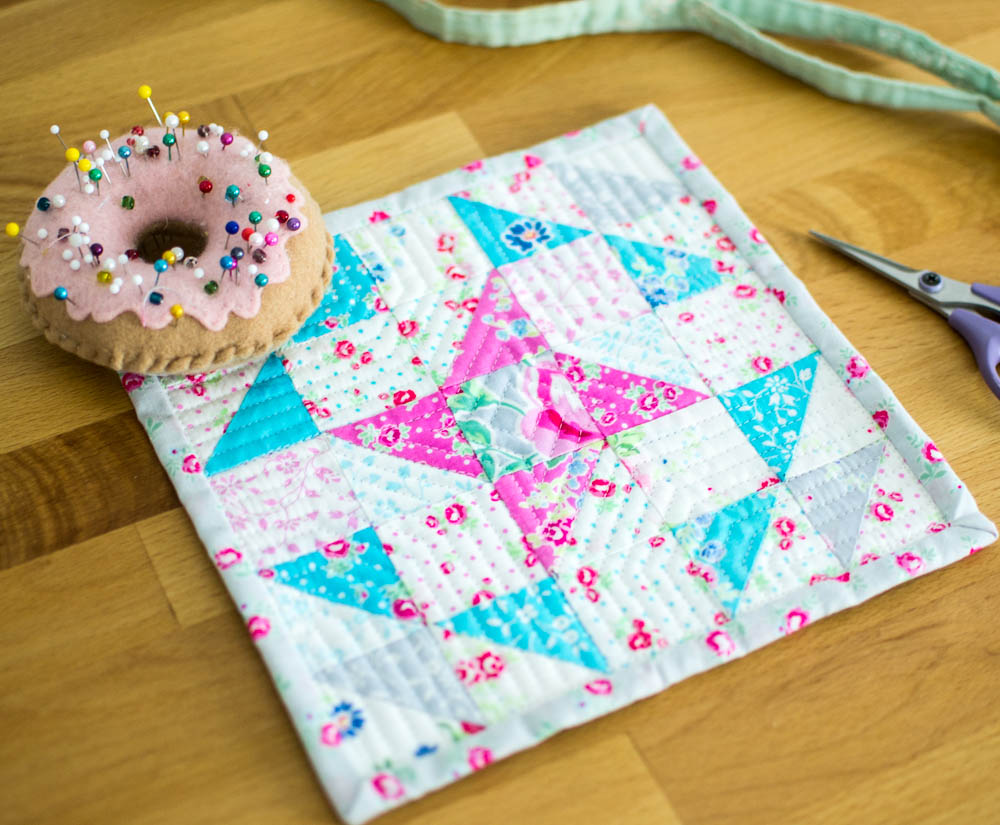
I designed this mini to be the first one in the Monthly Mini Quilts series, and I’m calling it the ‘Friendship Mini’ because there’s an adorable classic Friendship Star in the middle. If you’ve never made a quilt before, this is a great one to start with. You’ll learn how to make half square triangles (HST’s) becuase that’s all it is – 16 HST’s and 9 squares.
The finished size of the ‘Friendship Mini’ is approximately 8” square.
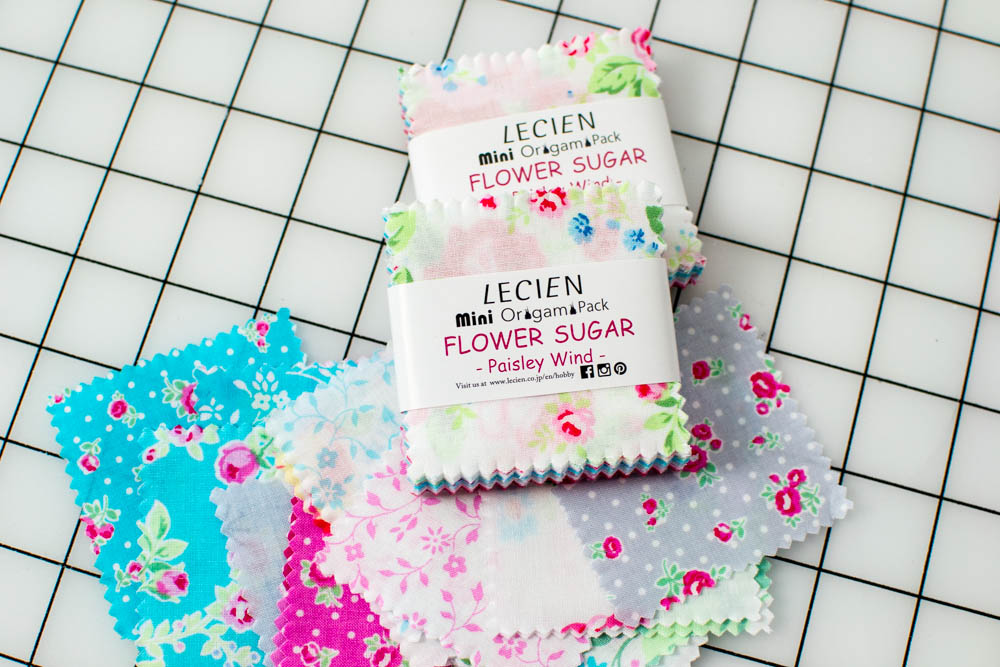
If you have mini-charm square packs like this that you’ve been saving, here’s your chance to use them! Mini-charm packs are pre-cut 2 1/2” squares of fabric. For the Friendship Mini I used 25 mini charm squares from 2 Flower Sugar Paisley Wind packs from Lecien. The reason why I used squares from 2 packs is because you’ll need 16 background print squares (mine are the white-ish prints). I’ll tell you more about how many squares to cut in the tutorial below.
So let’s get started!
Friendship Mini Quilt tutorial
You wil need:
-
8 – 2 1/2” background fabric squares (for making HST’s)
-
2 – 2 1/2” pink squares (for making HST’s)
-
4 – 2 1/2” turquoise squares (for making HST’s)
-
2 – 2 1/2” gray squares (for making HST’s)
-
8 – 2” background fabric squares (trim down mini-charm squares, if using)
-
1 – 2” focal point square for the center of the quilt (trim down a mini-charm square, if using)
-
pencil or fabric marker
-
1 – 9” square of backing fabric
-
1 – 9” square of quilt batting
-
Quilt basting spray (such as SpraynBaste) or pins
-
1 strip of fabric 2 1/2” x 40” for the binding (can be pieced together)
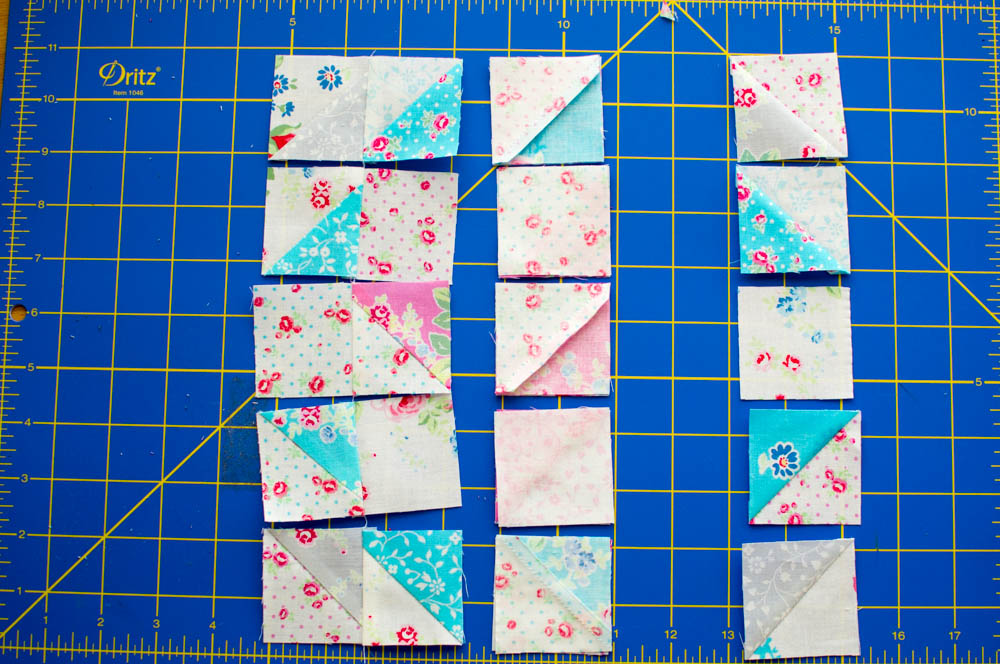
Notice that you’ll need 25 squares total. 16 of them are 2 1/2”, which you will use to make half square triangles that trim down to 2”. The other 9 squares need to be 2” before you sew them, so if you are using mini-charms, just trim them down like I did.

Sew the Half Square Triangles (HST’s):
1. Place a 2 1/2” background square on top of a 2 1/2” pink square, right sides together. Use the pencil or fabric marker to draw a diagonal line across the block on top. This is the cutting line.

2. Sew a seam on either side of the drawn line, 1/4” away from the line. (Do not sew on the line that you drew.)

3. Cut the block apart along the line.

4. Press these open, and you now have 2 half square triangles! Trim the HST’s down to 2” squares.
Use the 7 remaining 2 1/2” background squares and the 7 remaining 2 1/2” colored squares to make half square triangles. Trim them to 2” squares.


Sew the Mini Quilt together:
1. Arrange the 2” squares as shown in the diagram above. I arranged mine on my little mat so I could move it next to my sewing machine.

2. You can sew your squares together in any order you like, but I prefer to chain-piece once I have reached this step. I carefully turn all of the squares in row 2 over onto the squares in row 1 so I can sew these all in a line.

Like this!
3. Press the units from rows 1 and 2 open.
4. Carefully place the squares in row 4 on top of the squares in row 3 so you can chain piece them. Sew them together.

5. Press the units from rows 3 and 4 open.


6. Then place the row 3/4 units on top of the row 1/2 units as shown above and sew together.

7. Finally, add the last row of squares.

And you have this adorable block! If my method of chain piecing is not clear, you can see it demonstrated on a full size quilt in the free Craftsy class Piece Patch Quilt.

Finish the Mini Quilt:
1. Place the 9” square of batting against the wrong side of the 9” background square. Center the pieced mini on top of the batting. Adhere the layers together with quilt basting spray (or just pin them together, if desired).

2. Quilt the layers together any way that you wish. I attached my sewing machine’s walking foot and quilted lines 1/4” apart, following the angles of the friendship star in the center.

3. Use the 2 1/2” x 40” strip of fabric to make and attach binding. Learn how I do it in my Tips and Tricks for Mini Quilt Binding post.

As always, I love to see the projects you make with my free patterns! Post a picture to instagram and tag me @sewcanshe or #sewcanshe so I can take a look!
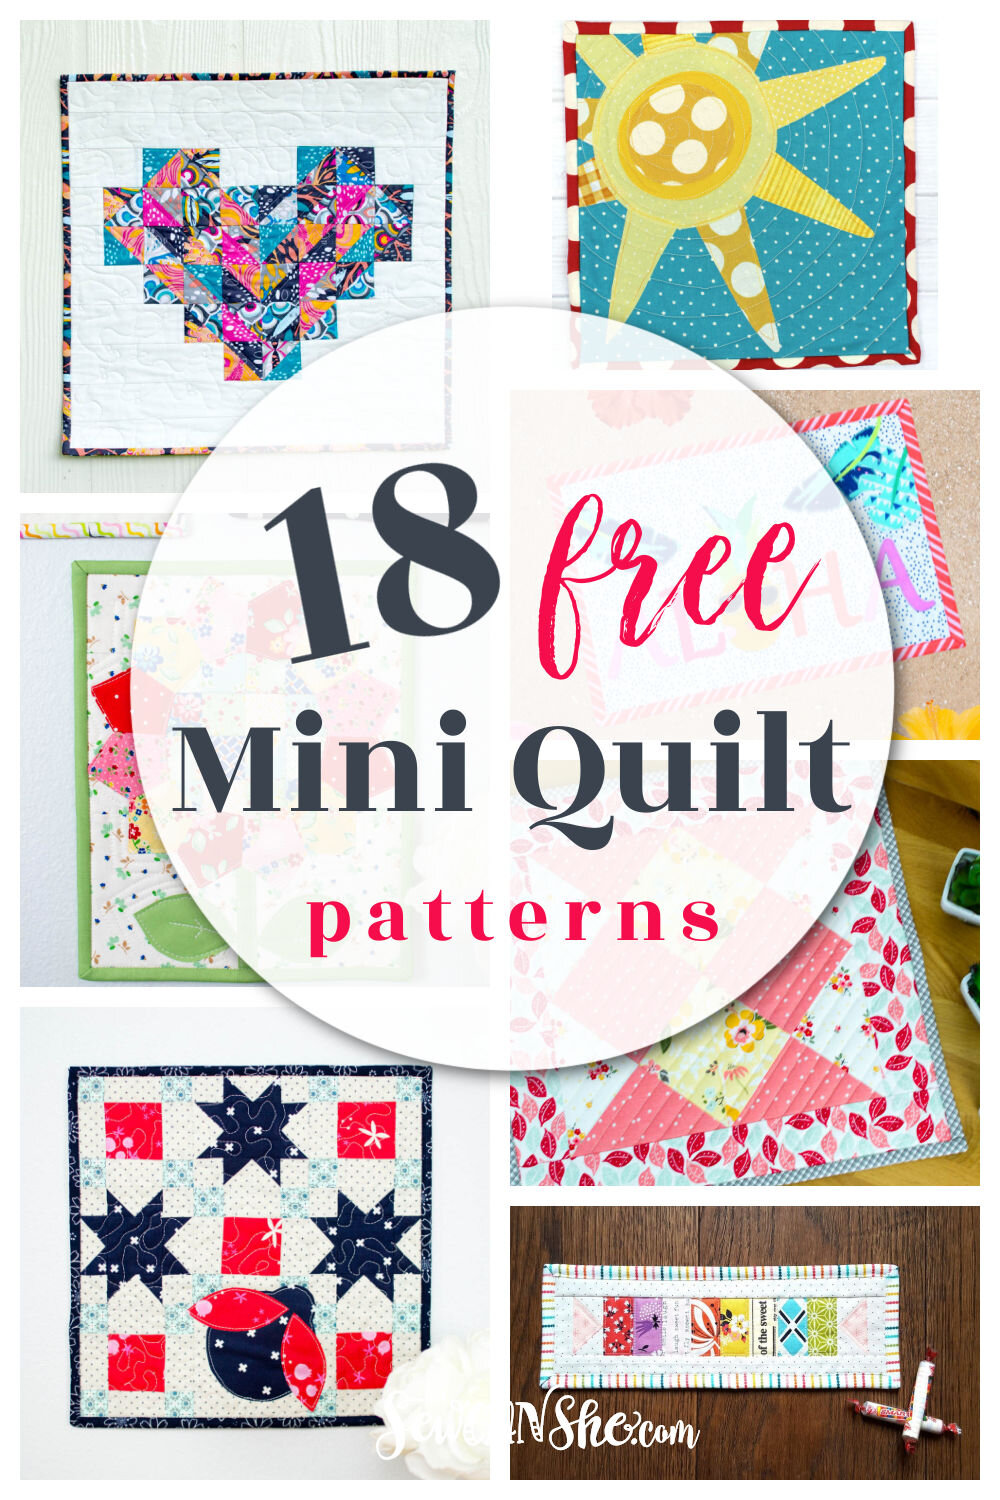
Check out all my free mini quilt patterns!
xoxo,

Featured


Disclosure: some of my posts contain affiliate links. If you purchase something through one of those links I may receive a small commission, so thank you for supporting SewCanShe when you shop! All of the opinions are my own and I only suggest products that I actually use. 🙂