Monthly Mini Quilt for May!

This month your mini quilt wall is going to grow a little bit bigger and a lot cuter! Here’s your free mini quilt pattern for May… Criss Cross by Nadra Ridgeway.
I asked Nadra to pretty-please join us as a guest designer because I LOVE her blog ellis & higgs and I think she has some of the most darling quilt and mini quilt patterns around. You can see them in her Etsy shop here.
Nadra is also a fabric designer for Riley Blake and she really wanted to use fabric from her new collection Arbor Blossom for this mini quilt – it just wasn’t available in time. But I have some on the way and will use it for the June Mini Quilt! 🙂

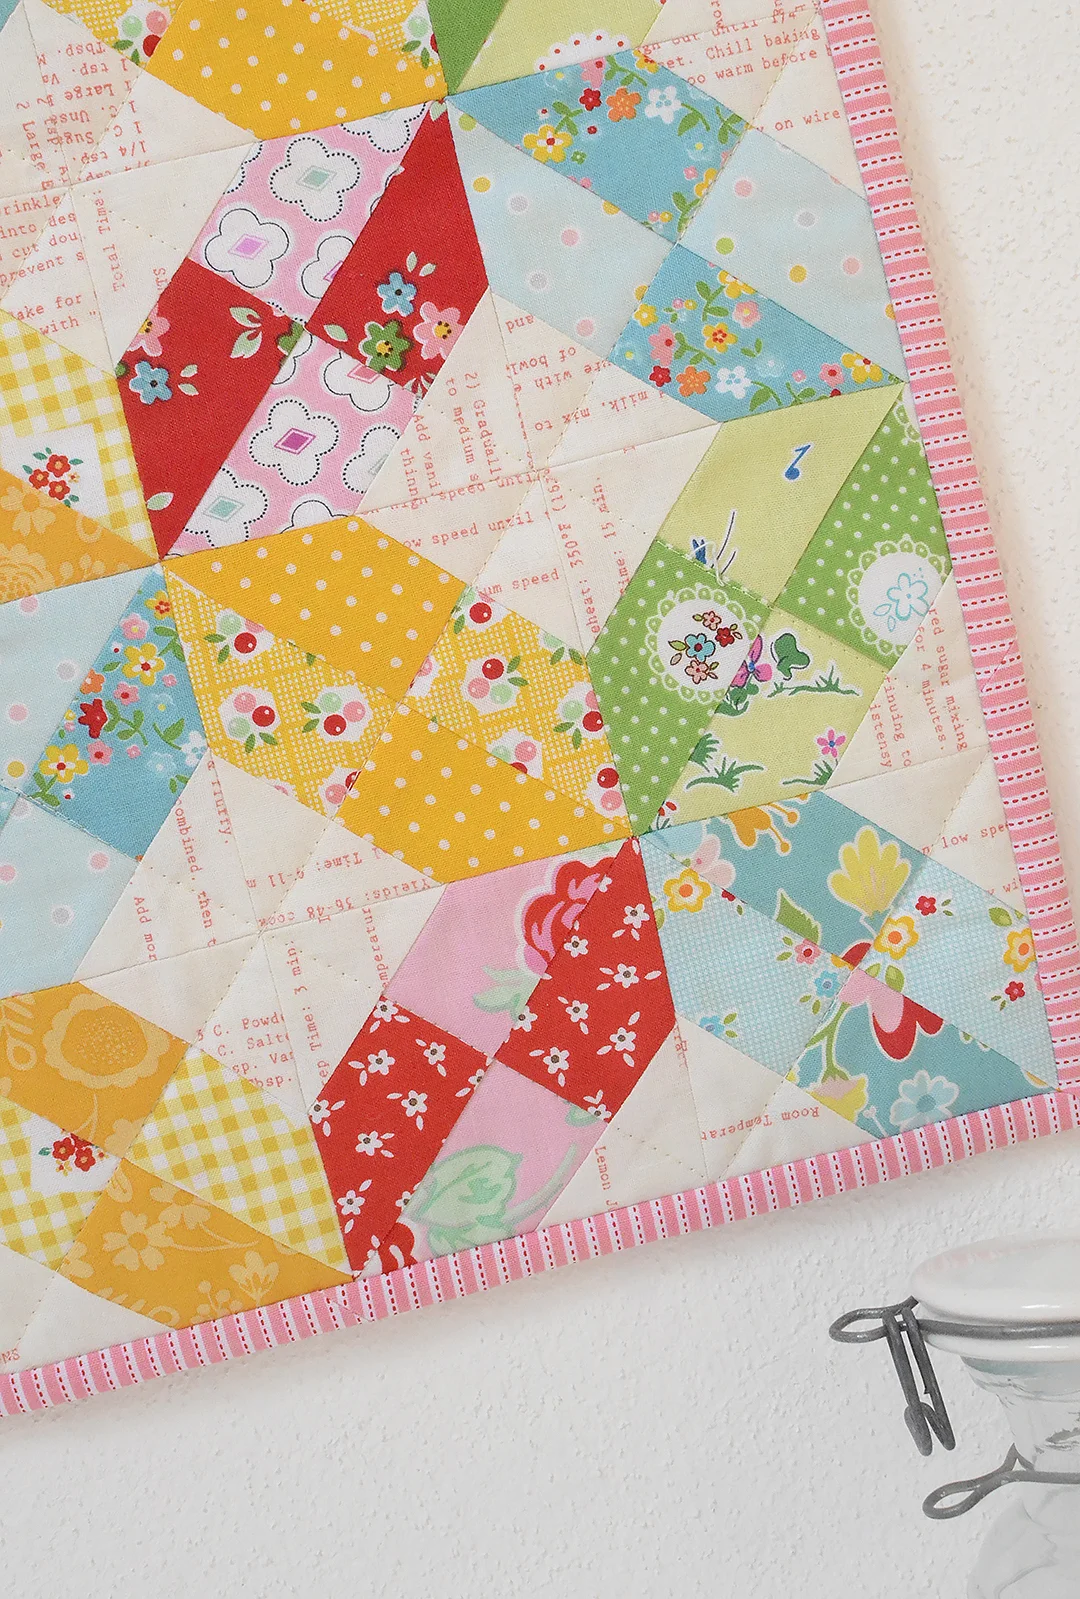
Here’s my Criss Cross mini quilt. I absolutely love it! Nadra’s instructions are excellent so whether you choose soft colors like hers or brights like mine – I know you’ll love your’s too.
Criss Cross Mini Quilt Pattern by Nadra Ridgeway
Finished size 12½” x 12½”
Materials needed:
-
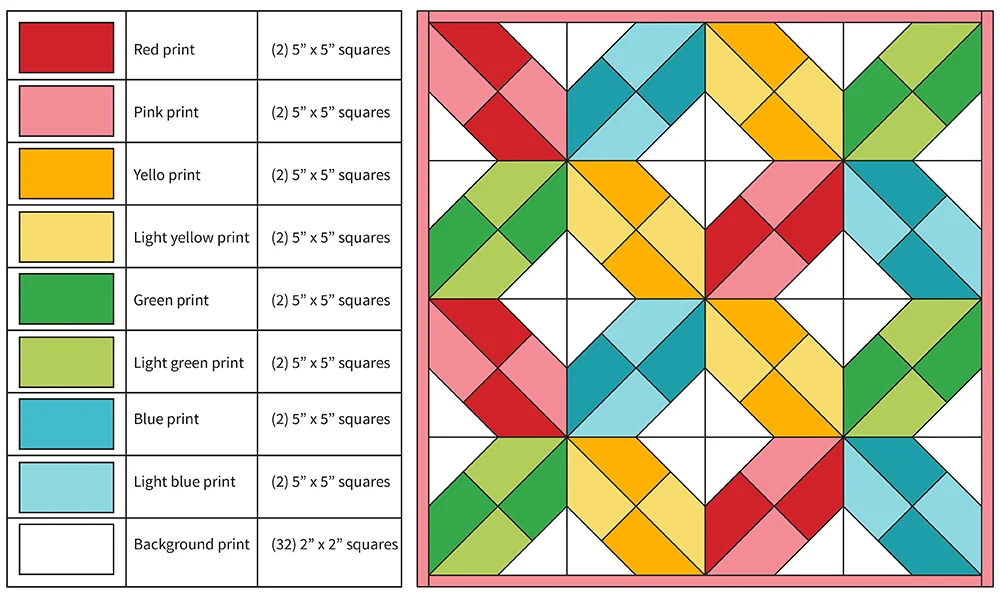
Two 5” x 5” squares of red, pink, yellow, light yellow, green, light green, blue and light blue print fabric
-
Background fabric: 1 Fat Eighth
-
Backing fabric: 14” x 14”
-
Batting: 14” x 14”
-
Binding: 2¼” x 60”
Join the pieces using a ¼” seam allowance.
Cutting:
Assembly:

Select one red and one pink fabric square and draw a diagonal line on the back of the pink square.
With right sides facing, place both squares on top of each other and use pins to hold them in place.
Stitch ¼” from each side of the drawn line. Cut the stitched unit apart on the drawn line. Press the two Half Square Triangle (HST) units you have created with the seam allowance towards the darker fabric.
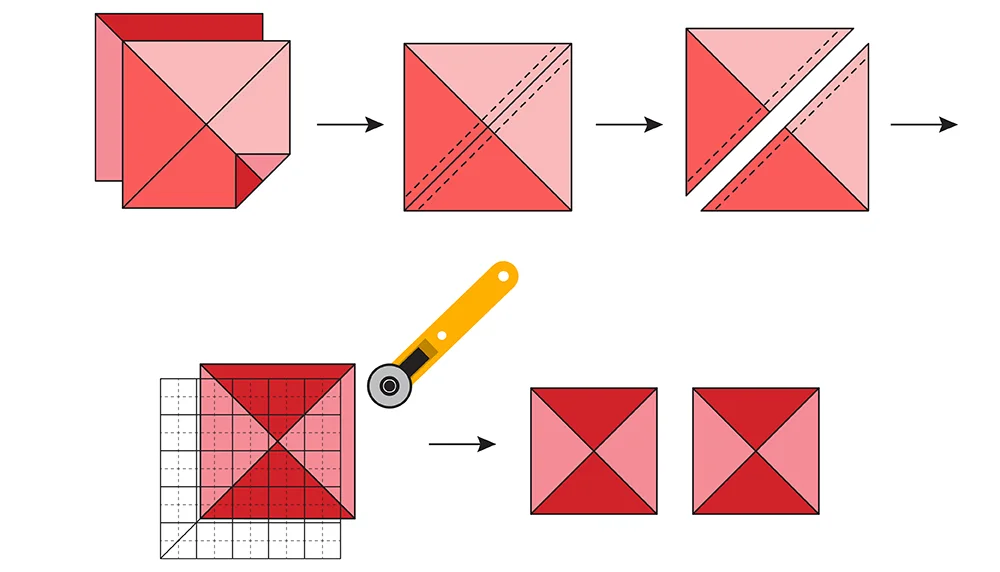
Draw a diagonal line on the back of one HST unit perpendicular with the seam. With right sides facing, place both HST units on top of each other with colors opposite to each other and use pins to hold them in place. Stitch ¼” from each side of the drawn line. Cut the stitched unit apart on the drawn line. Press the two Quarter Square Triangle (QST) units you have created towards one side.
Next trim the two QST units down to 3½” x 3½”.

Draw a diagonal line on the wrong side of the background fabric squares. Layer a background fabric square on the top right corner of a QST unit.
Attention: when sewing on the background fabric squares, make sure that the red (dark) triangles are pointing up / down and the pink (light) triangles to the left / right!
Stitch on the drawn line and trim away ¼” from the seam. Repeat on the bottom left corner.
The Criss Cross block should measure 3½” x 3½”.
Repeat the above steps to make a total of 16 Criss Cross blocks.

Lay out and assemble the Criss Cross blocks as shown in the image above. Press the seams open. The finished quilt top should measure 12½” x 12½”. Make a quilt sandwich with your quilt top, batting and backing fabric and quilt as desired. Trim off excess batting and backing fabric and bind the quilt using my favorite quilt binding tutorial.

I hope you have lots of fun sewing up this darling mini quilt free pattern! See more of our monthly mini quilt patterns here.
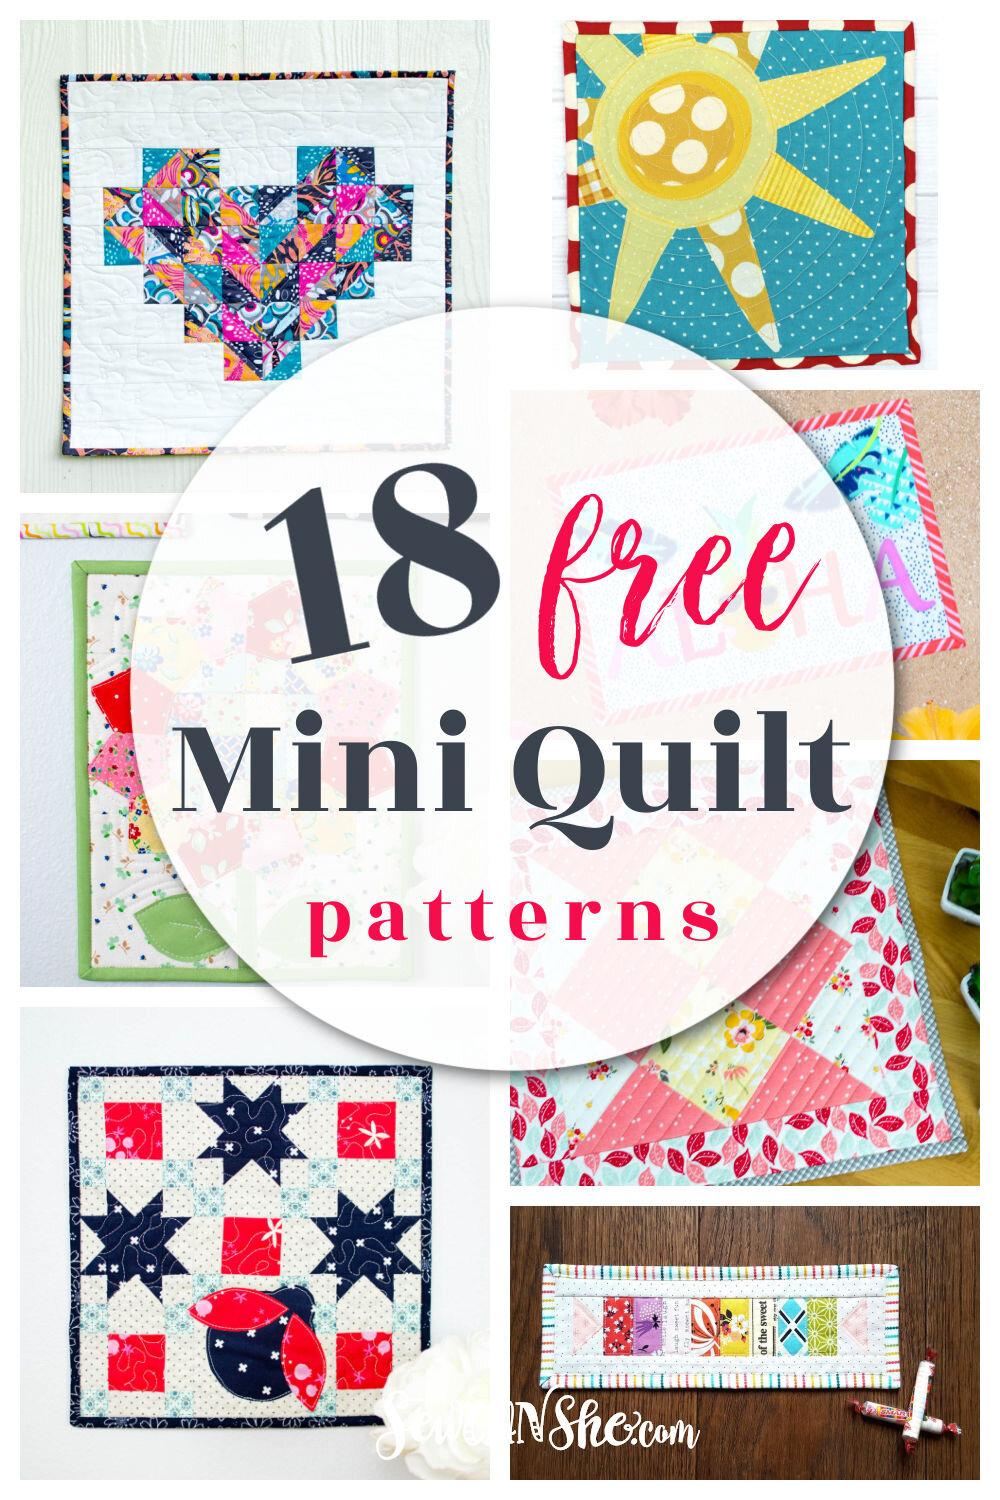
Check out all my free mini quilt patterns!

Featured


Disclosure: some of my posts contain affiliate links. If you purchase something through one of those links I may receive a small commission, so thank you for supporting SewCanShe when you shop! All of the opinions are my own and I only suggest products that I actually use. 🙂