Easy Pine Tree Quilt Block (plus how to finish your Gnome Forest Quilt)
Here’s a classic pine tree quilt block that you can make an entire pine tree quilt from, or mix it with my Gnome block for some easy whimsical quilty fun.
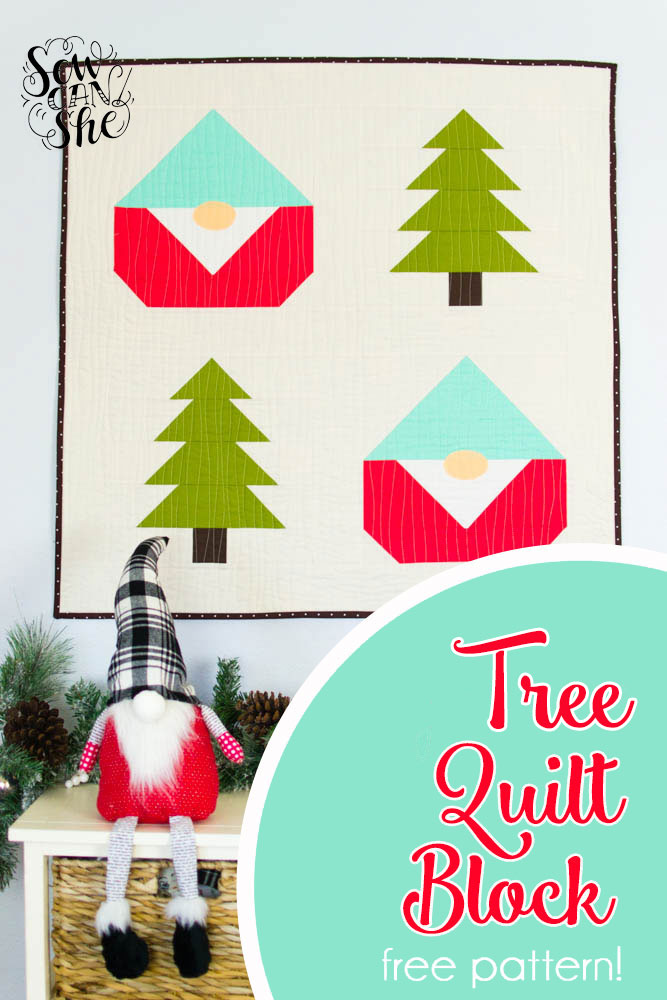
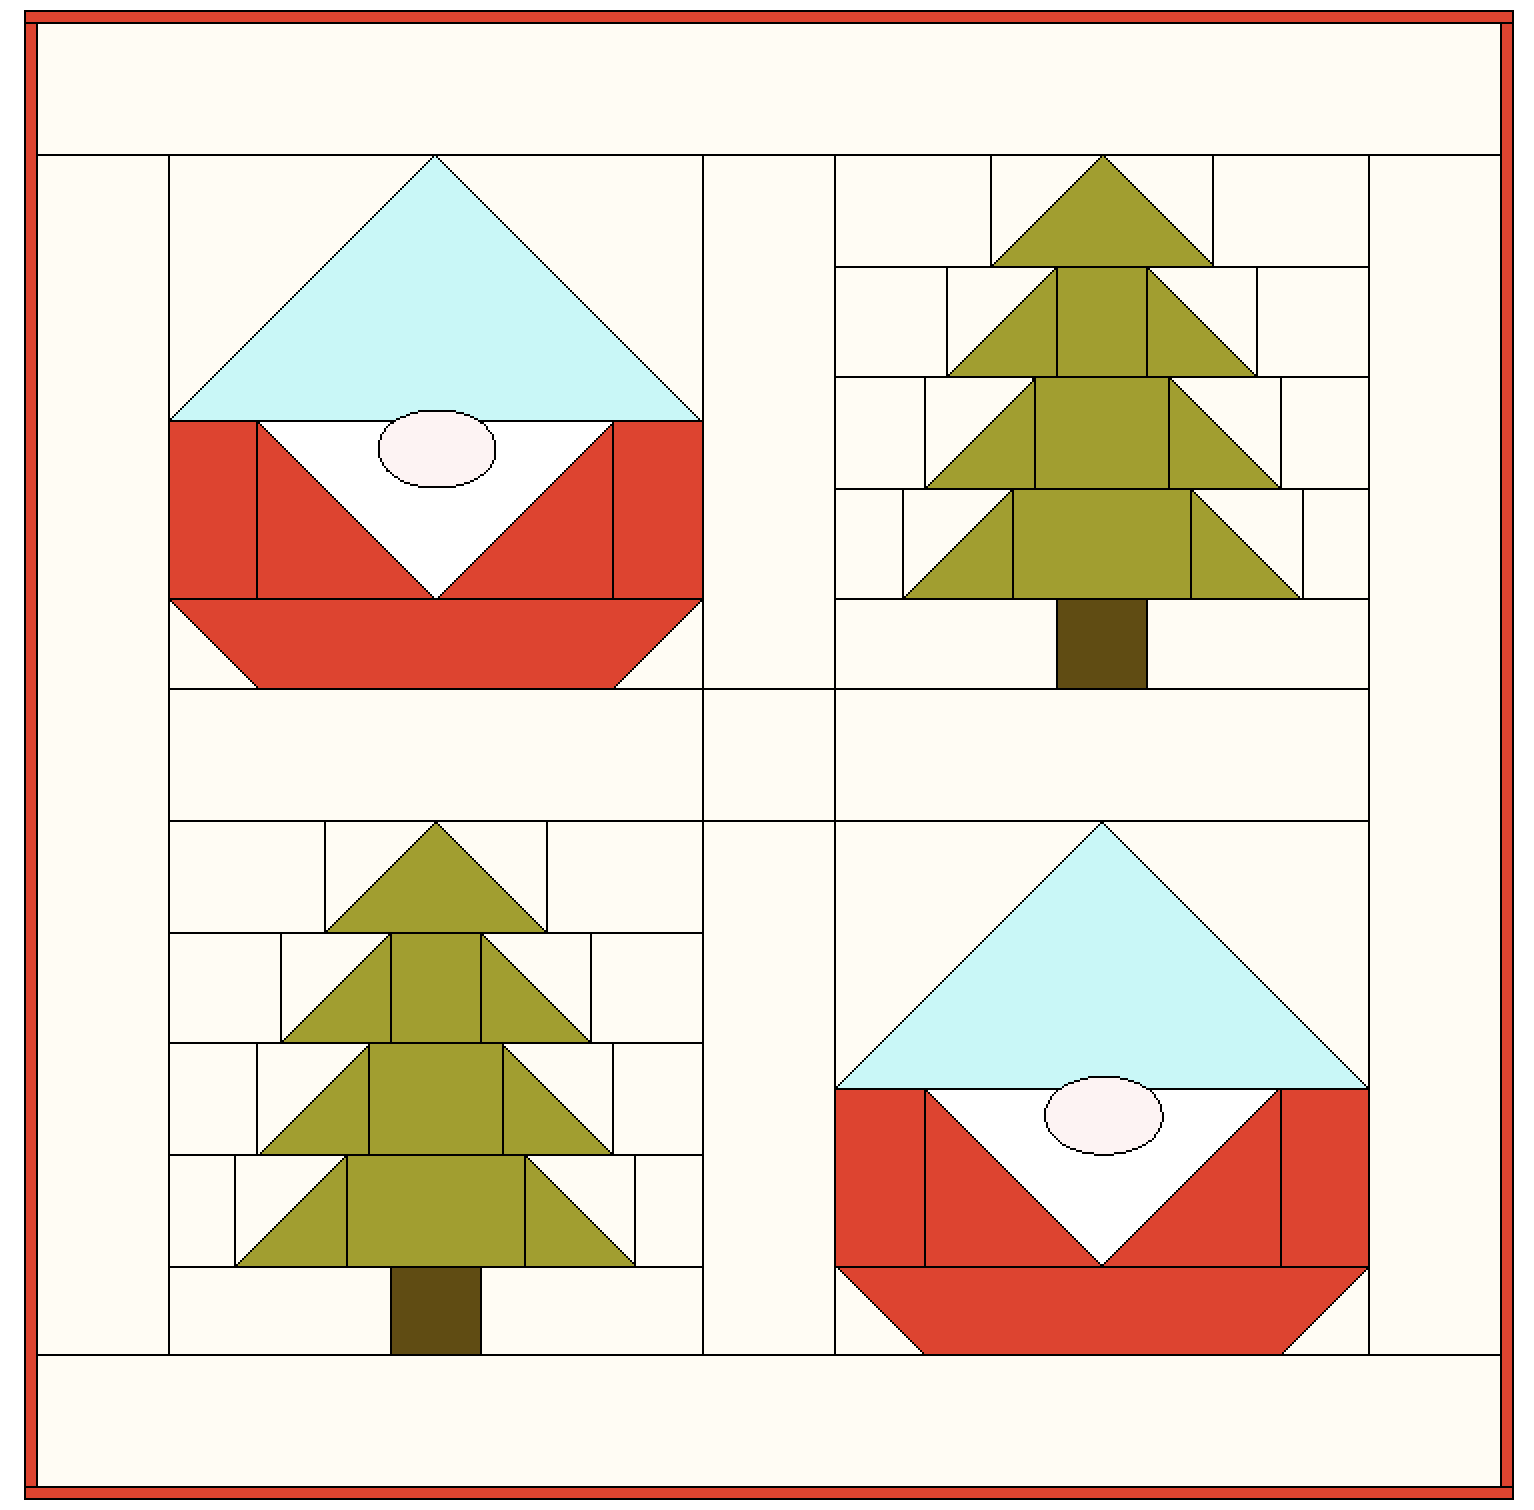
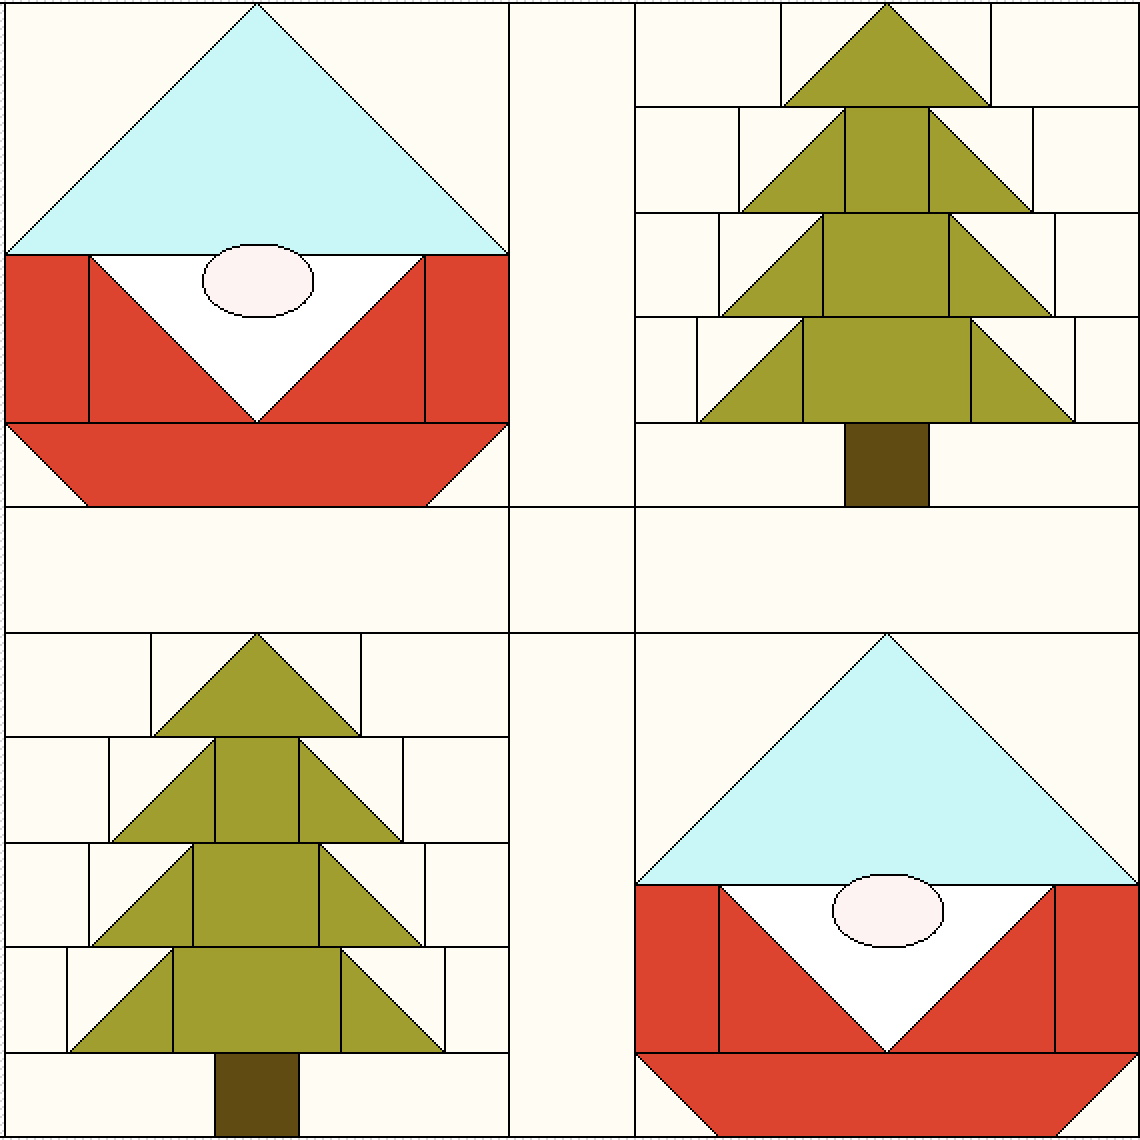
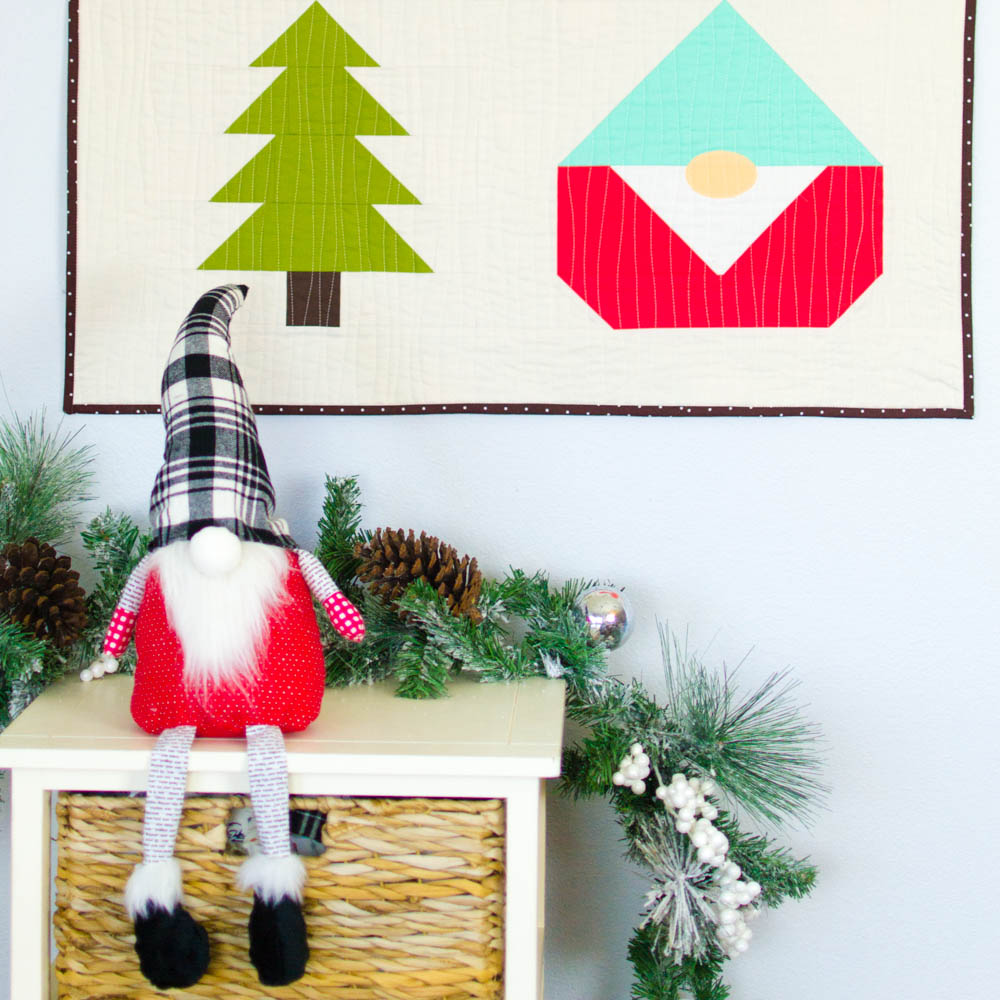
Some of you may think that the tree blocks are the cutest part of my Gnome Forest mini quilt. I’m really on the fence about it. I love the gnomes, but having pine trees on the quilt too really gives them a setting, and now the quilt starts to tell a story.
Do the gnomes live in the woods or were they just out having a picnic? Or maybe they are lost? Or out cutting down a Christmas tree!
If you are browsing pine tree quilt patterns right now, make sure you also check out my Little Pine Trees Pattern. It teaches another easy way to make pine trees from half-square triangles.
Even though everything you need to sew my Gnome Forest Mini Quilt is here in this blog post and the blog post for the Gnome Block, I know lots of you love the PDF files that I provide that are optimized for printing. That’s why I also made an optional PDF file for the Gnome Forest Mini Quilt that contains everything from both posts. Find it here. Remember, the blog post below is totally free to read, print, and sew! Just hit CTRL +P on your computer to print. The PDF download is inexpensive and optional.
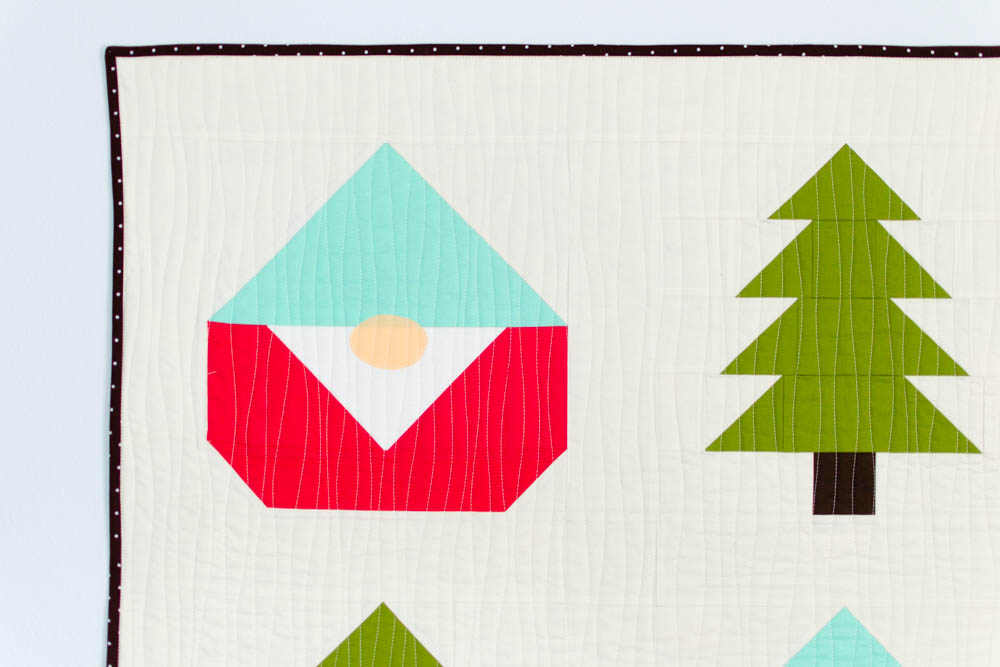
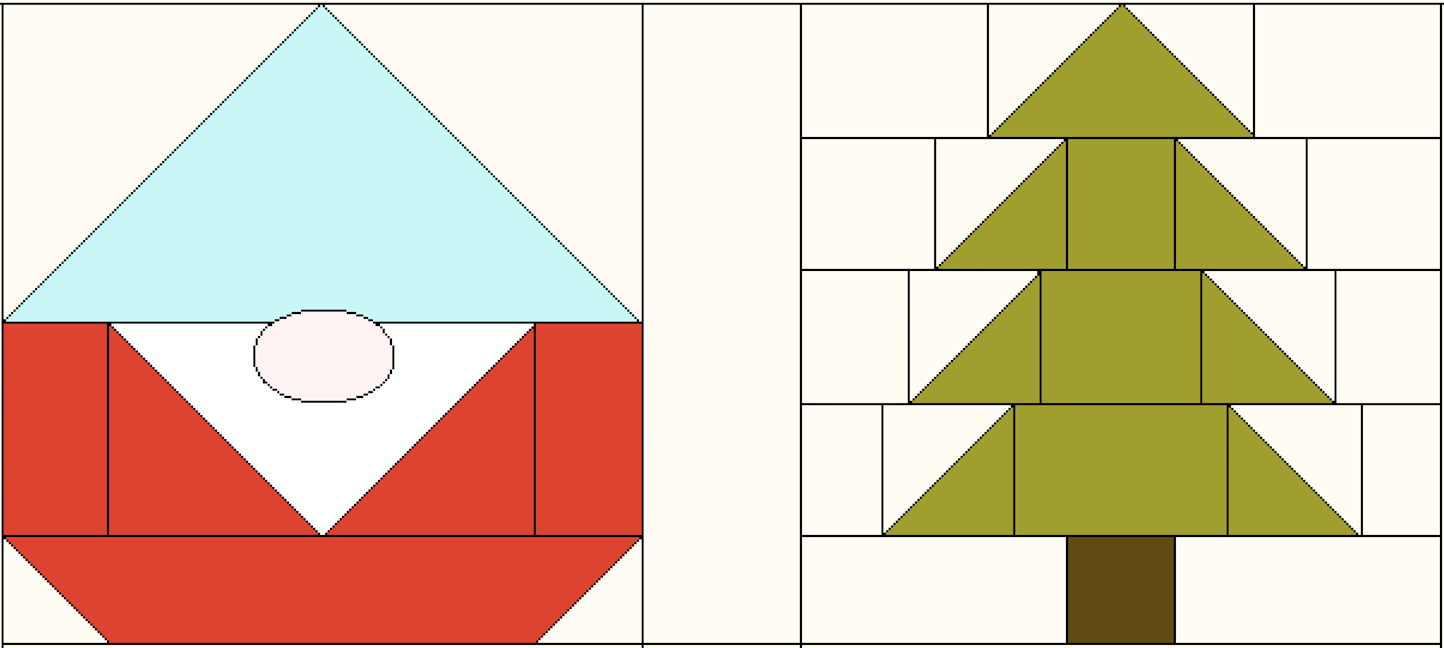
The 12’’ pine tree block is really easy to sew together – it’s just one flying geese unit, 6 half square triangles, and a bunch of other rectangles and squares.
Feel free to use it on your other quilts too if you wish…
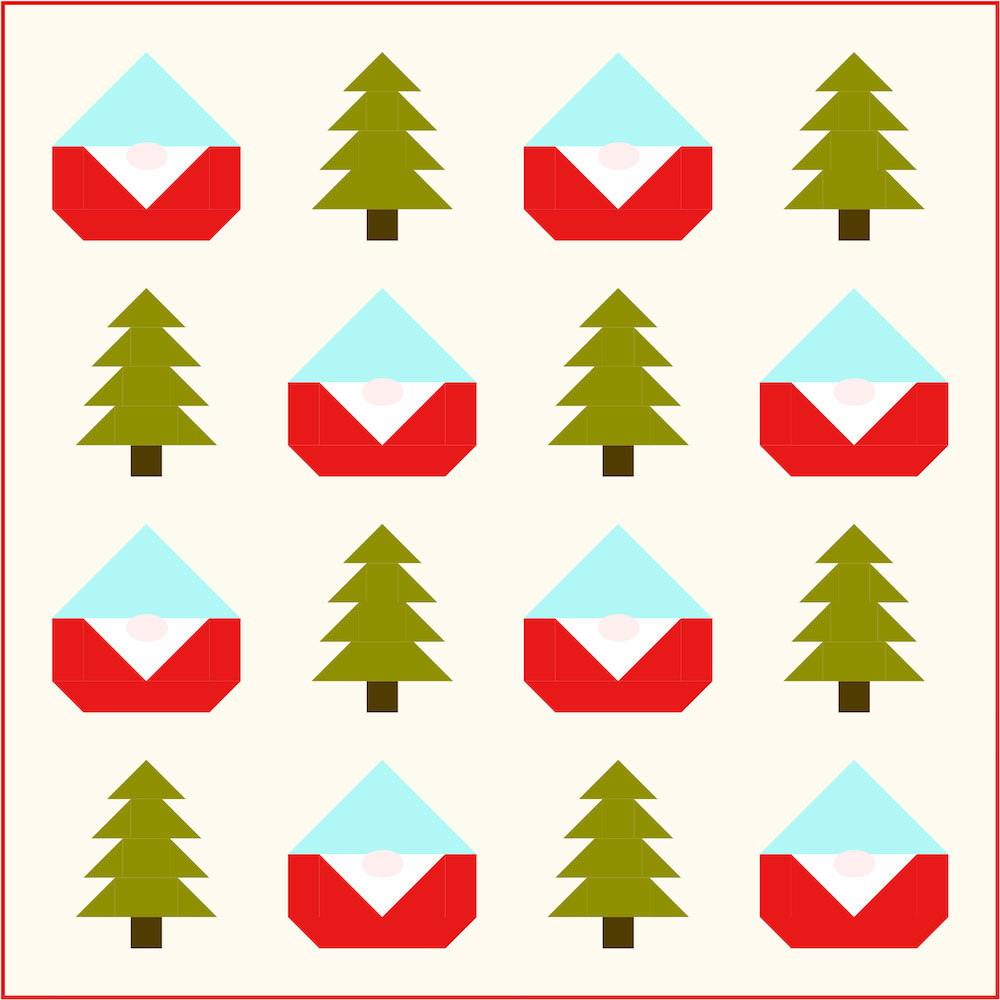
Or maybe you won’t stop at the mini Gnome Forest Quilt – maybe you will sew 8 gnome blocks and 8 pine tree blocks to make this 64’’ throw quilt!
Click here for the Gnome Quilt Block instructions. Please scroll to the bottom of that post if you would like a materials list for the Gnome Forest Mini Quilt seen in the top photo above.
In this blog post, I’ll share how to make the Pine Tree Block plus how to sew it together with the Gnome Blocks + sashing + borders, if you like.
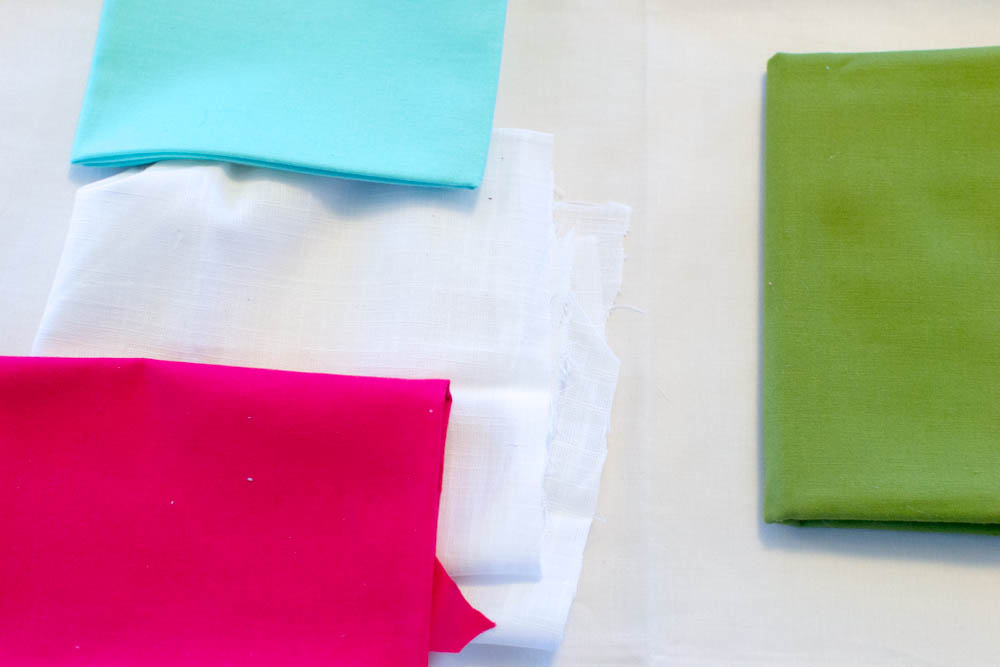
All of the fabrics I used for this block came from Craftsy’s Boundless Solids Modern Brights collection. All except the white for the beard, lol.
My cream background fabric is the color Porcelain, the green is Mojito, and the brown tree trunk is Espresso.
The amount of fabric that you will need depends on how many blocks you want to make. Click here and scroll to the bottom of the post if you are planning to make a Gnome Forest mini quilt like mine. I share a materials list for the entire mini quilt there.

Cutting Instructions for one 12’’ (finished) Pine Tree Block:
From the cream fabric, cut:
- 4 squares 3’’ x 3’’
- 3 squares 3 1/2’’ x 3 1/2’’
- 2 rectangles 3’’ x 4’’
- 2 rectangles 3’’ x 2 1/2’’
- 2 rectangles 3’’ x 2’’
- 2 rectangles 2 1/2’’ x 5 1/2’’
From the green fabric, cut:
- 3 squares 3 1/2’’ x 3 1/2’’
- 1 rectangle 3’’ x 2 1/2’’
- 1 rectangle 3’’ x 3 1/2’’
- 1 rectangle 3’’ x 4 1/2’’
- 1 rectangle 3’’ x 5 1/2’’
From the brown fabric, cut:
- 1 square 2 1/2’’ x 2 1/2’’
Make 1 Flying Geese Unit:
The top of the tree is made from a flying geese unit.
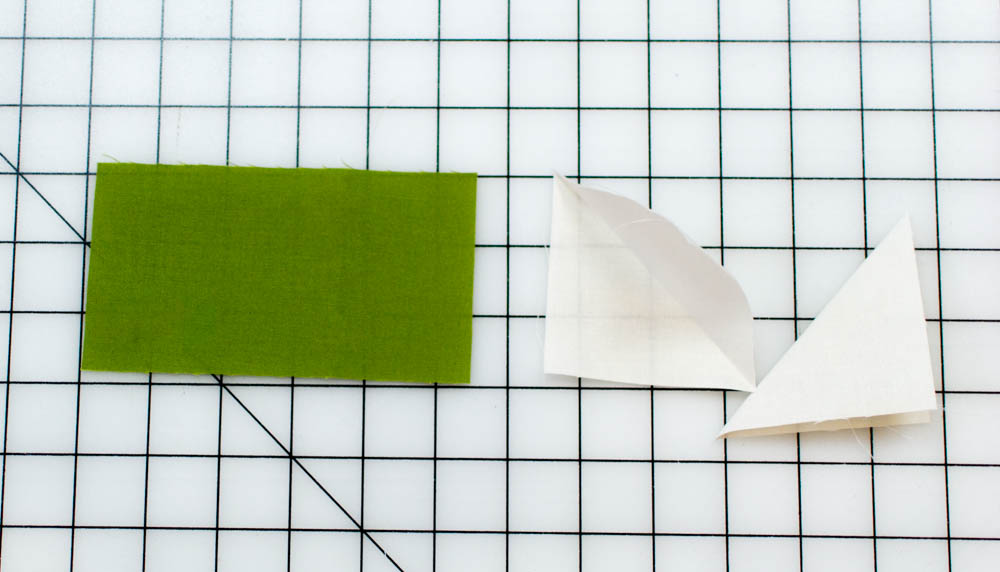
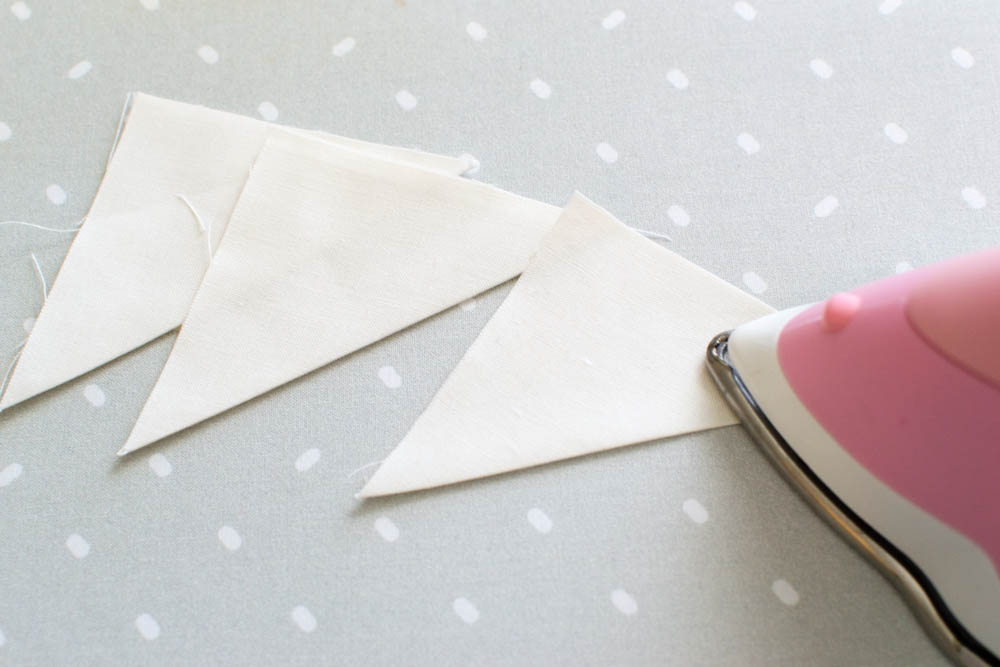
1. Mark a diagonal line on 2 of the 3’’ square cream pieces. You can use a fabric marking pen, or fold each square in half and press a light crease as I did (see above).
This will be the stitching line for of these 2 squares.

2. Place one of the 3’’ squares on top of the 3’’ x 5 1/2’’ green piece, right sides together as seen above. Pin along the line.
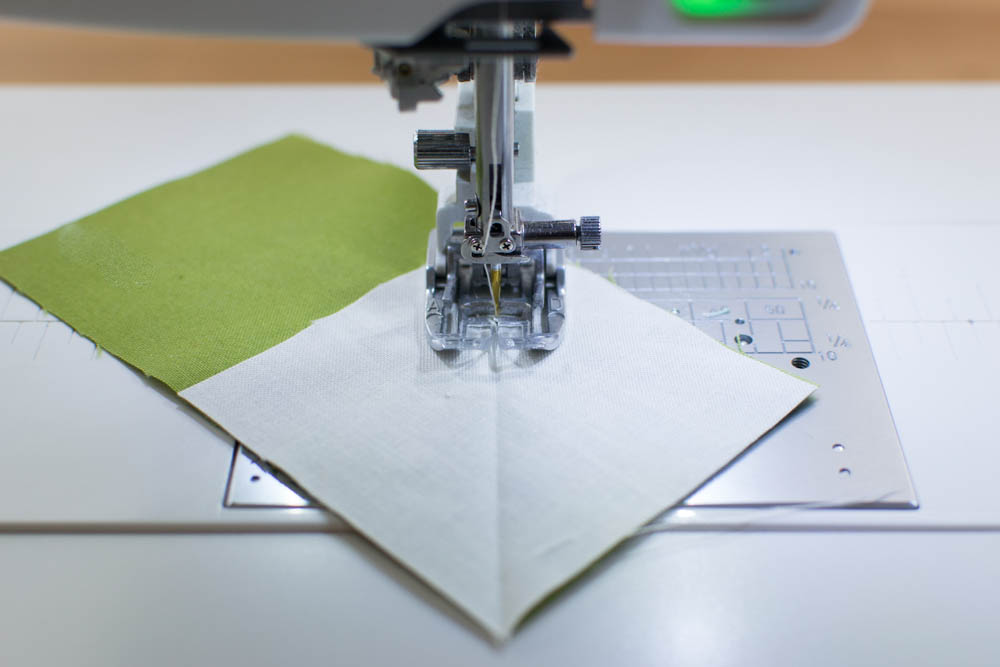
3. Stitch along the crease or marked line.
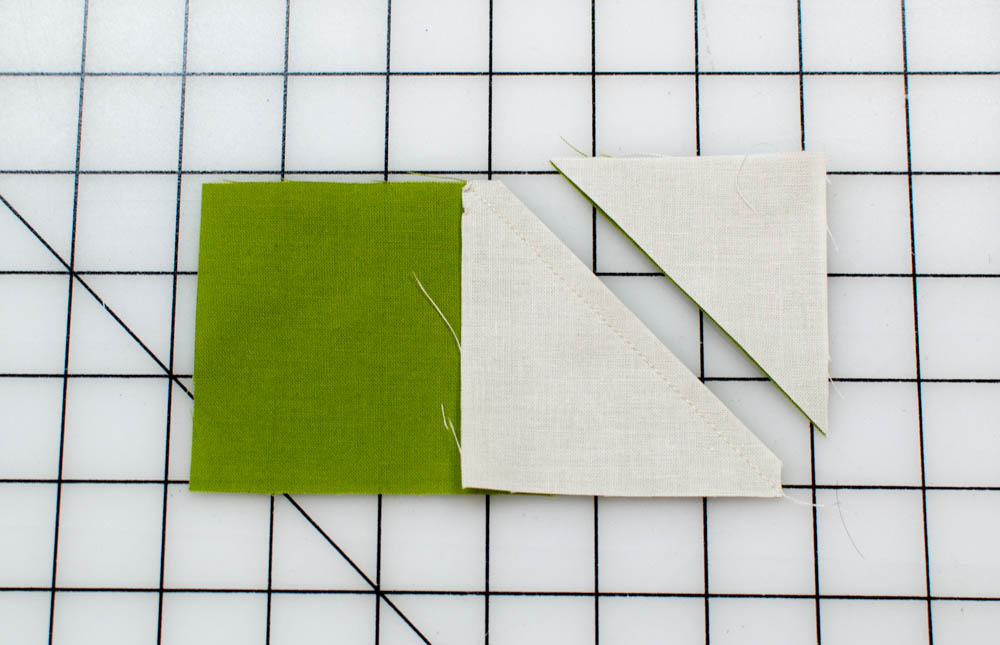
4. Trim away the fabric 1/4’’ past the sewn line. Discard these triangles or save them for a future project.
Open the piece and press flat.
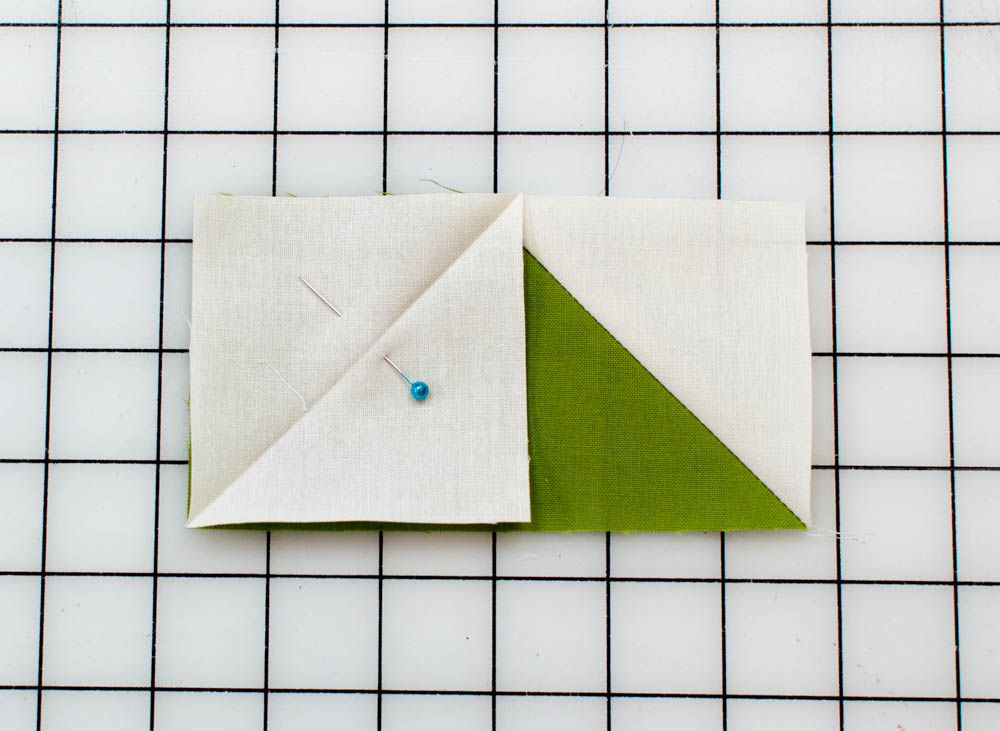
5. Place the remaining 3’’ square on the other side of the flying geese unit as seen above. Pin along the line.
6. Stitch along the line.
7. Trim away the extra fabric 1/4’’ past the line of stitching, open, and press as before.
The flying geese unit for the top of the pine tree is done! Set it aside for now while you make it 6 half square triangle units (HST’s).
Make 6 cream and green Half Square Triangle units:
1. Fold the three 3 1/2’’ squares in half diagonally and press to make a crease or draw a line with a pencil or fabric marking pen.
This time the line will be a cutting line (not a stitching line).

2. Place the 3 squares right sides together with the 3 green squares of the same size and pin.

3. Sew each square twice: once on either side of the line, 1/4’’ away from the line.
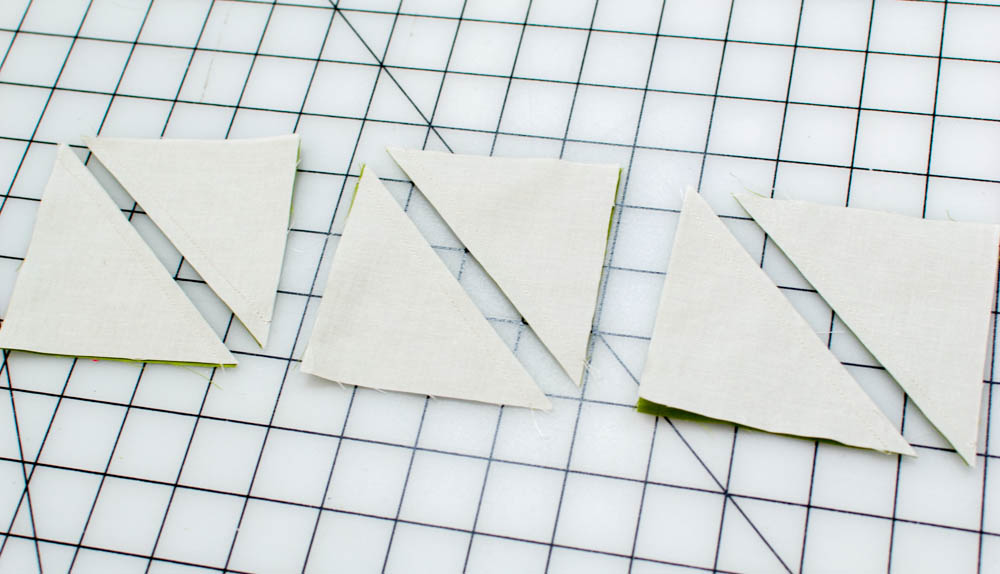
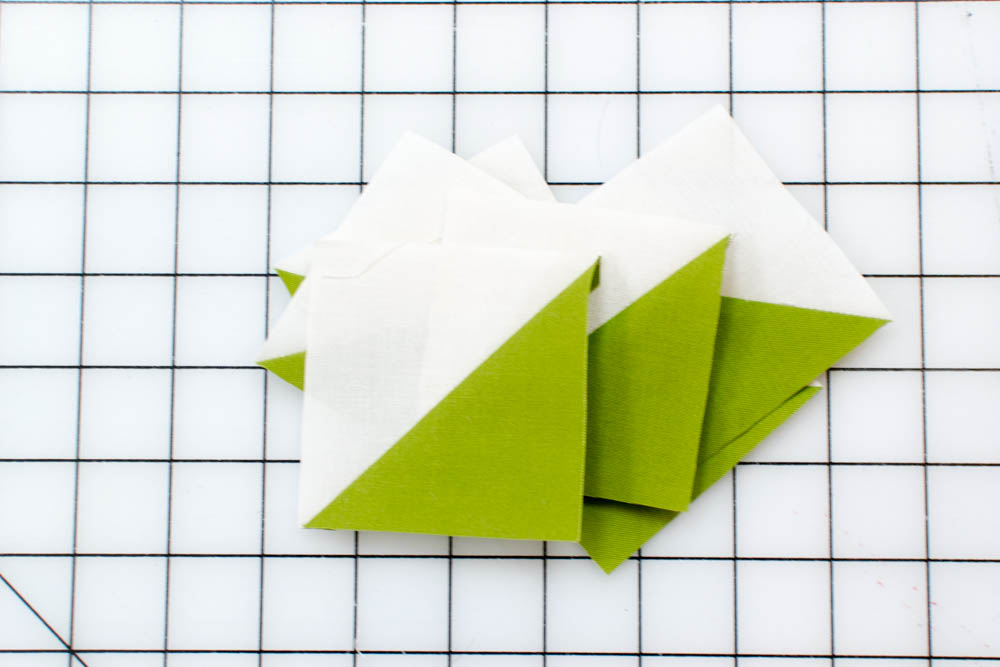
4. Cut the squares in half along the marked line. Open and press each square flat.
5. Trim the half square triangles so they are each exactly 3’’ square.
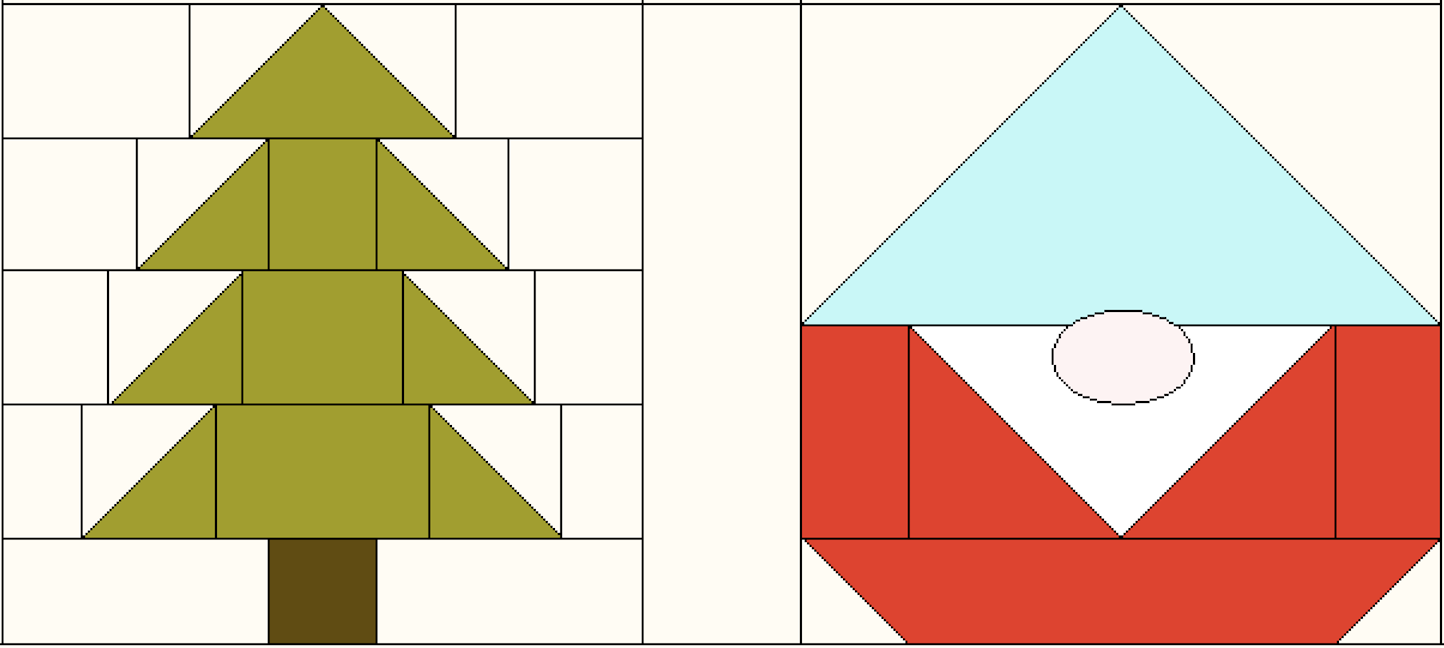
Assemble the Pine Tree Quilt Block:
Use the photos to help piece together each row.
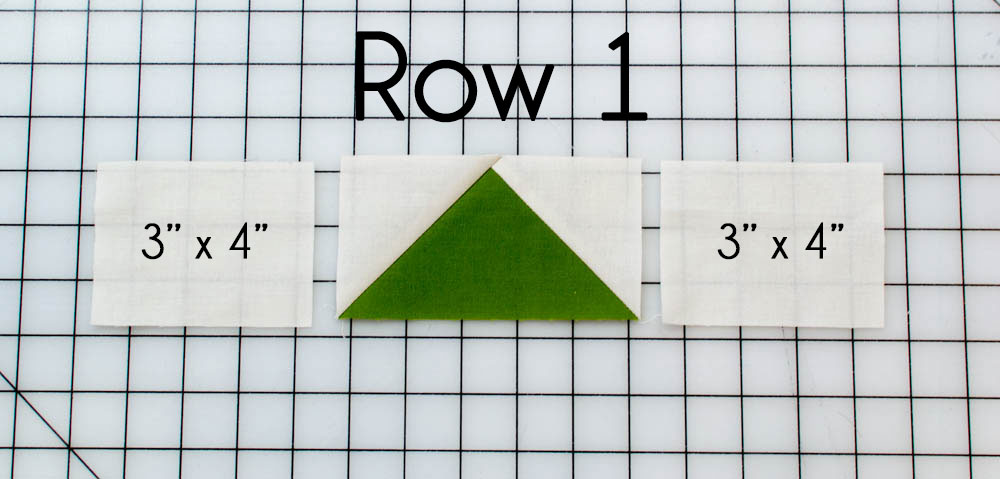
Row 1: Sew the flying geese unit together with the two 3’’ x 4’’ cream rectangles.

Row 2: Sew together the two remaining cream 3’’ squares, two HST’s, and the green 3’’ x 2 1/2’’ rectangle as shown above.
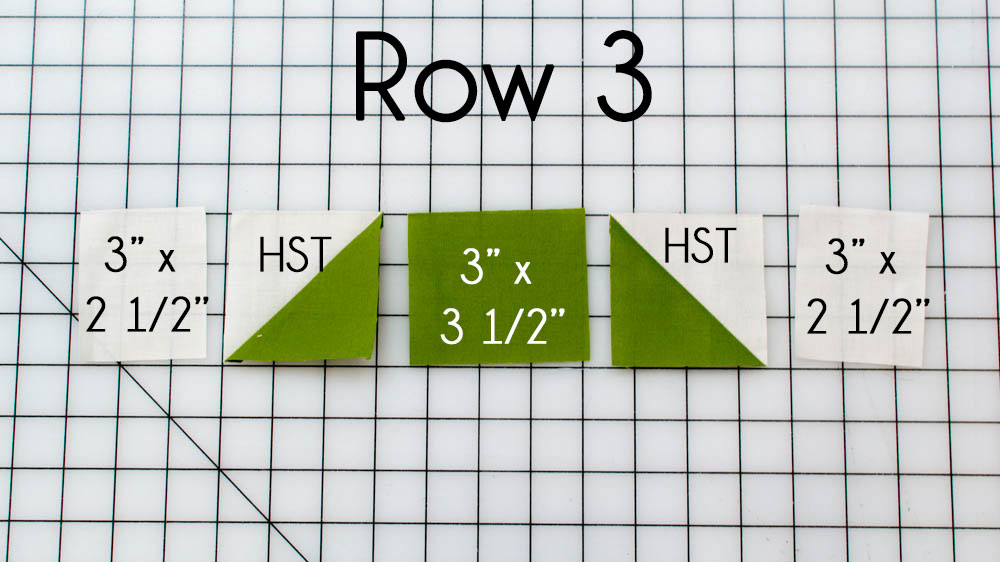
Row 3: Sew together the two cream 3’’ x 2 1/2’’ rectangles, two HST’s, and the green 3’’ x 3 1/2’’ rectangle as shown above.

Row 4: Sew together the two cream 3’’ x 2’’ rectangles, two HST’s, and the green 3’’ x 4 1/2’’ rectangle as shown above.
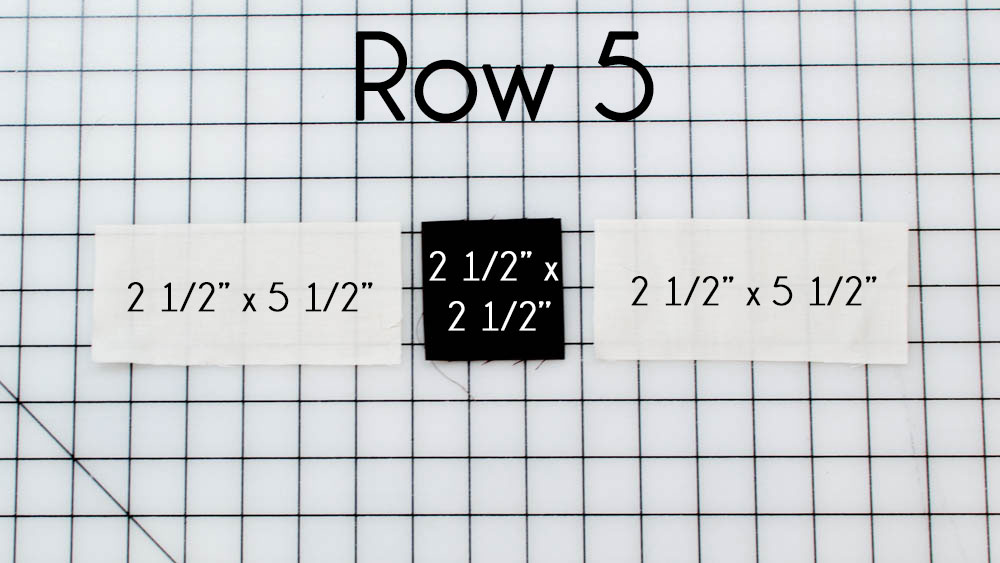
Row 5: Sew together the two cream 2 1/2’’ x 5 1/2’’ rectangles and the brown 2 1/2’’ square as shown above.
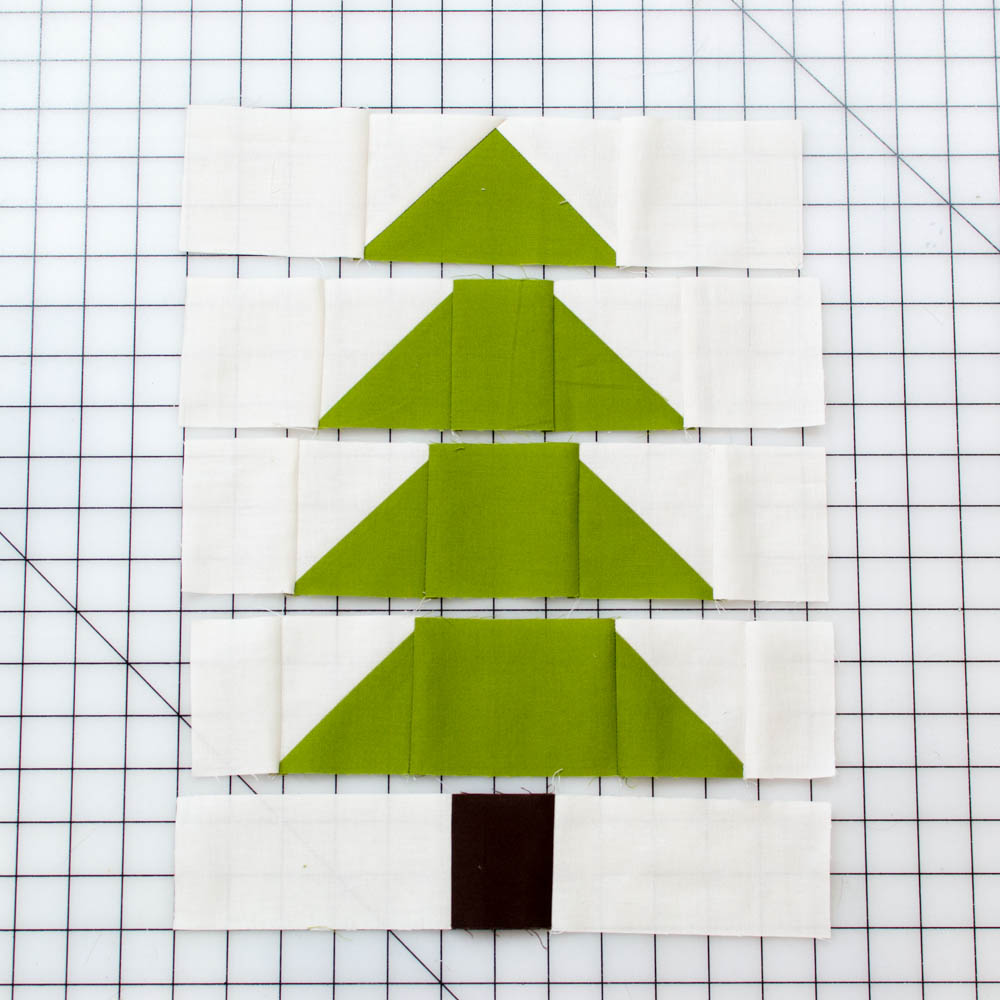
Press the seams and sew the 5 rows together.
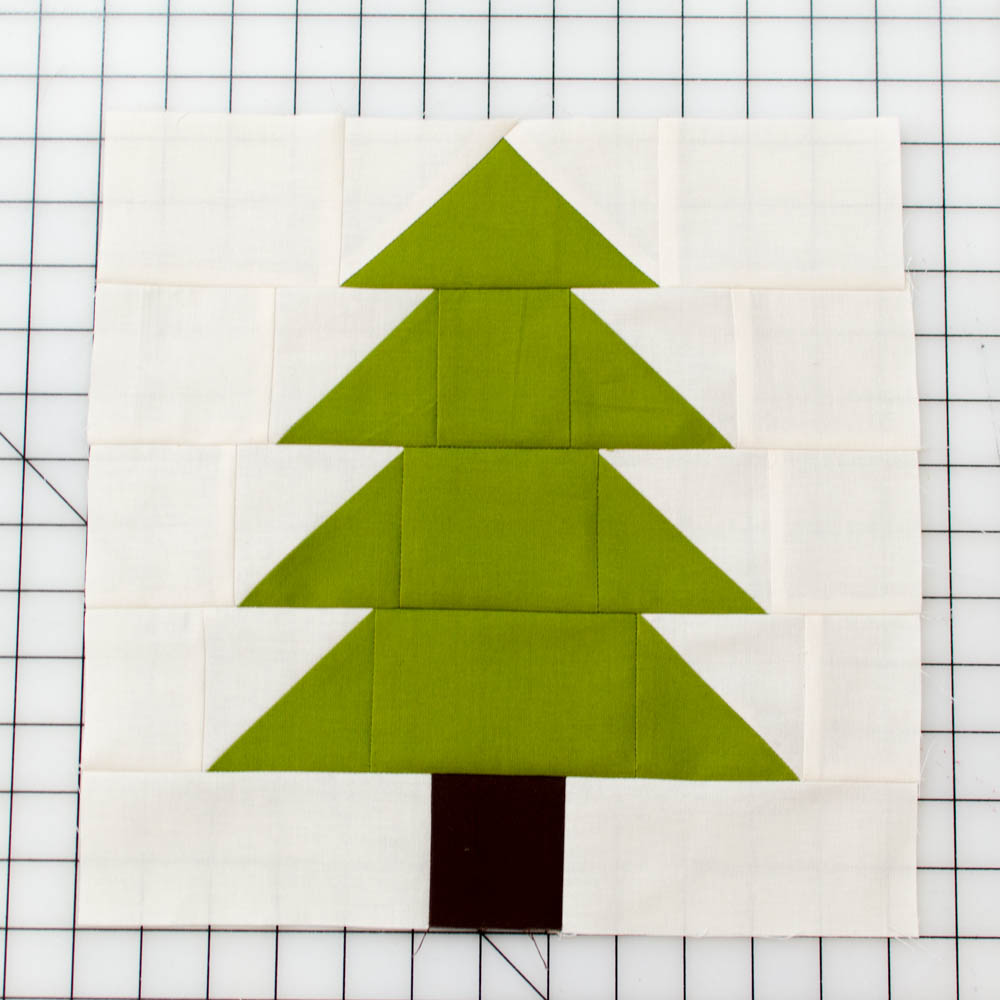
Your Pine Tree block is done!
If you are making the Mini Gnome Forest Quilt, make 2 Pine Tree Blocks and 2 Gnome Blocks.
Mini Gnome Forest Quilt Sashing and Binding:
Cream colored fabric is used for the sashing and binding.
For the sashing, cut:
- 4 strips 3 1/2’’ x 12 1/2’’
- 1 square 3 1/2’’ x 3 1/2’’
For the borders, cut:
- 2 strips 3 1/2’’ x 27 1/2’’
- 2 strips 3 1/2’’ x 33 1/2’’
Assembly:
1. Sew a gnome block and a tree block together with a sashing strip in between them.
2. Sew the other tree block and gnome block together in the opposite order – also with a sashing strip in between them.

3. Sew the last two sashing strips together with the 3 1/2’’ square in between them.
4. Sew the 3 pieces together.
5. Sew the 3 1/2’’ x 27 1/2’’ border strips to the sides of the quilt top.
6. Sew the 3 1/2’’ x 33 1/2’’ border strips to the top and bottom of the quilt top.
7. Sandwich, baste, quilt, and bind as desired!
If you make a quilt (or something else) using my gnome or pine tree block pattern, I’d love to see! Please tag me on Instagram @sewcanshe.
By the way, there’s a free pattern for my Christmas Gnome too!
Happy sewing!
Disclosure: some of my posts contain affiliate links. If you purchase something through one of those links I may receive a small commission, so thank you for supporting SewCanShe when you shop! All of the opinions are my own and I only suggest products that I actually use. 🙂