Charm Patch Quilt Pattern: Free Throw quilt Pattern for Pre-Cut Charm Squares!
I love quilt patterns for pre-cut fabrics! Learn to sew this easy Charm Patch Quilt using easy pre-cut charm square fabric pieces. The Charm Patch free quilt pattern is perfect for a beginner and requires just 2 charm packs of fabric. It can be charm packs from the same fabric line, or two packs that look good together. You’ll also need 1 1/4 yards of background fabric.

For anyone new to quilting, a charm pack is a pre-cut bundle of fabrics that contains 42 pieces of fabric that are 5” square. A charm pack usually contains 2 of each fabric in a particular fabric line.
This easy quilt pattern uses 81 charm squares, so you’ll need 2 charm packs. If you don’t have any charm packs on hand, this is a great way to use up fabric scraps from your scrap bin!
The blog post below is totally free to read, print, and sew! Just hit CTRL +P on your computer to print. There is an optional PDF download offered at the end of the post.

Nothing could be more fun or beginner friendly than this easy throw quilt. Some of the 5” squares will be cut up and sewn into 4-patches, and the rest are simply trimmed to 4 1/2” and sewn in the rows. You’ll use almost all of the charm squares and quickly piece this throw quilt pattern in an afternoon with very little fabric waste.

When I made my quilt I had 2 beautiful charm packs from Anna Maria Horner’s Hindsight collection.
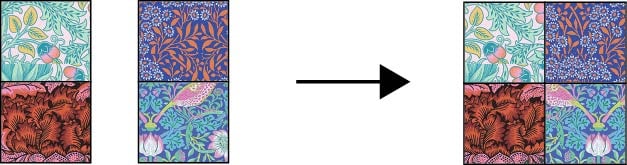
Those fabrics are hard to come by now, so I for my diagrams, I used Kaffe Fassett x Morris & Co. fabrics. The effect is similar with bold florals and a creamy off-white background fabric. And best of all – these fabrics are currently available. I have a fat quarter bundle of them in my studio waiting to be made into something beautiful!
This throw sized quilt finishes at approximately 46’’ x 57’’, which is perfect for snuggling up on the couch or tossing on a bed (on top of a bigger quilt) for chilly nights.
Sew the Charm Patch Throw Quilt Pattern
You will need:
- 81 – 5” squares or 2 charm pack bundles of fabric
- 1 1/4 yard cream colored fabric for the background
- 1/2 yard binding fabric
- 3 yards of fabric for the quilt back
- 51’’ x 62’’ piece of quilt batting
Cutting:

1. Select 32 fabric squares and cut each in half twice to make 128 squares, each 2 1/2” x 2 1/2”.

2. Select 18 fabric squares and cut each in half diagonally once to make 36 half-square triangles.
3. Trim the remaining 31 charm pack squares to 4 1/2” x 4 1/2”.
4. From your background fabric, cut 80 squares 4 1/2” x 4 1/2”.
Make 32 Easy 4-Patch Blocks
Use a 1/4’’ seam allowance. Tip: I use a scant 1/4’’ seam allowance to account for the fabric lost when pressing seams to the side.

1. Select two 2 1/2” squares at random and sew them together. Repeat to sew all of your 2 1/2” squares in sets of two. Press the seams to one side.
2. Sew two 2-patches together to make a 4-patch. Repeat to make 32 4-patches. The 4-patches should be 4 1/2” square.
Make the Diagonal Rows

1. Sew a 4-patch unit to two 4 1/2” background fabric squares as shown. Then sew half square triangles to the ends of the row in the directions shown. Repeat to make 2 rows like this.

2. Sew three 4-patch units to four 4 1/2” background fabric squares as shown. Then add half square triangles to the ends. Repeat to make 2 rows like this.

3. Sew five 4-patch units to six 4 1/2” background fabric squares as shown. Then add half square triangles to the ends. Repeat to make 2 rows like this.

4. Sew seven 4-patch units to nine 4 1/2” background fabric squares as shown. Then add half square triangles to the ends. Note that on the right end, the long side of the triangle is sewn to the strip. Use a ruler and rotary cutter to trim away the points of the triangle to make straight edges.
Repeat to make 2 rows like this.

5. Sew two 4 1/2” square fabric pieces to three 4 1/2” background fabric squares as shown. Then add half square triangles to the ends. Repeat to make 2 rows like this.

6. Sew four 4 1/2” square fabric pieces to five 4 1/2” background fabric squares as shown. Then add half square triangles to the ends. Repeat to make 2 rows like this.

7. Sew six 4 1/2” square fabric pieces to seven 4 1/2” background fabric squares as shown. Then add half square triangles to the ends and trim. Repeat to make 2 rows like this.

8. Sew seven 4 1/2” square fabric pieces to nine 4 1/2” background fabric squares as shown. This time, the long edges of the triangles will face opposite directions. Take care to sew this row exactly as shown.
Only make 1 row like this.

9. Sew 2 half square triangles to the sides of a 4 1/2” background fabric square as shown. Trim away the ends of the triangles. Make 2 pieces like this.
Sew the Diagonal Rows Together

1. Lay the quilt strips out as shown on a bed or a design wall. Place the two remaining half square triangles at the top left and bottom right corners.

2. Sew the rows together. Trim the triangles at the corners to match the edges of the quilt.
Assemble the Quilt

1. Sew together or cut a 51’’ x 62’’ piece of backing fabric.
2. Make a quilt sandwich with the backing, batting, and top. Baste together with fusible batting, pins or basting spray.

3. Quilt as desired. I used my Babylock Sashiko 2 Machine to quilt simple straight lines around the patchwork squares. Before Sashiko stitching, I stitched in the ditch with Sulky Invisible Thread. Stitching in the ditch first really makes the Sashiko stitching look great.
4. Cut 5 binding strips and bind using your favorite method. This is my favorite quilt binding method.
As always, I love to see what you are making with my free sewing patterns! Upload a picture to Instagram and tag me @sewcanshe or #sewcanshe so I can take a look!
xoxo,


CHARM PATCH THROW QUILT PATTERN
Purchase this pattern in PDF format! The PDF file contains all of the instructions, plus the step by step photos that have been reduced to fit the page nicely with no ads.
Download the file immediately and keep your confirmation email so you can download it again later. Unlimited downloads are available from the confirmation email.
Disclosure: some of my posts contain affiliate links. If you purchase something through one of those links I may receive a small commission, so thank you for supporting SewCanShe when you shop! All of the opinions are my own and I only suggest products that I actually use. 🙂