Dot Dot Dash: Free Throw Quilt Pattern for Mini Charm Bundles or 2 1/2” Squares!
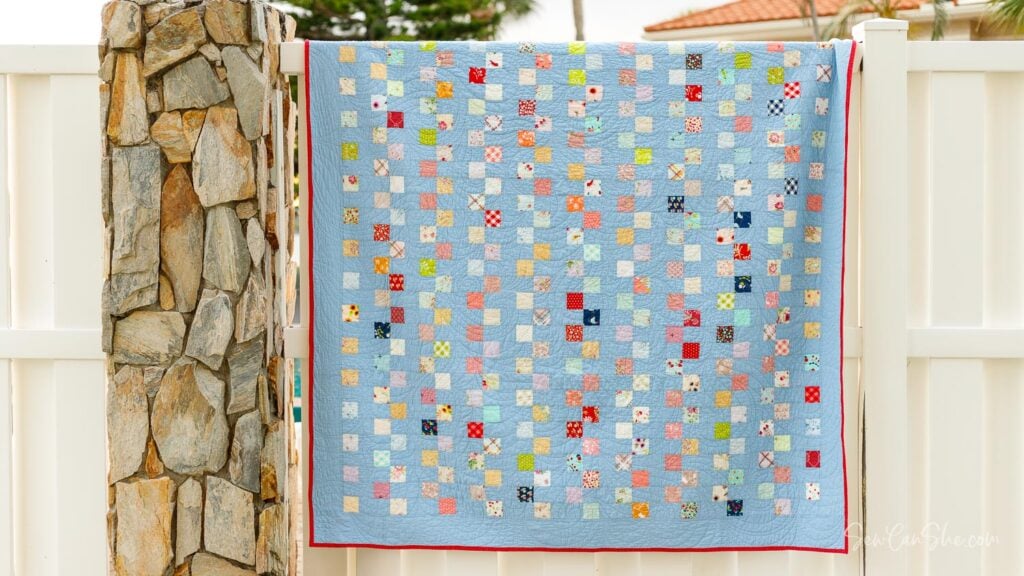
We all love those tiny bundles of 2 1/2” fabric squares that they sell near the cash register at our favorite quilt shop. But after you buy this adorable bundle, what can you do with it? That was what I was thinking when I designed Dot Dot Dash – an adorable throw quilt that you can sew with 7 mini charm packs or 2 1/2” fabric squares that you can cut from scraps. The quilt dimensions are approximately 68” x 68”.
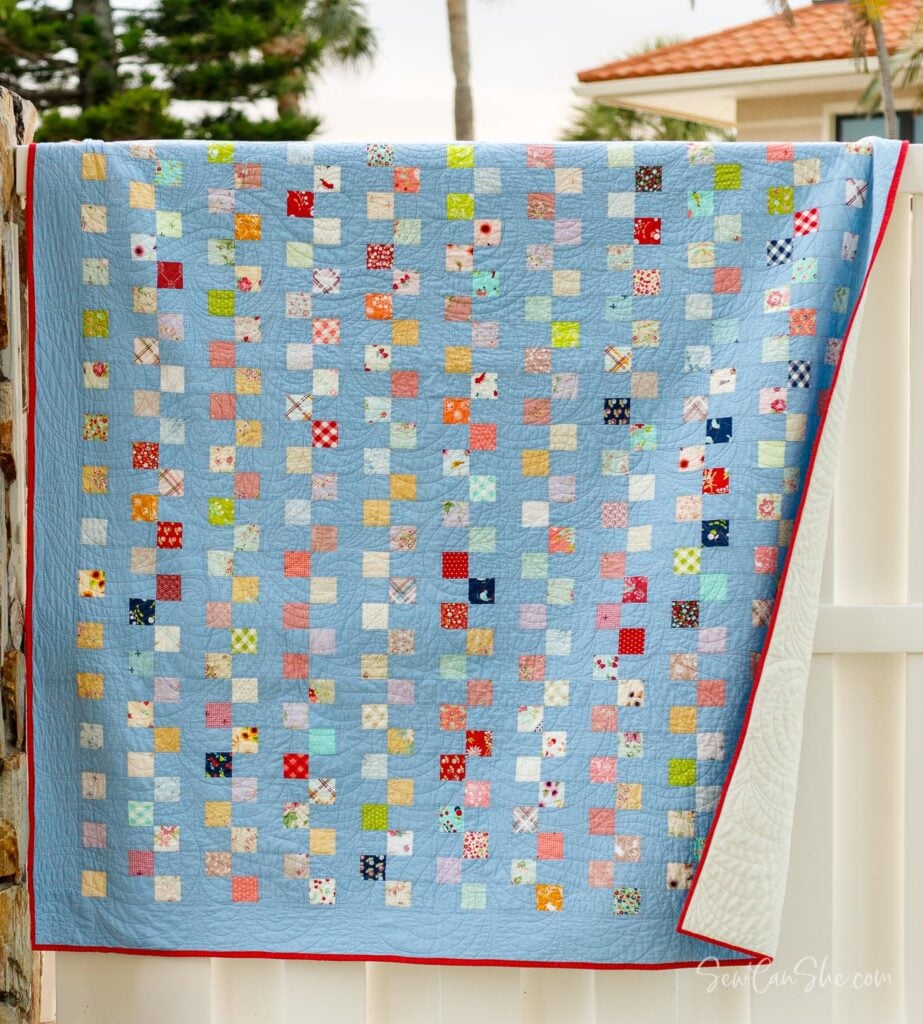
You’ll love the simple design of this quilt that is so beginner friendly! Throw quilts like this are easier to quilt on a home sewing machine when compared to bed quilts, and they are so much fun to snuggle up with on the couch.
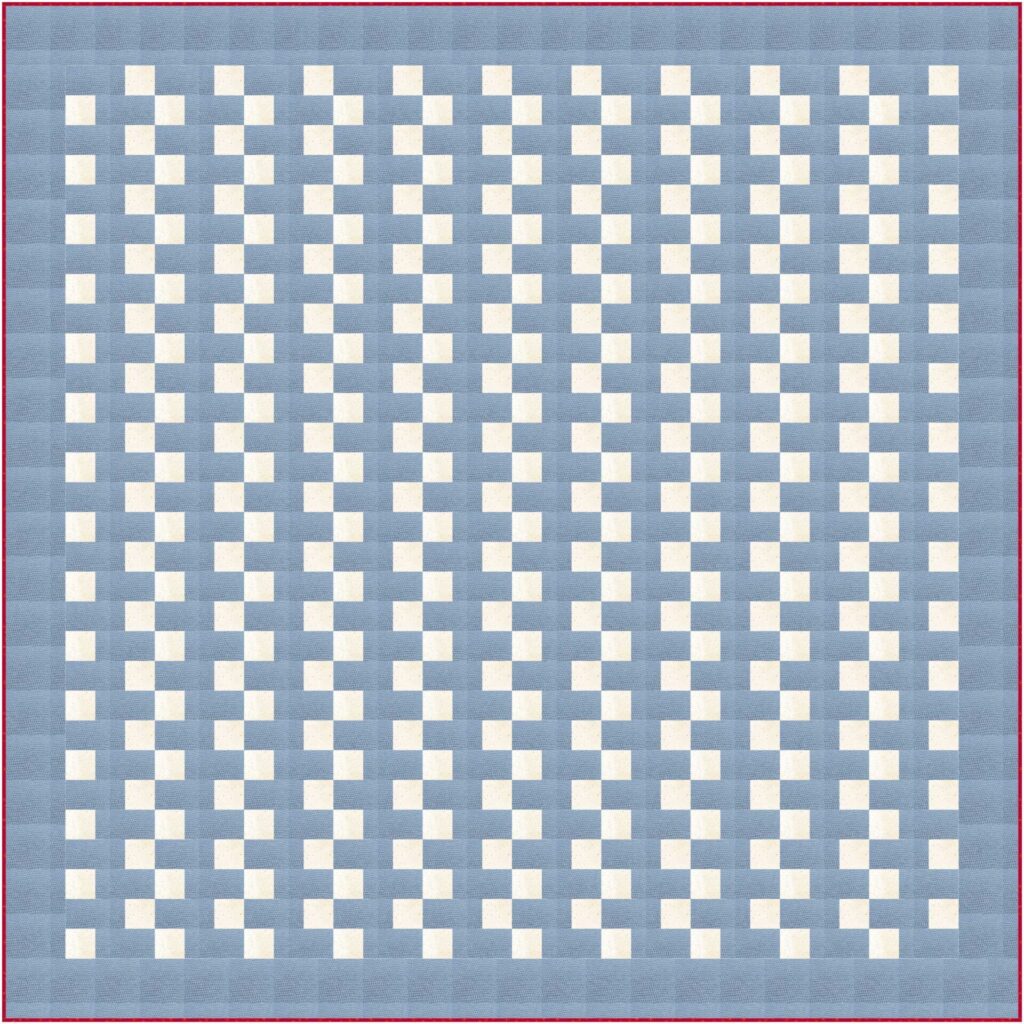
The 2 1/2” squares that I used came from different mini charm packs that I have collected over the years. They are not from the same collection or even the same designer, but they still look beautiful! The background fabric on this quilt is Tilda Chambray Basics (Blue).
The blog post below is totally free to read, print, and sew! Just hit CTRL +P on your computer to print. There is an optional PDF download offered at the end of the post. Join our Sewing Bee Community for access to over 300 PDF patterns (including this one), live workshops, premium video courses, and more.
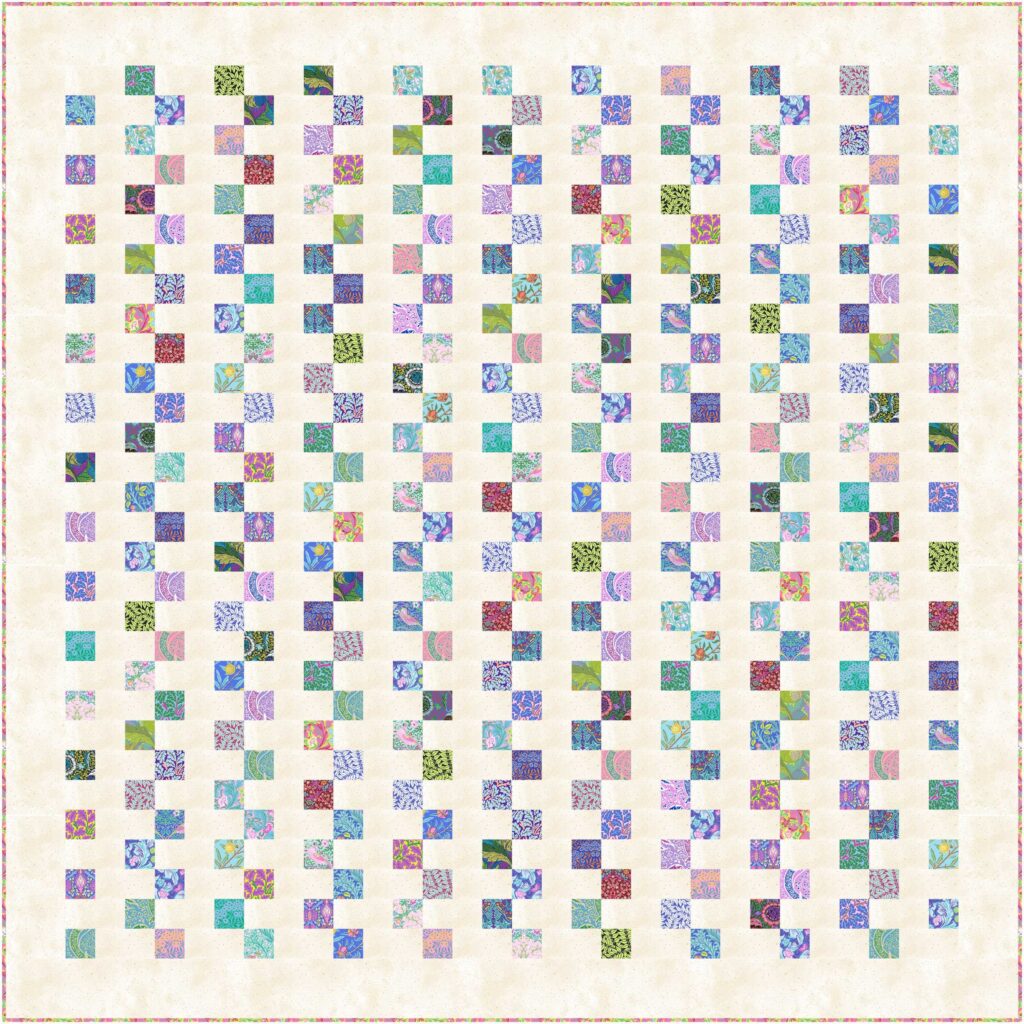
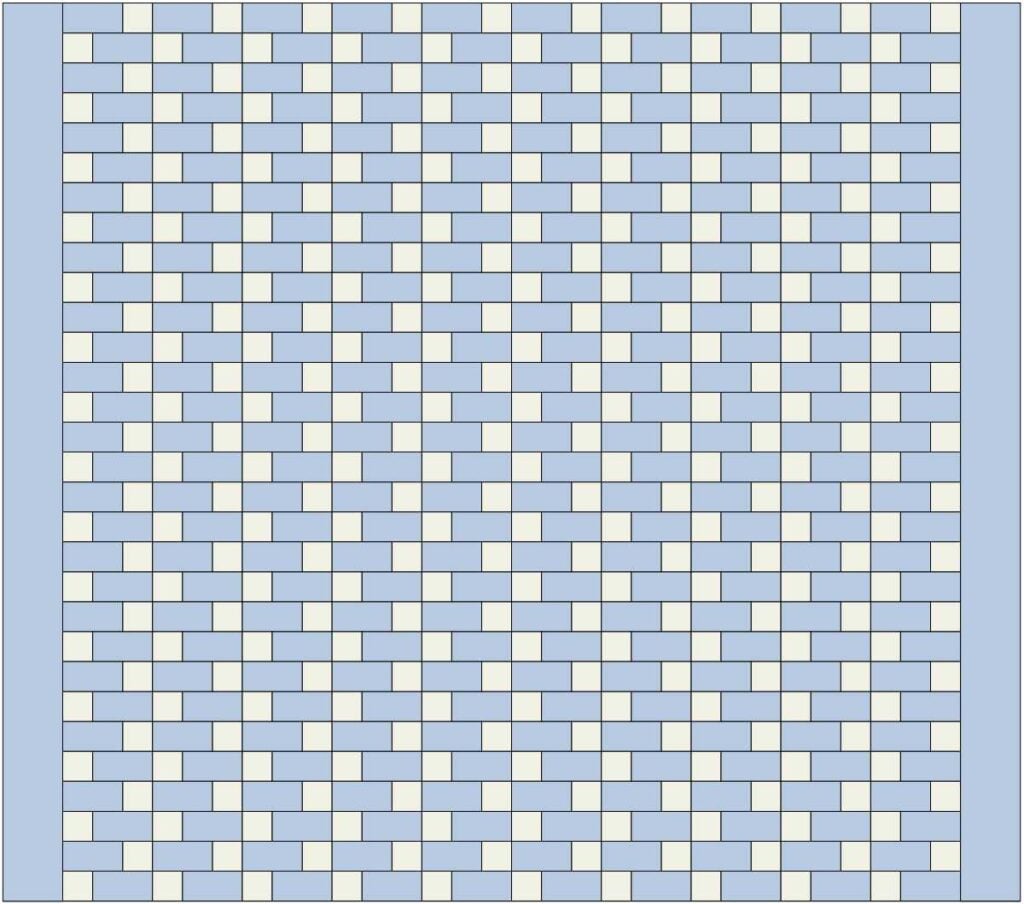
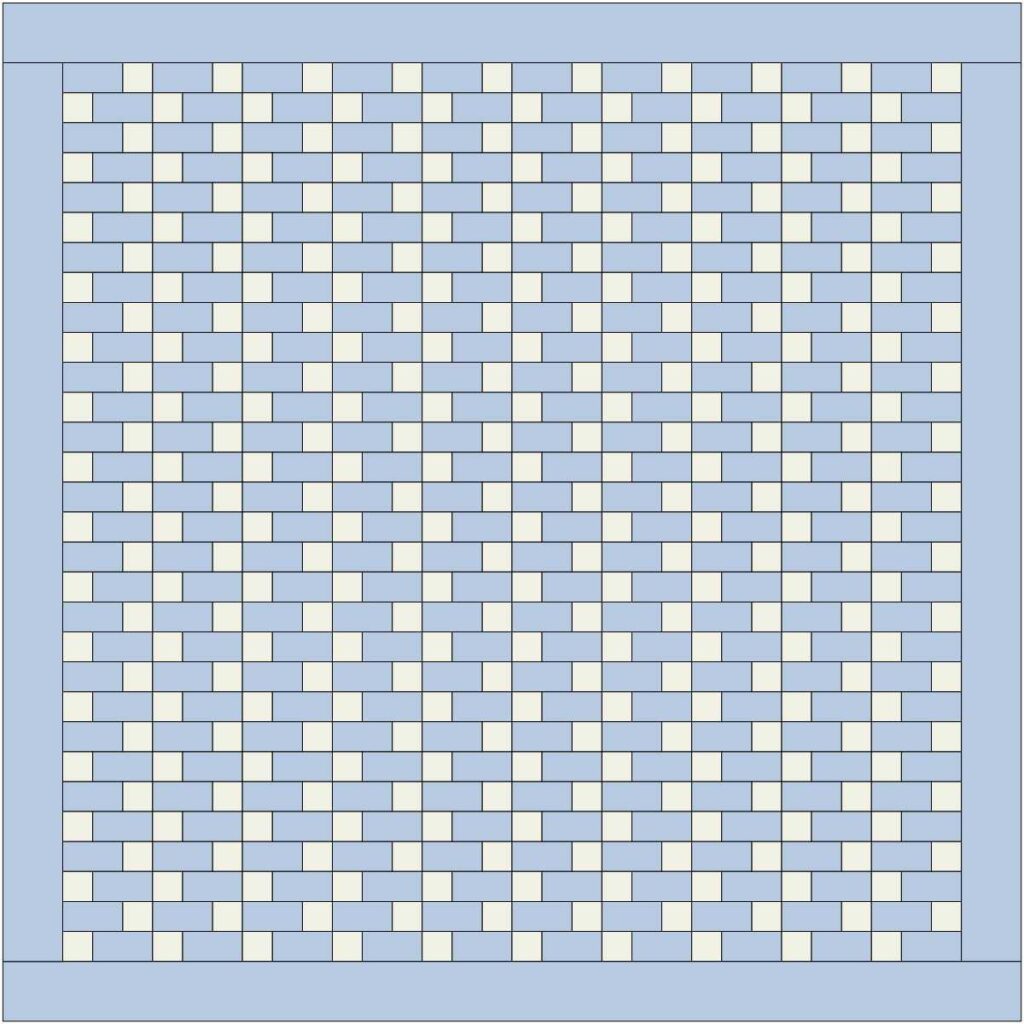
I used EQ8 Quilt Design Software to see how this quilt would look with other fabric collections.
Here is what your quilt would look like if you used mini-charm bundles from the Kaffe Fasset x Morris & Co. fabric collection from Free Spirit and a cream colored blender fabric for the background.

Other Ways to Cut 2 1/2” Fabric Squares
There are lots of other ways to cut the 2 1/2” fabric squares needed for this quilt. The most fun way (I think) would be to use scraps! You can use a ruler and rotary cutter to do that, or save time using an AccuQuilt GO! cutter. I absolutely love my AccuQuilt cutters and dies. Read my review of AccuQuilt products.
If you have regular charm fabric packs (5” squares), you can cut those fabric pieces in half twice to get 4 squares from each piece. In that case, this free quilt pattern will require 2 charm fabric bundles.
There’s another way too! You can cut the 2 1/2” squares from 2 1/2” wide jelly roll fabric strips. In that case, one jelly roll will be enough because you’ll need just 19 strips (less than 1/2 of most jelly rolls).

How to Cut the Background Fabrics
The background fabrics for this quilt are all 2 1/2” strips, except the border, which is sewn from 4 1/2” fabric strips. That means that you can cut most of the background fabrics from 2 1/2” jelly roll fabrics or 2 1/2” strips cut with an AccuQuilt 2 1/2” strip die. You’ll need 38 strips of fabric for the background of the center of the quilt or just one jelly roll bundle.
You also have the option to use 2 1/2” strips for the border too, which would make the dimensions of the quilt 64” x 64”. You’ll need 7 more strips of fabric to sew the border.
For my quilt, I used my AccuQuilt Go! electric fabric cutting machine to cut 2 1/2” background fabric strips, which I subcut for the center of the quilt. Then I cut 4 1/2” strips for my border.
Dot Dot Dash Free Quilt Pattern
This is a strip quilt. You’ll piece together 30 easy strips for the center of the quilt, which makes it so fast to sew!
The finished throw quilt is approximately 68” x 68”. It’s perfect for snuggling on the couch, providing extra warmth on cold nights, or making into a large baby quilt.
You will need:
- 300 squares of fabric 2 1/2” x 2 1/2”:
- 7 mini charm packs (2 1/2” squares) OR
- 2 regular charm packs (5” squares) OR
- 1/2 of a jelly roll fabric bundle (2 1/2” strips) OR
- 1 1/2 yards of other fabric
- 3 1/2 yards of background fabric OR
- 1 jelly roll bundle plus 1 yard for the quilt border
- a rotary cutter, acrylic ruler, and cutting mat
- sewing machine
- thread (I suggest thread matching the background fabric)
- ironing board and iron
To sew the quilt top into a finished quilt, you will also need:
- 4 1/4 yards of backing fabric (or enough to piece together a 73” x 73” or larger quilt back)
- a piece of quilt batting at least 73” x 73”
- 1/2 yard of fabric for the binding
Cutting
Select 300 mini charm squares or cut 300 squares 2 1/2” x 2 1/2” from various fabrics or all one fabric.
From the background fabric, cut:
- 300 rectangles 2 1/2” x 4 1/2”
- 7 strips 4 1/2” x width of fabric (for the border)
Quilt Piecing
Use a 1/4’’ seam allowance and a regular stitch length such as 2 – 2.5.
Piece Together 30 ‘Dot Dash’ Strips

1. Sew a 2 1/2” print fabric square to a 4 1/2” background fabric rectangle. Press the seams toward the darker fabric.
Make 300 pieces.

2. Sew 10 pieces together to make a long strip, as shown.
Make 30 ‘dot dash’ strips.
Sew the Strips Together

1. Sew two ‘dot dash’ strips together, with one strip turned around 180 degrees, as shown.
Make 15 strip sets.
2. Sew all of the strip sets together to make the center of the quilt top.
Make and Sew the Quilt Borders
1. Piece together the seven 4 1/2” x width of fabric border strips to make one long strip. Press the seams open. Cut the border pieces from this long strip.
2. The expected length of the side border pieces is 60 1/2”. I highly recommend measuring the quilt top and cutting all border pieces to the correct size. See how to cut the correct size quilt borders. Measure your quilt and cut two strips for the side border pieces. Attach the side border pieces.
3. The expected length of the top and bottom border pieces is 68 1/2”. Measure your quilt and cut 2 strips for the top and bottom border. Attach the top and bottom border pieces.
Finishing the Dot Dot Dash Quilt Pattern
1. Cut or piece together a 73” x 73” piece of quilt backing fabric and make a quilt sandwich with the backing, batting, and top.
2. Baste together with fusible batting, pins or basting spray.
3. Quilt as desired. Straight line quilting or cross hatch quilting with your walking foot would be fast and easy. Trim away the extra batting and backing.
4. Depending on your fabric width, you will likely need 7 strips of fabric for the binding. Cut 2 1/2” tall (or desired height) binding strips. Sew the binding strips together and bind using your favorite method. This is my favorite quilt binding method.
xoxo,


DOT DOT DASH EASY QUILT PATTERN
Purchase this pattern in PDF format! The PDF file contains all of the instructions, plus the step by step photos that have been reduced to fit the page nicely with no ads.
Download the file immediately and keep your confirmation email so you can download it again later. Unlimited downloads are available from the confirmation email. Free patterns must be downloaded within 30 days.
Disclosure: some of my posts contain affiliate links. If you purchase something through one of those links I may receive a small commission, so thank you for supporting SewCanShe when you shop! All of the opinions are my own and I only suggest products that I actually use. 🙂