Easy Peasy Drawstring Backpack… with a Zipper Pocket {free tutorial}
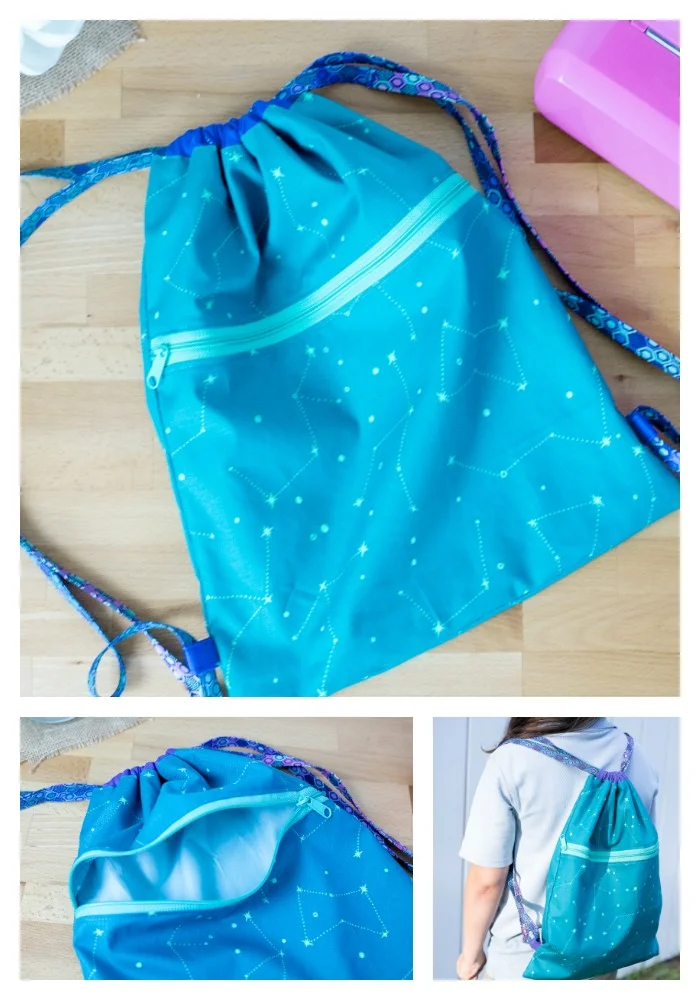
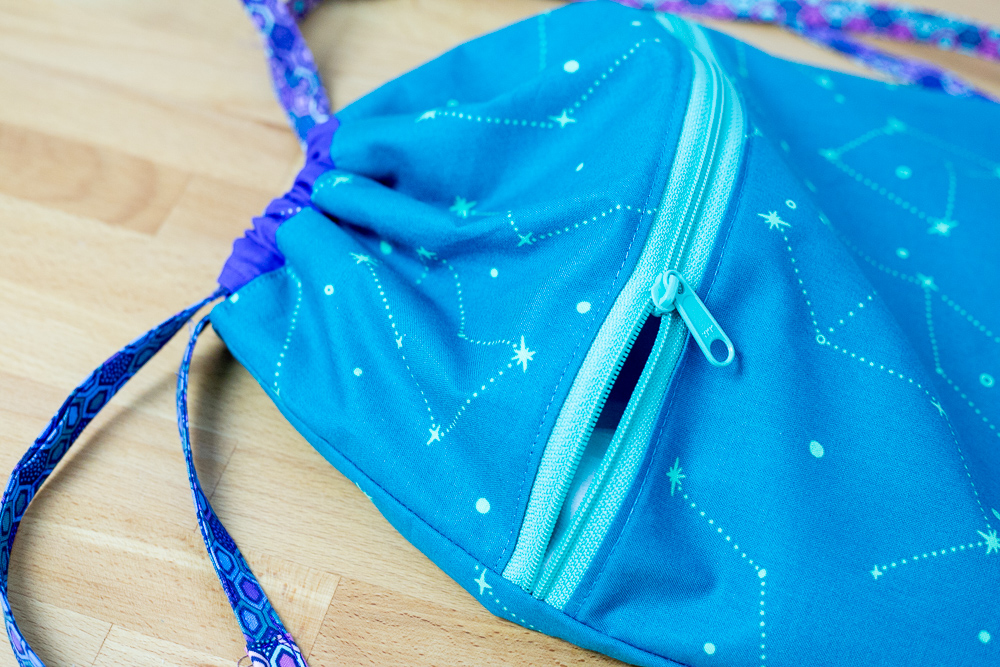
My Easy Peasy Drawstring Backpack tutorial gets even better because now I’m adding a zippered pocket!
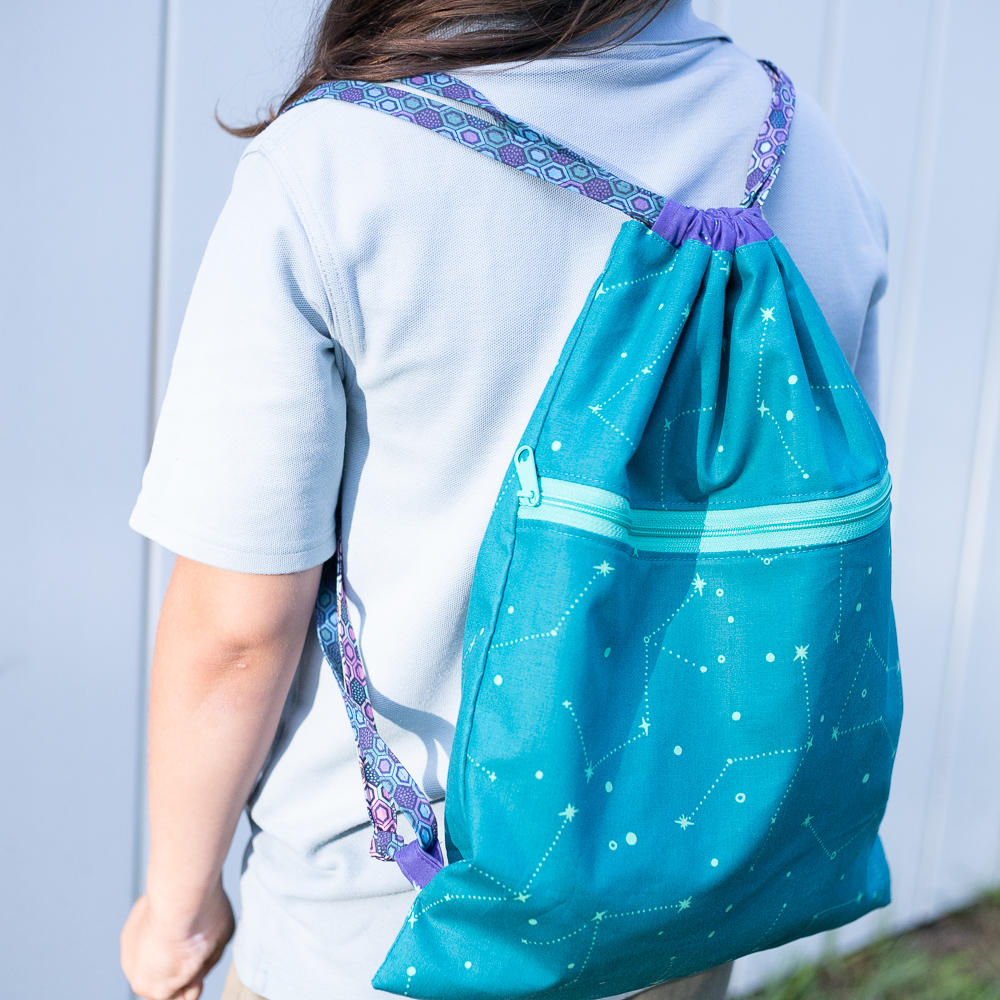
We recently took this backpack on a trip for my daughter Cadie to use – and it was so handy that I used it too!
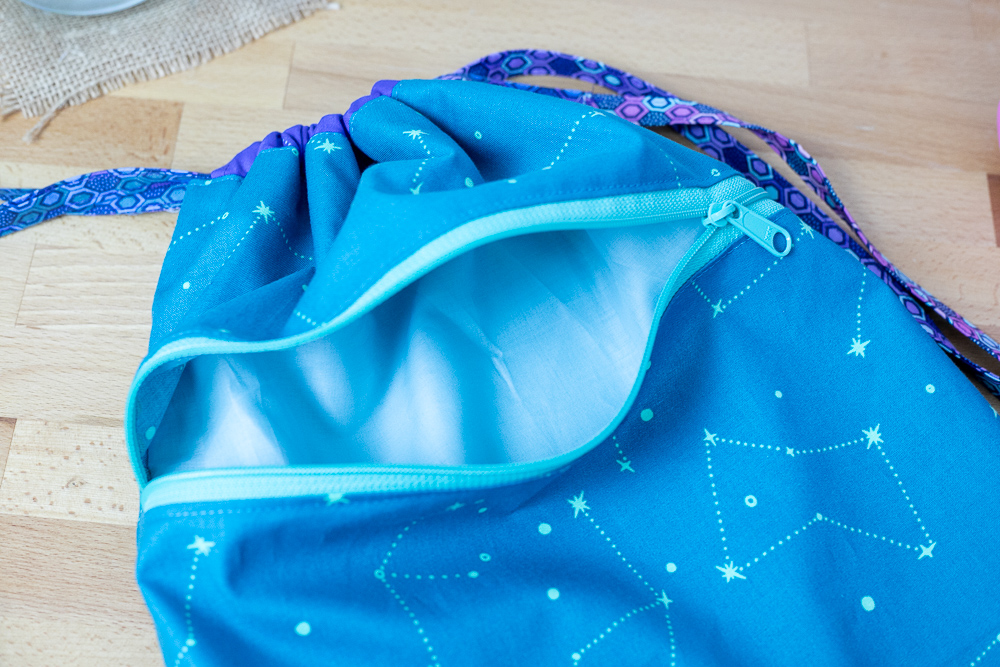
The exterior zippered pocket is almost as large as the main compartment of the bag, so it can hold anything you might want to grab easily – a book, wallet, hand sewing project, and more. Even though I didn’t, you could add a zippered pocket to both sides of the backpack if you wish – just like that.
This blog post contains a pre-tutorial (you might say) for preparing the zipper side of the bag. After that, you’ll finish making your Easy Peasy Drawstring Backpack using my free tutorial here. Everything follows perfectly and this bag is so easy to make (just like the name!).

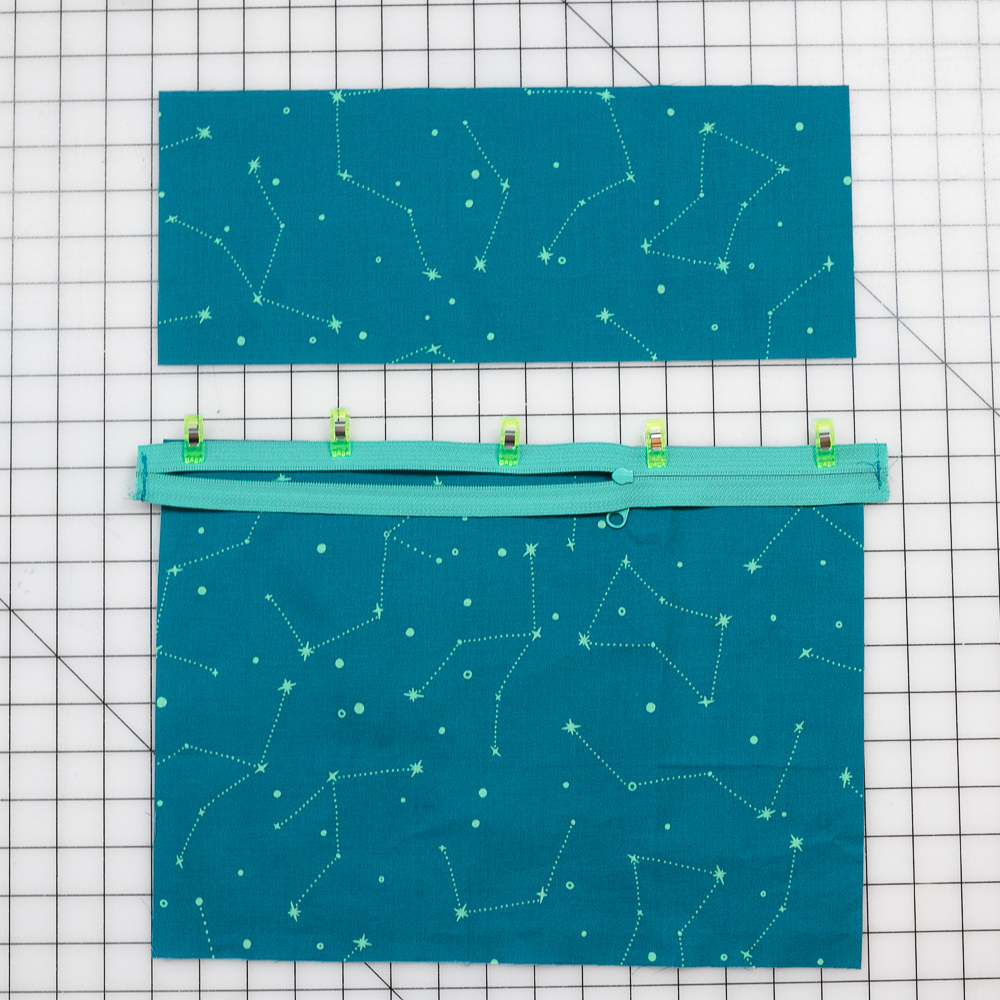
The bag pieces – after you have completed the exterior side with a pocket.
To make the Easy Peasy Backpack with a Zipper Pocket, you will need:
-
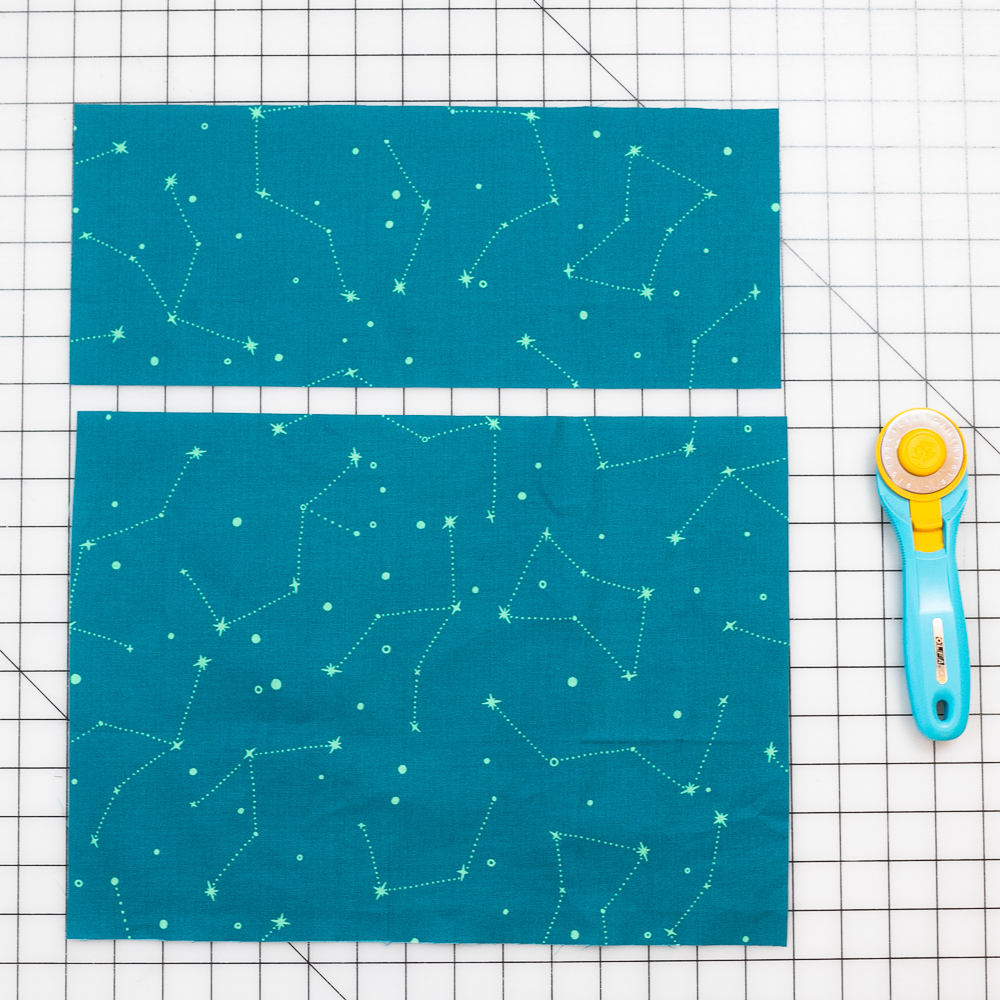
2 exterior rectangles 17” x 15”
-
2 lining rectangles 17” x 15”
-
1 pocket lining rectangle 17’’ x 15’’ (new!) – not shown above
-
1 zipper, 15’’ or longer (new!)
-
2 casing rectangles 3” x 14”
-
2 loop squares 3” x 3”
-
3 strips for the drawstrings, each 2” tall x width of fabric (42-44”)
You’ll notice that the list above contains everything you need to make the drawstring backpack, not just the zippered pocket.
The fabric rectangle and zipper above with (new!) after them are only things different between this pre-tutorial and the Easy Peasy Backpack tutorial that doesn’t have a zipper compartment.
Preparation
1. On one of the exterior fabric rectangles, cut the 6’’ off the top edge.
2. Place your zipper face down against the top edge of the lower piece (that is now 11’’ x 15’’). Pin or clip the top edge of the zipper in place.
Note: I’m using a wide YKK #4.5 handbag zipper that was cut from a Zipper By the Yard. That’s why the ends are cut and I have sewn across each end of the zipper to create thread stoppers.
This project will work for a handbag zipper or regular zipper, as long as it is 15’’ or wider.
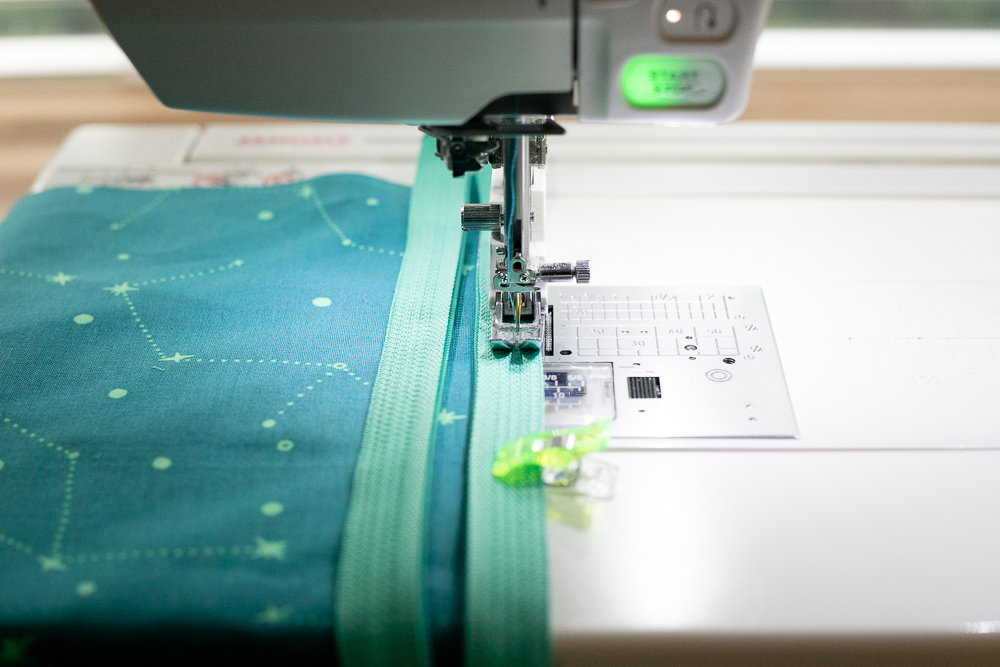
Sew the Zipper to the Exterior Piece
1. Stitch the zipper to the top edge with a 1/4’’ seam allowance. Use a zipper foot, if necessary and move the slider out of the way as you approach it to ensure a nice straight seam.
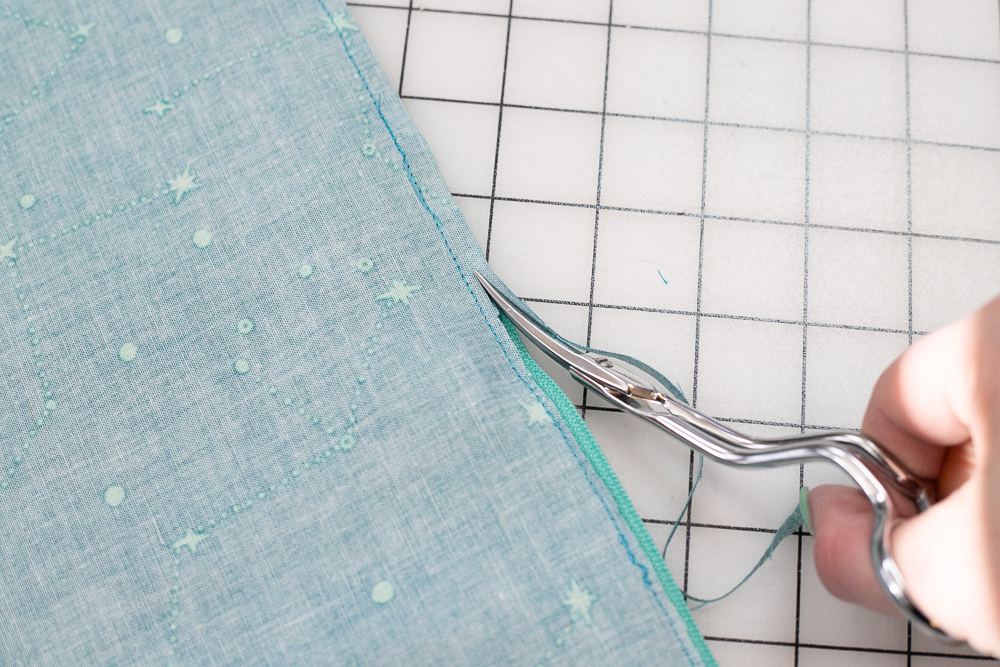
2. Flip the piece over and trim 1/8’’ away from the fabric in the seam allowance behind the zipper. Do not cut the zipper tape, just trim some of the fabric away behind it.
Turn the piece over to the right side again and gently press the fabric away from the zipper, being careful not to touch the zipper teeth with your iron.
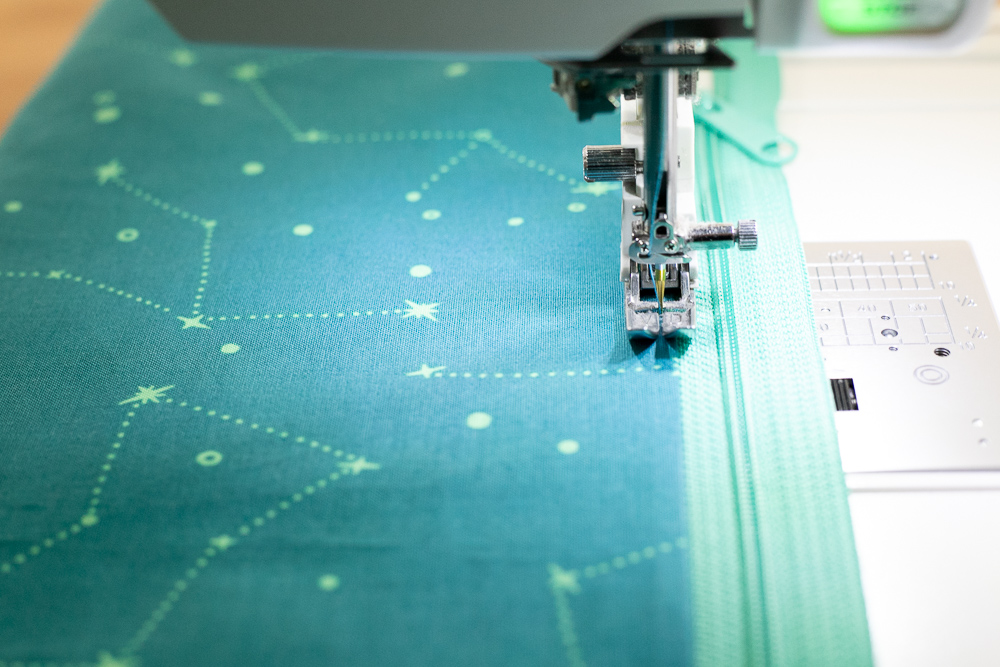

3. Topstitch along the bottom of the zipper 1/8’’ from the edge.
On the other side, you’ll see that the zipper tape covers the raw edge of the fabric to make a neat finish.
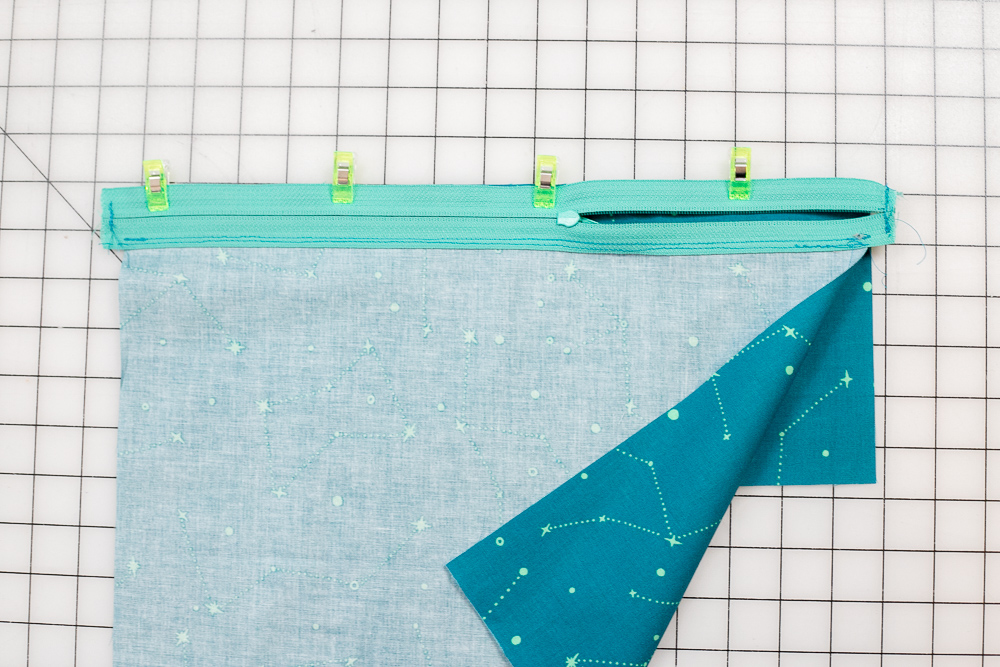
4. Now place the zipper face down against one long edge of the 6’’ x 15’’ rectangle that remains. Pin or clip the free zipper tape in place.
5. Just as before:
-
Stitch the zipper in place.
-
Trim away 1/8’’ of fabric from the seam allowance.
-
Press the top fabric away from the zipper.
-
Topstitch 1/8’’ from the zipper.
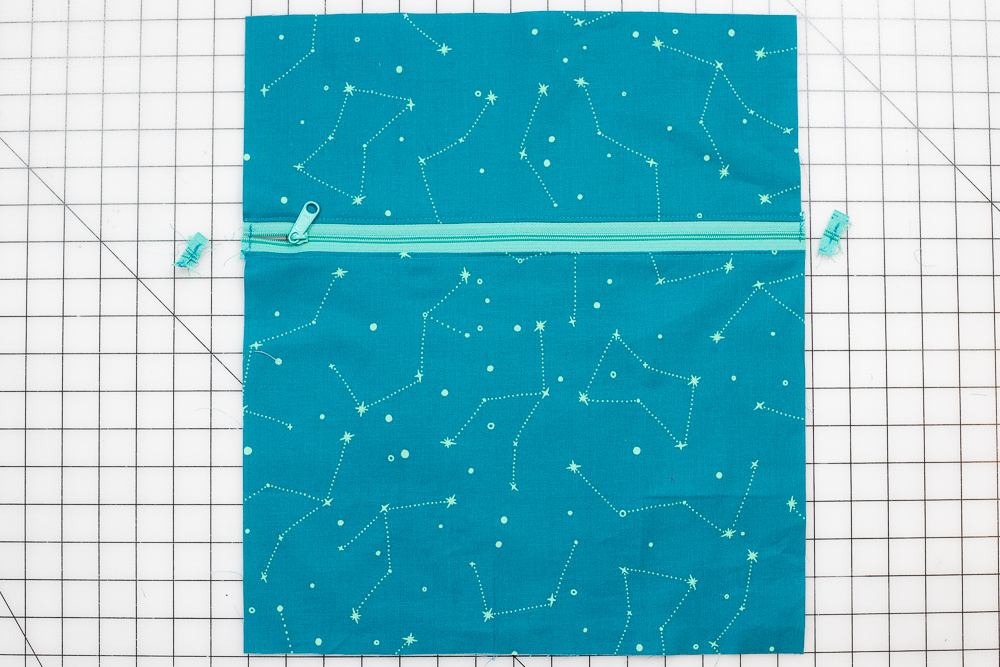
This is now a ‘bag exterior’ piece. If it is taller than 17’’, trim it to 17’’ tall. (If somehow it turned out shorter than 17’’, you will need to trim your other 17’’ x 15’’ bag rectangles to the same height as this new exterior piece.)
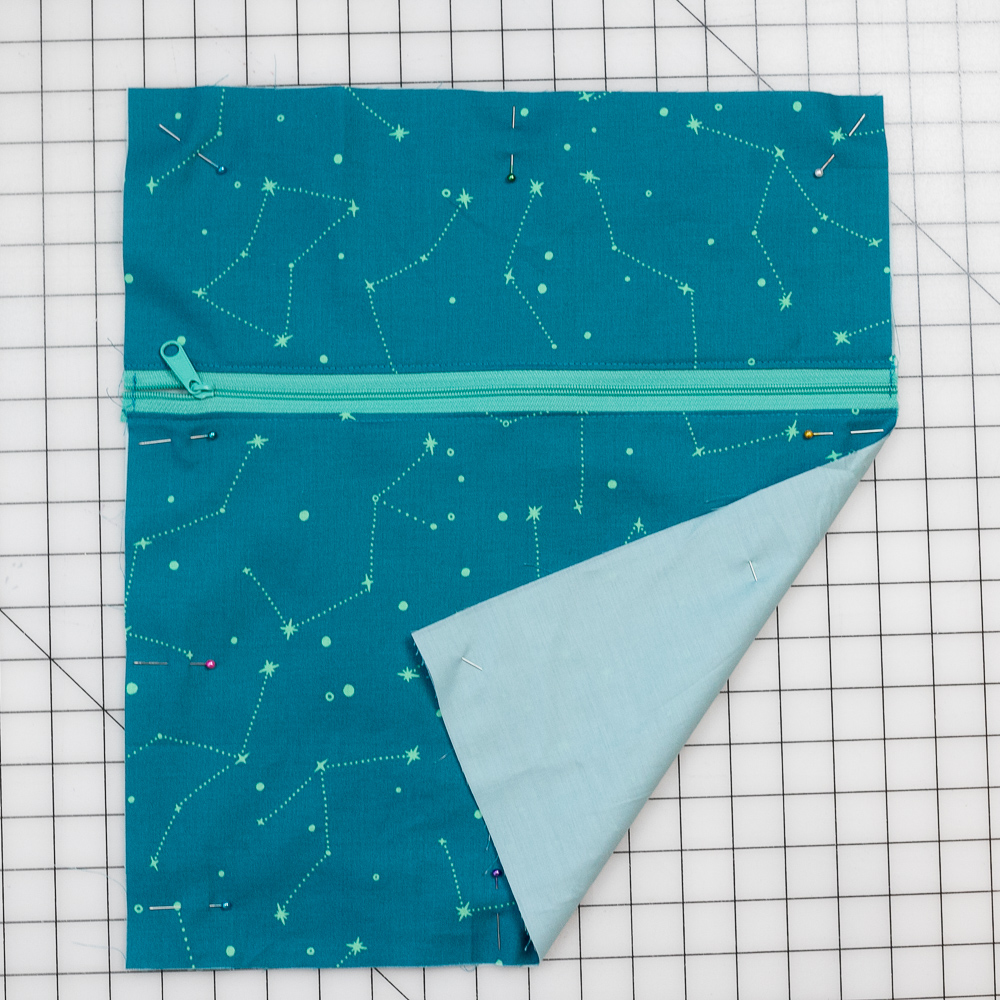
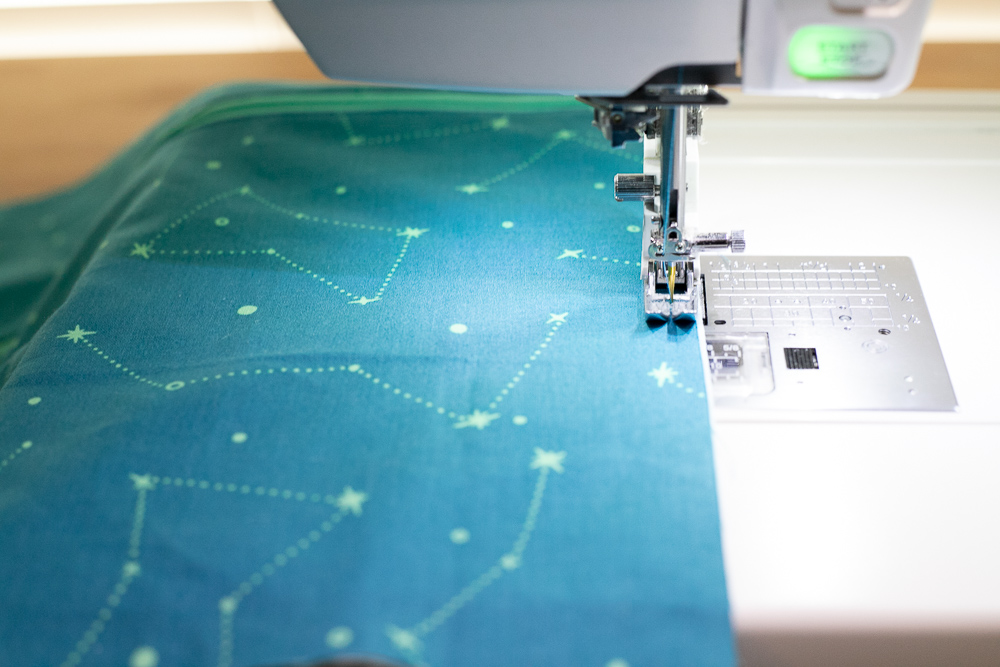
Attach the Pocket Lining
1. Place the right side of the 17’’ x 15’’ pocket lining piece against the back of our new bag exterior piece. Pin around all of the edges.
2. Baste the two pieces together by stitching with a long stitch length all the way around 1/4’’ from the edge.
Now use my Easy Peasy Drawstring Backpack tutorial to finish the bag, using the zippered piece as one of your 17’’ x 15’’ exterior fabric rectangles.
You have already done half the work so go ahead and finish your cute drawstring backpack! I’d love to see it when it’s done… Be sure to tag me on Instagram @sewcanshe and show me your photos!
xoxo,

Featured

Disclosure: some of my posts contain affiliate links. If you purchase something through one of those links I may receive a small commission, so thank you for supporting SewCanShe when you shop! All of the opinions are my own and I only suggest products that I actually use. 🙂
Read More →