How to Sew a Gaiter-Style Face Mask for Men or Women

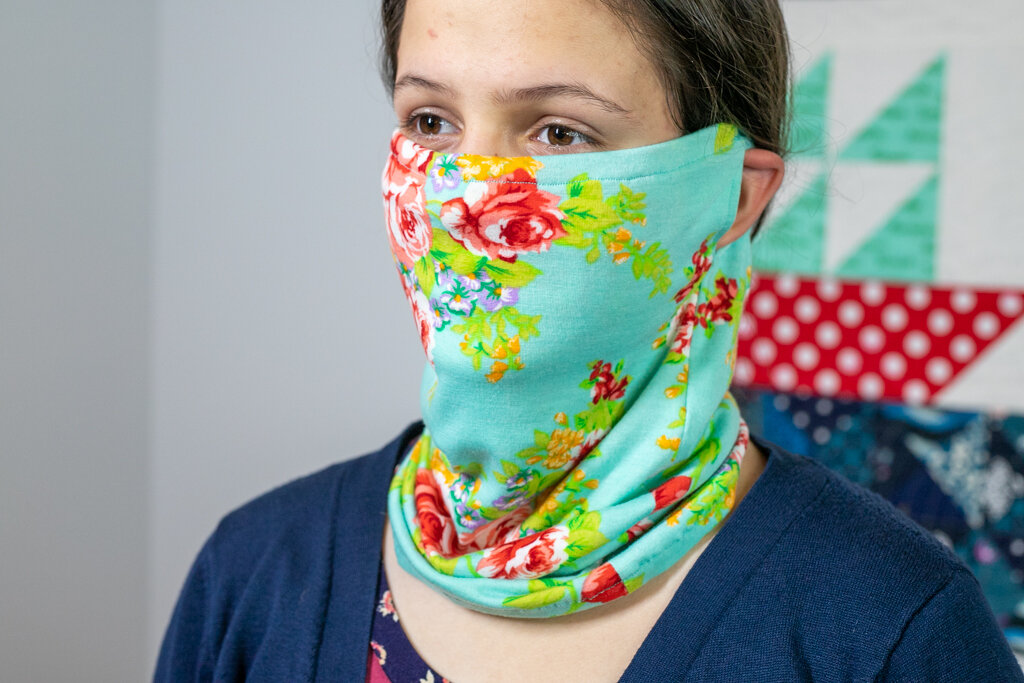
The gaiter or scarf style face mask is great for men or women, and some people find it a lot more comfortable than a surgical style face mask. Lots of people use face gaiters when doing dusty work and lawn care, but they can be just as good at filtering small particles like germs too if there is more than one layer of fabric!
According to research, two layers of stretchy cotton (like t-shirt fabric) can filter small particles, and gaiter or scarf masks like this are even more effective when there is a filter between the layers.
This mask includes a filter pocket, so there are two layers of fabric on the front.
This blog post has been converted to an optional PDF that’s optimized for printing. Find it here. The blog post below is totally free to read, print, and sew! Just hit CTRL +P on your computer to print. The PDF download is inexpensive and optional.
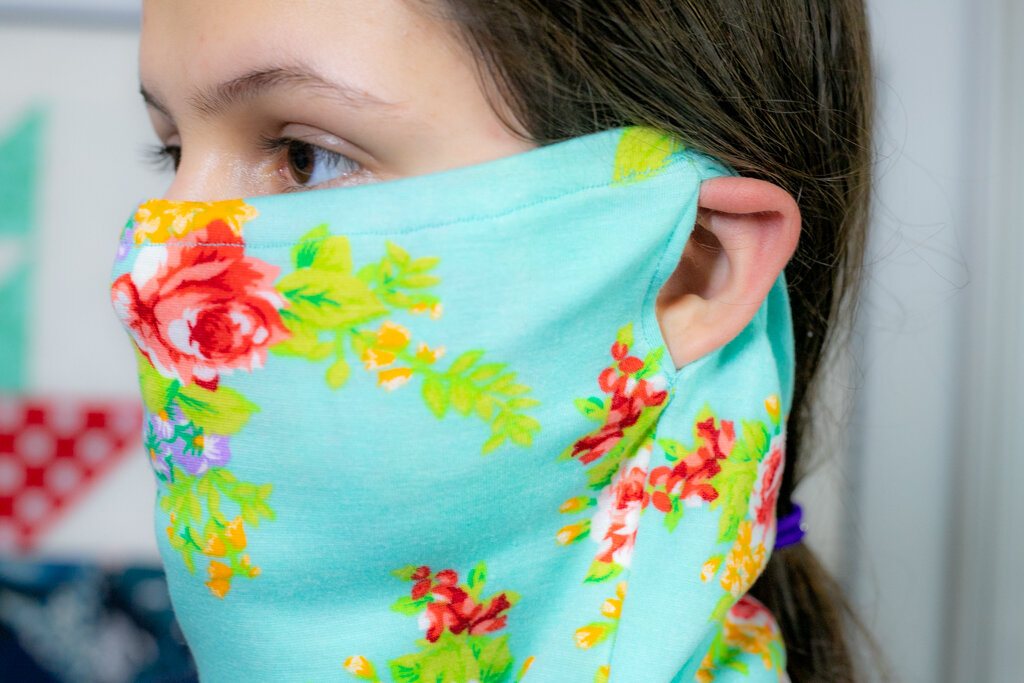
Stretchy cotton forms around the face to ensure that air is filtered through the material.
My pattern for a gaiter style face mask includes optional openings in the seams for your ears.
If you’ve never sewn with stretch fabric before, don’t worry! I’m sharing lots of tips and this pattern is so easy that you’ll have no problem. If you don’t have stretch fabric on hand, you could also use a t-shirt. The shirt should be new or fairly new. If it’s old and worn, it won’t filter very well.
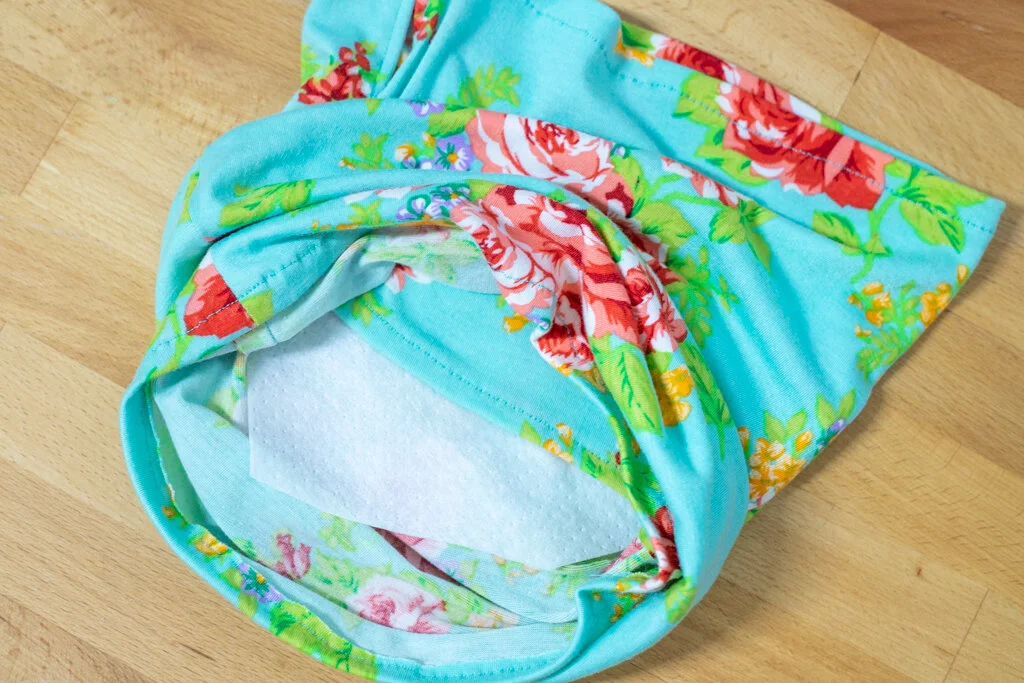
The optional filter (using Filti or another material of your choice) is inserted through the pocket on the inside front of of the mask.
Free Sewing Pattern for a Gaiter Style Face Mask
Instructions are included for a medium (women’s) size and a large (men’s) size.
You will need:
- 1/2 yard of stretch knit fabric, or 1 new or fairly new t-shirt that you don’t mind cutting up.
- matching polyester thread (tip: polyester thread has a tiny bit of stretch so it’s less likely to break than cotton thread when sewing on stretch fabrics)
- a universal needle or a ball-point (jersey needle) for your sewing machine
Tip: This pattern works best with fabric that has at least 50% stretch. Hold your fabric up to a ruler and see if 5’’ easily stretches to 10”. If so – it’s perfect. The fabric may be stretchy in both directions, but it should at least be stretchy in the width.
Cutting:
Cutting dimensions for the large (men’s) size face mask are in parentheses.
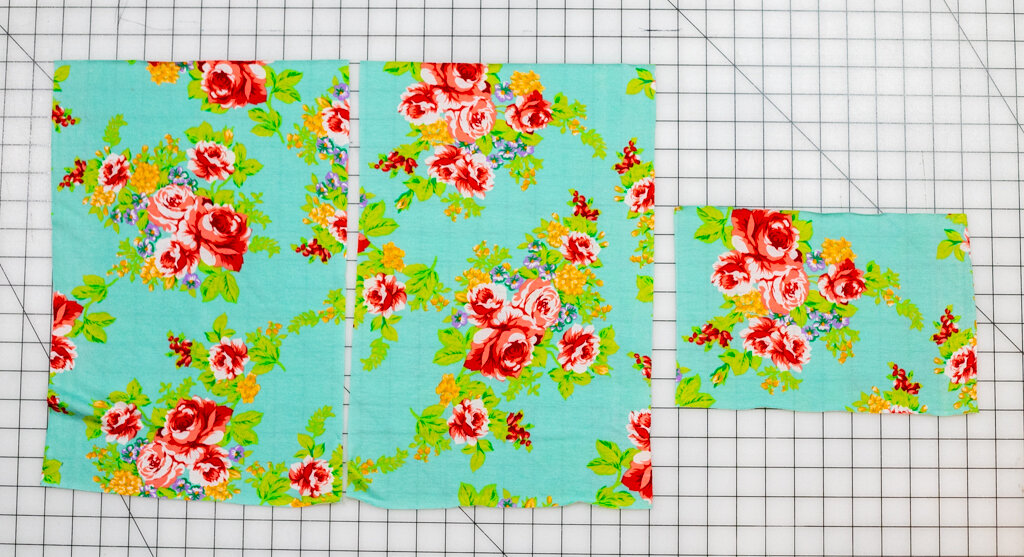
From the stretch fabric or t-shirt, cut:
- 2 rectangles 15 1/2’’ tall x 10’’ wide (17’’ tall x 10 1/2’’ wide) – mask front and back pieces
- 1 rectangle 7’’ tall x 10’’ wide (7’’ tall x 10 1/2’’ wide) – filter pocket piece
Tip: since stretch fabric does not fray, this pattern uses single hems to reduce bulk. I use a straight stitch and stretch the seams gently so that my seams will be stretchy. Here are lots more tips for sewing with stretch fabrics.
If you have them, you may use a serger for the seams, and a coverstitch machine for the hems.
Sewing:
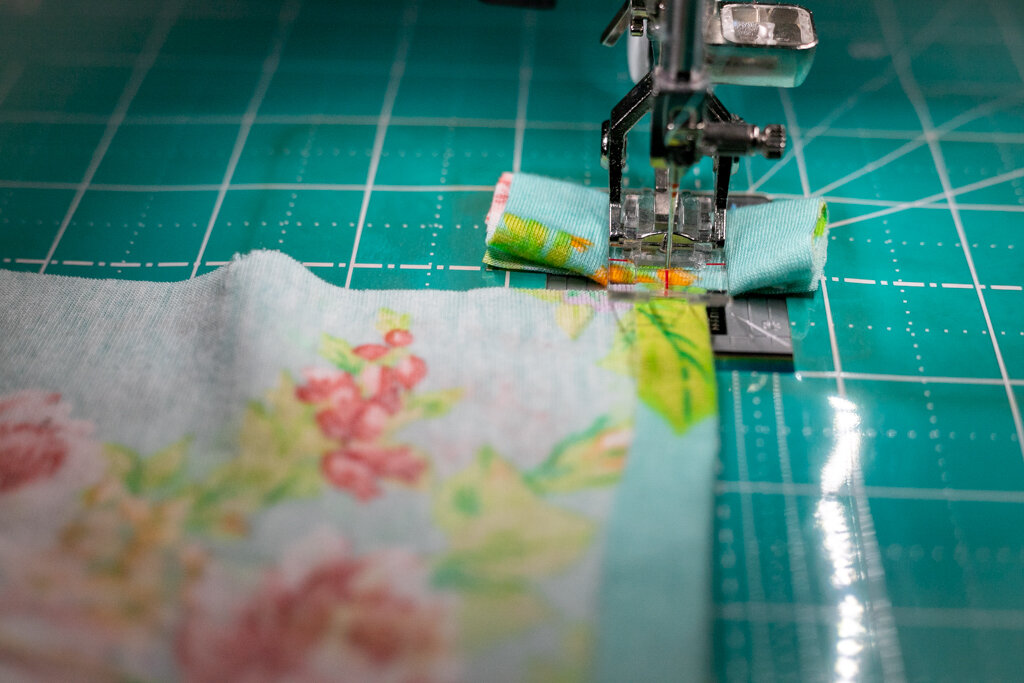
1. Fold the bottom edge of the filter pocket piece over to the wrong side by 1/2’’ and press.
Tip: use a small scrap of fabric folded over several times as a ‘leader’. If you sew over it first before you start sewing thin fabrics, the thin fabrics won’t get stuck in the feed dogs.
Stretch the seam as much as it will easily stretch while you sew the hem. Use a medium stitch length (such as 2.5) while you sew.
Tip: if the fabric gets stretched while sewing, no worries! Simply hit it with some steam from your iron and it will shrink back to shape.


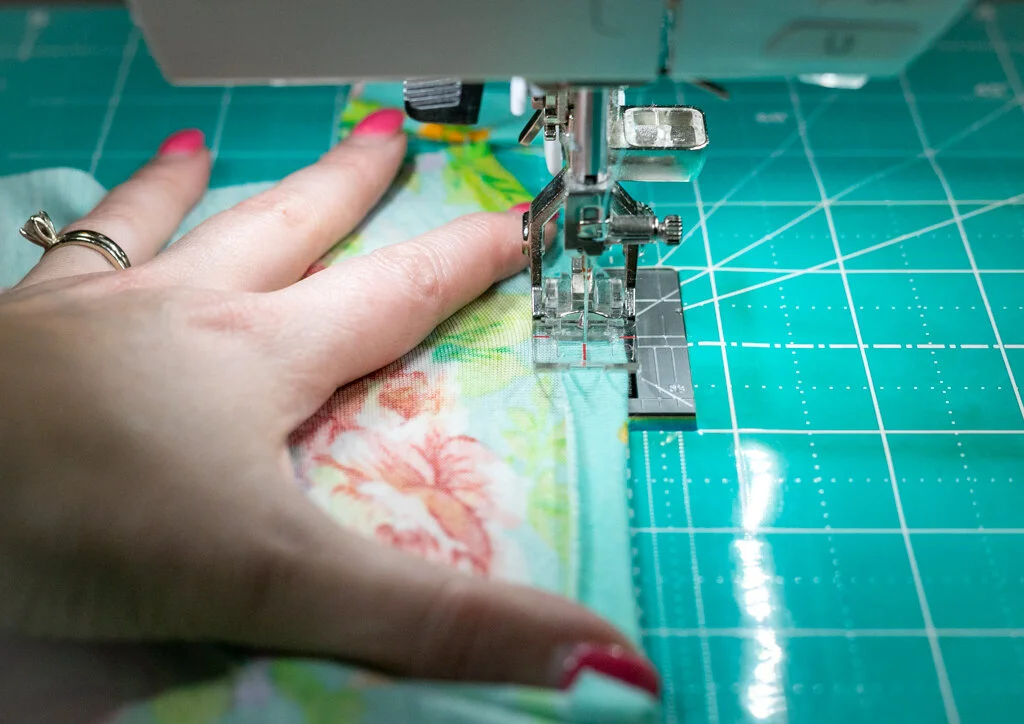
2. Place the filter pocket piece against the front mask piece along the top edge, wrong sides facing. The three raw edges of the filter pocket piece should be against the top and side edges of the mask front piece, with the hemmed edge down.
Use a longer stitch length to baste the raw edges together around all three sides, 1/4’’ from the edge.
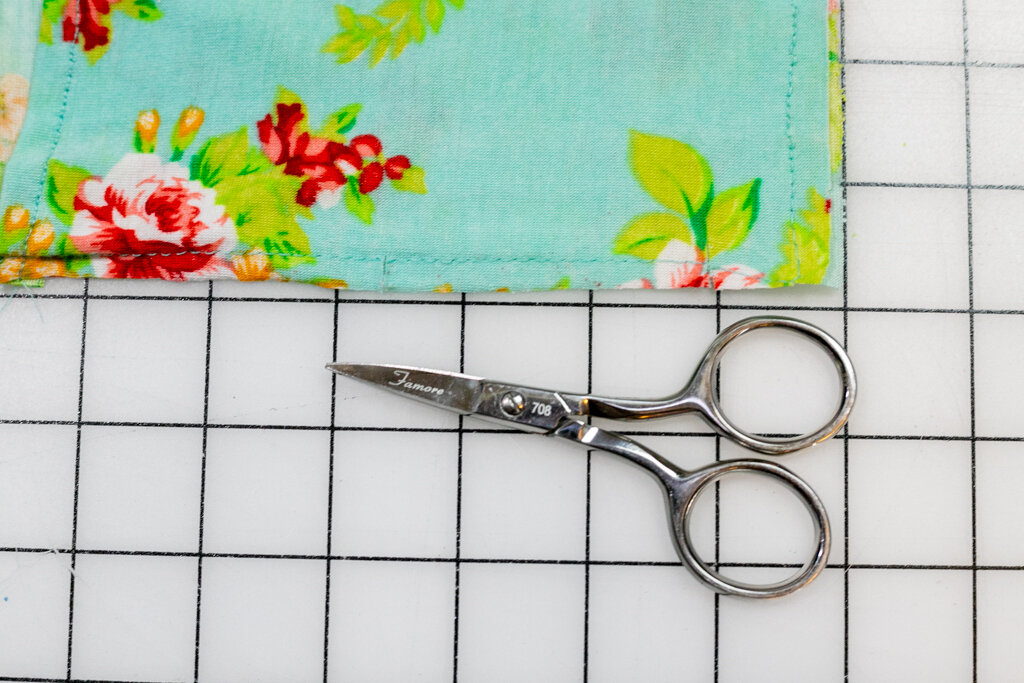
3. To make the ear openings, lay the front piece on your work table with the wrong side up and the filter pocket on the right.
Measure 1’’ over from the top edge (on the side of the mask) and make a 1/4’’ clip into the fabric (through all layers). Then measure 2 1/2’’ further (3 1/2’’ from the top edge) and make another 1/4’’ clip into the fabric.
For the men’s size, the second clip should be 3’’ away from the first clip (or 4’’ from the top edge)
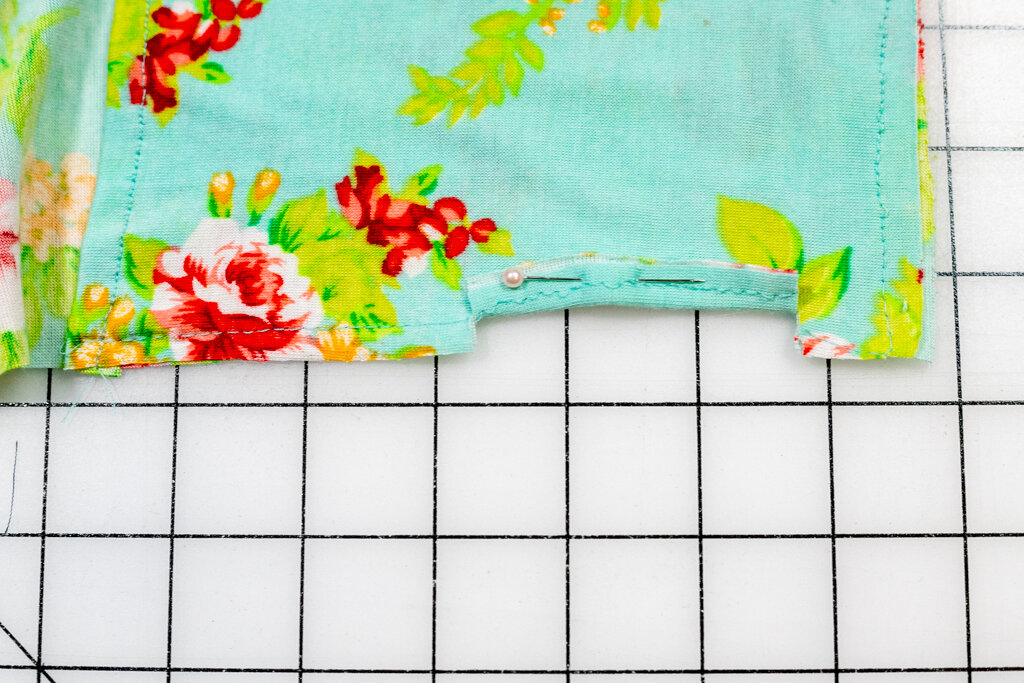

Fold the fabric in between the clips over by 1/4’’ and pin. Repeat on the other side of the face mask front piece.

4. Stitch a 1/4’’wide single hem. Backstitch neatly at the start and stop. Stretch the fabric as much as you can comfortably.
Repeat to cut ear openings and sew hems on the face mask back piece too.

5. After you have sewn ear opening hems on both the front and back pieces, place the two pieces right sides together.
Make sure the ear openings are lines up and pin along both side edges.
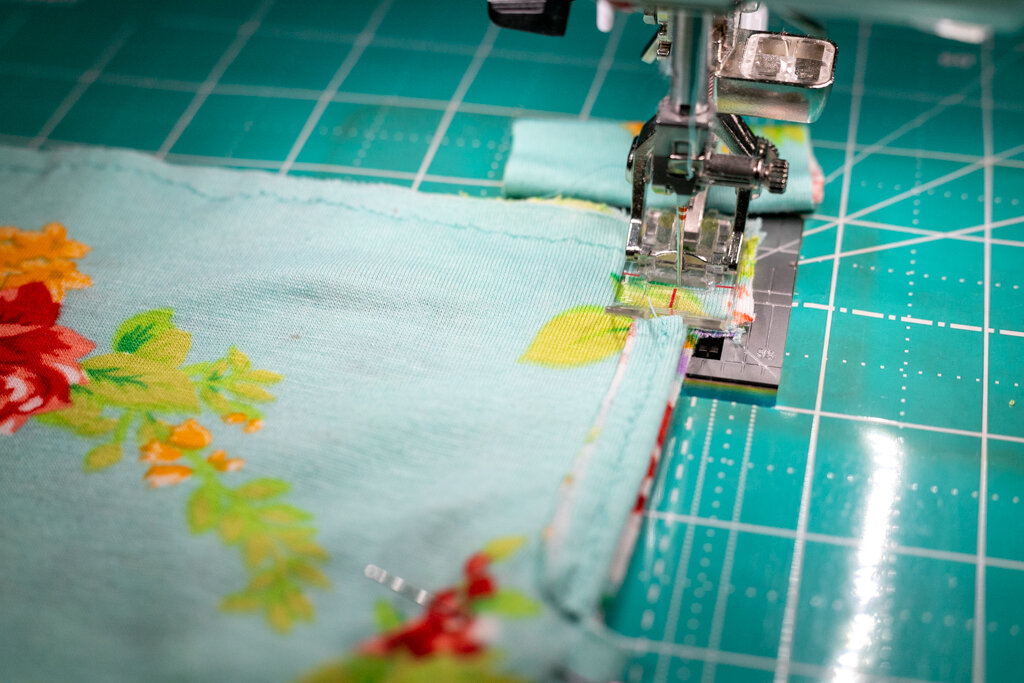
6. Using a 1/2’’ seam allowance, backstitch at the top and then stitch the top 1’’ raw edge.
The entire side seams are sewn while stretching the fabric as much as comfortable.

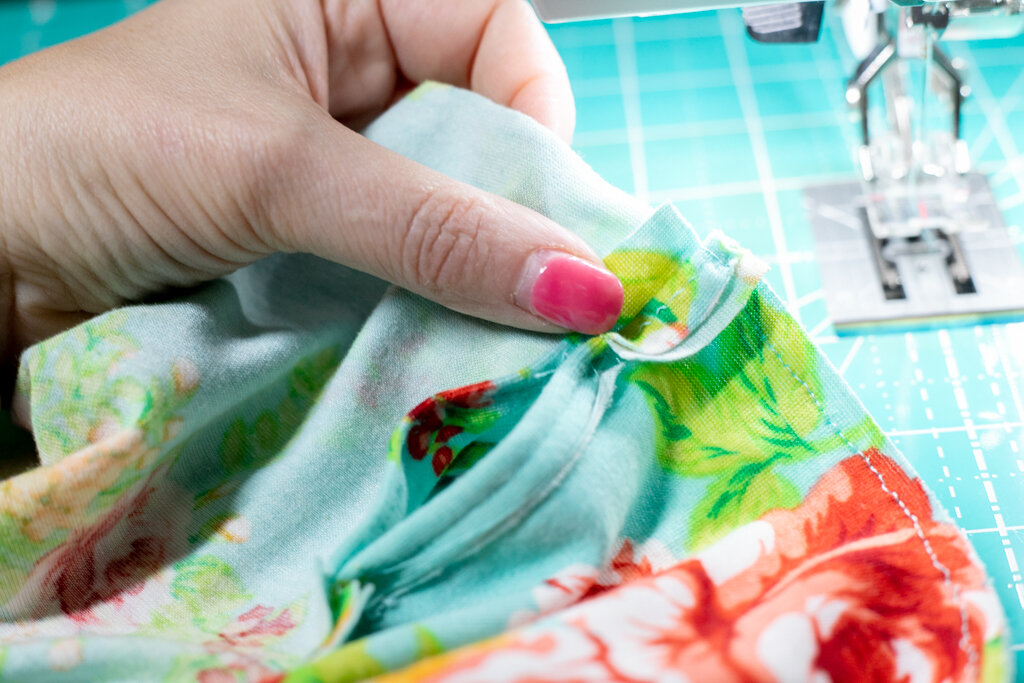
Carefully sew onto the hemmed edges for only 1/8’’ – 1/4’’. Then backstitch and cut threads.

Begin sewing again at the bottom of the hemmed ear opening, about 1/4’’ – 1/8’’ above the bottom of the hem. Backstitch and sew from the hem back onto the layers of fabric again next to the raw edge.

Finish sewing the seam with a 1/2’’ seam allowance and backstitch.
Repeat on the other side of the face mask.

7. Press or finger-press the side seams open. Fold the top edge down by 1/4’’ (all layers).

Sew a 1/2’’ hem all the way around the top edge of the mask, stretching it as much as comfortable.
8. Repeat to sew a 1/2’’ hem at the bottom edge of the mask.
Press and steam the face mask seams and hems to release any parts that have stretched.

If you want to use a filter, slide it under the hemmed edge of the filter pocket.
Here are some additional resources about sewing face masks you might find helpful:
- The free Olson Style Face Mask Pattern (with quilting cotton fabric)
- How to use a Pipe Cleaner (or other wire) to Make Your Fabric Face Mask Fit Better
- How to make a wash bag for face masks (and more)
- How to make filters from HEPA fabric.
- I found actual face mask material you can buy and reviewed it here.
- My recommendations for the best fabrics to use are found here.
- More tie options that I have tried, including different kinds of elastics and fabric ties.
Sew on and stay safe,

Disclosure: some of my posts contain affiliate links. If you purchase something through one of those links I may receive a small commission, so thank you for supporting SewCanShe when you shop! All of the opinions are my own and I only suggest products that I actually use. 🙂