How to Sew Designer Zipper Bags – video course Lesson 1

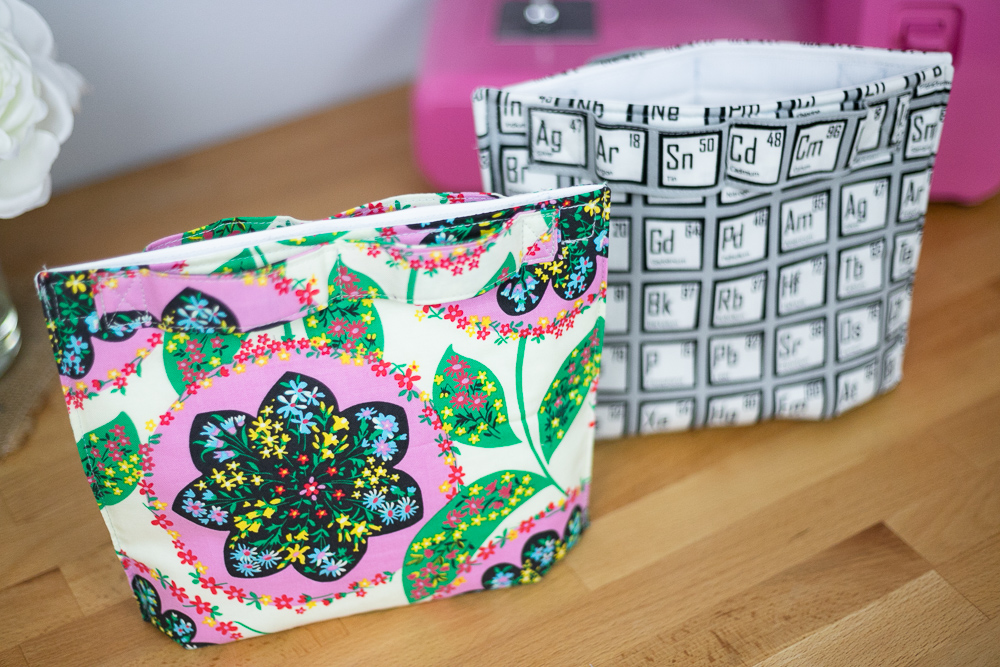
I’m so excited to finally show you how I make designer zipper bags with beautiful quilted sides and zippers that aren’t pinched!
This is a free video course that I have been working on to share the entire process in a way that you can’t go wrong.
My How to Sew Designer Zipper Bags video course consists of 14 short videos.
Why 14 short videos? I want you to be able to watch them all in order, and then go back to re-watch any section that you want to see again. If I made only one hour-long video, I think it would be frustrating to try to find a specific step. So that’s why they will be split up.
The course has one intro video and then 3 easy lessons split up into 13 videos total:
-
Lesson 1 – Preparing the Bag Sides (the 4 videos in this blog post)
-
Lesson 3 – Sewing the Seams, the Binding, and a Finale! (6 videos)
Right here I will show you everything you need to know for Lesson 1.
If for some reason, the videos in this post won’t play for you, you can watch the entire course in this YouTube playlist.
Lesson 1, part 1 (above) is all about the fabric and stabilizer.
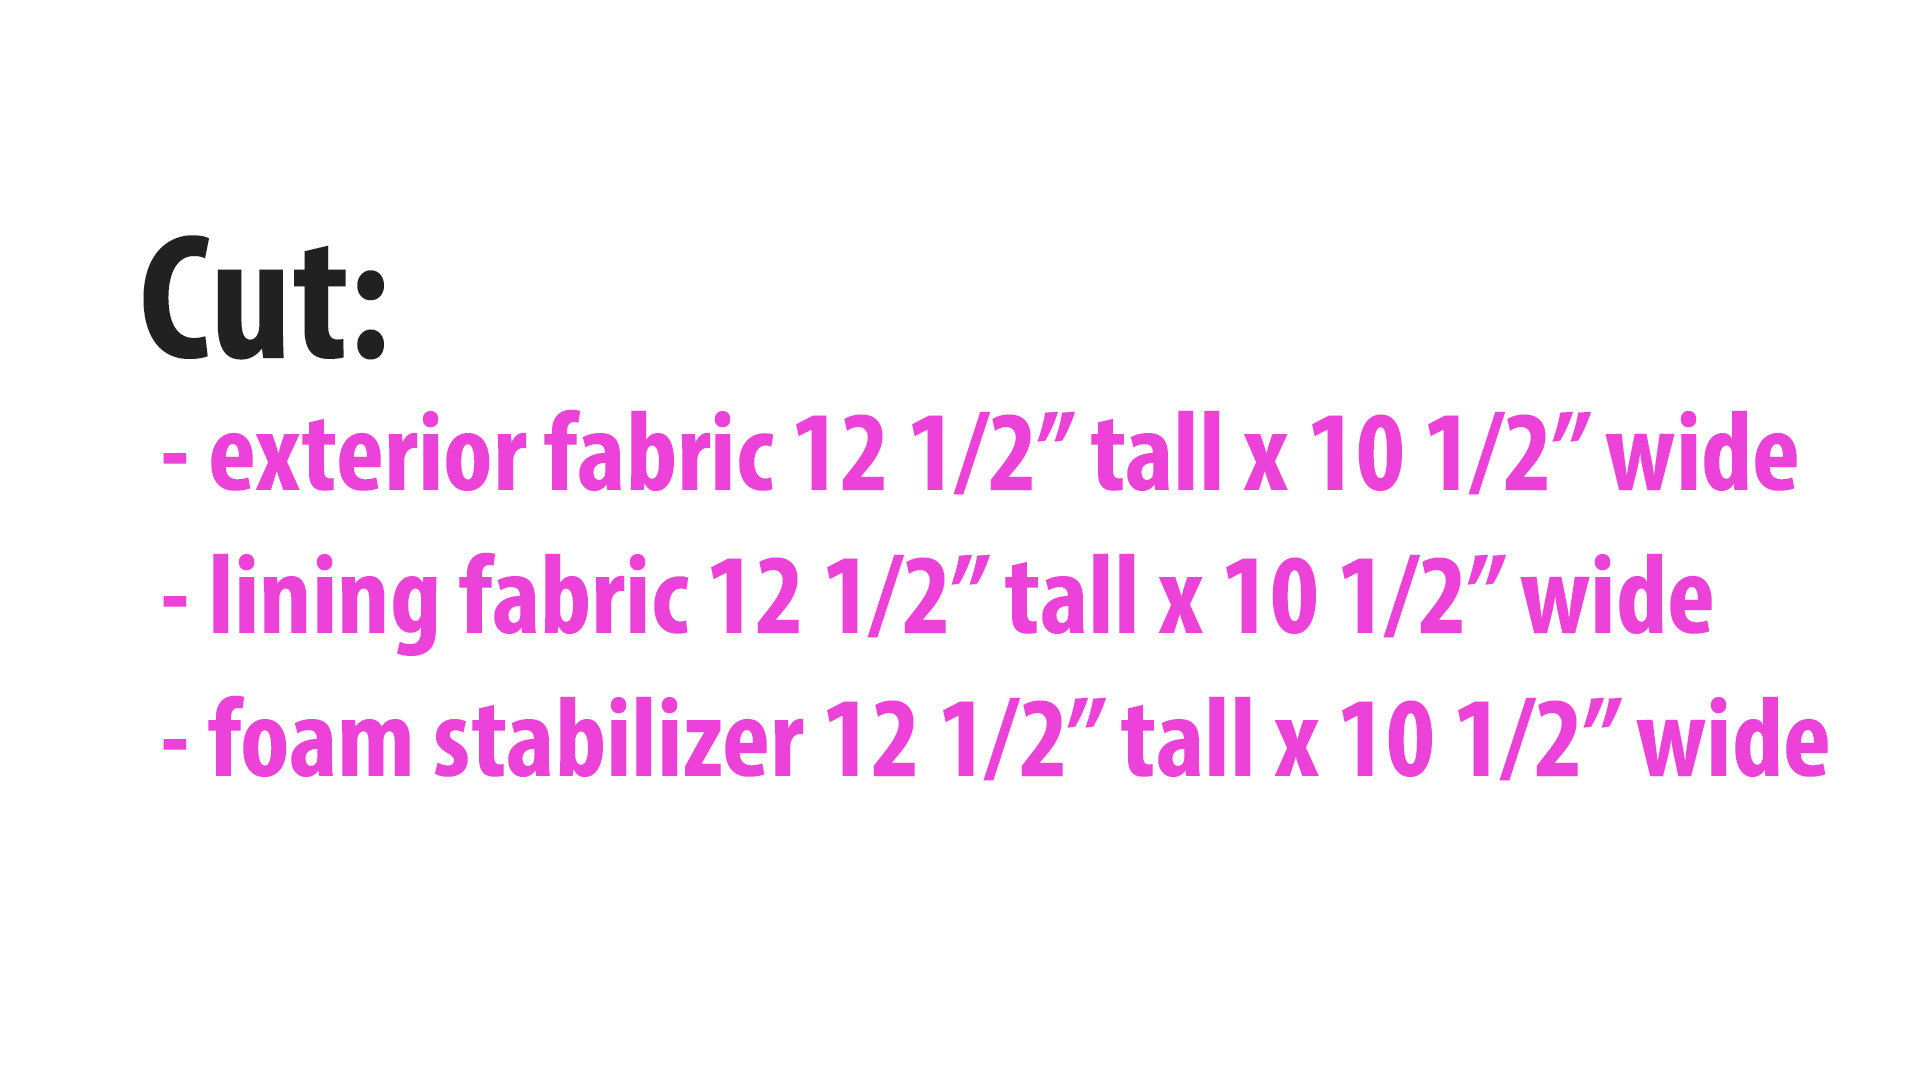
To make a zipper bag that is approximately 5’’ tall and 9’’ wide, you will need to cut the following…
To sew along with the video course, you will need:
-
1 piece of exterior fabric 12 1/2’’ x 10 1/2’’
-
1 piece of lining fabric 12 1/2’’ x 10 1/2’’ (I’ve been breaking into my Tula Pink All-Stars bundle and coordinates bundle)
-
a piece of foam stabilizer (such as Soft and Stable) 12 1/2’’ x 10 1/2’’
And for Lesson 2 (premiering tomorrow!), you will need:
-
a handbag zipper at least 10’’ long (I’ll also show you how to use handbag zippers by the yard)
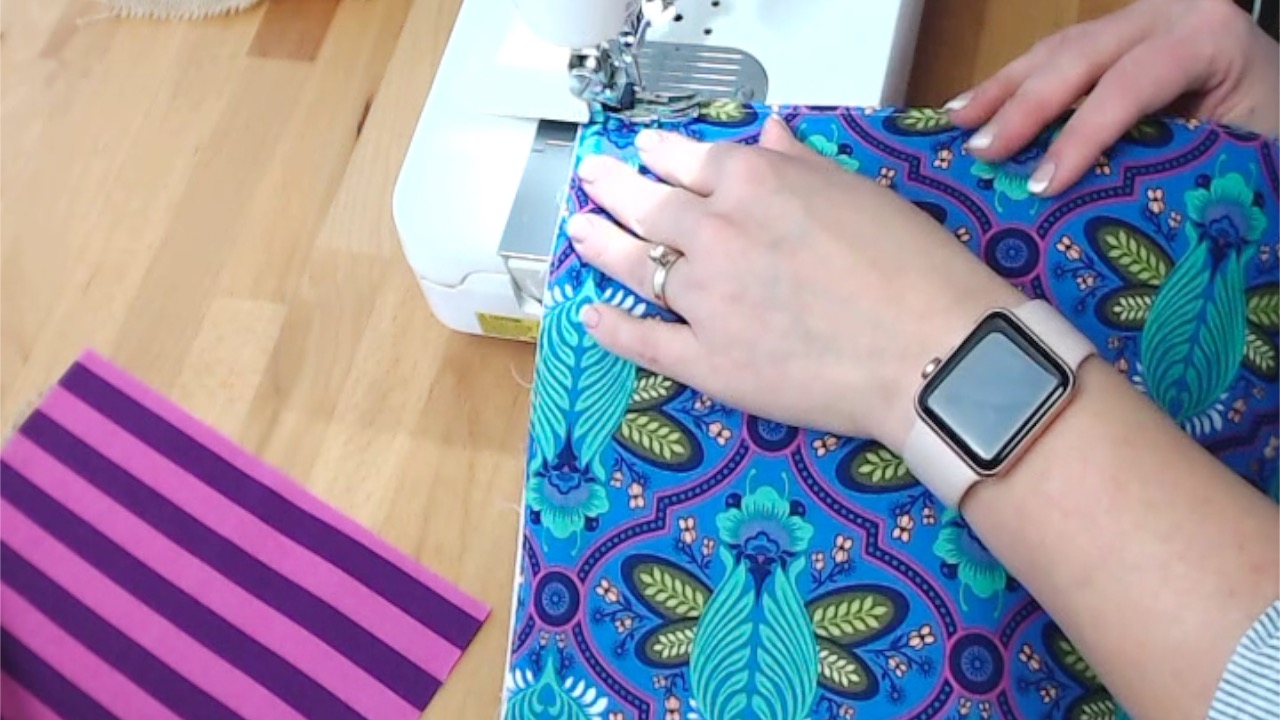
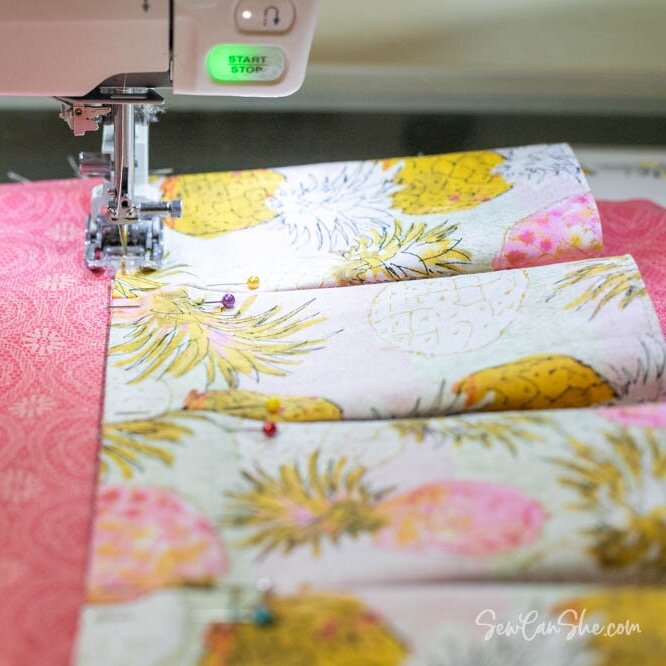
Watch Lesson 1.2 to see how I basted my fabric and stabilizer pieces together.
I have been asked why I don’t just baste all 3 layers together in 1 step. You certainly can do it that way, it’s not illegal!
I simply find it faster and more accurate to baste the layers together in 2 steps. In the past, I have clipped all 3 layers together and then attempted to sew them in 1 step and it took quite a bit of time to clip all the layers accurately and then I drove myself crazy trying to smooth out the fabric on both sides at once.
I just think it’s easier to do it in 2 quick steps with no pins or clips.
In Lesson 1.3, I show you how to quilt your basted layers.
Why?

Well, it helps keep the fabric and stabilizer layers from separating and looking baggy. And it adds so much definition and texture. It’s really beautiful!
In the video, I quilt my layers using my walking foot. If you enjoy free motion quilting more – go ahead! You can quilt circles, straight lines, curves, patterns – whatever you want.
On this particular piece, I let the fabric be my guide.
Before moving on to Lesson 1.4 (above), cut two rectangles 6’’ x 10’’ from your quilted piece.
Your quilted piece is a little bit larger than you’ll need, so you’ll be able to trim your pieces down to the exact size.
The last step in Lesson 1, which you’ll see in 1.4, is to ‘seal’ the edges of the cut pieces. This will ensure that all of the fabric gets caught in your seams and you are not fiddling with fabric and stabilizer layers as you sew other steps.
So now it’s time for you to give it a try!
Make sure you watch all 4 parts of Lesson 1 in order and then take a few minutes to prepare the sides of your zipper bag.
Then move on to Lesson 2.
Subscribe to my YouTube Channel and sign up for my email newsletter to make sure you don’t miss a thing!
xoxo,


Disclosure: some of my posts contain affiliate links. If you purchase something through one of those links I may receive a small commission, so thank you for supporting SewCanShe when you shop! All of the opinions are my own and I only suggest products that I actually use. 🙂