Easy to Sew Re-usable DIY Placemats for Work or Play – a free tutorial

Make a re-usable fabric placemat set, designed by Crafty Staci for SewCanShe!
Now is the time to ditch single-use napkins and utensils to save the environment!
These DIY placemats are easy to make, and so flexible!
The pocket will hold your utensils and there is a cute matching napkin.
Just roll it up, secure the tie, and you’re ready for a party, picnic, or to throw it in with your lunch!

All your office buddies will be jealous of your beautiful DIY placemat that you made yourself, and your clean desk!
When you are done eating, roll everything up and take it home to be washed and used again!

Or sew up enough for everyone invited to your Labor Day cookout!
Roll-Up Reusable Placemat Tutorial
by Crafty Staci for SewCanShe
Materials
Two separate yards of coordinating cotton fabrics will yield 4 placemats and small fabric napkins, although more fabrics are preferable for variety.
You’ll also need approximately 1/2 yard of 20’’ wide fusible fleece for each placemat.

Cutting
For each placemat, cut the following pieces:
-
one 12 ½ x 16 ½” fabric rectangle for the placemat front
-
one 12 ½ x 16 ½” coordinating fabric rectangle for the placemat back
-
one 12 ½ x 8 ½” fabric rectangle for the utensil pocket
-
one 1 ½ x 25” fabric strip for the tie
-
one 9 x 9” fabric square for the napkin
-
one 12 ½ x 16 ½” rectangle of fusible fleece for the inside of the placemat
Sewing Steps:
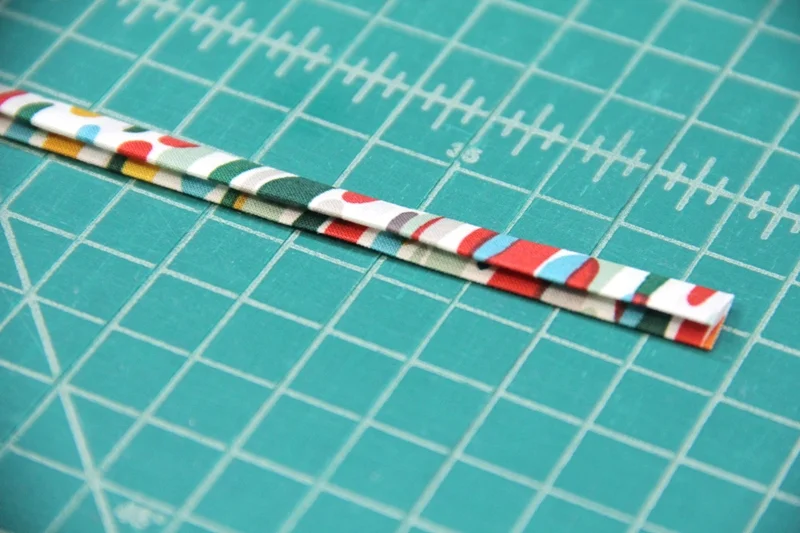
1. Fold the tie lengthwise with right sides together. Press. Fold both long edges into the center fold and press again. Unfold both short ends. Turn the short edges under ¼” and press. Refold the entire tie and press one
more time. At this point, all of the raw edges should be inside and the tie should measure about 3/8 x 24 ½”.
If you have an 18mm bias tape maker, it will fold those long edges to the inside, then you can fold the tie in half.

2. Stitch close to the long, double-folded edge to finish the tie.

3. Fuse the fleece to the wrong side of the placemat front. Lay it right side up, find the center on the left edge, and make a mark.
Fold the tie in half and pin it at that mark. The fold should be even with the edge and the tie to the inside. Make sure the pin head is outside the placemat for removal while sewing.
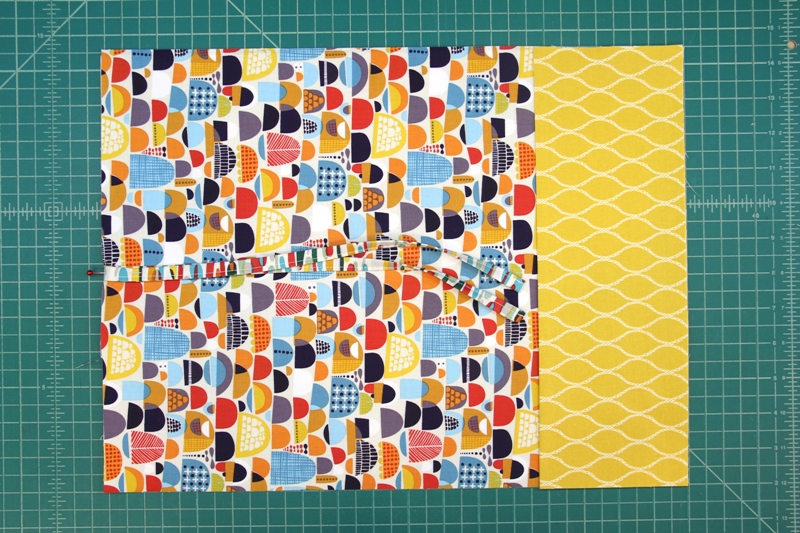
4. Fold the 12 1/2’’ x 8 1/2’’ pocket piece in half lengthwise with wrong sides together. Press. Place on the righthand side of the placemat front with the raw edges even and the fold to the inside.

5 Lay the placemat back over the top with the right side down. Pin. Stitch around ¼” from the edge, leaving 4” open at the bottom for turning.
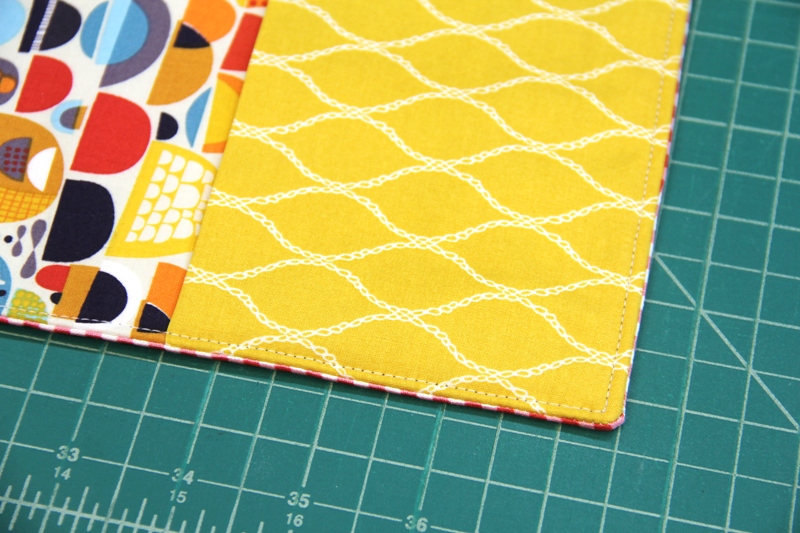
6. Clip the corners. Turn right side out. Press, turning in the opening.
Topstitch close to the edge, all the way around the placemat.

7. To make the napkin, fold all edges under ½”, then turn the raw edge into the fold and press, creating a ¼” seam. Miter the corners if desired. Stitch close to the inner fold.
(For more cloth napkin ideas, see DIY Cloth Napkins: the regular way and the speed method.)

To use, simply insert the napkin and utensils into the pocket.
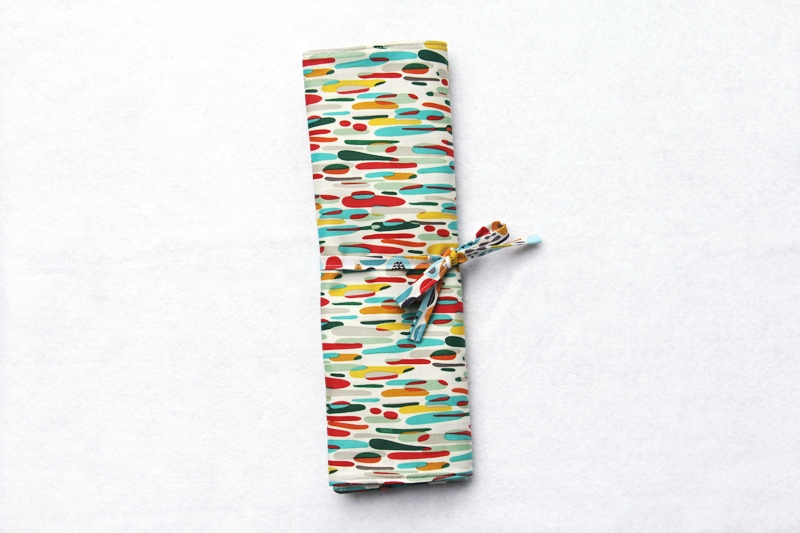
Roll up the placemat, tie a bow, and it’s ready to go!
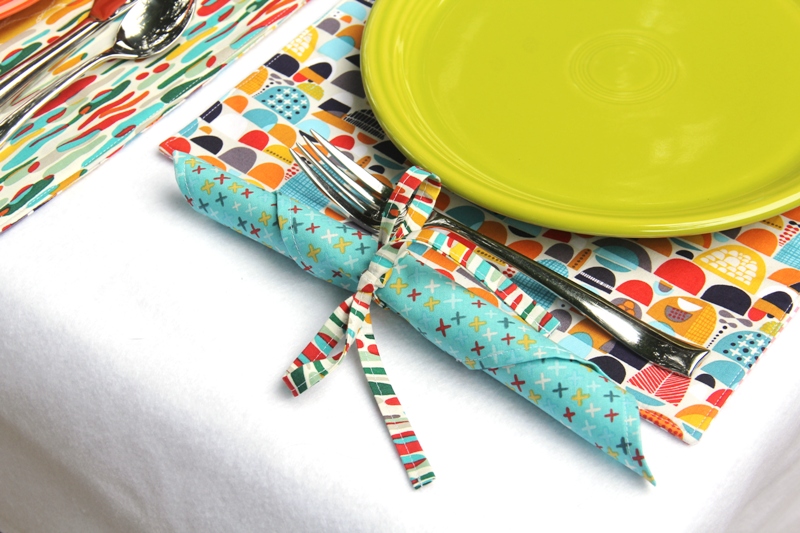
When you’ve laid it out to use, the tie can wrap around the napkin to hold it in place. Especially handy if it’s windy outside.

I’ve been a maker for as long as I can remember. If there’s a technique I haven’t tried, it’s probably on my to-do list. At my blog, Crafty Staci, I create beginner-friendly craft and sewing tutorials, simple recipes, and curate links to fun things to make. Sometimes people are hesitant to take that first step into making things. My goal is to guide and inspire them to jump in, and not be afraid to make mistakes along the way. I want to do my part to keep handmade alive and well!
Disclosure: some of my posts contain affiliate links. If you purchase something through one of those links I may receive a small commission, so thank you for supporting SewCanShe when you shop! All of the opinions are my own and I only suggest products that I actually use. 🙂


