Sew a Face Mask Wallet – free pattern
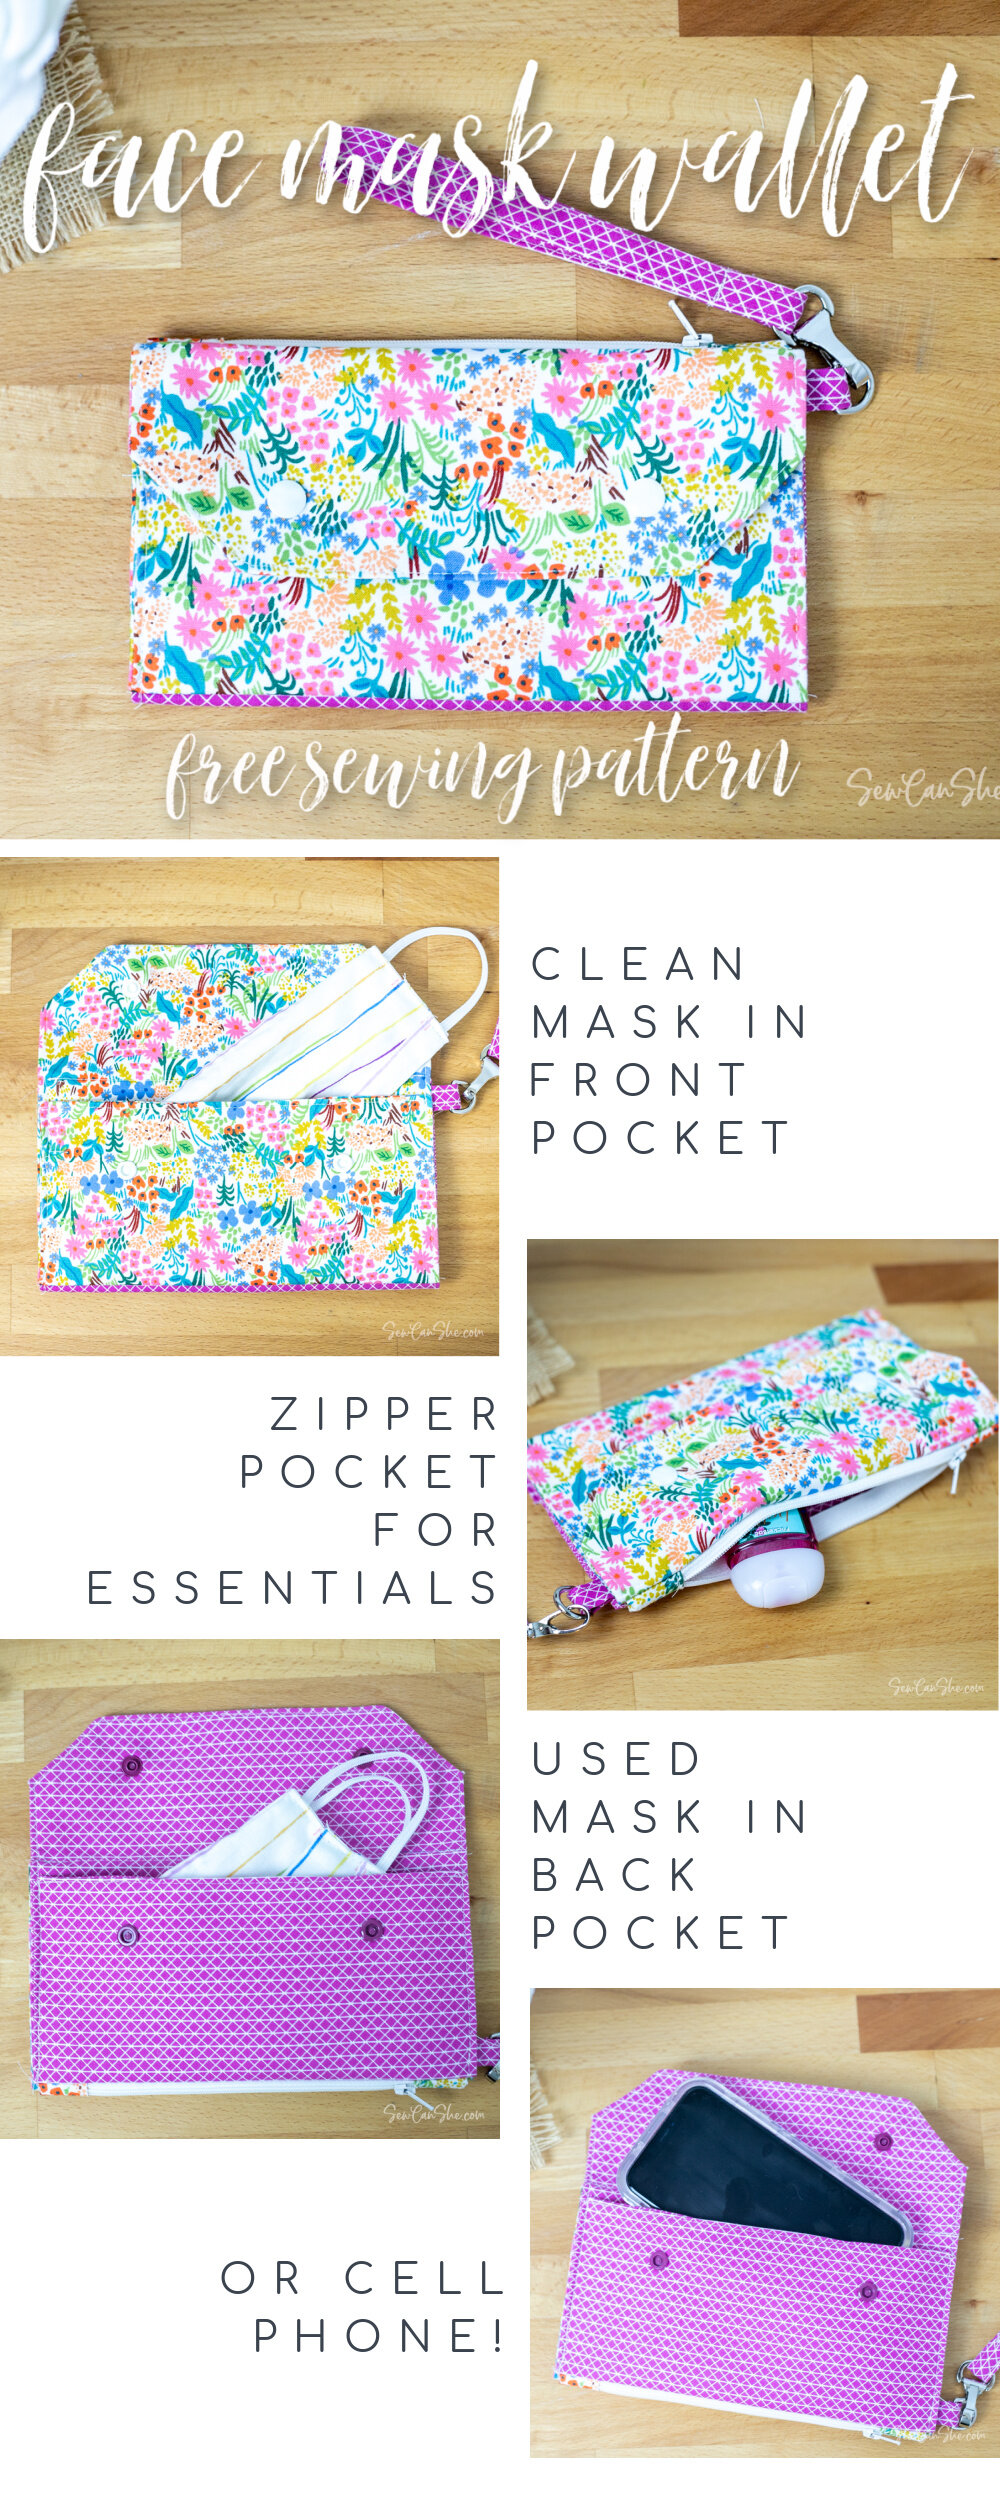
Sew up a double sided wallet to hold your face masks, hand sanitizer, and all the essentials – this one pocketbook is all you need! There’s also a narrow wrist strap that connects with a d-ring tab. The face mask in the photos is one that I sewed using my Pleated Face Mask with a Filter Pocket Tutorial.
I made a short video to show you all the features of this wallet and how the front and back pockets are arranged. The intro video for this project will play automatically in the video player on this page. You can also find it on YouTube here.
This blog post has been converted to an optional PDF that’s optimized for printing. Find it here. The blog post below is totally free to read, print, and sew! Just hit CTRL +P on your computer to print. The PDF download is inexpensive and optional.
This fantastic accessory is also fat quarter friendly! All the materials and notions for this sewing project are easy to find, including fabric, a zipper, plastic snaps, and simple metal hardware.
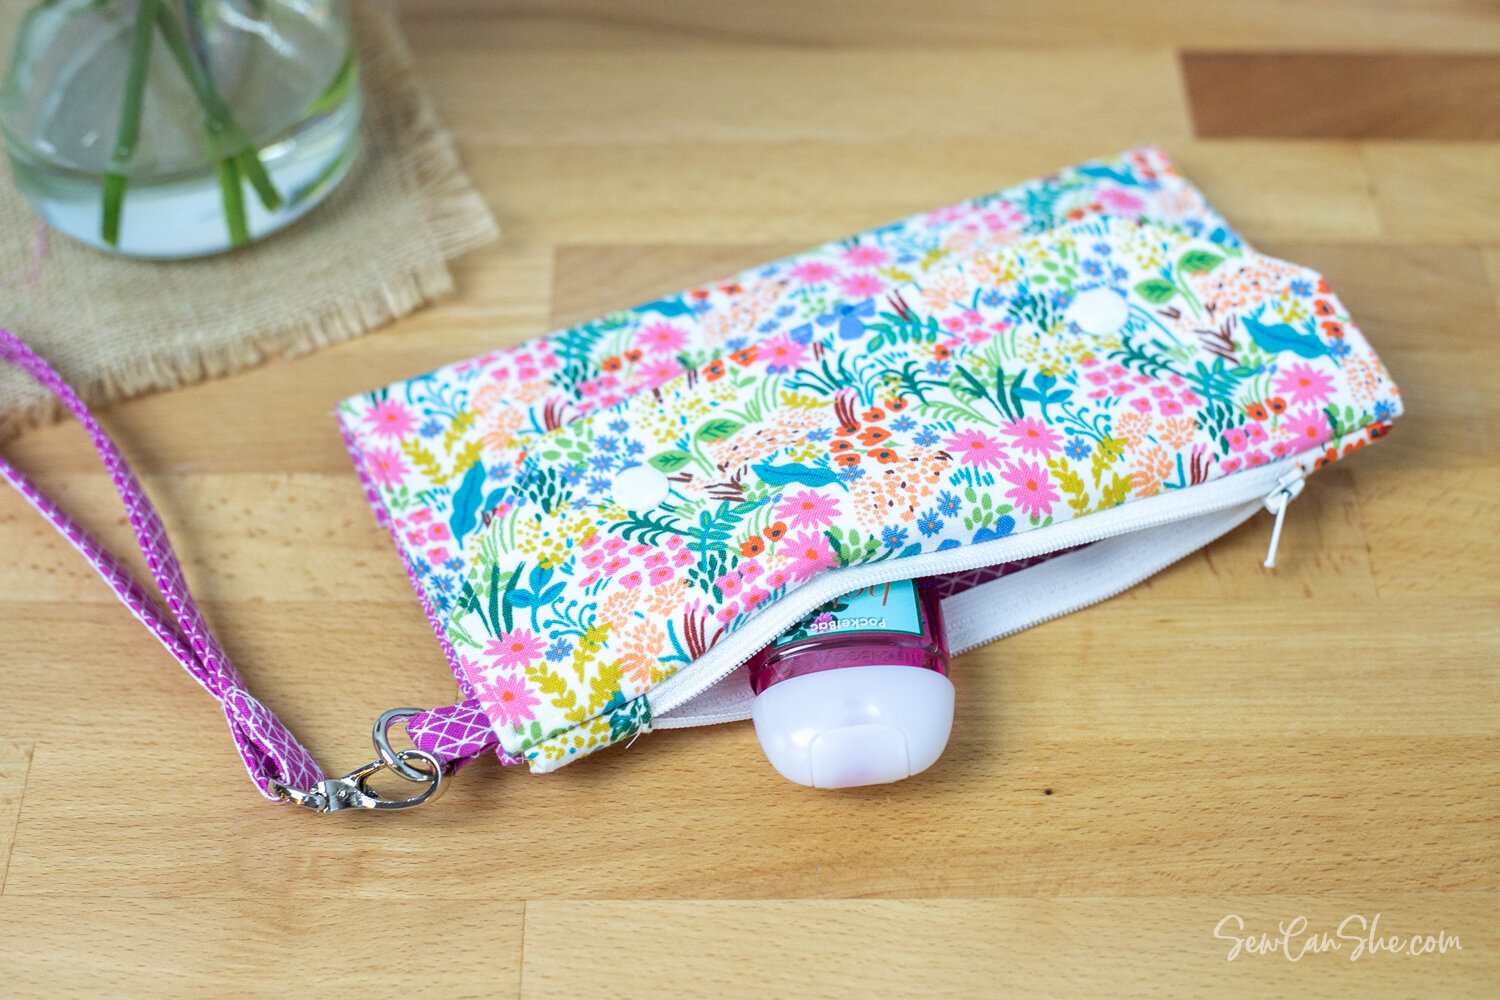
How to Sew a Face Mask Wallet
You will need:
- two fat quarters of fabric (or two 1/4 yard pieces)
- 3/4 yard medium weight woven fusible interfacing (such as Pellon SF101)
- 1 zipper – 8’’ or longer measured between the stoppers
- 1 swivel snap clip with a 1/2’’ opening
- 1 d-ring with a 1/2’’ opening
- plastic snaps and snap setter (such as this set)
- fabric marking pen (such as a Frixion pen)
Cutting:
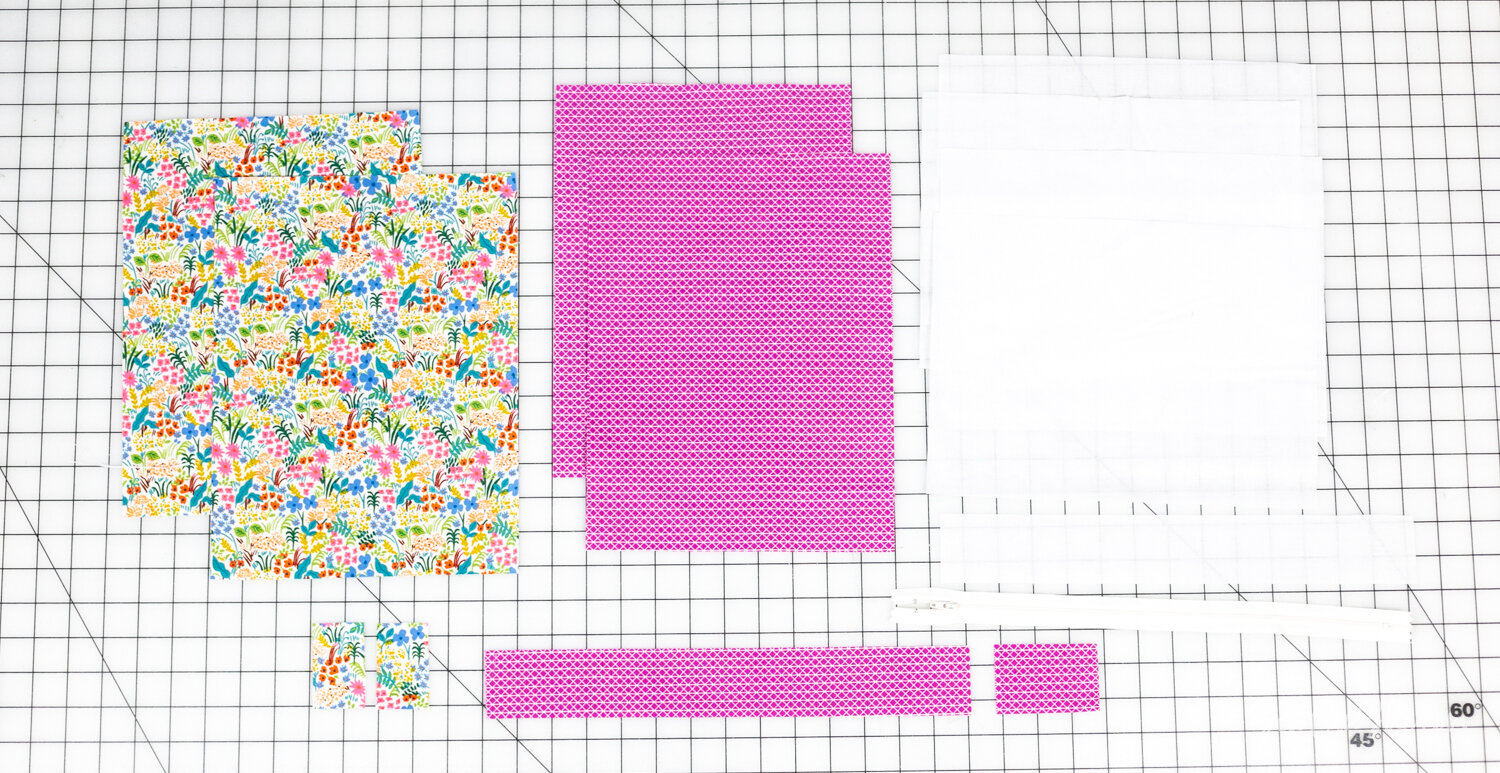
From the first fat quarter (wallet front pocket), cut:
- 2 rectangles 12’’ tall x 9’’ wide
- 2 zipper end tabs 1 1/2’’ x 2 1/2’’
From the second fat quarter (wallet back pocket), cut:
- 2 rectangles 12’’ tall x 9’’ wide
- 1 strip 2’’ x 14’’ (wrist strap)
- 1 strip 2’’ x 3’’ (d-ring tab)
From the fusible interfacing, cut:
- 4 rectangles 11 1/2’’ x 8 1/2’’*
- 1 strip 2’’ x 14’’
*The fusible interfacing on the pocket pieces is cut 1/2’’ smaller to reduce bulk in the seams.
Preparation:
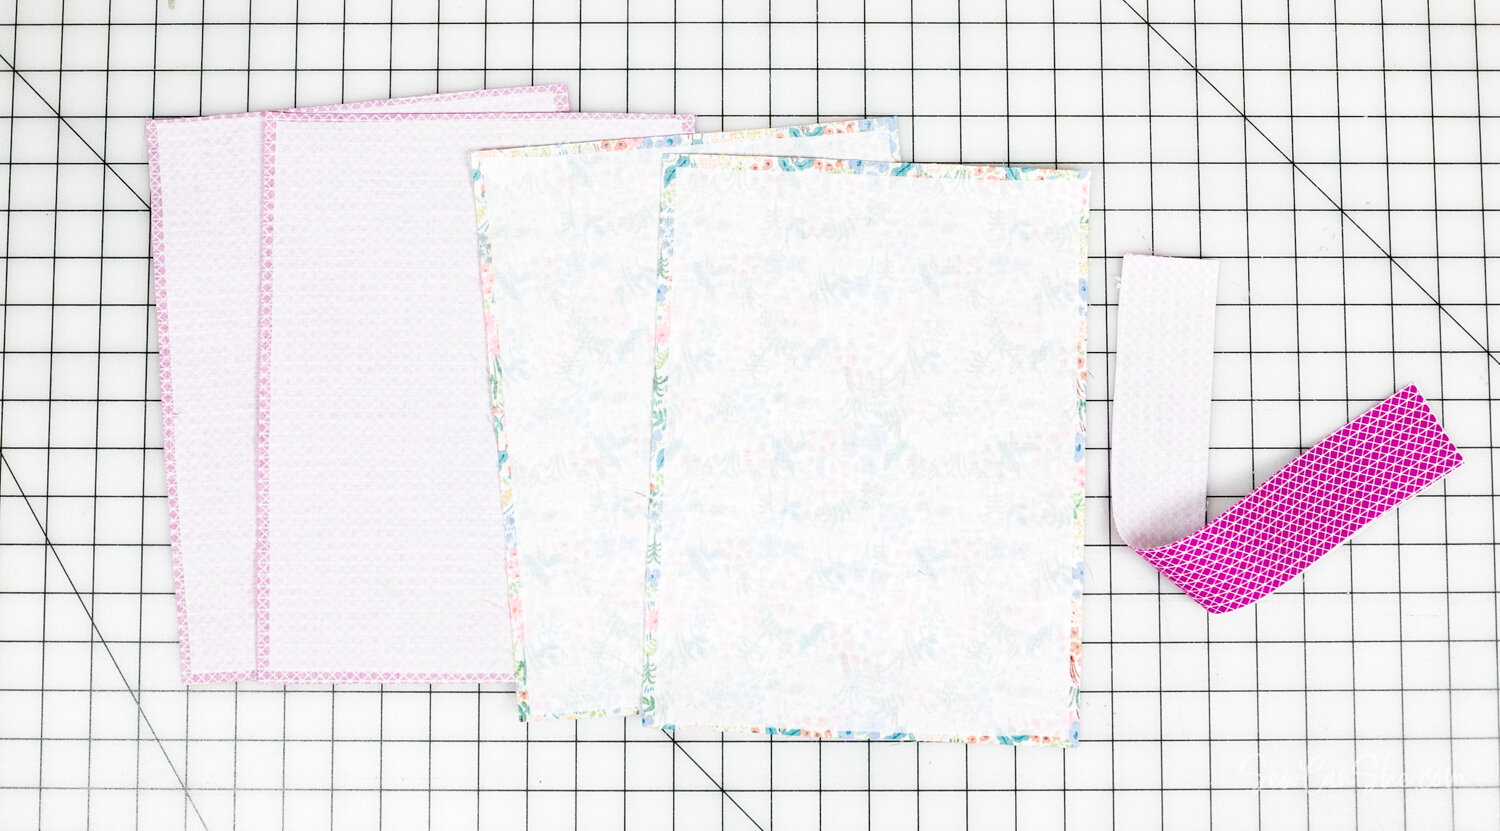
1. Thoroughly fuse the 11 1/2’’ x 8 1/2’’ interfacing pieces to the back side of all four 12’’ x 9’’ fabric rectangles. Center the interfacing in the fabric rectangle. Use steam in your iron (if possible) to help it fuse really well.
2. Fuse the 2’’ x 14’’ interfacing strip to the wrist strap strip of the same size.

3. Place two of the same fabric rectangles right sides together. Pin along the sides and bottom edge. Use the fabric marking pen to make marks 1 1/2’’ away from each top corner.

4. Cut off each top corner by connecting the marks with a ruler and slicing off with a rotary cutter.
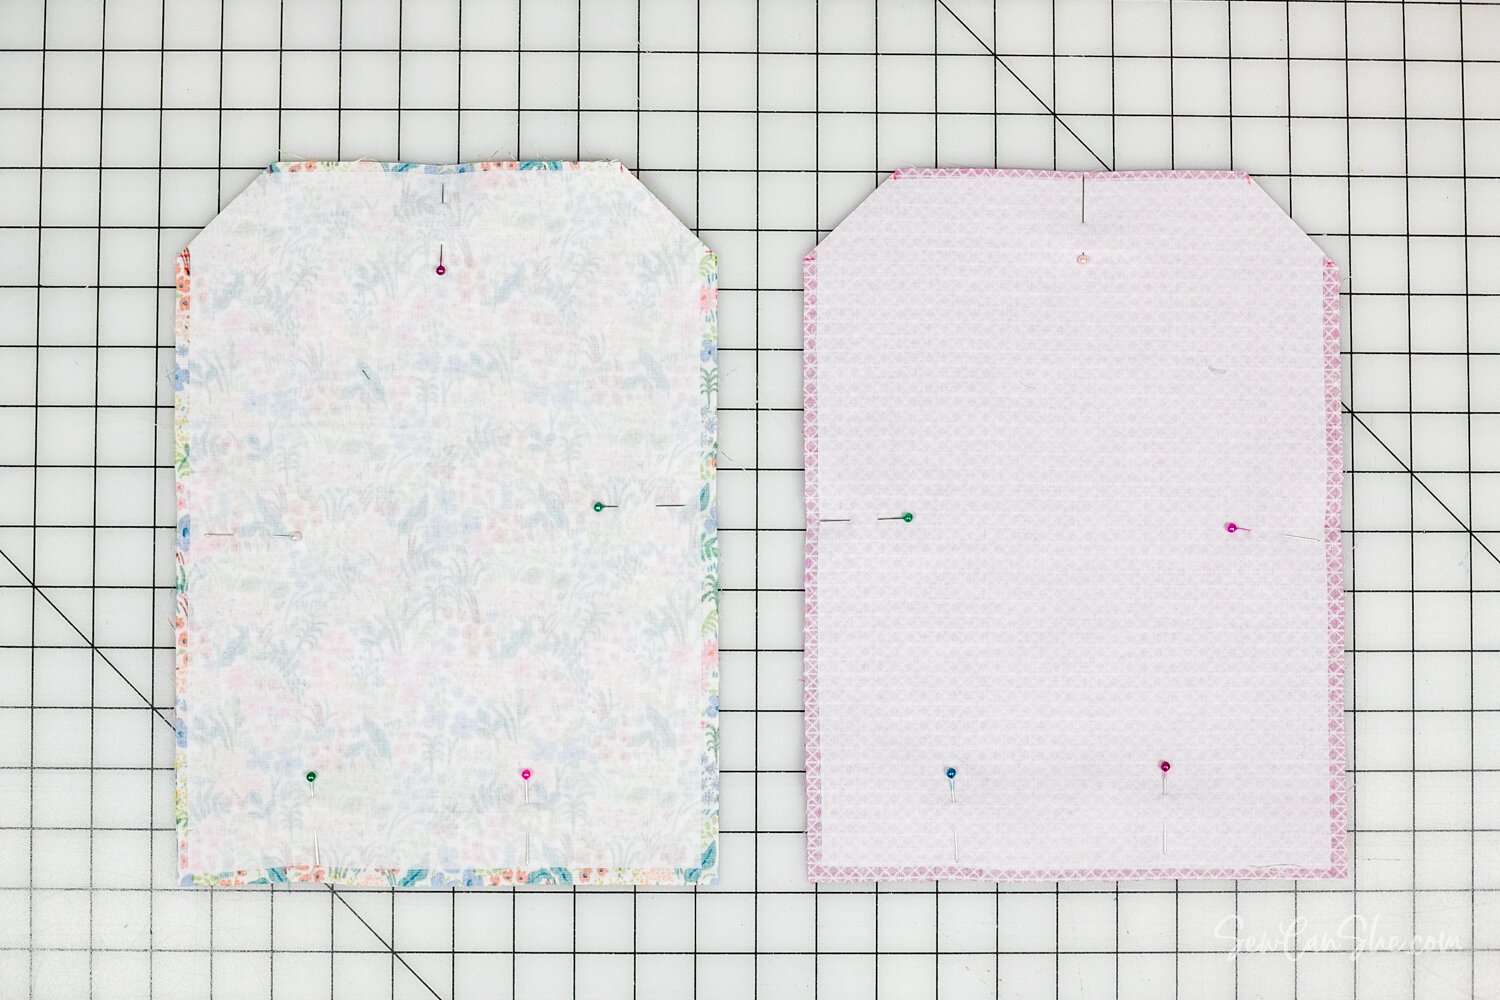
Repeat with the other set of fabric rectangles. You should have two pairs of rectangles pinned right sides together with the top corners cut off.

Sewing the Pocket Pieces
1. Sew all the way around each set of pinned rectangles with a 1/4’’ seam allowance. Pivot at each corner with the needle down.
Leave a 3’’-4’’ opening at the bottom of each one for turning.
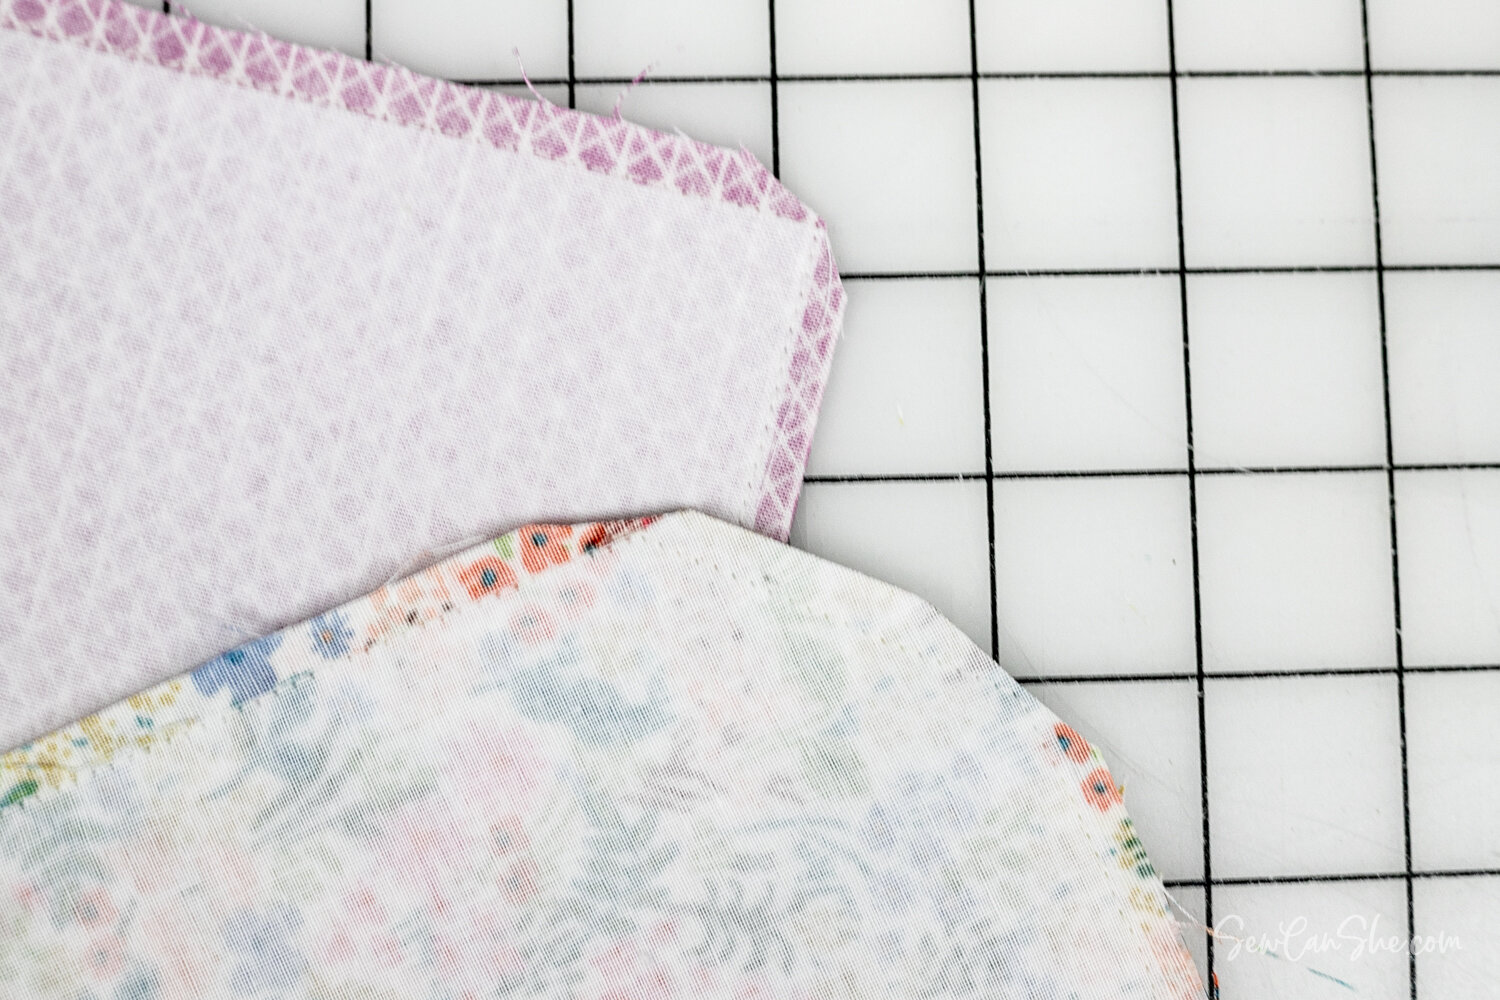
2. Clip the extra fabric away from the corners without cutting the stitching.
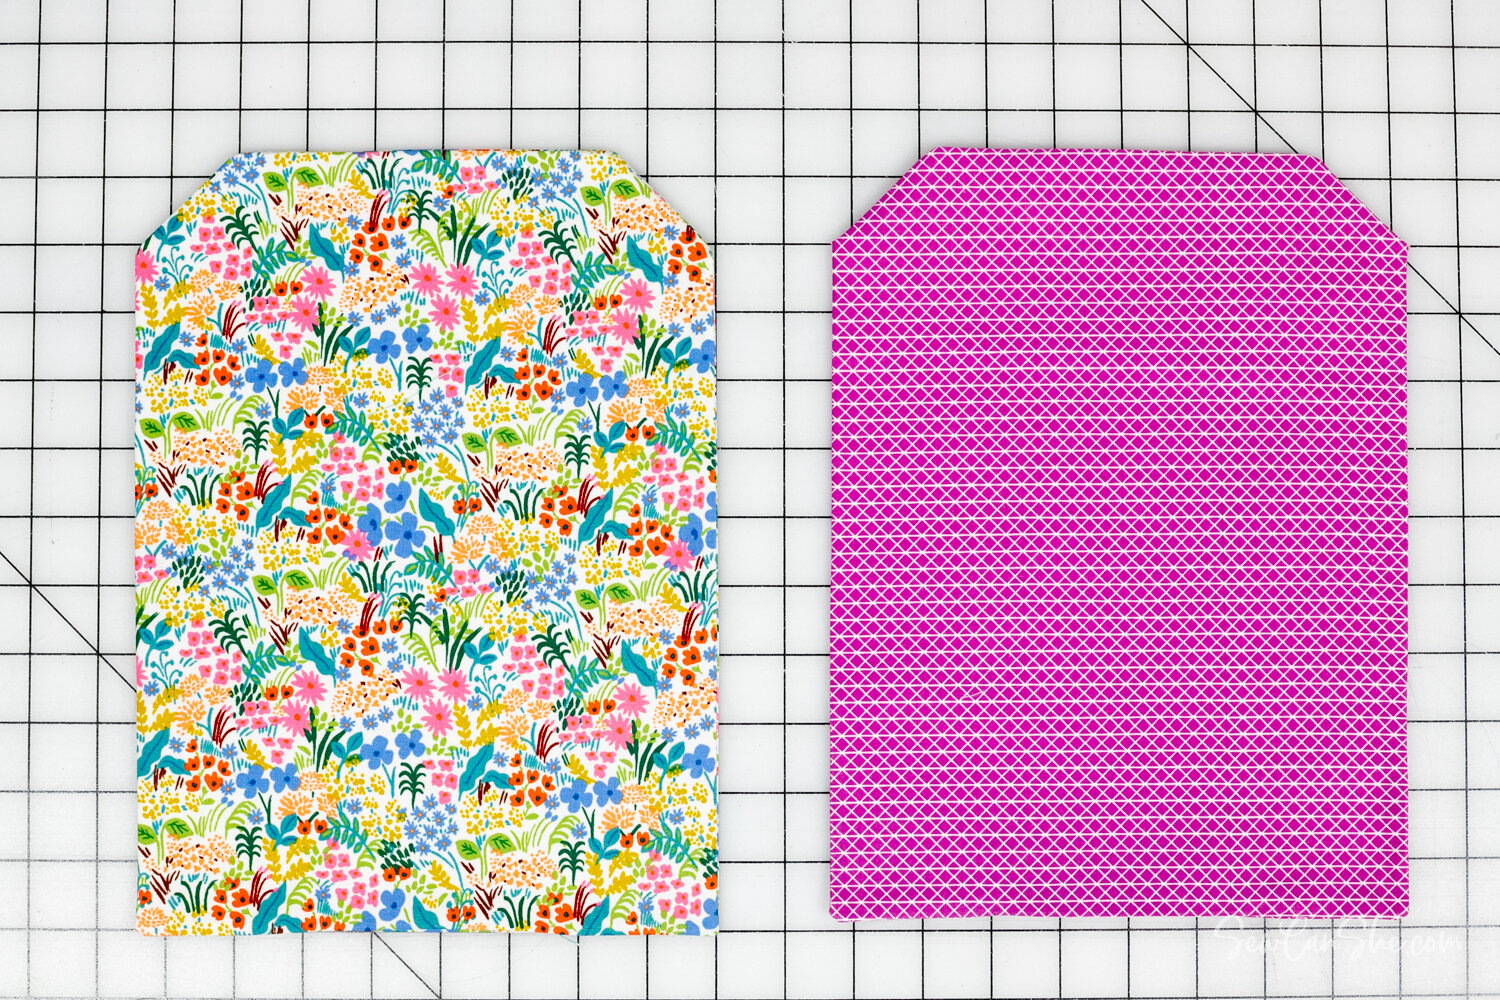
3. Turn the pocket pieces right sides out through the openings, and press carefully. Use a turning tool (or chopstick) to help you push the corners out, as well as all of the straight edges.
Fold and press the raw edges at the openings to the inside.
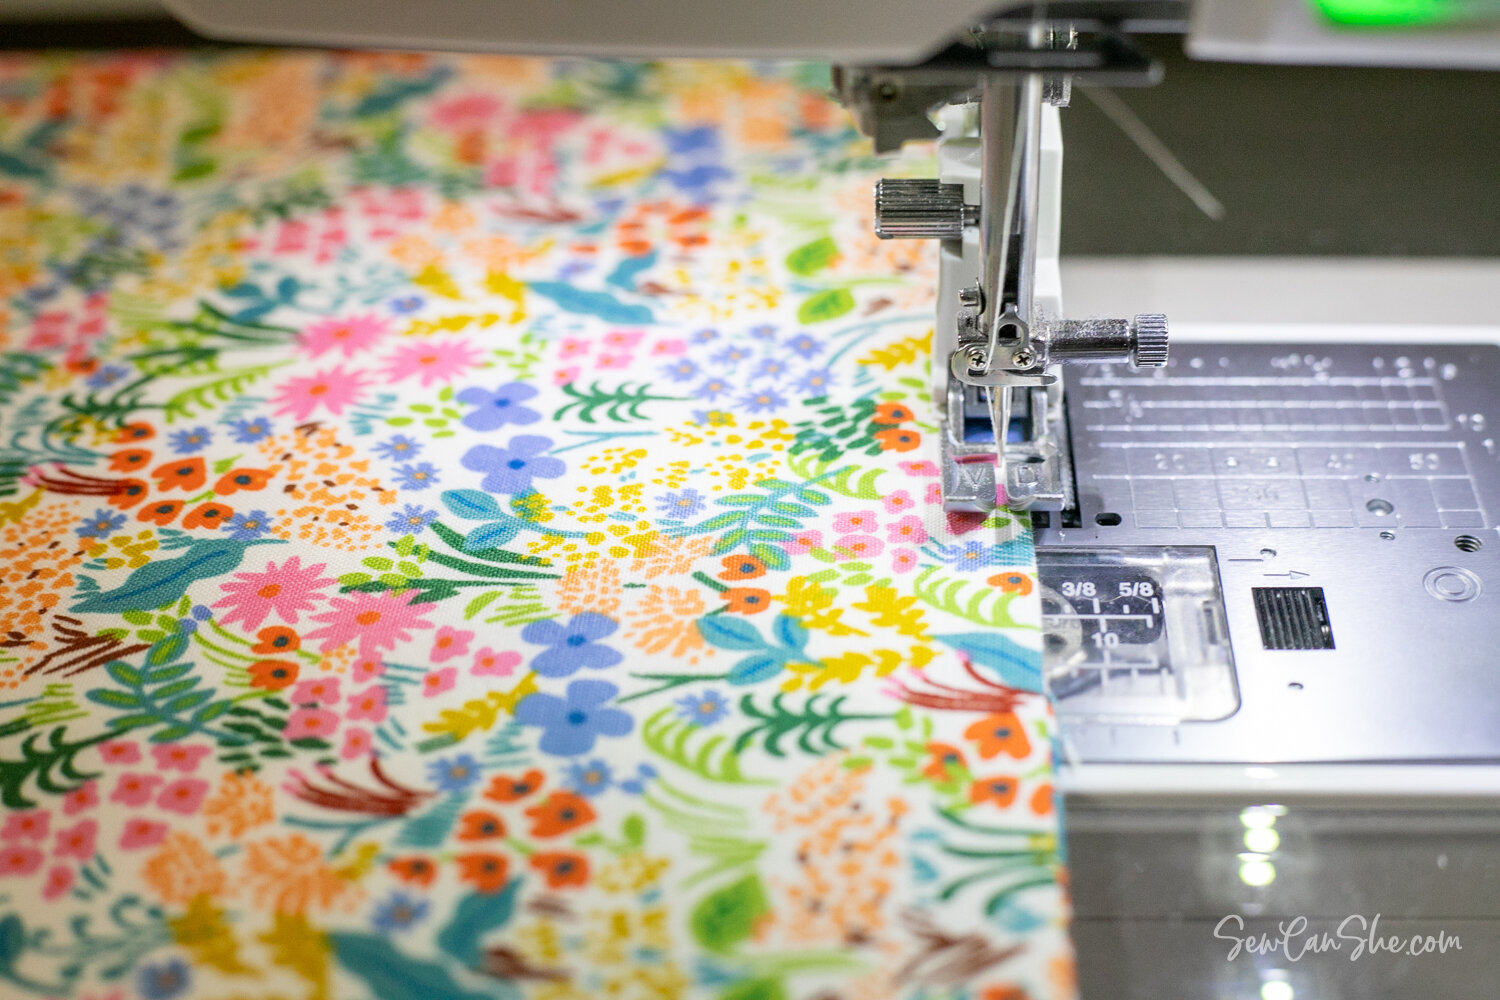
4. Topstitch along the bottom edge of each pocket piece, closing the opening at the same time.

Prepare the Zipper
1. Move the zipper slider to the middle, and cut the zipper down to 8’’ long, making sure to cut off the zipper stoppers. Sew across the ends of the zipper to create new stoppers.
2. Fold one short end of a 1 1/2’’ x 2 1/2’’ zipper end tab piece over to the wrong side by 1/2’’ and press. Repeat with the other zipper end tab piece.
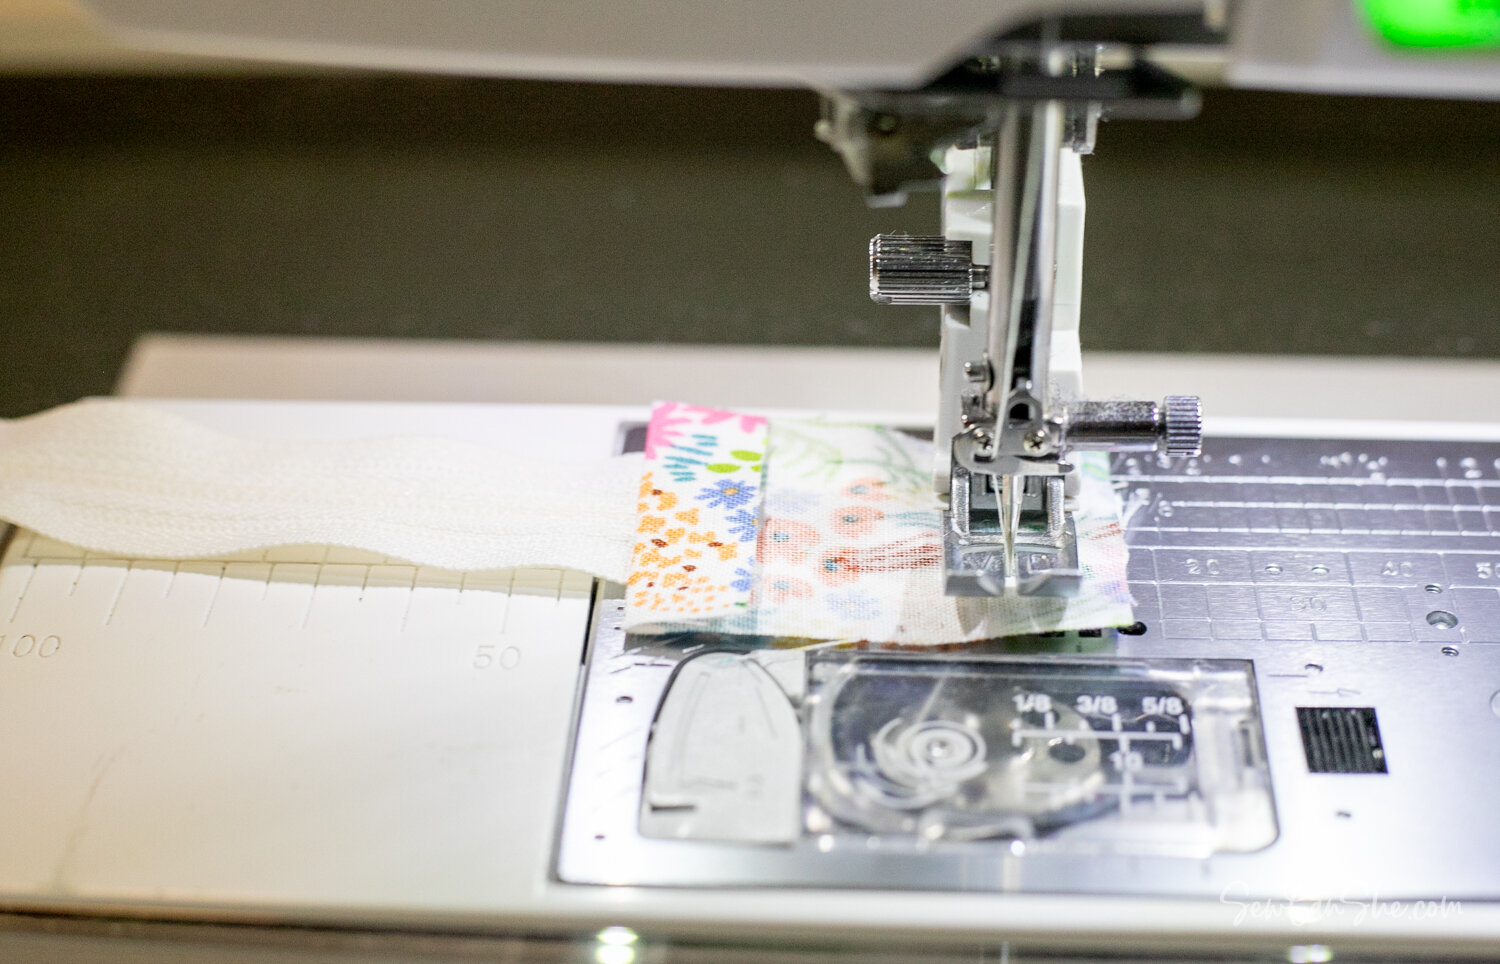
3. Place one of the fabric pieces against the back of the zipper, lining up the end of the zipper with the short raw edge of the zipper end tab piece. The right side of the fabric should be against the back of the zipper.
Stitch with a 1/2’’ seam allowance.
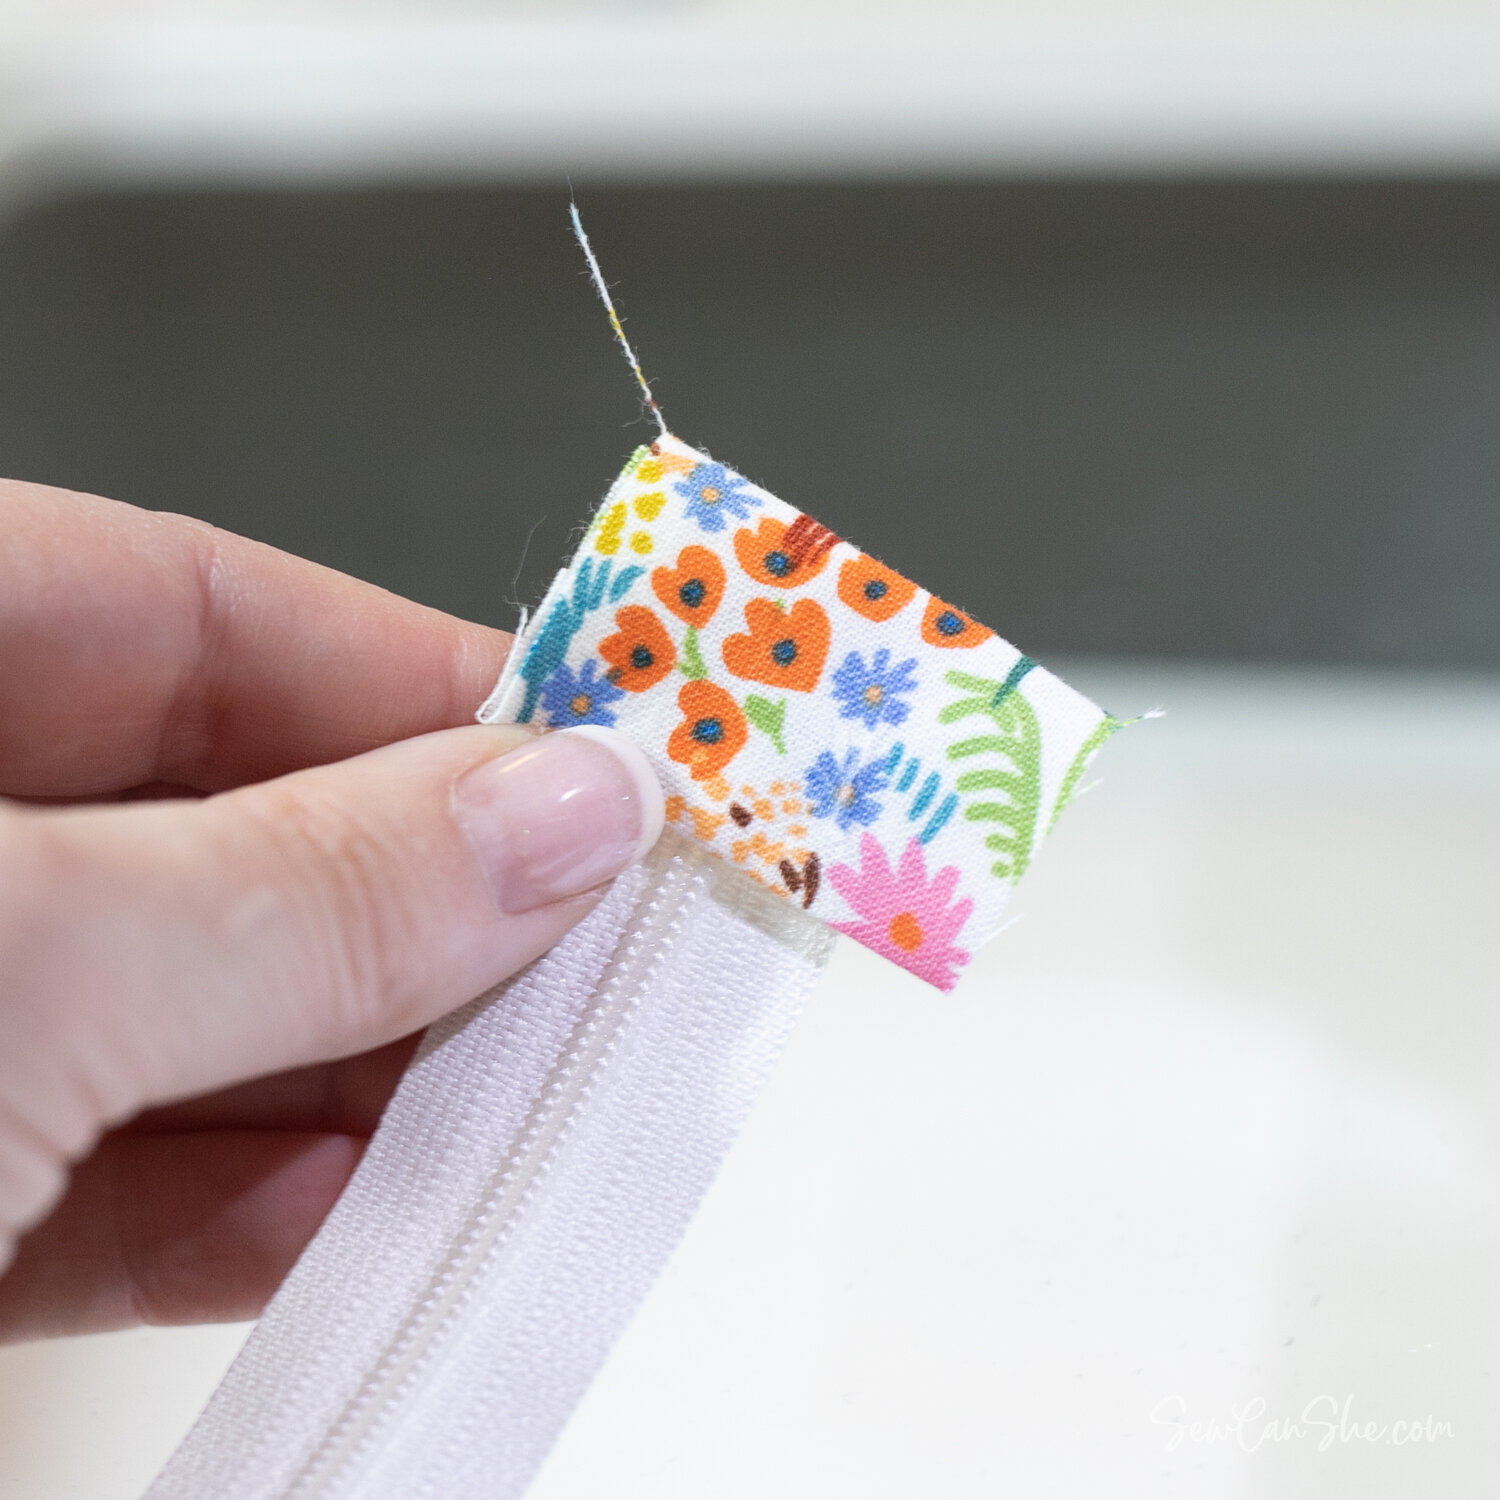
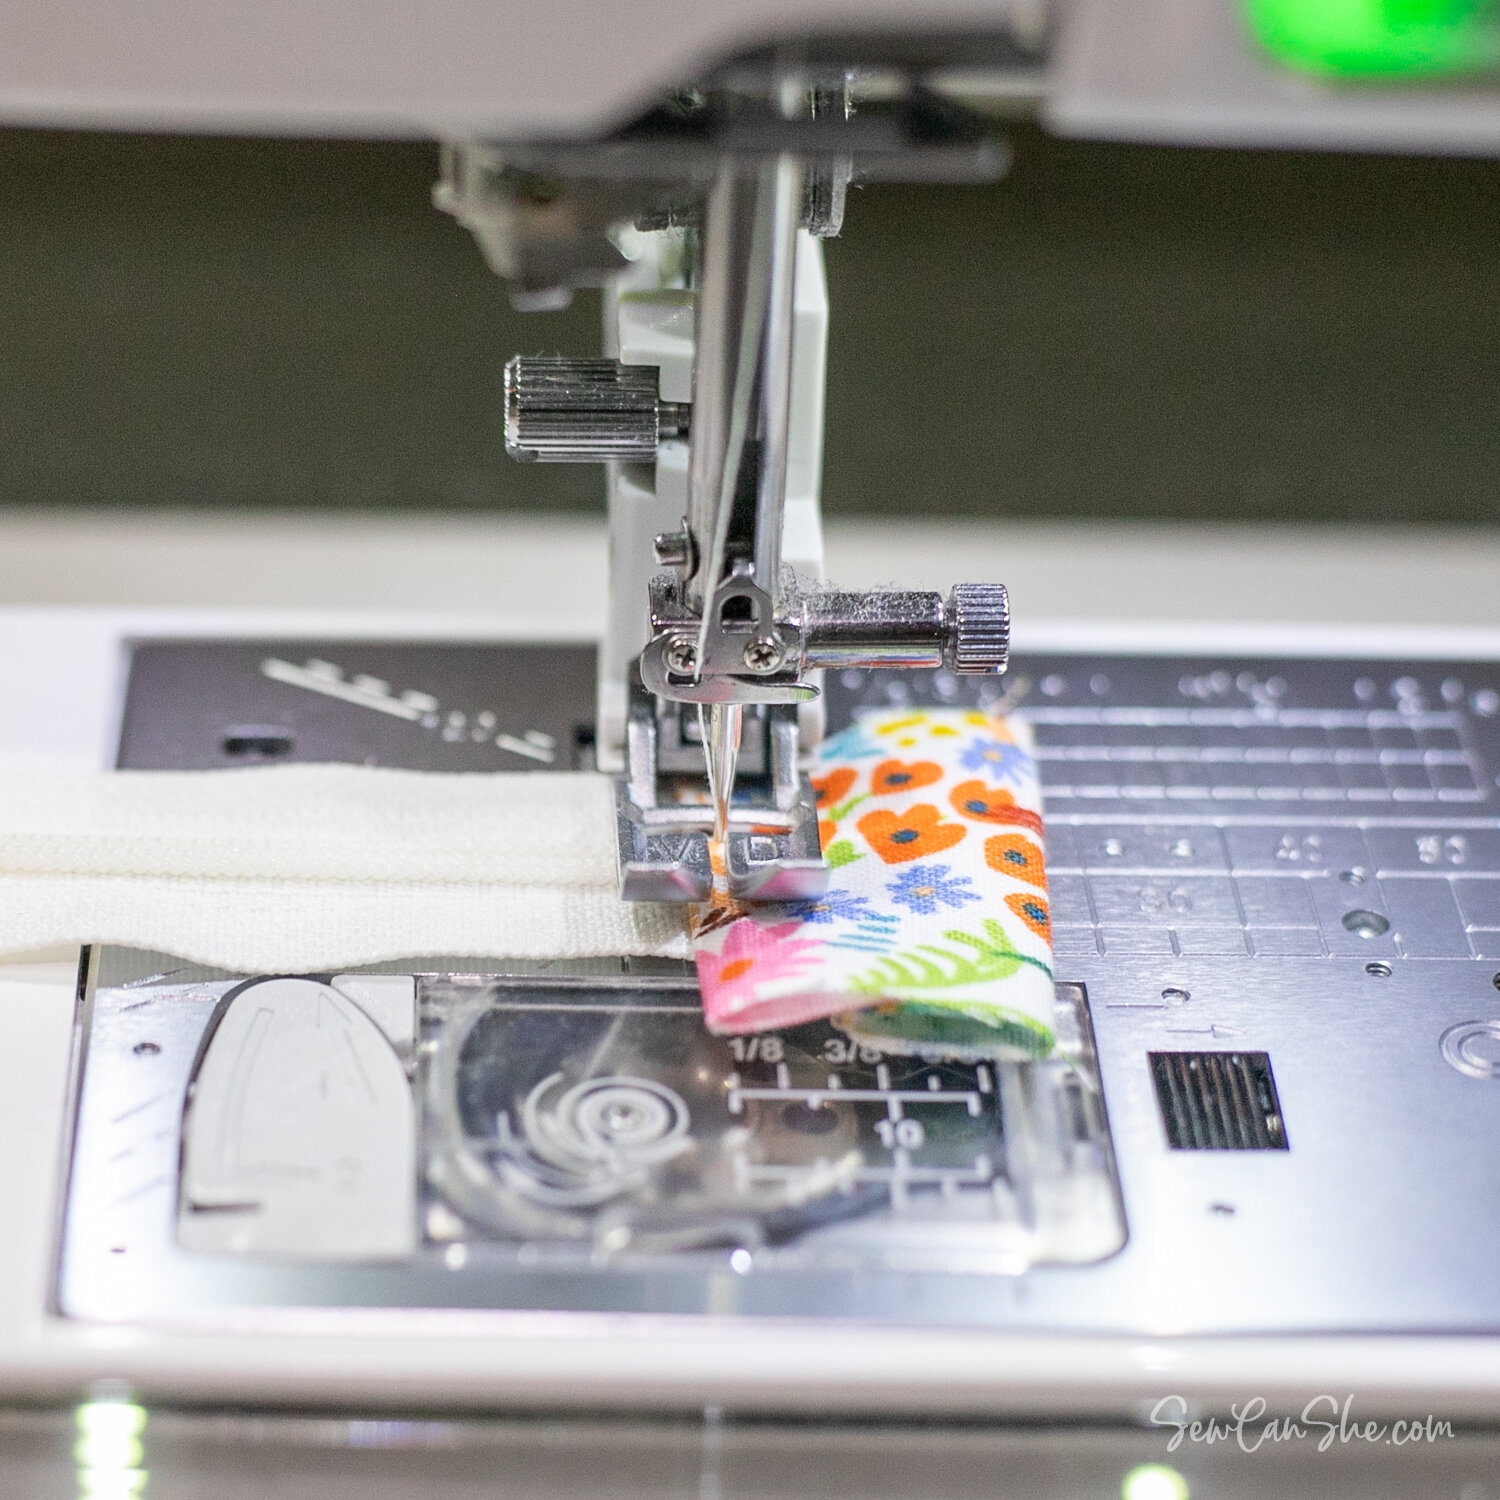
4. Fold the fabric around to the front of the zipper with the pressed edge folded under.
Sew across the tab on the front, close to the folded edge.

Repeat to sew another end tab at the opposite end of the zipper. Trim away the extra fabric on either side even with the sides of the zipper.

Attach the Zipper
1. Place both pocket pieces on your work space with the side that you want to be the front of the pockets right side up.
On the FRONT pocket piece, use the fabric marking pen to draw a horizontal line 3 1/4’’ below the top edge.
On the BACK pocket piece, use the fabric marking pen to draw a horizontal line 4 1/4’’ above the bottom edge.
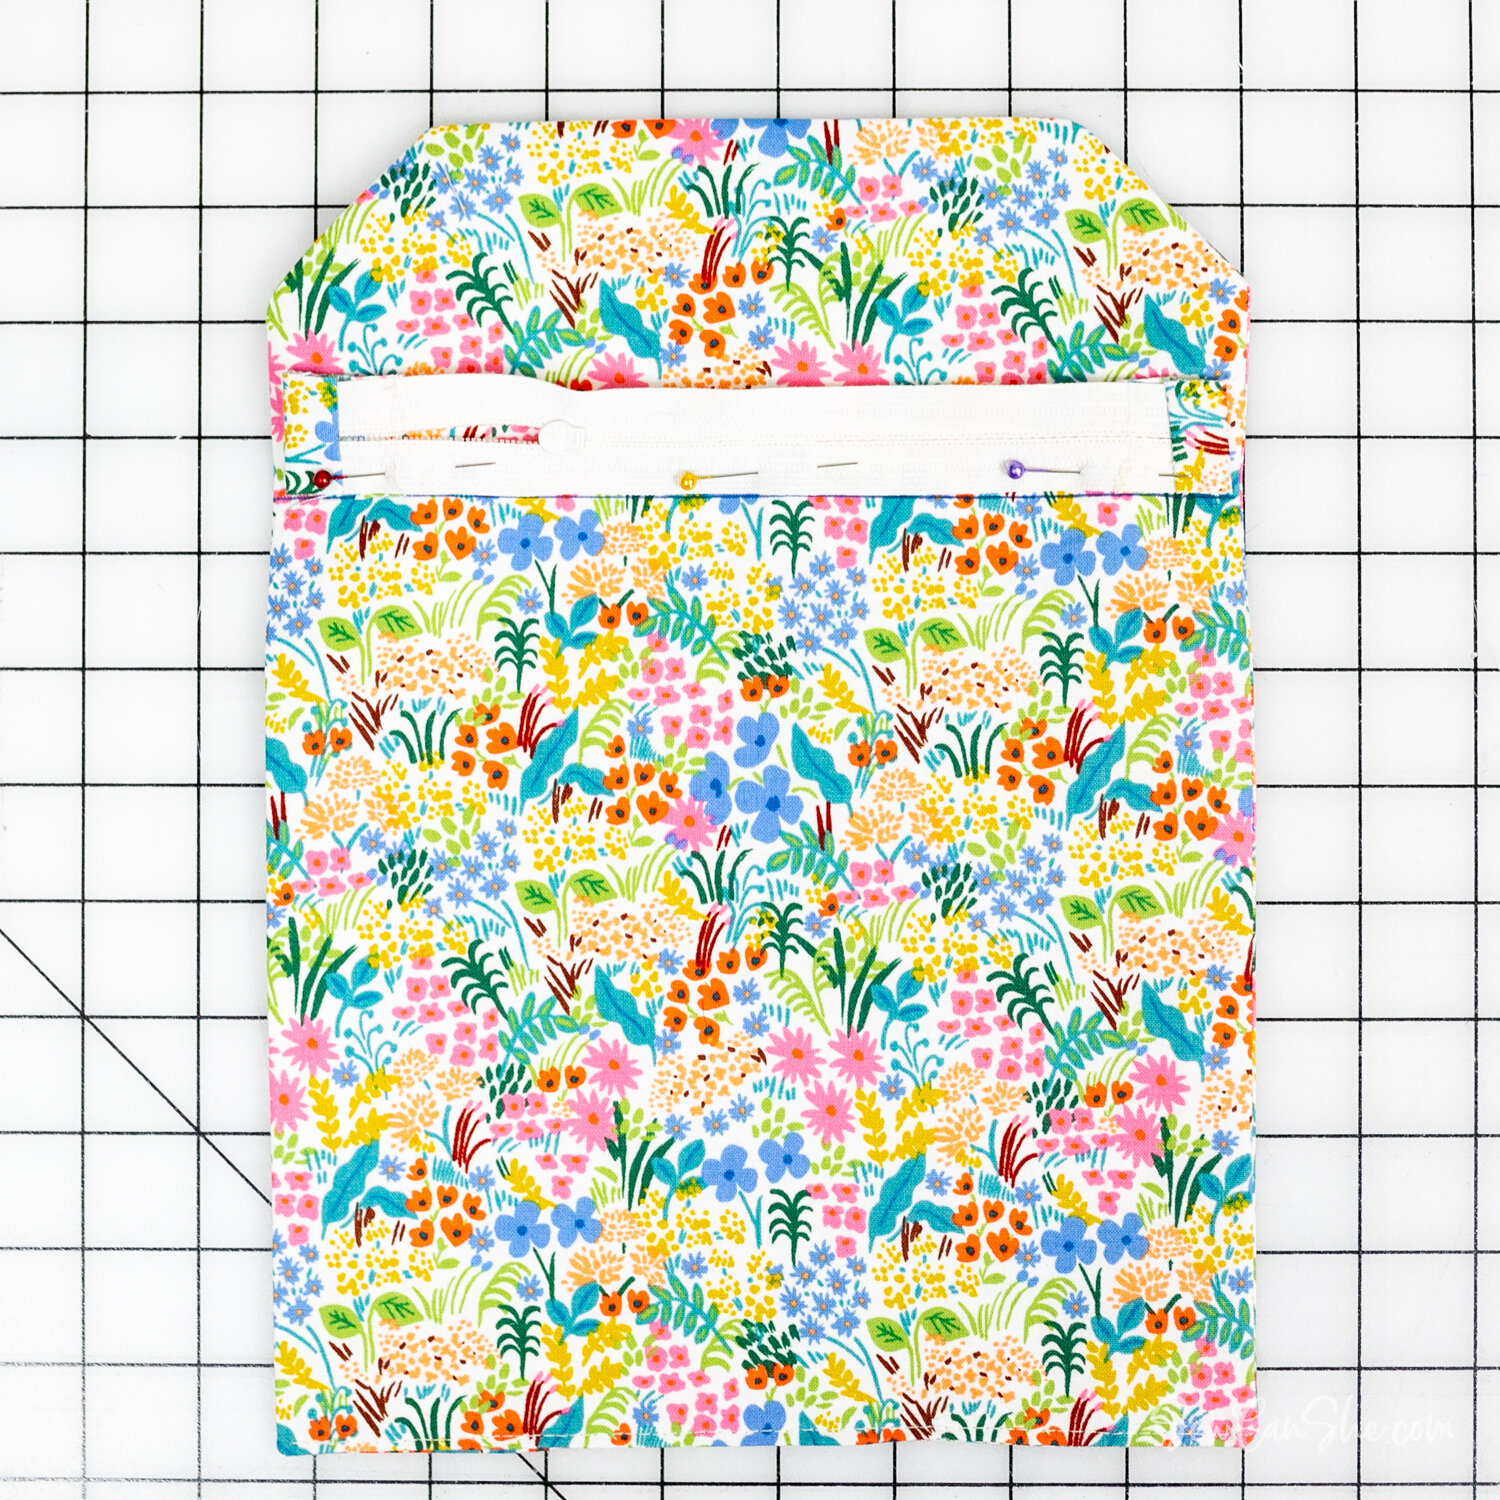
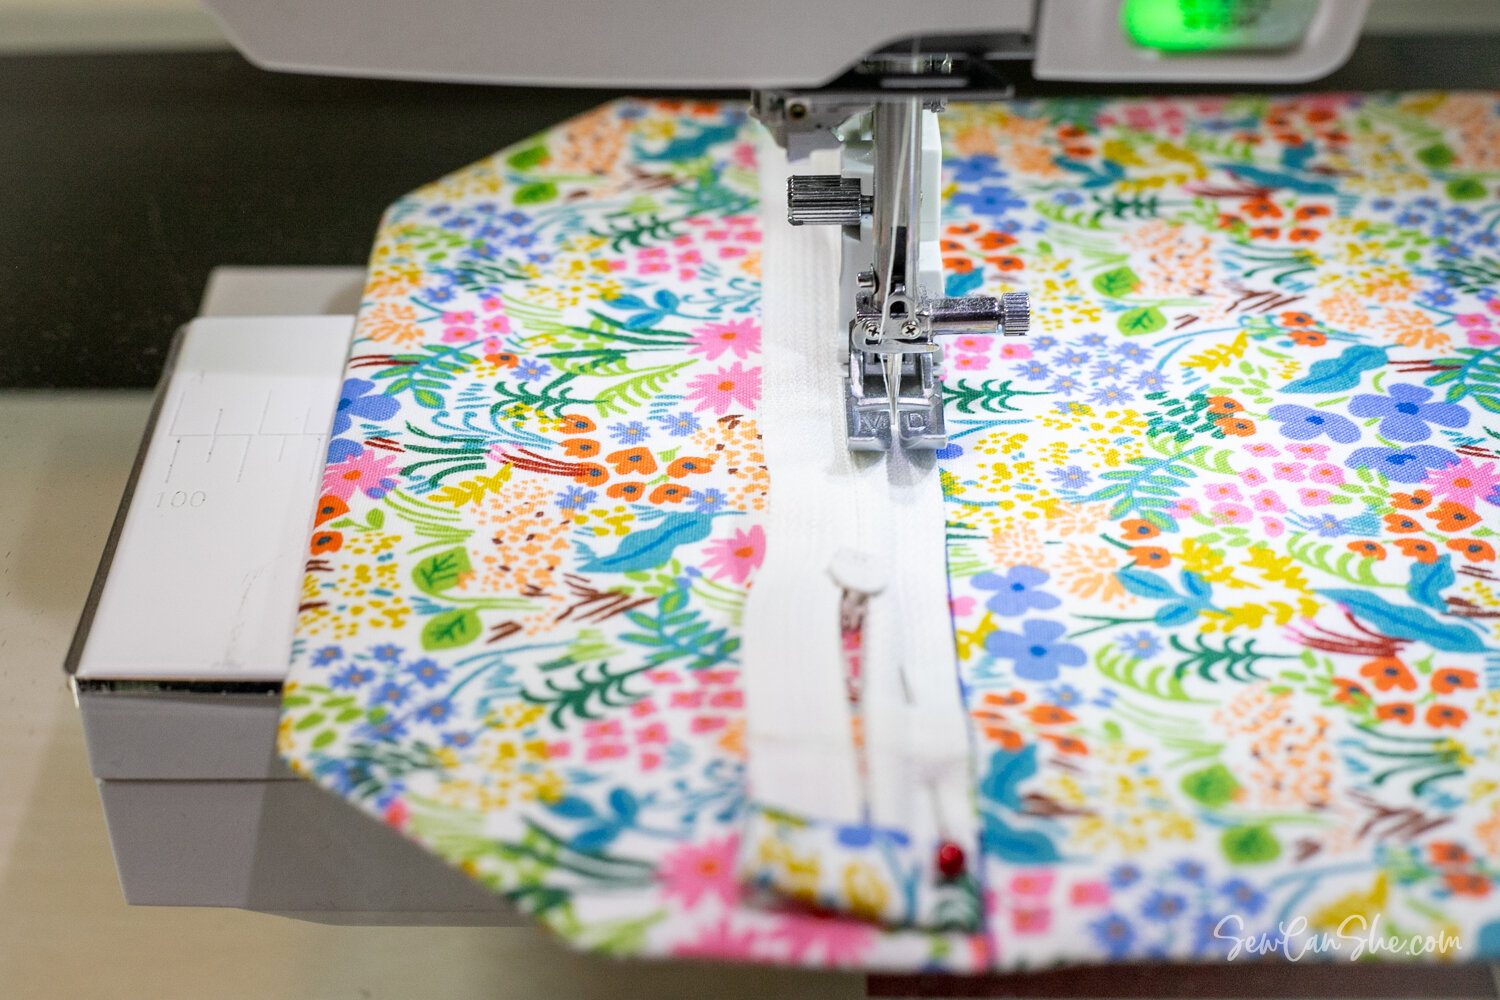
2. Place the zipper right side down against the front pocket piece with one long edge of the zipper along the top edge of the line.
The zipper is 1/4’’ – 1/2’’ shorter than the width of the pocket piece. Just center it along the line. Pin in place.
3. Sew along the zipper tape that’s next to the line, 1/4’’ away from the edge of the zipper. Switch to a zipper foot on your sewing machine if necessary.

4. Turn the front pocket piece over to the back. Fold the top flap down so you can see the zipper sticking up. Pin the flap down to keep it out of the way.

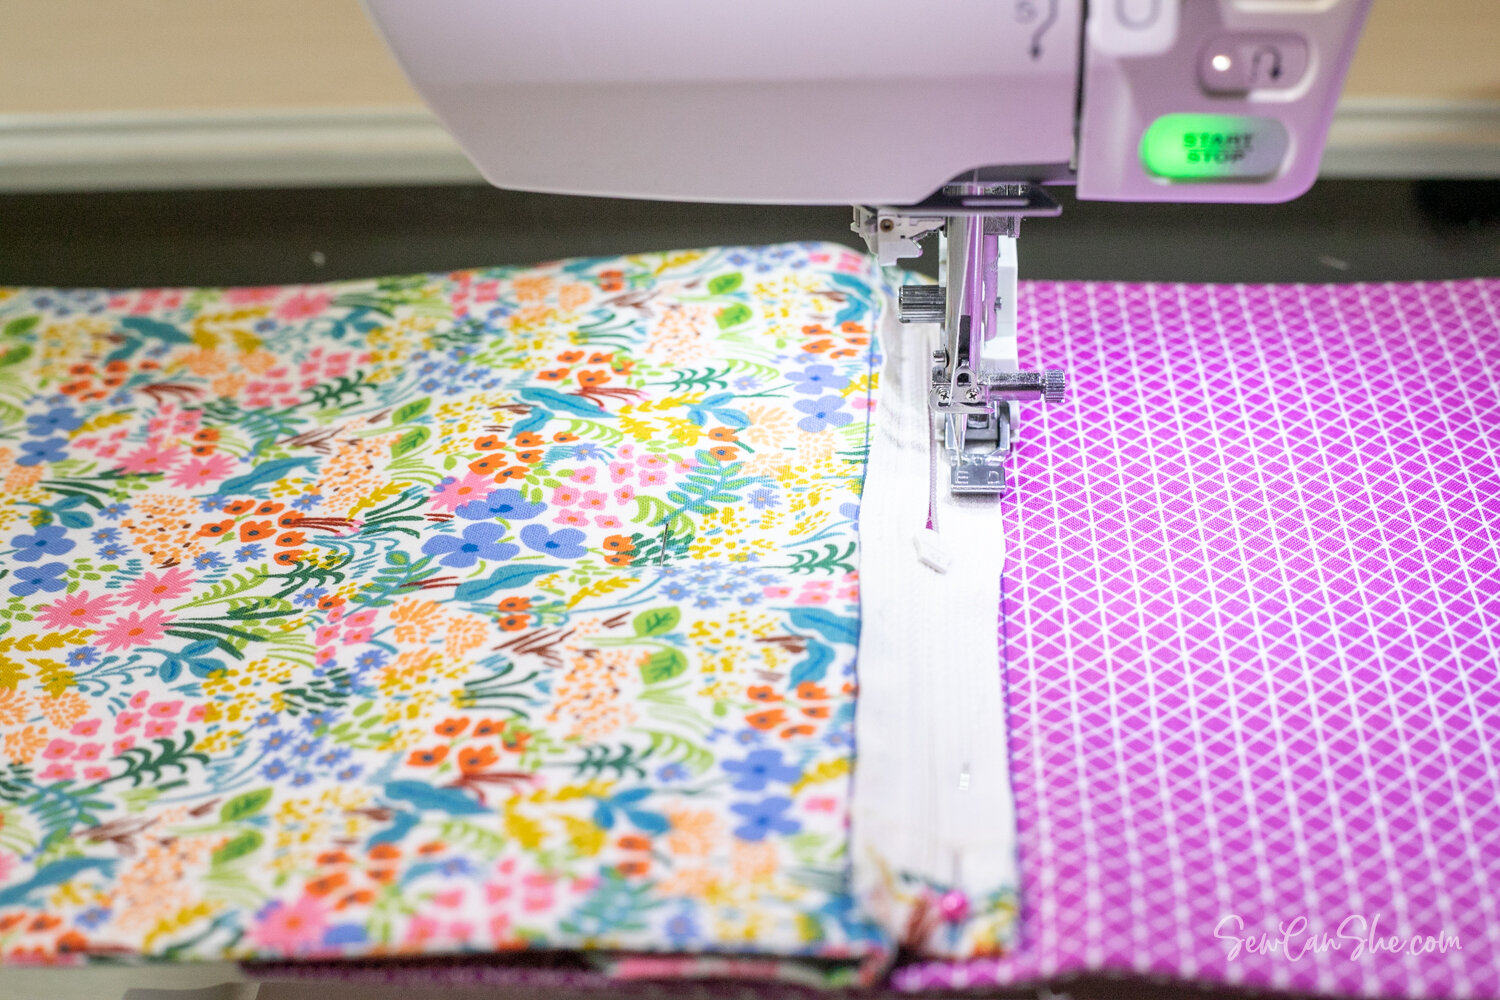
5. Place the front pocket piece on top of the back pocket piece with the zipper face down and the flap sandwiched in the middle out of the way.
Line the top long edge of the zipper with the bottom of the line marked 4 1/4’’ up from the bottom of the back pocket piece. Pin the zipper in place.
6. Sew along the zipper tape, 1/4’’ from the edge.

7. Turn the piece over and place it on your work space so that the back pocket piece is upside down and you can see a bit of the front pocket piece at the bottom.
Shift the layers a bit until the front pocket piece is sticking out by just 1’’ (not counting the cut off corners). Place a pin in the middle so the layers won’t shift.
8. Use the fabric marking pen to draw a line 4’’ up from the bottom edge of the front pocket piece.

9. Sew across the line.

Make the D-Ring Tab and Wrist Strap
1. Fold and press the d-ring tab piece with the 3’’ edges together. Open and press the 3’’ edges to the center. Then fold in half and press again to make a 1/2’’ x 3’’ piece.
2. Fold and press the wrist strap piece with the long edges together. Open and press the long edges to the center. Then fold in half and press again to make a 1/2’’ x 14’’ piece.


3. Topstitch along both long edges of the shorter d-ring tab piece. Do not topstitch the longer piece yet.
Push the one end through the 1/2’’ d-ring. Fold the tab in half and sew the ends together about 1/4’’ away from the raw edges.
Set the d-ring tab aside.


4. Push one end of the pressed wrist strap piece through the opening on the 1/2’’ snap clip.
Open the folds and pin the ends right sides together. Take care that the strap is not twisted.


5. Stitch the ends with a 1/4’’ seam allowance. Finger press the seam open.
6. Refold the wrist strap the way that you pressed it.
Topstitch along both long edges of the wrist strap in a circle – moving the clip out of your way as you go.
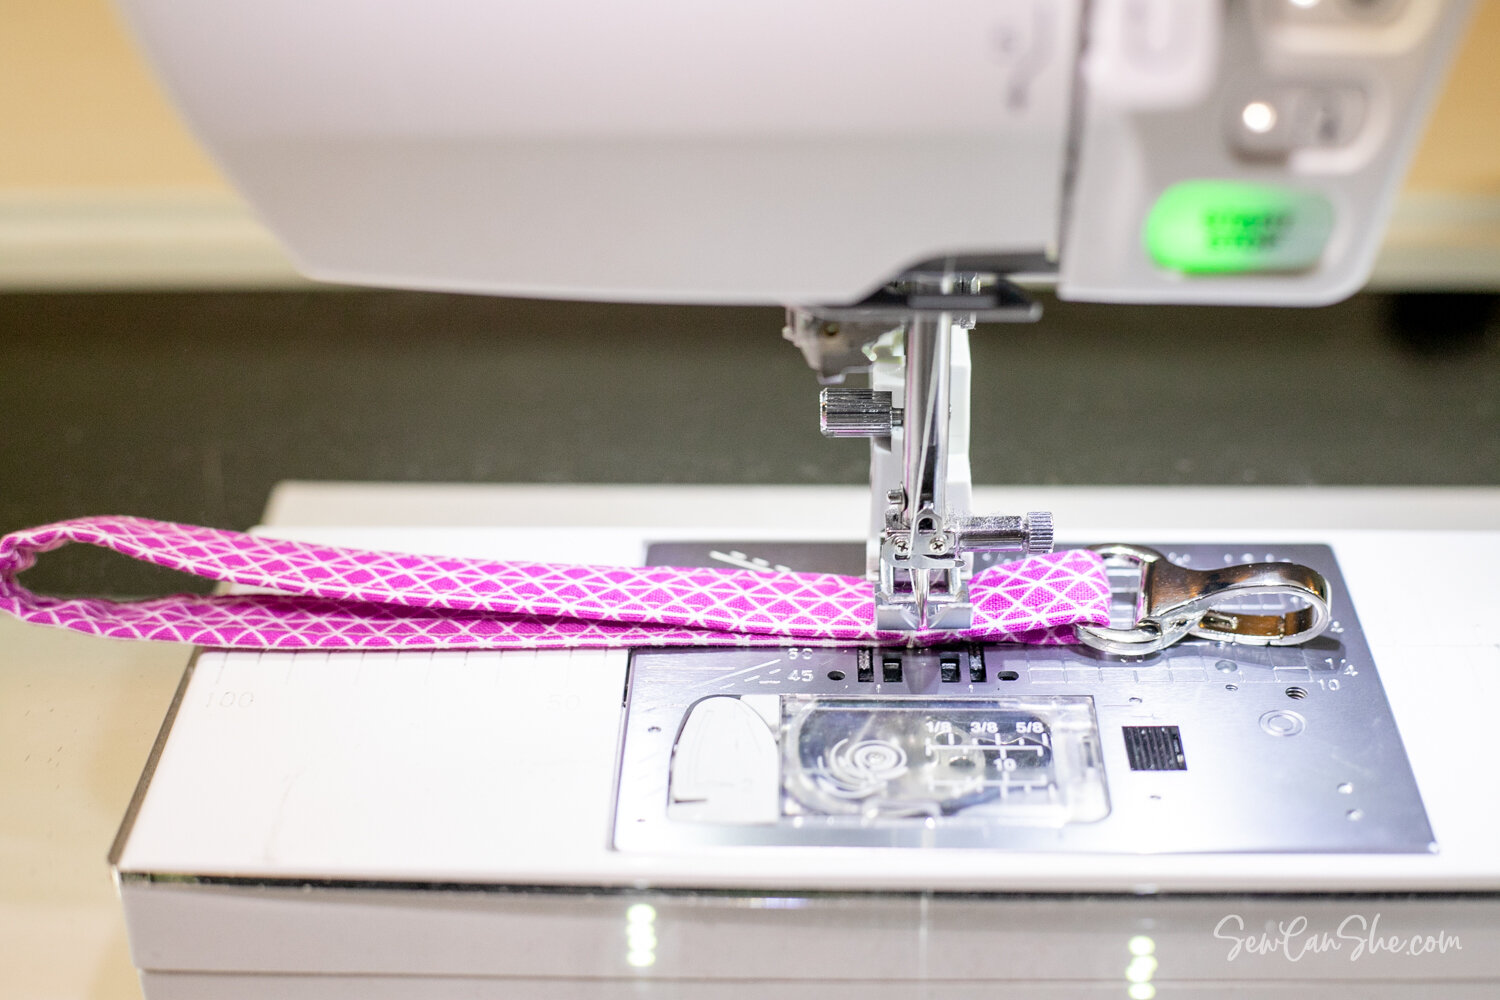
7. Flatten the strap in half and stitch about 1’’ away from the clip to keep the clip in place.
Finish Sewing the Wallet
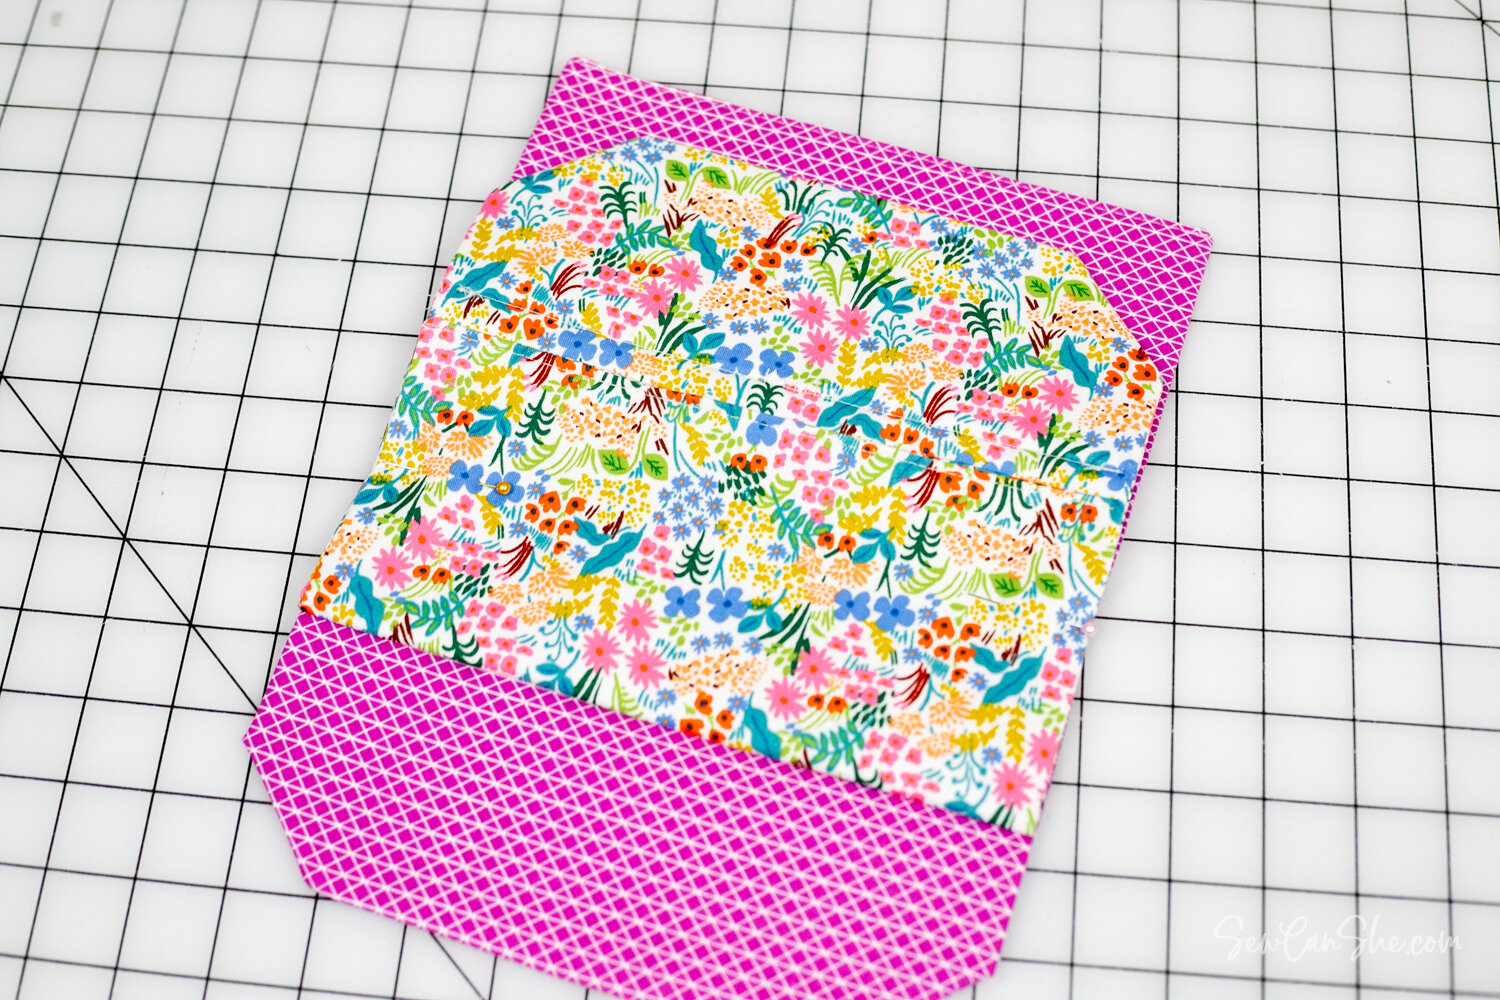
1. Place the wallet on your work space with the front pocket facing up and the top edge of the front pocket with the cut off corners is at the top.
Fold the bottom straight edge of the front pocket up tightly and pin in place with one pin along each side edge.


2. Turn the wallet over and turn it around so that the top edge of the back pocket (with the cut off corners) is now at the top.
Fold the bottom straight edge of the back pocket up. This time do not fold it up tightly – just fold it up enough so that the zipper is folded in half (see the photo above right).
Place two pins on either side of the pocket, through all layers.
Turn the wallet over again and remove the two pins on the front pocket side. These are not needed any more since the other 4 pins go through all layers.

3. Insert the ends of the d-ring tab in between the layers (so they will be inside the zipper pocket) close to the zipper pull with the zipper closed. Pin or clip the d-ring tab in place so it won’t shift.
The d-ring tab should be sticking out by about 3/4’’.

4. The last sewing step is to sew all the way around the wallet.
Start sewing on one side of the back pocket. Sew over the d-ring tab so it will be secure. Continue sewing onto the front pocket flap.

Sew around the flap, pivoting at the corners.

Then sew across the other side of the back pocket and onto the back pocket flap.

Sew around the back pocket flap.

Finish sewing and backstitch at the same place where you started.

Attach the Plastic Snaps
1. Use the fabric marking pen to mark spots for the snaps on the outside of each flap piece.
The snaps should be 1’’ away from the top edge of the flap and 2’’ away from each side edge.

2. Use the snap setter to apply the female snap pieces to the flap.
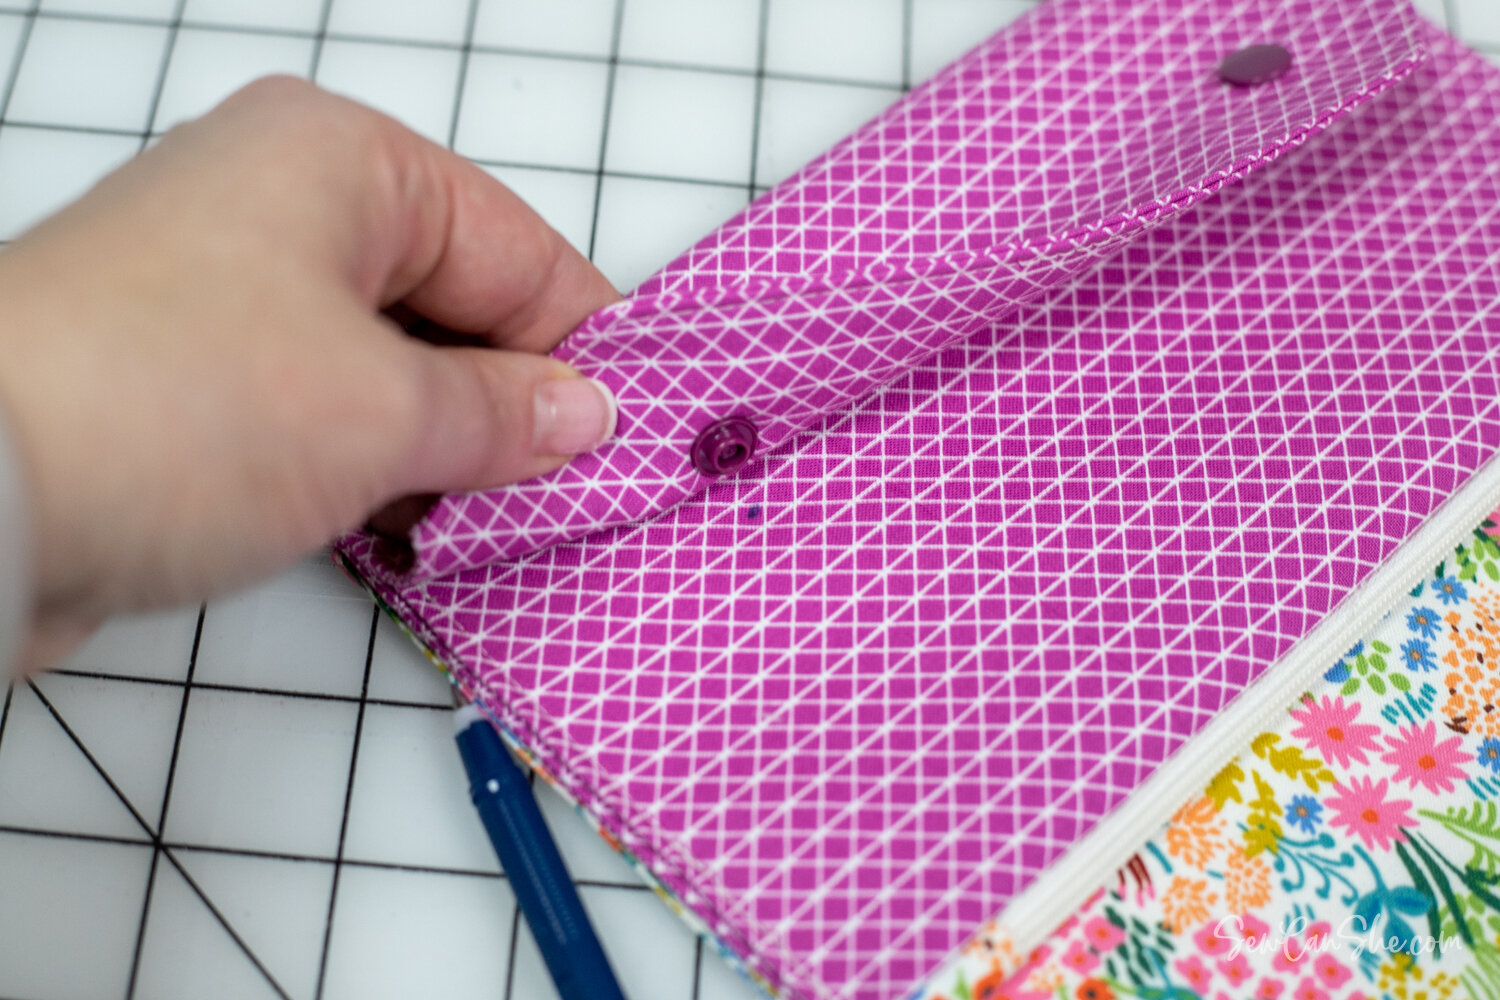
3. Fold the flap down over the pocket so you can mark where the male ends of the snap should be.
Install the male ends over your marks.

Apply snaps to the pocket on the other side and attach your wrist strap.
All done! I can’t wait to see the beautiful face mask wallets that you make! Please upload a picture to Instagram and tag me @sewcanshe or #sewcanshe so I can take a look.
xoxo,

Disclosure: some of my posts contain affiliate links. If you purchase something through one of those links I may receive a small commission, so thank you for supporting SewCanShe when you shop! All of the opinions are my own and I only suggest products that I actually use. 🙂
