Easy Quilt Block Tutorial: The Churn Dash!
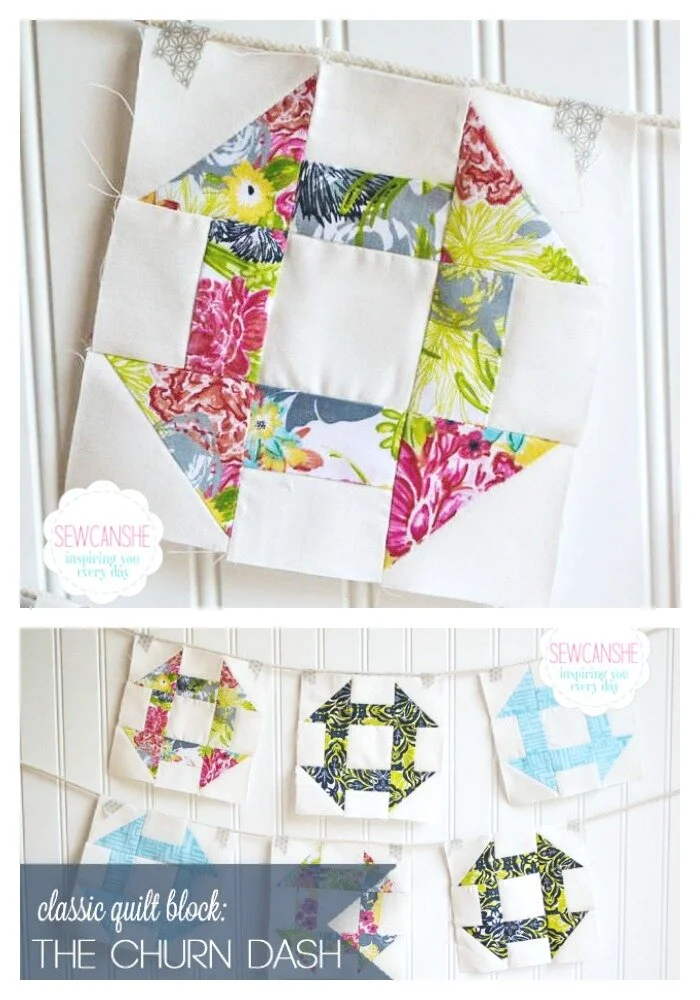
A lot of classic quilt blocks have their names rooted in history and the Churn Dash easy quilt block is especially so. This block originates in the early 1800’s and was named by the early Americans because it looked similar to a butter churn looking down from above. I love the fact that our fore-mothers expressed themselves by making beautiful quilts!
If you’re just joining us now, we’re making gorgeous quilt blocks using the classic patterns and easy to follow tutorials. Last month we made the Friendship Star.
This tutorial includes cutting dimensions for at 2 different size churn dash quilt blocks – 12’’ square and 6’’ square.
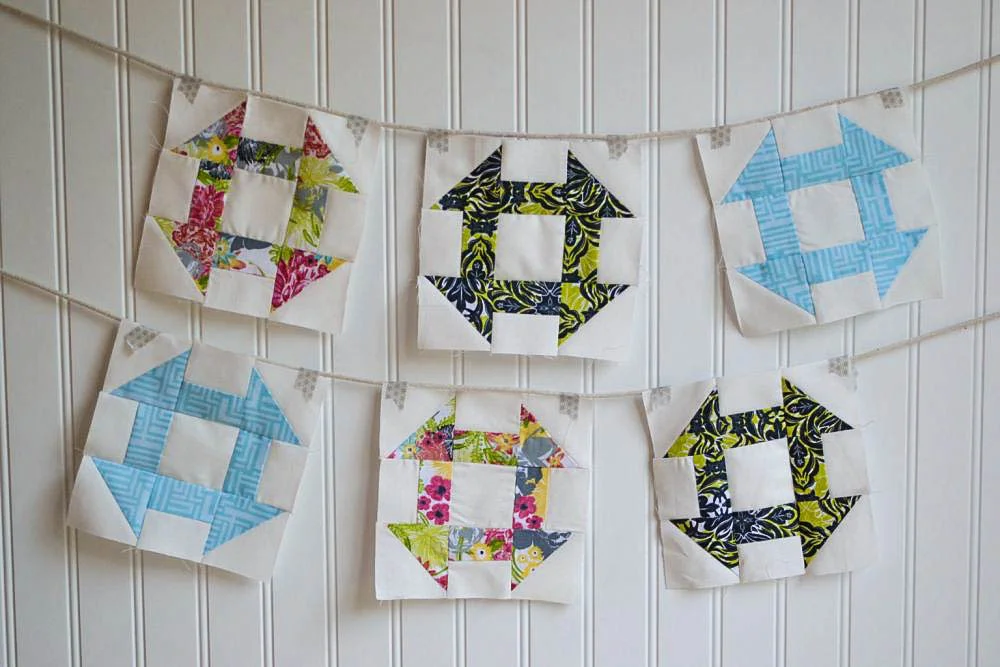
The fabric I’m using is Modern Eclectic by Khristian Howell for Blend Fabrics. I was so hoping they would send me some of this collection. It’s gorgeous!
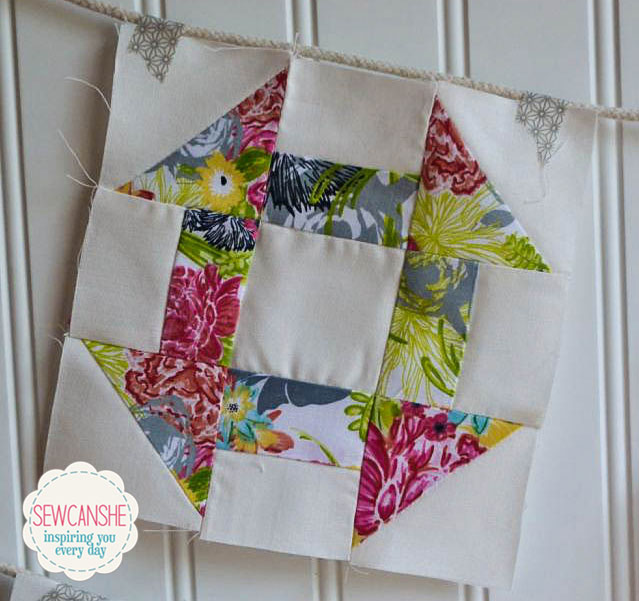
The churn dash quilt block is essentially a 9 patch. Four of the ‘patches’ are half square triangles and four are sewn from two rectangles. Once you get all the parts ready, it’s totally easy to put together. So let’s get started!
My 6’’ blocks are so cute! I’ll give dimensions for a 12” block too, because everyone loves that basic size.

Cutting instructions for a finished 6” block:
-
Color 1 (the print) – cut 2 squares 2 7/8” and 4 rectangles 2 1/2” x 1 1/2”
-
Color 2 (the solid) – cut 2 squares 2 7/8”, 4 rectangles 2 1/2” x 1 1/2”, and one square 2 1/2”
Cutting instructions for a finished 12” block:
-
Color 1 (the print) – cut 2 squares 4 7/8” and 4 rectangles 4 1/2” x 2 1/2”
-
Color 2 (the solid) – cut 2 squares 4 7/8”, 4 rectangles 4 1/2” x 2 1/2”, and one square 4 1/2”

This block uses half square triangle units. I’m going to use a special technique so you don’t have to sew along bias cut edges. Just stack one of the print squares with one of the larger solid squares (right sides facing) and draw a line diagonally down the middle. Repeat with the other set. This is your cutting line, not your sewing line.

Sew down either side of the diagonal line with a 1/4” seam allowance. Repeat for the other set.

Now cut along the line and you have 4 half square triangle units.

Next sew all of the rectangles together, one print with one solid right sides facing.


Press all of the units open. I pressed my seams to the print side.

Cut the dog ears off all of the hst units.
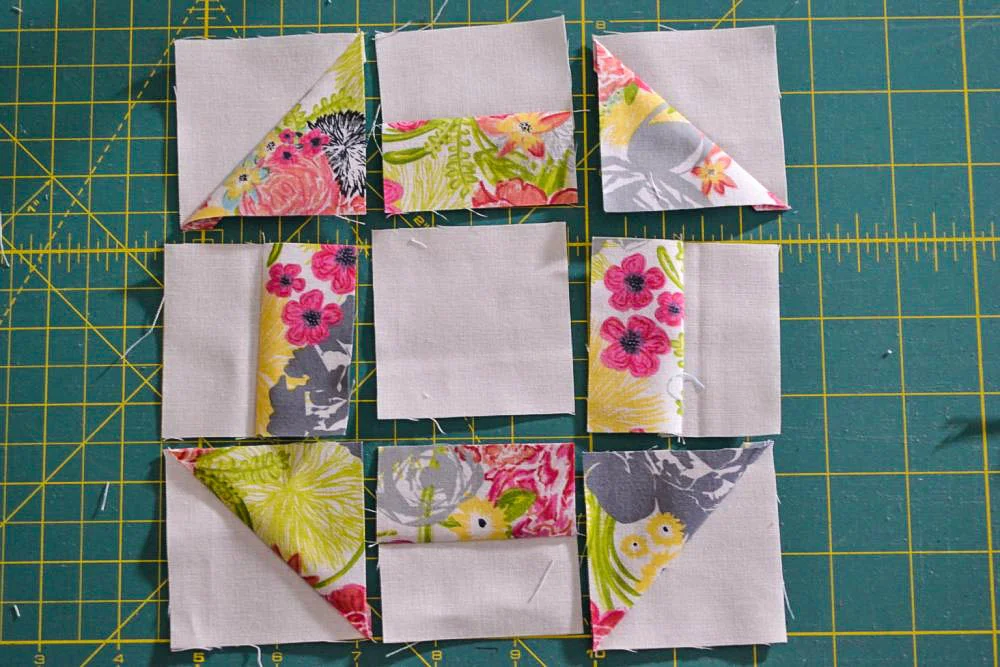
And arrange all 9 units like so with the remaining square in the middle. Almost done!
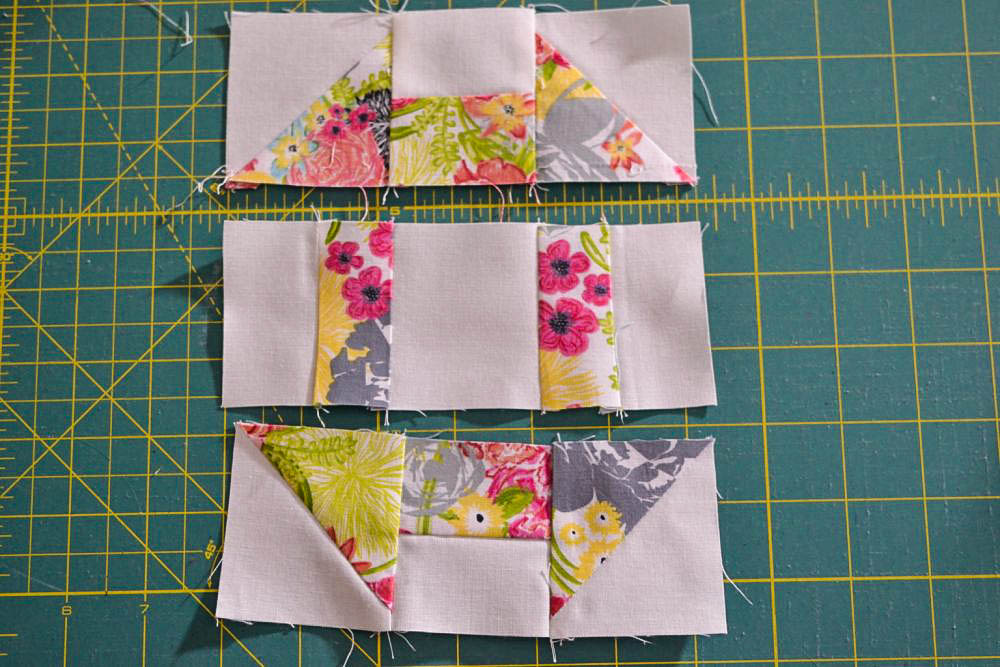
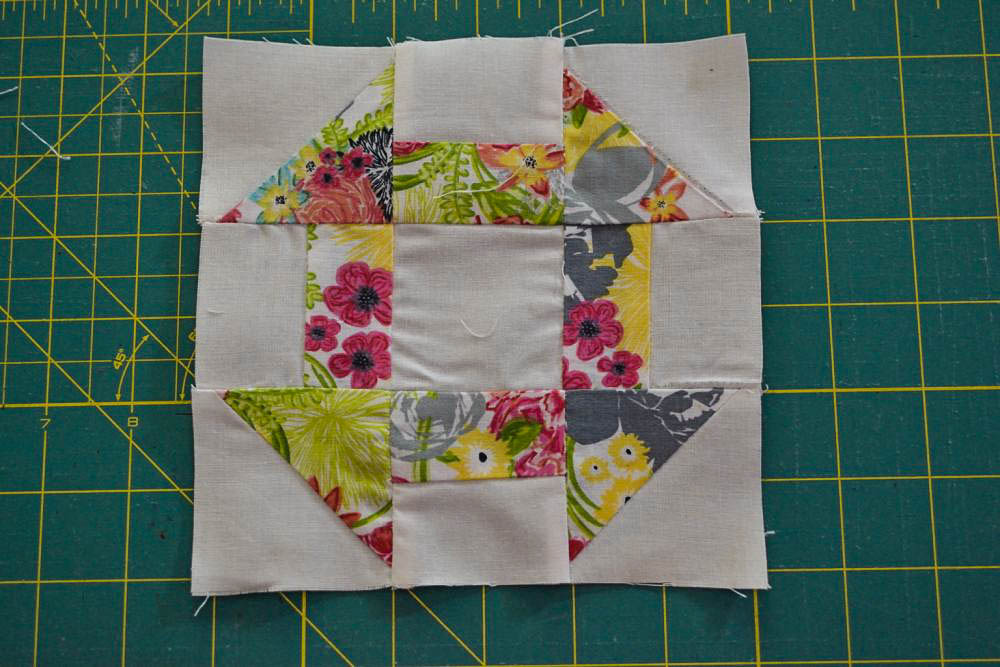
Sew the square units into rows, and the rows into a block. Done!

I strip pieced 12 of these blocks that I’m going to make into a mini-quilt. 3 of them have the solid and print fabrics reversed. I can’t wait to show you!
Find all of my easy quilt block tutorials on this pinterest board.
Happy sewing!
Featured


Disclosure: some of my posts contain affiliate links. If you purchase something through one of those links I may receive a small commission, so thank you for supporting SewCanShe when you shop! All of the opinions are my own and I only suggest products that I actually use. 🙂