Shoofly Quilt Block Pattern
Learn how to sew the classic Shoo Fly Quilt Block! It’s a fun twist on the nine-patch block.

In case you are catching this blog series, we’re making gorgeous quilt blocks using the classic patterns and fresh modern fabrics from Anna Griffin and Blend Fabrics! So far we’ve made the Bear Paw quilt block, Yankee Puzzle, Spinning Spools, the Rail Fence Block, the Variable Star, the Sailboat Block, the Dutchman’s Puzzle Block, the Churn Dash Block, the Friendship Star, and the Snowball and Nine Patch blocks together! You can search for ‘classic blocks fresh fabric‘ in my search box to find them too.

The Shoofly Block is really very easy. It’s just a nine patch block with half square triangles in the corners.

Quilt Math:
To make the Shoofly Block, divide your finished block size into 3, and then add seam allowances to each block.
For example, I decided to make a block with a finished size of 7 1/2”.
For each 7 1/2” (when finished) block, I prepared:
-
4 plain/print HST’s that will be 2 1/2” finished
-
1 print square 3”
-
4 plain squares 3”
If you would like to make a 12” block, prepare:
-
4 plain/print HST’s that will be 4” finished
-
1 print square 4 1/2”
-
4 plain squares 4 1/2”
I’m not going to show you how to make a HST (half square triangle) again. The tutorial for the Friendship Star Block shows a fun way to make two at a time with no bias seams. And the tutorial for the Bear Paw Block shows how to make and use HST papers.

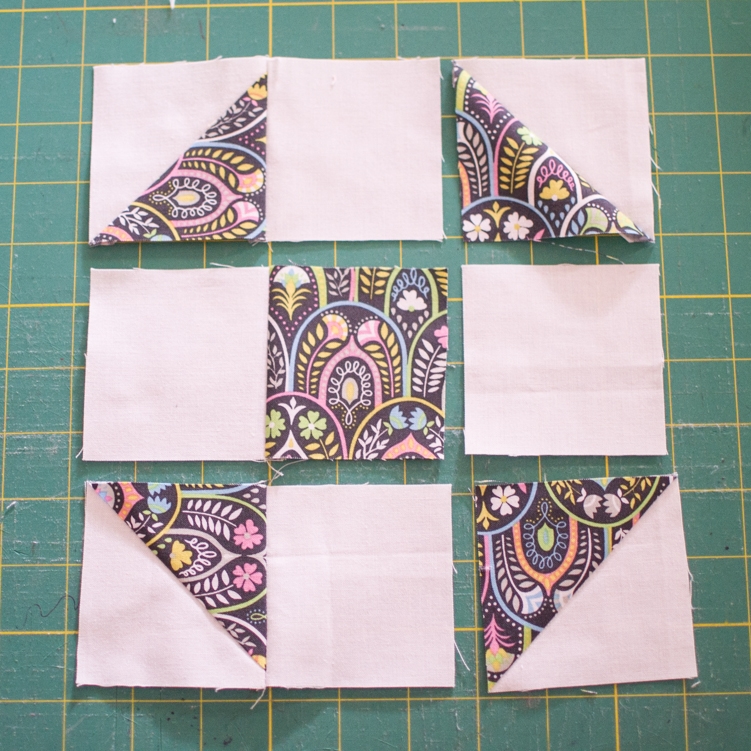
First arrange the 9 pieces in this cute formation. I think it’s adorable. It would also be fun to switch the print and solids around. Or use scrappy mixed up prints.
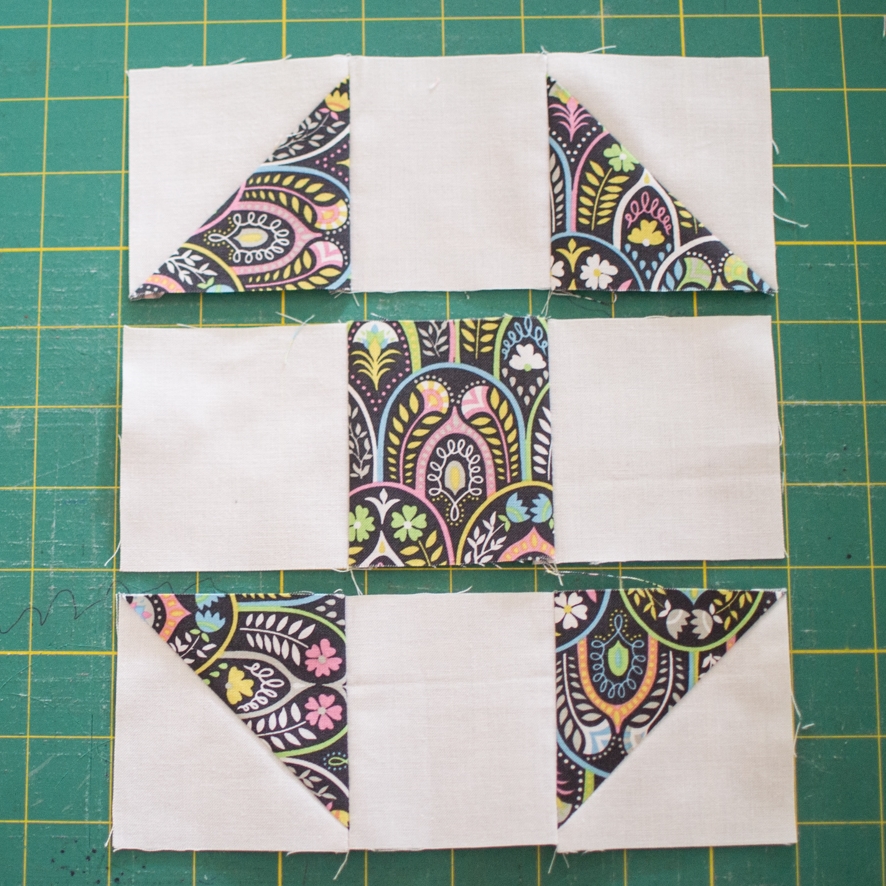
Sew the first two pieces in each row. Chain piecing makes quick work of it. Press the seams toward the print (or darker fabric). Then chain piece one more time to add the last piece in each row. Press the seam allowance toward the print again.

This is what it looked like when I chain pieced the other blocks.


Now sew the rows together. If you pressed each seam allowance toward the print, you will be set to nest your seams instead of pinning each row. This is my favorite technique for perfectly matched corners. I think it works better than pins.
I wrote a blog post about nesting seams here.

And there you go. Wasn’t that easy? Now go make a whole quilt-ful!
Starting today you have two weeks (until January 19th) to sew a shoofly block and post a picture into one of the two photo albums mentioned above to enter to win the beautiful fq bundle from Blend fabrics. You may make any size block using any fabric. I’ll announce the winner in our facebook group in case you are lurking there.
Happy sewing!

Disclosure: some of my posts contain affiliate links. If you purchase something through one of those links I may receive a small commission, so thank you for supporting SewCanShe when you shop! All of the opinions are my own and I only suggest products that I actually use. 🙂