Pretty Colored Pencil Roll Tutorial – from Burlap and Lace!

Sophisticated and beautiful coloring books are all the rage right now… have you seen Tula Pink’s? My daughter Chloe is only 10, but she LOVES the fancy new coloring books, and she loves to color them with colored pencils. Right now she keeps her pencils in the box they came in so I thought I’d stitch up something prettier as a last minute Christmas gift. What do you think?

I made it using regular old burlap, some vintage lace (& a button) from my stash, along with some muslin and lightweight 7oz cotton duck cloth from Canvas Etc.

The cotton duck on the inside compliments the burlap nicely but you could use natural colored muslin fabric instead if you’d rather.

To sew a pretty Burlap & Lace Pencil roll, you will need:
-
1 rectangle of burlap 9” x 19” (I pieced 2 scraps together – you can see a seam in some pictures)
-
1 rectangle of natural colored muslin 9” x 19”
-
1 rectangle of 7oz cotton duck 9” x 19” (or muslin)
-
1 rectangle of 7oz cotton duck 12” x 19” (or muslin)
-
15” of vintage lace about 2” wide
-
40” of vintage lace about 3/8” wide
-
2” of hook and loop tape (velcro)
-
1 wooden button
Tips:
Cutting burlap can be tricky. In this blog post I shared some tips for cutting burlap straight.
Imperfections in the burlap only add to it’s charm. 🙂
You’ll also need a fabric marker and clear ruler. I used a Hera Marker from Clover – it never runs out!

Sewing the Pencil Roll Exterior
1. Cut the 3/8” piece of vintage lace in half. Sew the pieces to the 9” x 19” burlap rectangle 3” from the top and bottom.

2. Sew one part of the hook and loop tape to the wider piece of lace on the right side, 3/4” from an end. To do this, sew around the tape close to all edges, backstitch.

3. Place the lace against the burlap, right side down, with the velcro end aligned with the right side of the burlap.
Baste the lace to the burlap along the right side 1/4” from the edge.

4. Pin the burlap to the 9” x 19” piece of natural muslin, wrong sides together. Baste all the way around 1/4” from the edge.


Sewing the Pencil Roll Interior
1. Fold the 12” x 19” piece of cotton duck in half lengthwise, wrong sides together and press.
Use a fabric marker and ruler to mark vertical stitching lines all along the folded piece. Make the first mark 1/2” from one end and then make 24 more marks 3/4” apart. The last mark should be 1/2” from the other end.

2. Place the folded piece on top of the remaining 9” x 19” piece of cotton duck with the bottom edges aligned. Pin in place.

3. Skip the marked lines that are 1/2” from the ends, and sew along all of the other lines that you marked.
I like to start about 1/4” below the fold, backstitch to the top of the pocket, and then sew down to the raw edges. Repeat for all of the vertical lines except for the two closest to the ends.

Sewing the Pencil Roll Together
1. Place the interior and exterior right sides together and pin.

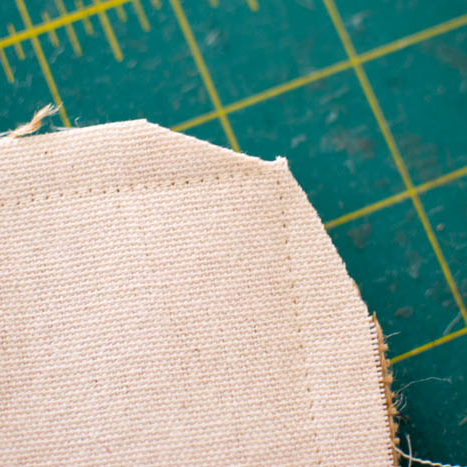
2. Sew all the way around, leaving a 4” opening at the bottom for turning.
Clip the corners.

3. Turn the roll right side out. Press the raw edges at the opening to the inside, and then press the entire piece.
Topstitch all the way around using the edge of your presser foot as a guide. Keep the lace strap out of the way.


Finishing the Lace Closure
1. Insert all of the pencils. If you don’t have colored pencils handy, use any other pencils that you do have. This is necessary to help you cut the lace to the right length.
2. Roll up the case and wrap the lace strap snugly around it. Cut the lace 2” past the end of the roll, as seen in the second picture above.

3. Working from the wrong side of the lace, fold the raw edge back 1” and pin the remaining piece of hook and loop tape on top. Stitch in place.

4. Sew the button to the end of the lace strap on the right side, if desired. It is decorative only, so you can skip the button if you want.

And you’re done! It may seem like lots of steps, but this is really an easy sewing project. You could substitute pretty quilting cotton for all of the fabric pieces too – make it your own! Let me know what you think in the comments below and if you make one share pictures in our SewCanShe Sewcialites facebook group.
Happy sewing!

Disclosure: some of my posts contain affiliate links. If you purchase something through one of those links I may receive a small commission, so thank you for supporting SewCanShe when you shop! All of the opinions are my own and I only suggest products that I actually use. 🙂


