Tetris themed iPad and Tablet Case: free pattern
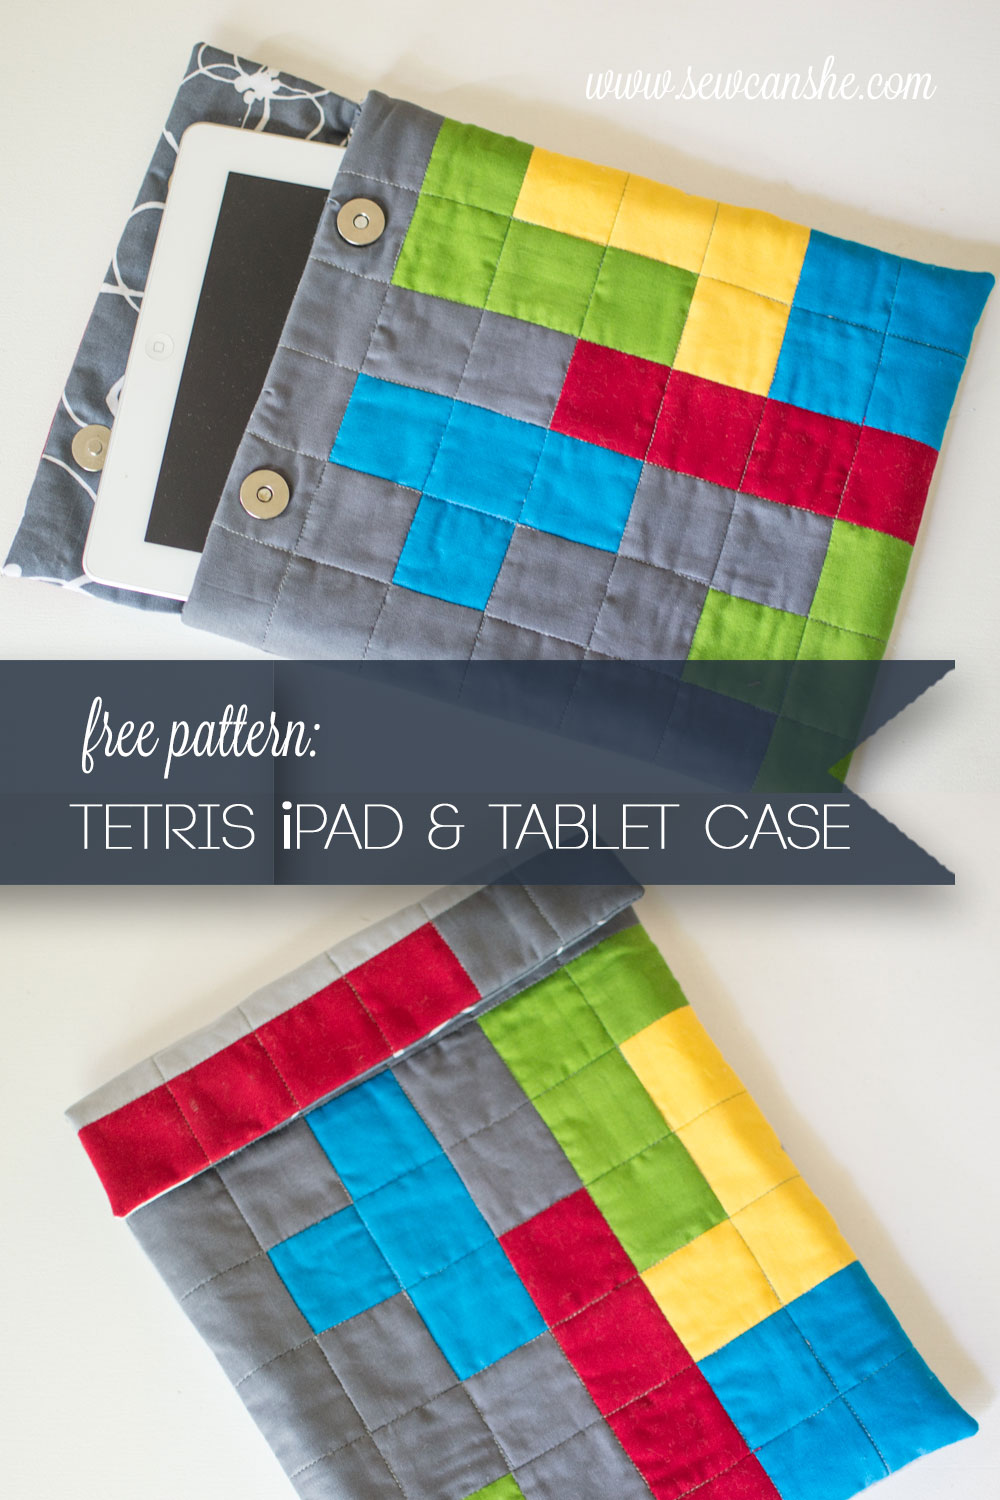
This fun case looks old-school like a Tetris game on the front, but it is made to hold the latest model iPad or Tablet.
The finished size is 11” tall by 9” wide.
UPDATE: This blog post has been converted to an optional PDF that’s optimized for printing. Find it here. The pattern in the blog post below is totally free to read, print, and sew! Just hit CTRL +P on your computer to print. The PDF download is inexpensive and optional.
It’s totally easy to make with a bit of patchwork and some straight line quilting.
I used Kona Cotton solids, but I bet it would look really cute in prints too.
You will need:
- 1/4 yard light gray cotton fabric
- Scraps of red, yellow, blue, green, and charcoal colored cotton fabric
- 1/4 yard lining fabric
- 1/2 yard HeatnBond medium weight fusible interfacing
- small pieces of cotton quilt batting
- SpraynBond quilt basting spray
- 2 magnetic snaps
- scraps of heavyweight interfacing to reinforce magnetic snap
- gray thread
quilt marking pen
Note: all seam allowances are 1/4”
Cutting
From the scraps of colored fabric cut:
- 8 red 2” squares
- 8 green 2” squares
- 8 blue 2” squares
- 4 yellow 2” squares
- 14 charcoal 2” squares
- 1 charcoal rectangle 9 1/2” x 2”
From the light gray cotton fabric cut:
- 1 rectangle 9 1/2” x 11”
- 1 rectangle 9 1/2” x 2”
From the lining fabric cut:
- 2 rectangles 9 1/2” x 11”
- 1 rectangle 9 1/2” x 3 1/2”
From the medium weight fusible interfacing cut:
- 2 rectangles 9 1/2” x 11”
- 1 rectangle 9 1/2” x 3 1/2”
From the cotton quilt batting scraps cut:
- 2 rectangles 9 1/2” x 11”
- 1 rectangle 9 1/2” x 3 1/2”
Preparation:
Fuse the medium weight interfacing to the lining pieces.

Patchwork:
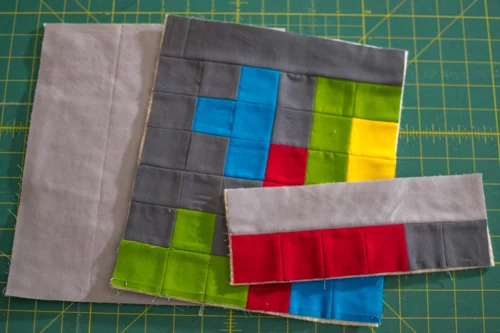
1. Arrange most of the 2” squares according to the diagram. Sew them together in four groups of nine. Then sew the nine-patches together. Press all seams open.

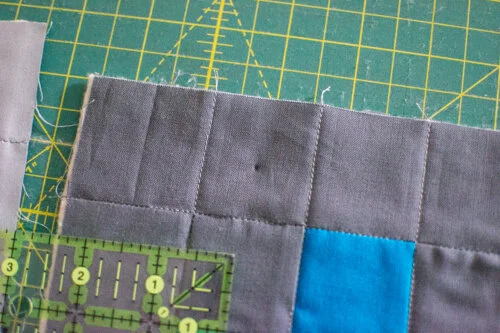
2. Sew the charcoal 9 1/2” x 2” rectangle to the top of the patchwork block. This is the exterior front piece.

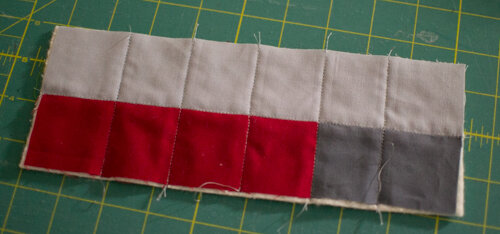
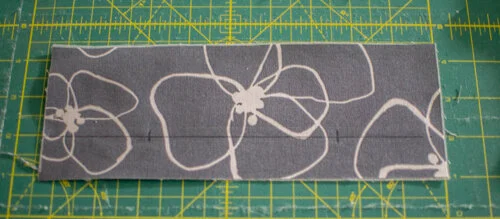
3. Arrange the remaining red and charcoal 2” squares in a row according to the diagram. Stitch and press seams open.

4. Sew the light gray 9 1/2” x 2” rectangle to the top of the patchwork strip. This is the exterior flap piece.

Quilting
1. Use the SpraynBond quilt basting spray to adhere the exterior front piece, exterior flap piece, and the light gray 9 1/2” x 11” rectangle to the same size pieces of quilt batting. The light gray piece is the exterior back piece.
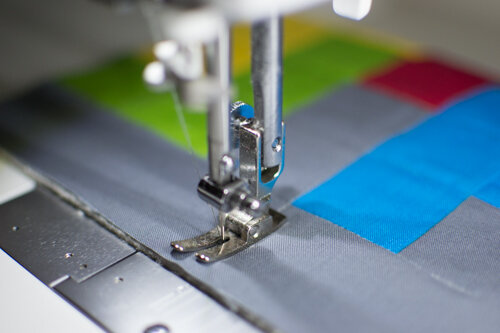
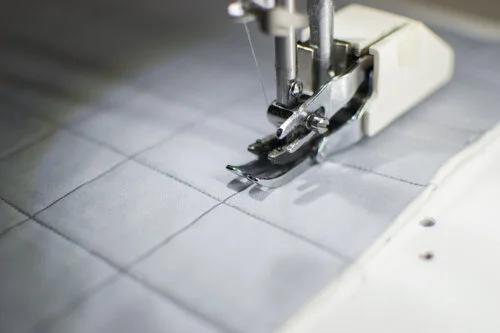
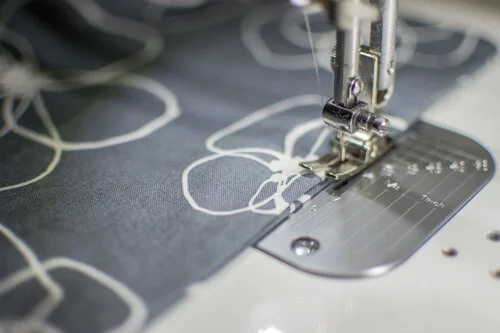
2. Quilt the exterior front piece using stitch-in-the-ditch along all patchwork seams. Continue the vertical lines through the charcoal strip at the top.
3. Quilt the exterior flap piece in the same manner, also extending the vertical lines through the light gray strip at the top.
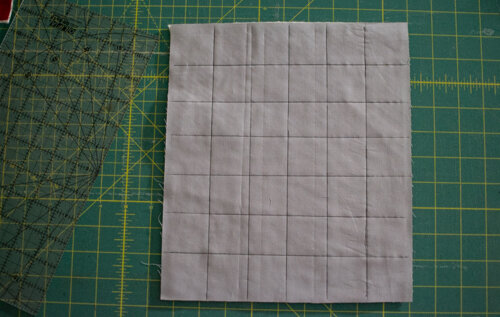
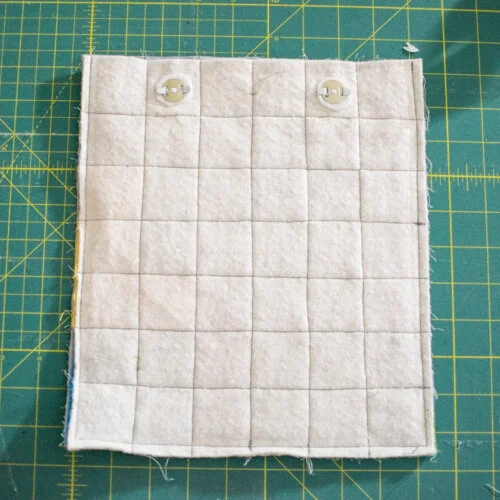
4. Using a quilt marking pen, mark the exterior back piece so that you can quilt it in the same pattern as the exterior front piece. The lines should be 1 1/4” away from the edges and 1 1/2” away from each other.
5. Quilt the exterior back piece along the marked lines.
Insert the Magnetic Snaps
1. On the exterior front piece, make a mark in the second square in the top row. The mark should be 3/4” from each quilting line and 1 1/4” from the top.
Make a mark in the same place in the 5th square across.
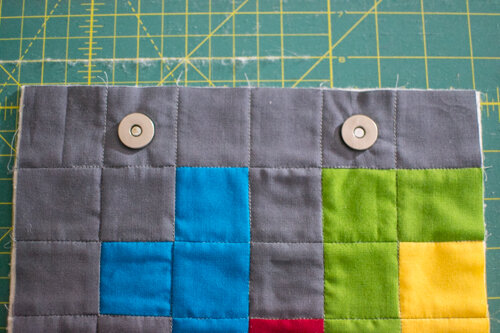
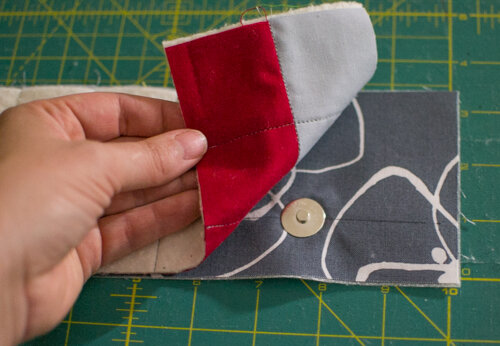
2. Insert the female side of the magnetic snaps in the marked locations, through all layers. Cut a scrap of heavyweight interfacing into a circle and use to reinforce the back of the snap.
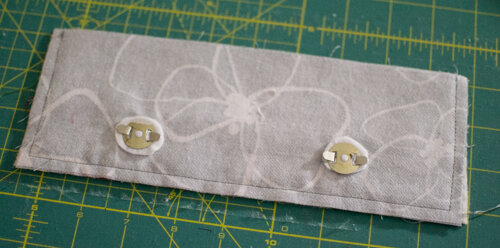
3. Using the quilt marking pen, draw a line 1” from the bottom of the 9 1/2” x 3 1/2” flap lining piece. Mark the intersection of this line 2 1/2” from each side.
4. Insert the male side of the magnetic snaps in the marked locations. Cut a scrap of heavyweight interfacing into a circle and use to reinforce the back of the snap.
Assemble the Case
1. Place the flap exterior piece and the flap lining piece right sides facing. The magnetic snaps should be opposite the patchwork squares. Pin.
2. Stitch around the sides and bottom of the flap piece.

3. Pin the exterior right sides together and sew around the sides and bottom.
Repeat this step with the lining pieces, except leave a 4” opening in the lining for turning.
4. Clip the corners on all three pieces. Turn the exterior and flap right side out and press gently, making sure corners are completely turned out.

5. Pin the flap to the back of the exterior, with the patchwork side of the flap against the right side of the exterior back, centered.
6. Baste in place within the 1/4” seam allowance.
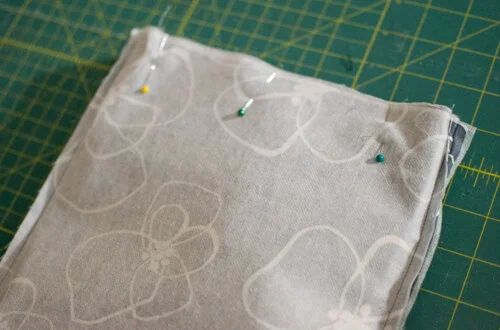
7. With the exterior right side out and the lining still inside out, place the lining over the exterior. The right side of the lining should be against the right side of the exterior and the side seams should line up. Pin around the top edges. Stitch.
8. Turn right side out through opening in lining. Gently press. Stitch opening in lining and stuff lining into case.
As always, I love to see what you are sewing up with my patterns and tutorials! Upload a picture to Instagram and tag me #sewcanshe or @sewcanshe so I can take a look!
Happy Sewing!

Disclosure: some of my posts contain affiliate links. If you purchase something through one of those links I may receive a small commission, so thank you for supporting SewCanShe when you shop! All of the opinions are my own and I only suggest products that I actually use. 🙂