How to Design-Your-Own Mini Quilt – free tutorial
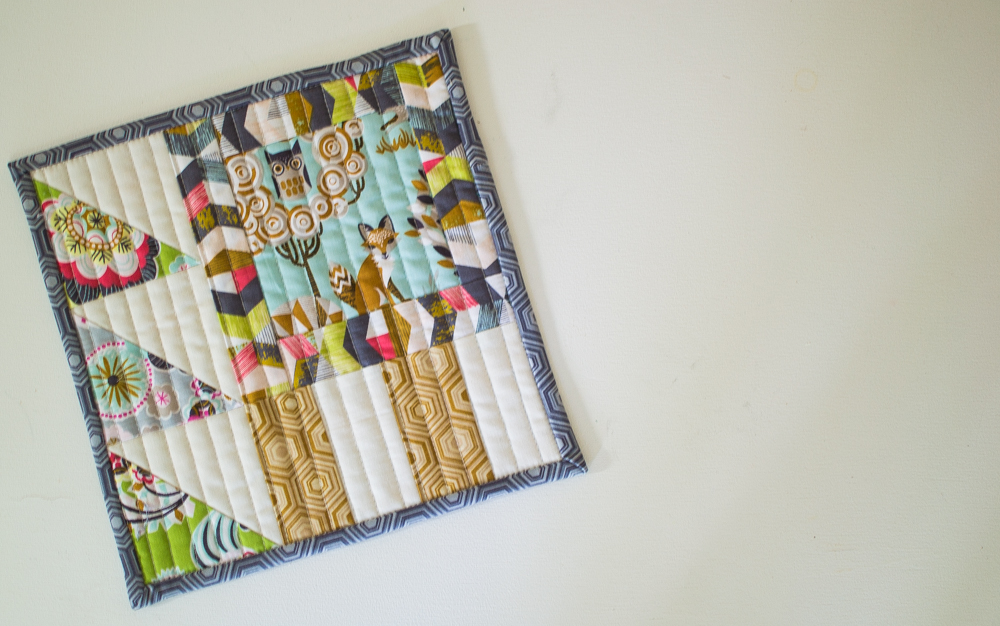
Do you have a favorite scrap of fabric that is so beautiful you could frame it? Make it the focal point of a mini quilt! This free tutorial shares how to start with a 4” x 4” piece of fabric and add more fabric pieces and shapes until you have a masterpiece.

Mini quilts are so much fun. They are quick to piece together, way easier to quilt than even a lap-size quilt, and they make truly memorable gifts (if you can bear to give yours away).
Our Design-Your-Own Mini Quilt is a 9” square.


This mini quilt is composed of 3 units that can be moved around, turned, and arranged in lots of different ways.
The first unit features a 4” fussy cut square highlighting one of your favorite fabrics!
After you sew the 3 units, move them around to find the most pleasing arrangement to you.


Sewing Unit 1
All seam allowances are 1/4”.
Cut:
- 1 fussy cut 4 1/2” square, from your focus fabric
- 1 strip 1 1/2” wide from a ‘framing’ fabric. Sub-cut this strip into 4 pieces that are 4 1/2”, 5 1/2”, 5 1/2”, and 6 1/2”.
Piecing:
Sew the framing pieces around the square starting with the smallest one. Refer to the photos above.

Sewing Unit 2
Cut:
- 2 rectangles 2” x 3 1/2” from a print fabric
- 2 rectangles 2” x 3 1/2” from a coordinating solid fabric
Piecing:
Sew the rectangles together in an alternating pattern as in the photo above.

Sewing Unit 3
Cut:
- 2 squares 4” or 3 7/8” from a print fabric
- 2 squares 4” or 3 7/8” from a coordinating solid fabric
Piecing:
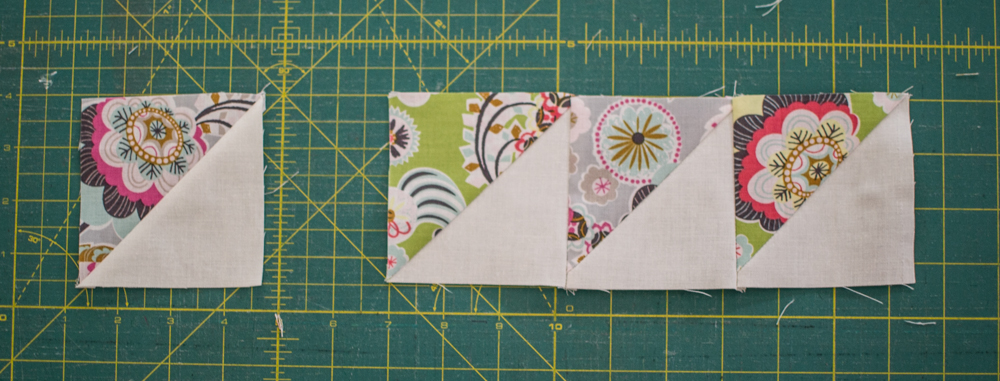
Sew the squares together to make 4 half square triangles using my easy HST method (or your own). Trim the HST’s to 3 1/2”, if needed.
Select your 3 favorite HST’s and sew them in a row. You don’t have to sew them all pointing in the same direction as I did. Have fun! One HST will be left over.

Now move your three units around until you like the way they look together.
This is how I liked mine best.

Sew Units 1 and 2 together.

Add Unit 3 where you want it to go.

Making a Mini Quilt Sandwich
Cut:
- 1 square 11” from backing fabric
- 1 square 11” from quilt batting
Layer the backing and quilt top with the batting in between. Secure with quilt basting spray, if desired. I love SpraynBond for small projects like this.

Quilt your mini as desired. For mine, I attached a walking foot and sewed straight lines about 1/2” apart. I like this method because I can start and stop on the batting and cut that part off later.

After quilting, trim away the extra batting and backing and square up the block. It will be approximately 9”.

Binding
Cut:
- 1 strip 2 1/2” tall and the width of your binding fabric
That’s right, this lucky little quilt only needs one binding strip.
Attach the binding using your favorite method. Here is my favorite binding method.

Check out all my free mini quilt patterns!
Disclosure: some of my posts contain affiliate links. If you purchase something through one of those links I may receive a small commission, so thank you for supporting SewCanShe when you shop! All of the opinions are my own and I only suggest products that I actually use. 🙂
