How to Design Your Own Triangle Quilt! {tips & tricks}

Equilateral triangle quilts are relatively easy to make because there is only one size and shape to cut out – and you’ll cut out lots of them. Start with a plan (whether you want random triangles or a carefully arranged design) and I’ll provide some tips for making your work go smoothly.
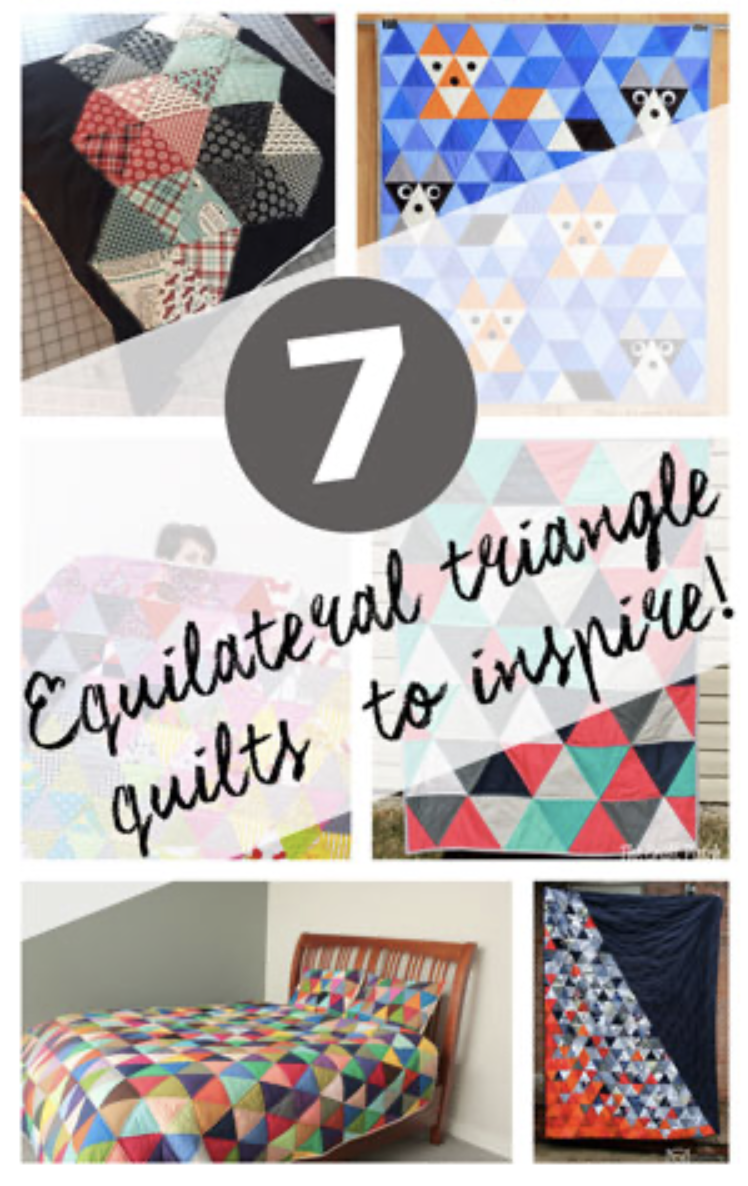
Triangle quilts are so fresh and modern, and can be stitched up in ‘sew’ many ways. Don’t believe me? Check out all of these free patterns for inspiring triangle quilts.

For my triangle quilt mini, I used triangle graph paper and some of my kids crayons to plan my little guy ahead of time. For his nose, I sewed two triangles together to make a pink corner on one. I’ll demonstrate that after I show some tips for sewing triangles together.

Tips for sewing an Equilateral Triangle Quilt
Tip #1 – press and starch your fabric. Do this before cutting to make your life easier, and then keep pressing as you go, using starch as needed. I don’t always use starch in my quilt piecing (I know some quilters do), but for all of these off-grain cuts, it really helps to make the fabric behave.
Tip #2 – how to cut equilateral triangles.
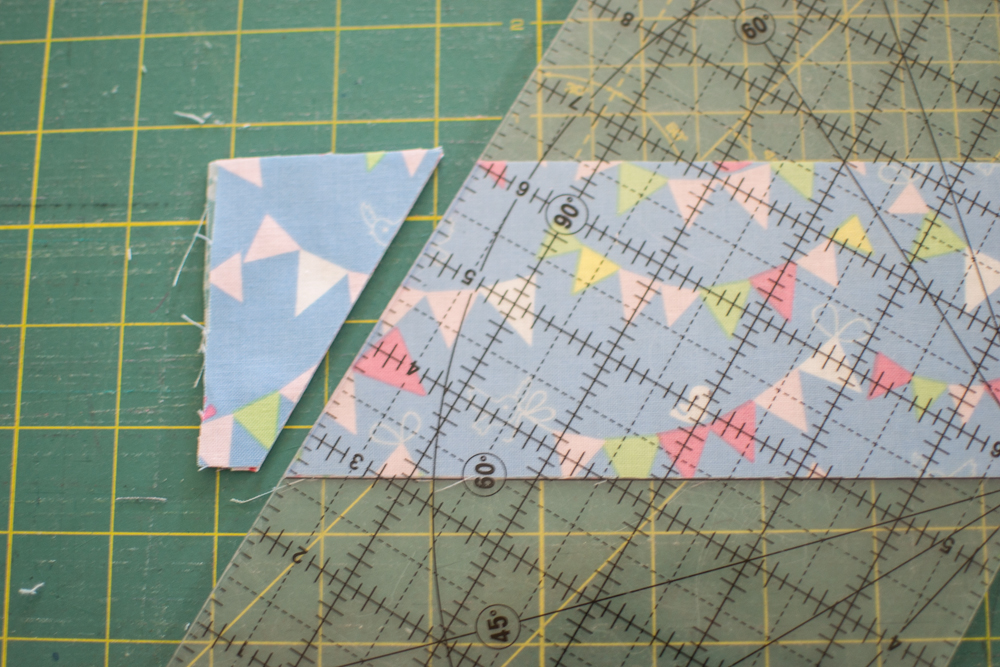
Start by cutting strips of fabric 3/4” taller than you want the finished triangles to be. You can stack up 4-6 strips to cut into triangles together if you have a sharp rotary blade.
If you remember your geometry, the interior angles of all triangles add up to 180. Equilateral triangles have three equal angles and 180 / 3 = 60. So find a ruler with one or more 60 degree lines marked on it. Most quilting rulers have some angle lines marked.
Line up the 60 degree line with the bottom of your strip and cut off the extra fabric at the end to make a nice 60 degree point. (first picture above)
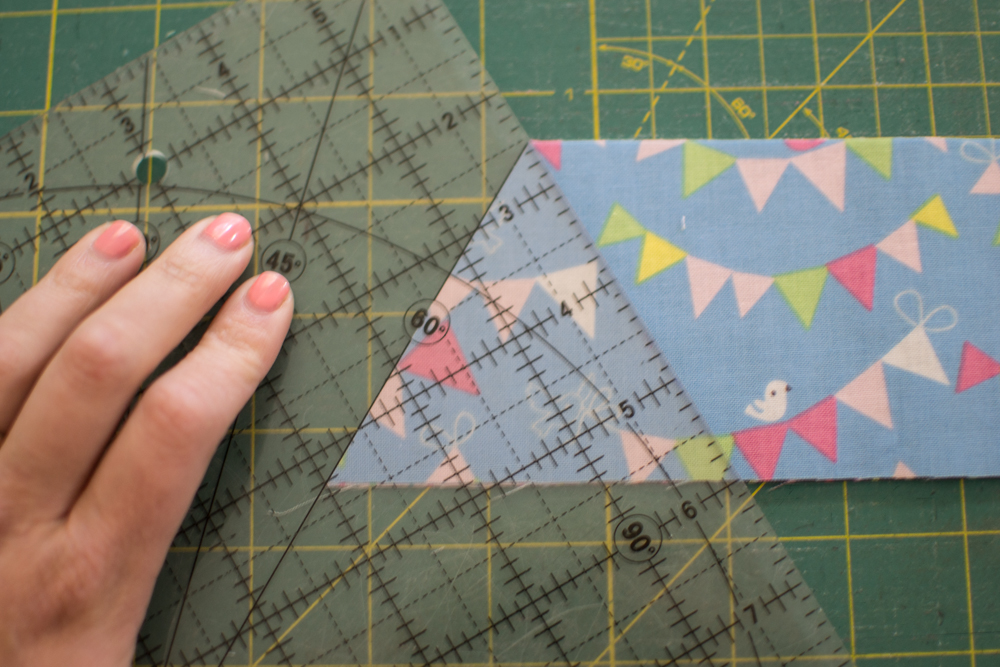
Then turn the ruler to put the 60 degree line against the cut you just made. Slide the edge up to the point so you have a triangle and cut again. (second picture above)
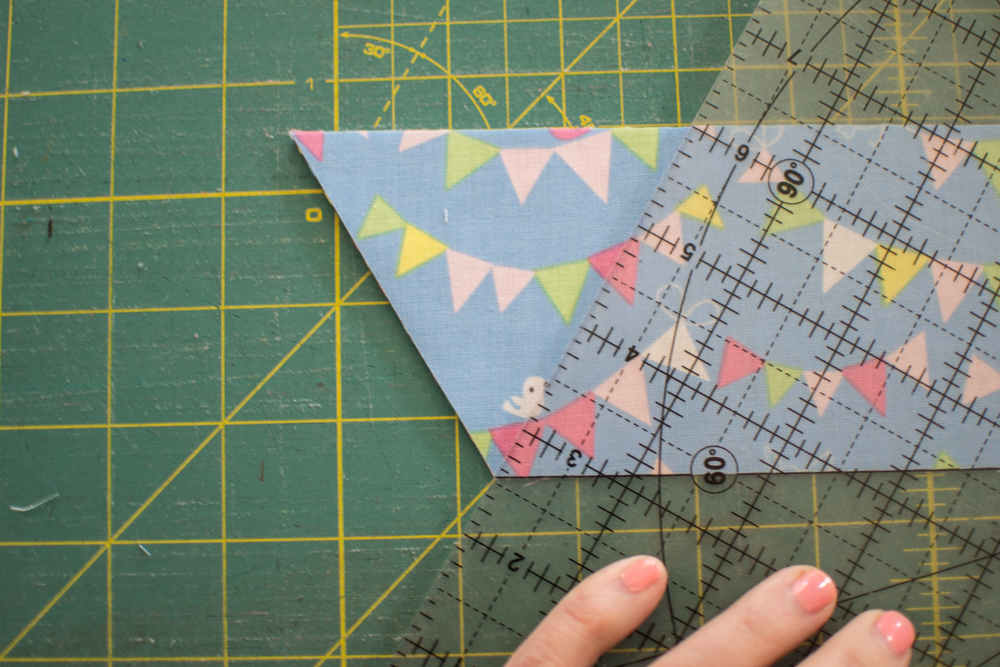
Repeat the process, moving the 60 degree line on your ruler back and forth from the bottom edge to the side edge, cutting the whole strip into triangles (third and fourth pictures above).
Now you arrange the triangles as desired or get ready to piece them randomly.

Tip #3 – press your seams open.
I usually press my seams to the side so I can nest the seams easier. But when sewing triangles together, I think open seams are easier to work with.
To make the work go faster, sew the triangles together in pairs. Having open seams really helps when its time to sew the pairs together. You don’t need think about how to offset the seam lines to make them match, just line up the pressed open corners.

Tip #4 – more starch.
If you end up with a row that is not straight after sewing the rows together, here’s a secret for making it behave. Spray a bunch of starch on it and without pulling or stretching, ease it into a straight line on your ironing board. Then use an up and down motion with your hot iron to ‘set it,’ pressing until it is dry. Voila! Straight row.

Tip #5 – use pins to make the corner points match up. Even if you don’t usually pin while quilting, it will help your triangle points here.

You may use 1/2 triangles at the sides of your quilt or trim away the extra fabric later. I like to use whole triangles so I have a little more freedom when trimming and squaring up later.
You could also work the angles into your quilt design if you’re up for sewing binding with lots of corners.
Tip #6 – How to piece a triangle corner from different fabric.
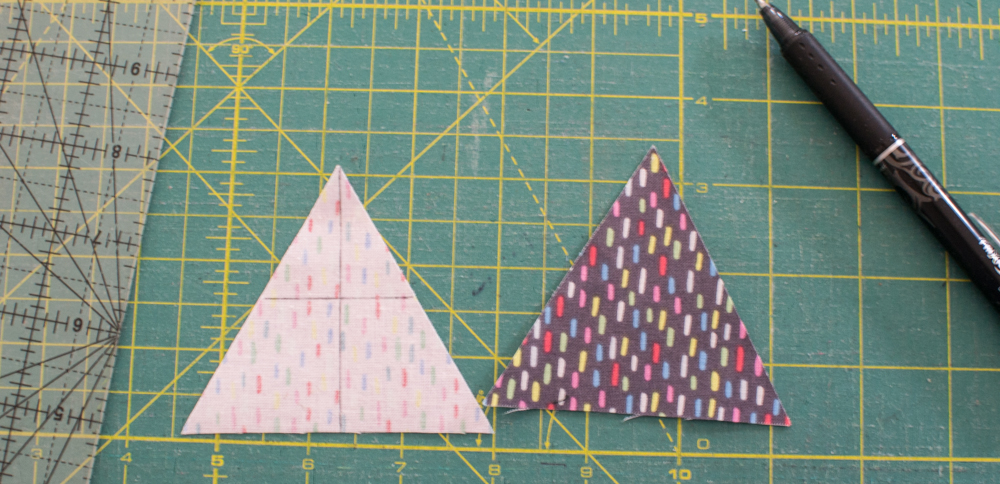
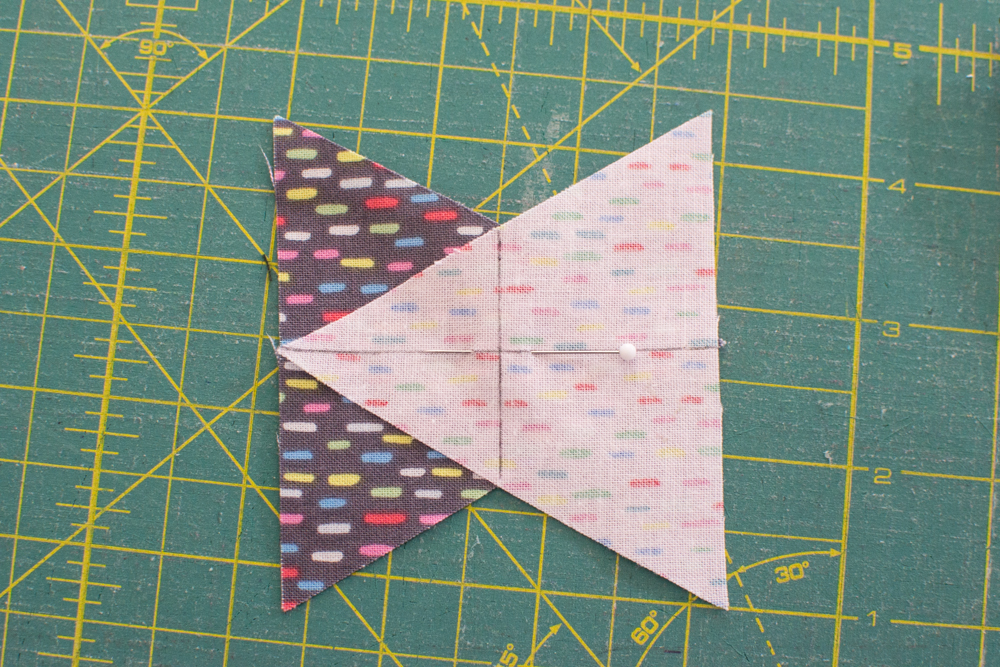
On the back of the lighter fabric use a pencil or fabric pen to draw two lines, one horizontally through the middle (use your ruler to put it exactly in the middle, top to bottom), and one vertically through the middle. (first picture)
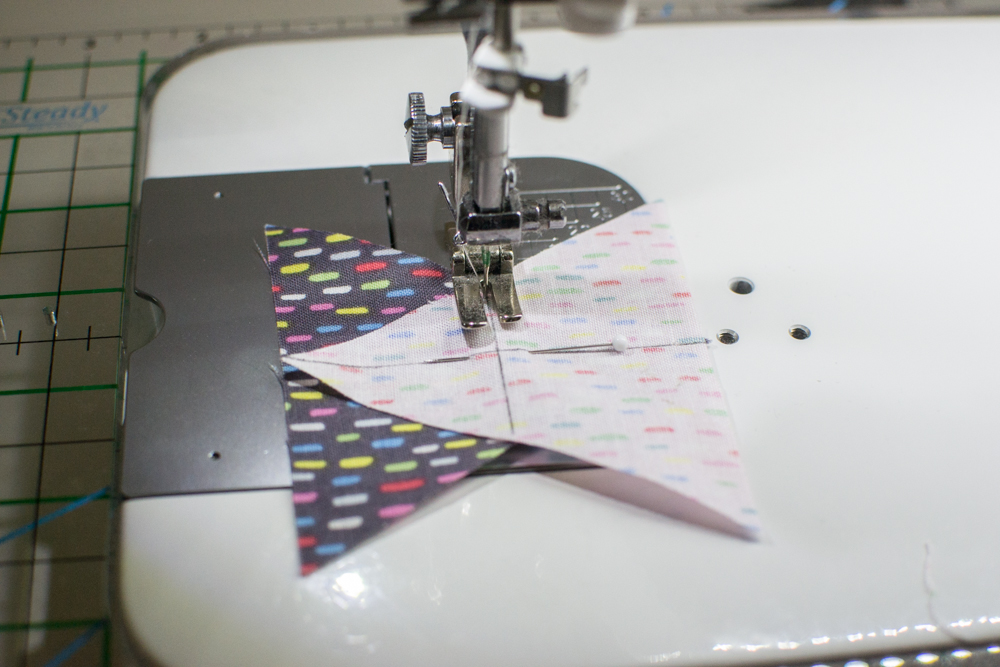
Use the vertical line to pin the triangles right sides together as shown in the second picture. The point of the triangle on the bottom should be lined up underneath the vertical line on the triangle on top.
Sew along the shorter horizontal line (third picture). {FYI: If you sewed along the vertical line you would get a half/half triangle. Might be cute!}
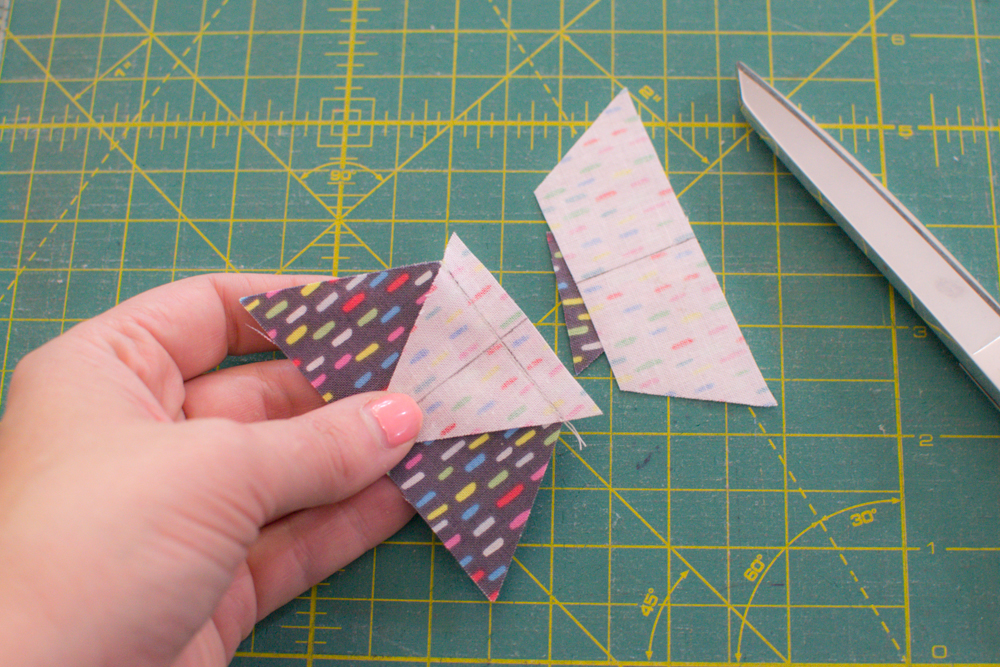
Open up both sides of the sewn unit and decide which side you want to keep. Trim away the extra fabric from the other side with a 1/4” seam allowance. (fourth picture)

Most people quilt equilateral triangle quilts with a straight line design. It’s easy to do – I used the edge of my walking foot along the seams lines as a guide.

And it makes a really cute geometric design on the back!

Happy quilt making!

Disclosure: some of my posts contain affiliate links. If you purchase something through one of those links I may receive a small commission, so thank you for supporting SewCanShe when you shop! All of the opinions are my own and I only suggest products that I actually use. 🙂

