How to Sew Chair Pockets for a Classroom!
Learn how to sew chair pockets for an elementary school classroom. This easy tutorial will help you be the hero of your favorite child’s teacher. Sewing these chair pockets (or seat sacks) for an elementary school classroom turned out to be really fun and a lot easier than I expected!

I’m so glad that my daughter’s teacher asked me to make these, because it will really help the kids keep their items organized and separate – less likely to spread germs! So if your kid’s teacher ever asks you about making chair pockets for the class, say yes – I’ll show you how.
The blog post below is totally free to read, print, and sew! Just hit CTRL +P on your computer to print. There is an optional PDF download offered at the end of the post. Join our Sewing Bee Community for access to over 300 PDF patterns (including this one), live workshops, premium video courses, and more.

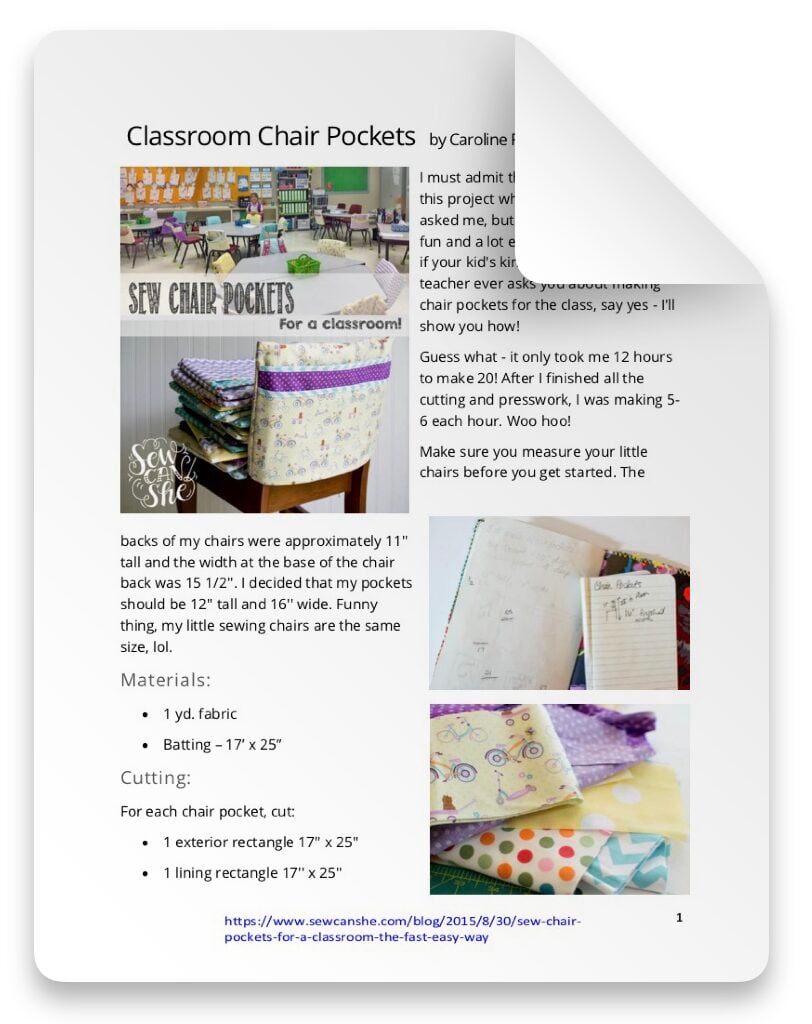
Guess what – it only took me 12 hours to make 20! After I finished all the cutting and presswork, I was making 5-6 each hour. Woo hoo!

Make sure you measure your little chairs before you get started. The backs of my chairs were approximately 11” tall and the width at the base of the chair back was 15 1/2”. I decided that my pockets should be 12” tall and 16” wide. Funny thing, my little sewing chairs are the same size, lol.

To sew the same chair pockets that I made, each one will require about a yard of fabric and a 17” x 25” piece of quilt batting. I pulled a whole bunch of different fabrics from my stash – mixing lavender, aqua, and yellow. Sweet combination.
Cutting:
For each chair pocket, cut:
- 1 exterior rectangle 17” x 25”
- 1 lining rectangle 17” x 25”
- 1 batting rectangle 17” x 25”
- 1 large pocket rectangle 17” x 21”
- 1 small pocket square 17” x 17”
- 2 pocket binding strips 1 3/4” x 17”


Binding Prepwork:
Fold the edges of the binding strip to the center and press. I used my Clover 1” bias tape maker tool to make quick work of it.
Then fold the strip in half lengthwise and press.

Here’s my pile of 40 – two for each chair pocket.

Sewing:
Fold and press each pocket piece in half with the 17” edges together.
Wrap a binding piece around the folded edge of a pocket and sew it down close to the fold.
Repeat for the other pocket.

Lay the 17” x 25” batting rectangle on your workspace and smooth out the exterior rectangle of the same size on top of it, right side up.
Then line up the two pocket pieces with the bottom 17” edge of the exterior. The smaller pocket goes on top of the larger one, and they are also both right sides up.

Now place the lining rectangle on top, right side down. Pin along both of the shorter edges.
Using a 1/2” seam allowance, stitch along the shorter edges only – not the long edges.

After sewing, Turn the lining to the back and press along the seams you just sewed.
Lay the pockets flat against the exterior piece, as before.
Sew basting stitches along the raw edges of the pockets to hold them in place, if desired.

Bring the top edge down to meet the bottom and make sure the pockets are flat on the inside. Pin along the side edges.

Stitch the sides, again with a 1/2” seam allowance.

Flip the cover right side out and check to make sure your side seams are good. If the pockets are straight and all the layers were sewn properly…

Turn inside out again and serger or zig zag the raw edges together for a nice finish.

And that’s one done! If you are planning to sew a lot, here are my tips:
- Use ugly fabric (we all have it!) for the lining, it won’t show at all.
- Do all of your cutting and pressing first so you can sew assembly line style later.
- If you are really in a hurry you can use wide double fold bias tape for the pocket binding. If you used thicker fabric for the exterior – such as canvas or upholstery fabric – you could skip the quilt batting. But it think it make the seats more comfortable and since I have a kid in the class, I don’t mind putting it in.
Happy back to school sewing! Don’t miss my 3-ring Pencil Pouch tutorial, I’ve been seeing some reader-sewn versions on Instagram, yay!

CHAIR POCKETS SEWING TUTORIAL
Purchase this pattern in PDF format! The PDF file contains all of the instructions, plus the step by step photos that have been reduced to fit the page nicely with no ads.
Download the file immediately and keep your confirmation email so you can download it again later. Unlimited downloads are available from the confirmation email. Free patterns must be downloaded within 30 days.
Disclosure: some of my posts contain affiliate links. If you purchase something through one of those links I may receive a small commission, so thank you for supporting SewCanShe when you shop! All of the opinions are my own and I only suggest products that I actually use. 🙂