Easy Quilt Block Tutorial: the Bow Tie Block!

|


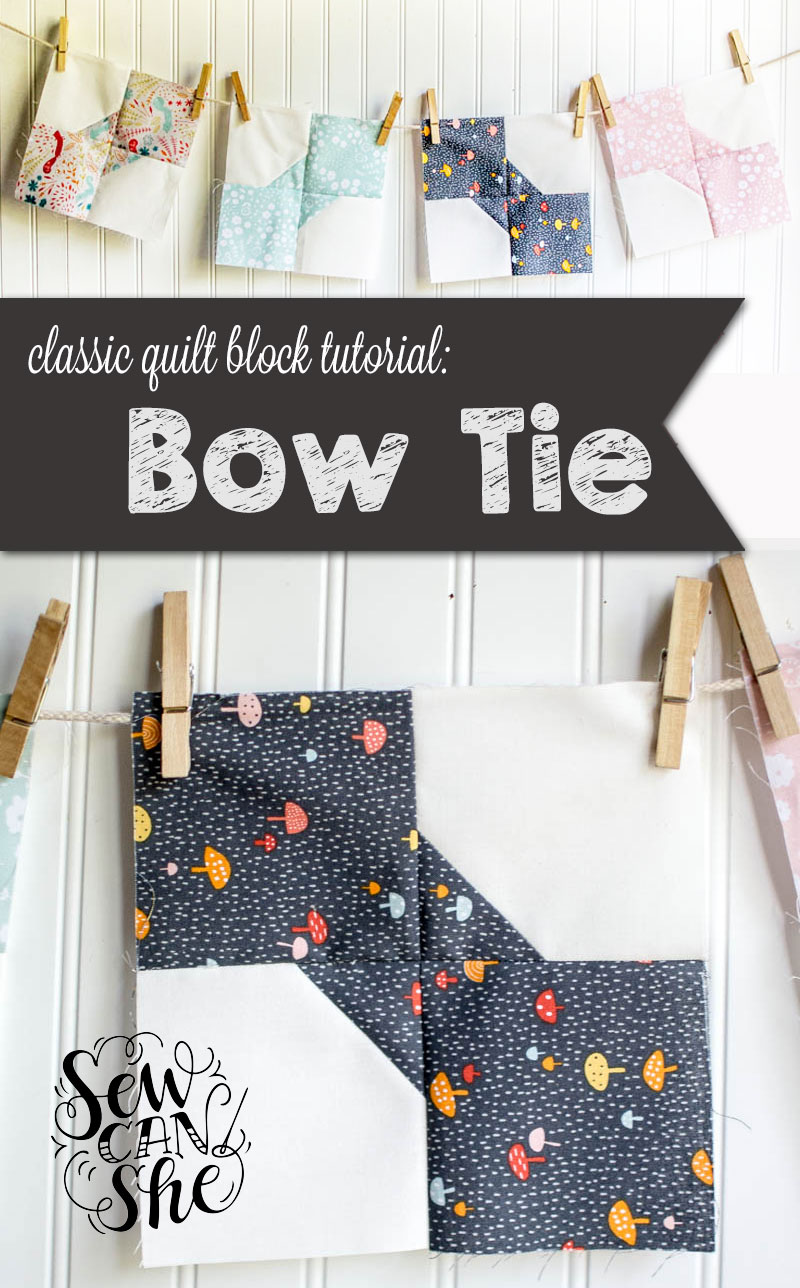
The easy Bow Tie Quilt Block is so fun to make – and it’s perfect when you want to make a baby quilt for a boy or a girl!

This tutorial contains cutting instructions for a 8’’ and a 12’’ quilt block (finished).

UPDATE: I decided to sew a whole bunch of bow tie quilt blocks and make a baby quilt with them! Check out my free bow tie baby quilt pattern here.


So let’s sew some easy bow tie quilt blocks!


Bow Tie Quilt Block Tutorial

These instructions are for an 8” (finished) quilt block. Dimensions for a 12” (finished) quilt block are provided in parentheses. All seam allowances are 1/4”.

Cutting:

From a print fabric, cut:

  • 2 squares 4 1/2” (6 1/2”)

  • 2 squares 2 1/2” (3 1/2”)

From a contrasting solid fabric, cut:

  • 2 squares 4 1/2” (6 1/2”)


Sewing:

1. Draw a diagonal line across the wrong side of the smaller squares. Pin the smaller squares to the corners of the larger solid squares as shown above.


2. Sew along the line that you drew. Repeat on the other unit. Using scissors or a ruler and rotary cutter, cut away the corners of the sewn units 1/4” past the sewn line.


3. Open and press.


4. Arrange the sewn units and the print squares as shown above and sew together.

Sew 2 rows first, and then sew the 2 rows together. 


_DSC0438-1.jpg

I love easy blocks like this one. I tend to make a whole bunch and then have fun arranging them into a quilt on my quilt design wall.

If you like this free sewing tutorial, check out my Easy Quilt Block Pinterest Board.


Disclosure: some of my posts contain affiliate links. If you purchase something through one of those links I may receive a small commission, so thank you for supporting SewCanShe when you shop! All of the opinions are my own and I only suggest products that I actually use. 🙂

Similar Posts

11 Comments

    1. Good question. You do NOT need to have a blog or include a link to enter, just upload a picture to prove you made one. If you did blog about your block, feel free to link so we can read the post. 🙂

  1. Very exciting! I only had a chance to make one or two of the blocks last year. I moved and just recently dusted off my sewing machine and pulled out my fabric stash. I am a beginner when it comes to quilt blocks, so this is a perfect start for me. :o)
    Melissa

  2. Anne McKenzie says:

    Who do we address the email, with our uploaded picture, to? I sent mine in, but haven’t seen where it is posted

  3. This is the year I decided I want to learn to quilt and I just happened upon your blog! This is a great jumping off point for me. Thank you!

  4. Jacquelynn Rose Smith says:

    I cant figure out how to add my bowtie block picture:( It’s my first one ever and even though its a bit crooked I’m very proud and excited!

  5. Hi everyone.
    This is my first venture into quilt blocks, I’ve only ever done one appliqué quilt before but I normally make children’s clothes. So after making the first block I have a question. How do I store the blocks for the next 12 months? I don’t really want to fold them because a 12 month old crease won’t be easy to get out.
    Thanks everyone xx

    1. First off, I have had great luck getting creases out of quilt blocks and tops by pressing with a hot iron and using spray starch or magic sizing.

      But I understand your desire to not get creases in the first place. Can you store them flat anywhere, like on top of a shelf or book case (protected from dust, of course)? If they aren’t too big you could put them in a file folder.

      Does anyone else have any ideas?

      xoxo,
      Caroline

  6. graciela ferrari says:

    Hello, I made my blocks of different sizes, I also one teeny well the final measure is an inch and a half,
      How should I send the picture? thank you very much my email is gracielarte@gmail.com

  7. graciela ferrari says:

    Thanks and I I could upload my images, thanks for the giveaway

Leave a Reply