Easy Quilt Block Tutorial: Double Diamonds Block – perfect for fussy cutting

I love this easy quilt block. It has clean and simple lines and a fun geometric pattern that makes it both classic and modern. Plus it’s perfect for fussy cutting.

Check out how I fussy cut flowers out of the gorgeous Lottie collection from Blend Fabrics.

Are you ready? I sewed each of my blocks with only two fabrics, one print and one solid (Kona Cotton Snow). Feel free to use any combination of fabrics you love.
Finished block size: 12”.
Cutting:
From the print fabric, cut:
- 4 squares 4 3/4” x 4 3/4” (I’ll show you how to fussy cut them below)
From the solid fabric, cut:
- 1 square, 4 3/4” x 4 3/4”
- 1 square 7 1/4” x 7 1/4”
- 2 squares 3 7/8” x 3 7/8”
Fussy Cut Ruler Hack

Fussy cutting is picking out exactly the part of your fabric that you want to show up on your quilt patch. There are specialty rulers for fussy cutting, but it’s easy enough to make your own.
To fussy cut these 4 3/4” blocks, use masking tape (or washi tape) to mark off a square that size on your acrylic ruler. Then put a small dot (I used a sticker) in the center of the square to help you center the design .
Center the Dot and Cut Two Edges

Center the design that you want to fussy cut in the marked off square and cut two sides.
Flip Ruler and Cut the Other Two Edges

Then turn your ruler around and cut the other two sides. Easy!
Back to the tutorial…

Subcut the 7 1/4” square in quarters diagonally.
Subcut the two 3 7/8” squares in half diagonally.
Now Arrange the Patches Like This
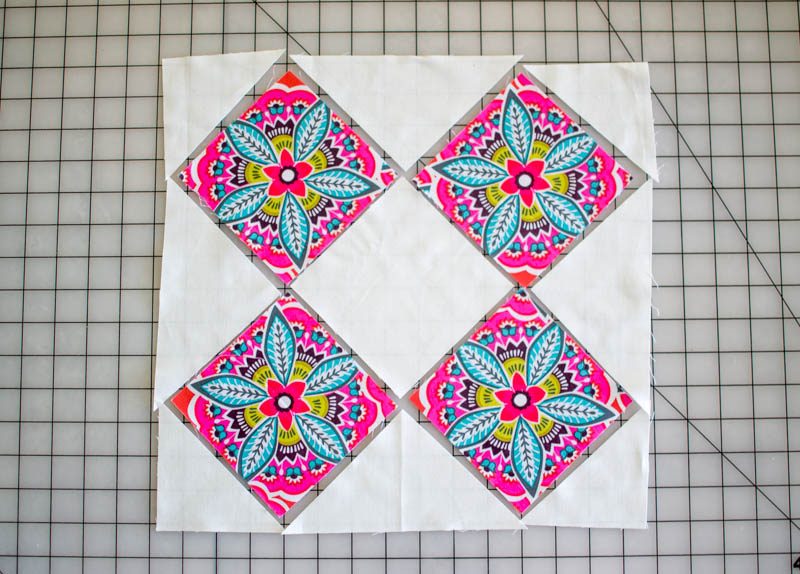
Sewing them together will be easy. Think of it like 5 diagonal rows, the first and last row being a single half square triangle. Press the seams toward the darker fabrics.
So, row 1 = a single triangle, leave it for now.
Rows 2 & 4= QST, Square, QST

Use two quarter square triangles (QST) and a square for the even diagonal rows. Row 4 will be rotated 180o from row 2.
Pay attention to the placement of the triangles. Line up the straight edges and let the small point hang off the edge as shown above.
Trim Dog Ears and Press Seams

After sewing both triangles to the square, trim off the little ‘dog ears’ on the top. Press your seams towards the printed fabric for tidy nesting later.
Row 3 = HST, 3 Squares, then another HST

Use a half square triangle (HST), then 3 squares, and then a half square triangle.
Sew the three squares together with the solid one in the middle.
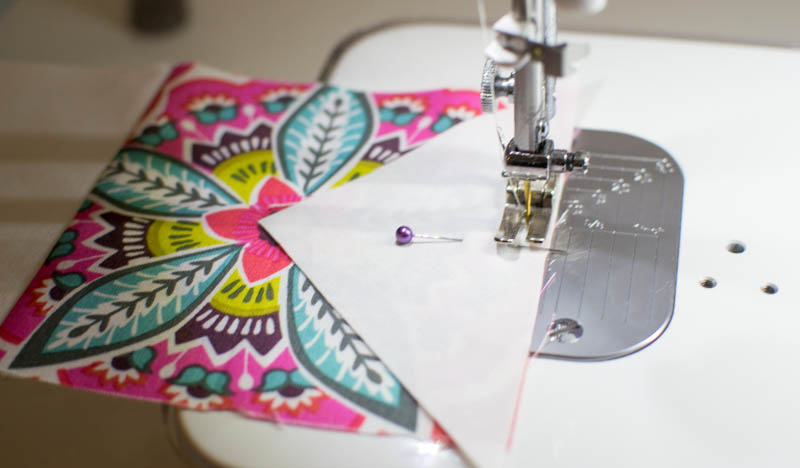
Align Triangle with Square

Fold the triangle in half to find the center and pinch it to crease. Do the same with a square at the end of Row 3. Match up the centers, and pin the triangle to the square. Stitch.
Repeat to sew another half square triangle on the other end of Row 3.
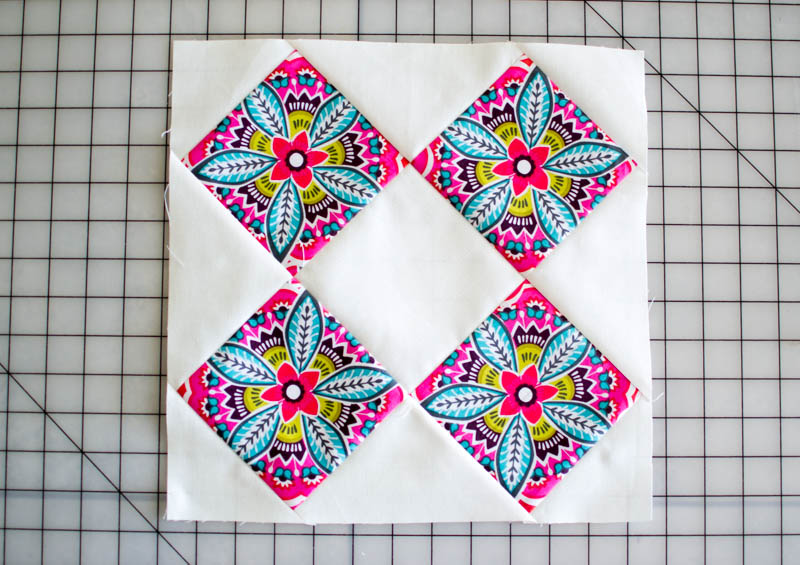
Line Up Diagonal Rows

Sew Row 4 just like Row 2 and line them up. Make sure that the design is oriented the way you want if the print is directional.
Sew Rows Together

Now it’s time to sew the rows together.
Find the centers and sew the triangle that is ‘Row 1’ to the center of ‘Row 2’.

Sew Row 2 to Row 3. If you have been pressing all of your seams toward the print blocks, it will be easy to nest your seams here.
Sew Row 3 to Row 4, and then Row 5 (the triangle) to Row 4.
Trim and square up the block if needed, and you’re done!
I love to see projects that people make from my free sewing tutorials. Please post a picture to Instagram and tag me @sewcanshe so I can take a look!
See more on my Easy Quilt Block Pinterest Board.
xoxo,

More from SewCanShe:

35 Free Quilt Patterns for A Quilting Newbie – All Easy!

How to Sew Straight Line: 20 Pro Tips – It’s Not As Easy As They Say!

Disclosure: some of my posts contain affiliate links. If you purchase something through one of those links I may receive a small commission, so thank you for supporting SewCanShe when you shop! All of the opinions are my own and I only suggest products that I actually use. 🙂