2 Ways to Join Quilt Batting (and use up small pieces)

|


Have you ever had almost enough cotton batting to finish a quilt? Or wondered if left over pieces of quilt batting could somehow be used? Of course you can use them… just join them together.

In this blog post I’m going to show you 2 different ways to join quilt batting and use it for your next quilt,  table runner, or set of potholders! I use both of these methods regularly. They both work equally well with cotton or cotton/poly batting. I’ve never tried this with high-loft polyester batting (the fluffy kind), but if you have, let us know how it works.

You can join quilt batting as much as you want because no one will know if your quilt has Franken-batting on the inside (sorry, Halloween is coming). 

For either method to work, cut the batting edges to be joined as straight as possible. Use a rotary cutter and long ruler if you have them available.


Method #1 – Zig Zag Sew the Pieces Together

This method only requires thread!

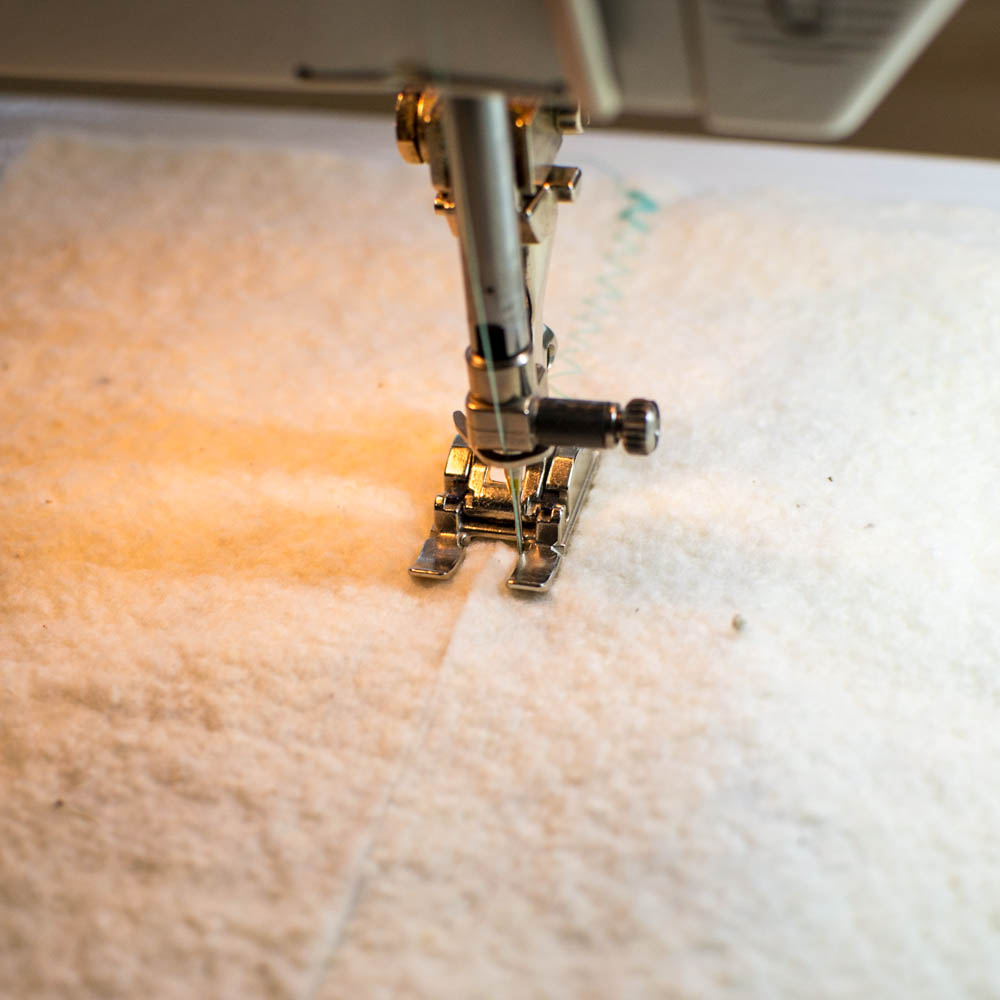
Set your sewing machine to the widest zig zag stitch possible and medium stitch length.

Butt the straight edges up together and sew, zig-zagging down and catching both pieces. Try not to let the pieces overlap, but if they do a little bit it won’t matter. 


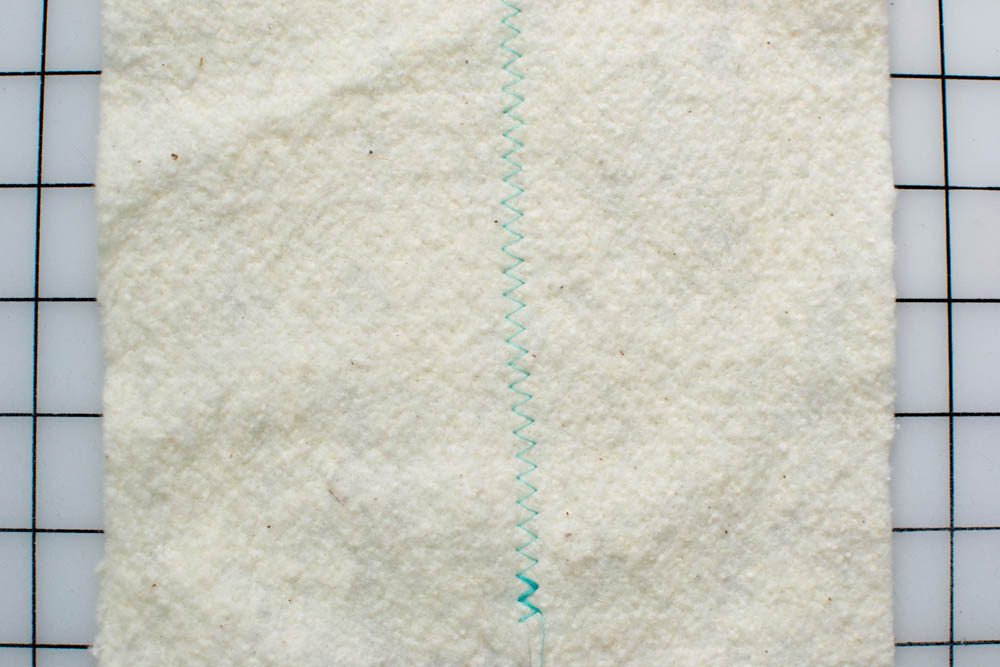
Backstitch at the start and end, just to help you keep the batting together long enough to get the quilt basted and quilted.


_DSC0018.jpg

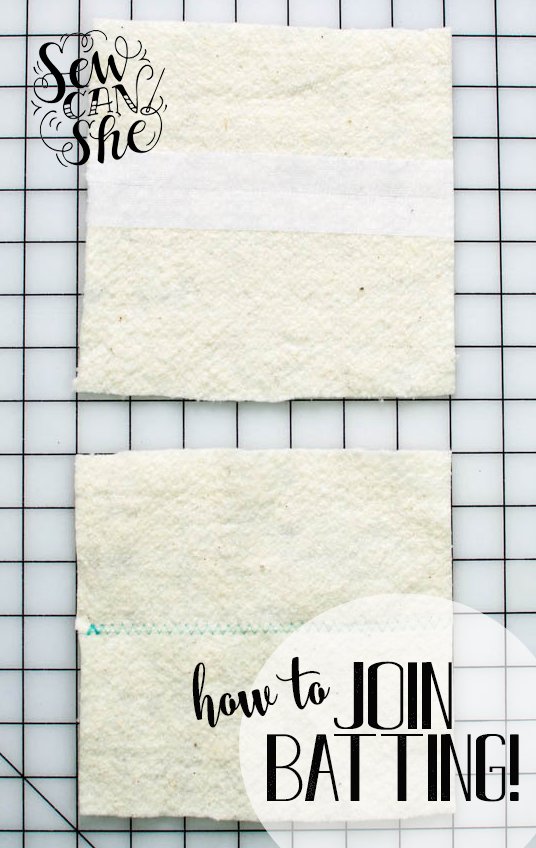
Method #2 – Fuse the Pieces Together

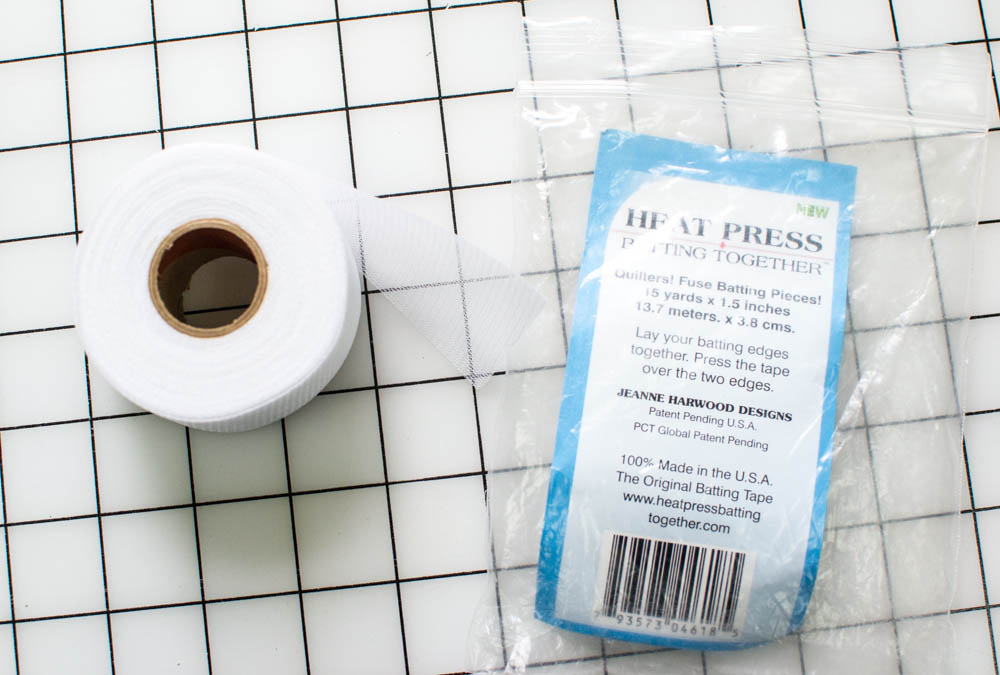
This method requires a product called Heat Press Batting Together (Pellon makes a similar product called Easy Knit Tape, but I’ve never tried it).

It is essentially a long strip of interfacing on a roll. This brand is 1 1/2” wide.


_DSC0020.jpg

Put the two straight edges together, lay a strip of the interfacing over the join, and press to fuse. A little steam helps too. I usually cut strips of Heat Press that are about 18” long. Trying to fuse a really large piece of batting with only one strip could be tricky.


_DSC0025.jpg

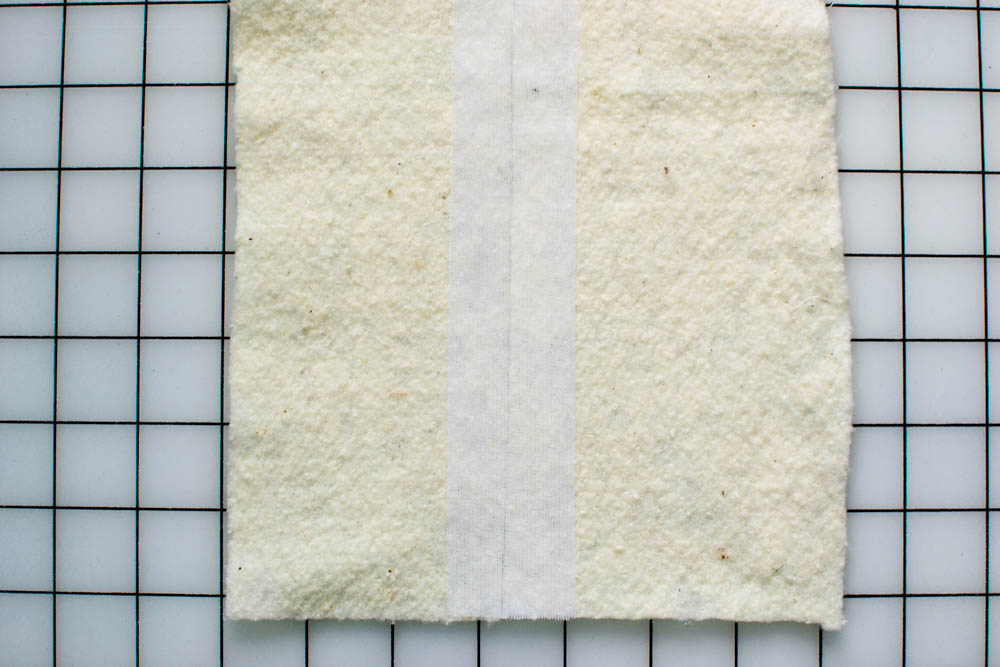
You only need to fuse the batting together on one side, so this method is fast and easy too.

And now you have no excuse… go finish a quilt top!

xoxo,


Disclosure: some of my posts contain affiliate links. If you purchase something through one of those links I may receive a small commission, so thank you for supporting SewCanShe when you shop! All of the opinions are my own and I only suggest products that I actually use. 🙂

Similar Posts

19 Comments

  1. Lisa from Texas says:

    Thanks for posting this. It’s the little things that help us new quilters.

  2. I did a whole quilt (throw size) with them zigzagged together, then I quilted it so there’s no way it’s coming apart in there. You’d never know.

  3. That was a timely hint about cutting the tape into 18" lengths. I’m going to be joining two large pieces of batting tomorrow, and I would have cut one long strip!

  4. I’ve always heard that you shouldn’t put a hot iron on batting. will the iron not hurt the batting?

    1. The scrim on cotton batting will gunk up your iron. Try to find the non-scrim side and iron that. When using the bonding tape, I find it seems to adhere better to the scrim side so I use a pressing cloth when ironing it down.

  5. Thank you for confirming how to use up smaller pieces of patting. To date I have been hand whip stitching them together , pulling the threads fairly snug to prevent gaps. This has worked well for me. However, love the iron on, reminds me of covering seams when putting up dry wall. I make a lot of folding baby change pads and end up with a lot of smaller pieces. Thank you for your info.

  6. Cindy Hamilton says:

    To make sure that your edges butt evenly and equally across lap them over slightly where they meet and using ruler and rotary cutter cut through both at the same time. Take away the sliver from the top and the sliver from the bottom and the pieces should match perfectly . If you don’t want a straight line where the batting joins you can free motion cut a slightly curved line the same way. They will automatically match up when you remove the cut off edges and will lie flat when stitched together.

  7. Thanks so much for the great tips. Such a great idea and now I can use my scraps of batting. Since I am new to quilting I didn’t want to try and put two pieces together and this tips was so helpful. Thanks again.

  8. Has anyone noticed their machine needing cleaned extra after the stitch-together method? I use the roll of tape for mine, but stitching would be cheaper. I just don’t want to gunk it up…

  9. I’m so glad you posted that! I have been joining batting but always kind of felt like I was cheating! Lol. I have used the zig-zag method on cotton batting, but for the fluffy kind I trim the 2 edges in the same configuration so they meet nicely, butt them right up against each other, and then use a needle and thread to make large overcast stitches to join them—about every 1/2, going into the edges of the batting about 1/4” on each side, and pulling the thread sort of snug, but not so much that it distorts the batting edges. I have even joined several smaller pieces this way, like a jig-saw puzzle. When it is quilted it will stay together just fine.

  10. Maybe this is a dumb question… what happens to the tape after washing the quilt? If you don’t have quilt stitches over all the joined sections, will it release after washing? I’m still a novice and learning!

  11. I use the fusible method, but use regular, lightweight interfacing that I cut into strips myself. It isn’t the knit variety, but does the job well, costs less and uses my leftover interfacing. You have a great website. I always look forward to your posts! Thanks!

  12. Pat Lloyd says:

    I use small pieces of batting to make coasters and mug rugs…

  13. Debbie C. says:

    You asked if anyone has joined pieces of the fluffy polyester batting. Yes I have. Simply make sure the edges are straight & are flush against each other. Then I hand baste in a large zig-zag to join both pieces. Two rows of zig-zag for added stay power is advised.

  14. Tana Steward says:

    I think there is a right and wrong side to cotton batting. It is pretty easy to find on Warm and Natural’s batting.

  15. Stephanie says:

    I use the three step zig zag on my Bernita and set it as wide as possible and fairly long.
    I feel it prevents a hard ridge effect along the join.
    Love your blog and read it every day. Thanks for all you do.

Leave a Reply