Sew the Cutest Applique with Novelty Fabric

Do you ever buy the cutest novelty fabric because you can’t stand to go home without it, and then later you wonder, how will I ever use this? I don’t really want a quilt with {insert whatever cuteness is on the fabric} but I love it so much anyway!
Well, here’s your solution, cut those adorable somethings out of your novelty fabric and applique them onto something else. Like a t-shirt, t-shirt dress, pant leg (knee patch), tote bag, zipper pouch, whatever! I love applique because it makes just about anything cuter.
This tutorial is kind of a sequel to the one I posted last week showing how to make sweet and trendy tee shirt dresses. I used extra fabric from the skirts of those dresses to sew appliques on the tops, and it was just the thing to tie the whole dress together. I was using Lolly from Blend Fabrics.
So read on to see how I did it!

To make your own appliques from novelty fabric, you will need:
- fabric with pictures or designs that you’d like to put on something else.
- medium weight woven interfacing – scraps work great (I used Pellon SF101)
- iron-on fusible adhesive (I used HeatnBond lite)
That’s all you need to make the applique patches, but if you want the metallic layer that I put under all of my patches, you will also need:
How to do it:

1. Cut out your favorite design (or all of them) from the fabric and lay it right side down against the fusible side of the woven interfacing.
2. Cover with a piece of parchment paper, wax paper, or pressing paper and press with a hot iron to fuse the design to the interfacing {FYI, parchment paper is included in the package of iCraft Decofoil Hot Melt Adhesive). One layer of quilting fabric is just too thin to make a nice looking applique patch. The intefacing will make it look way better. The pressing paper will protect your iron from the glue.
3. After fusing the fabric pieces to the interfacing, cut around them again.

4. Now place a piece of iron-on fusible adhesive (HeatnBond lite) on your ironing board with the paper side down, glue side up. Place the applique patch on top, wrong side down. Cover with pressing paper again, and press for about 20 seconds in each spot. When it is cool, peel the patch off the paper and trim away any glue that hangs off the edges.

The applique patch is now ready to be fused to something, but I think it looks kind of boring by itself. Putting a layer of Deco-foil under it really makes it pop!
To do that:

1. Trace your applique patch onto the paper side of the iCraft Decofoil Hot Melt Adhesive. You can make the area around the patch as wide or narrow as you want.
2. Cut out the shape that you traced onto the hot melt adhesive.

3. Center the piece of hot melt adhesive on the object, glue side down and cover with the parchment paper included with the adhesive. Press for about 30 seconds in each spot.

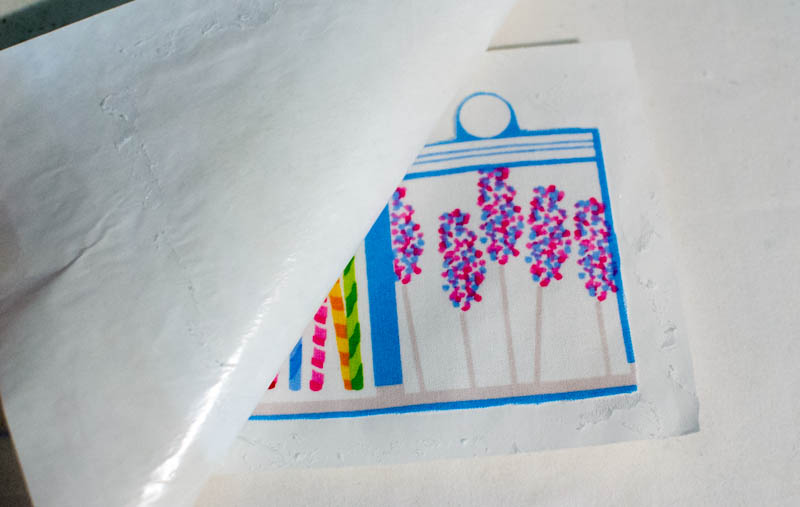
4. Lay a sheet of Decofoil on top of the hot melt adhesive, cover with pressing paper, and press each spot for at least 30 seconds.
Tip: keep your iron moving, it seems to make the foil fuse better and the iron will slide easily over the parchment paper.

5. Peel the edge of the foil away and the part over the adhesive will magically stay! It’s so easy and fun. If it seems like the metallic part is still sticking to the sheet, cover with parchment paper and press some more.

7. Center the applique patch over the deco foil layer, cover with parchment paper, and press to fuse. Make sure you use the pressing paper, touching the deco foil with the iron will melt it.

7. Now it’s time to stitch around the applique patch to hold it down. I stitched around the edge of the deco foil also. That wasn’t necessary, but I really like the look of it.
That’s it! Here are some ideas for where to put your cute new applique patches.
Happy sewing,

Full disclosure: Thermoweb sent me the DecoFoil supplies and Blend Fabrics sent me the fabric to use as I wish. I wouldn’t accept these items if I didn’t really want to sew with them. 🙂
Disclosure: some of my posts contain affiliate links. If you purchase something through one of those links I may receive a small commission, so thank you for supporting SewCanShe when you shop! All of the opinions are my own and I only suggest products that I actually use. 🙂
