Easy Quilt Block Tutorial: Patchwork House Block!

Sew a patchwork house quilt block with my easy photo tutorial. The house quilt block is one of the most beloved blocks in all quilting. I think it’s because quilts are lovingly made in the home, for the home, and often reflect our desires for the kind of home we want.
I used Christmas fabrics for mine (and that’s totally optional) becauseI want to use my quilted pillow cover tutorial with this block to make our first Christmas decoration in our new house.

I highly recommend cutting up lots of 2” squares and auditioning a bunch of fabrics for this block. Feel free to use any combination of fabrics if you are sewing along with us.
As you can see from the diagram above, it is important that the front and the side of the house contrast well with each other to give it a 3 dimensional look. The two planes of the roof should also contrast so they don’t blend together.
When I was auditioning fabrics, I decided to have the front of the house be light and the side be dark (comparatively) to help me with the 3 dimensionality. I made the patchwork on the front blue and white, with a light gray roof. Then I chose darker red and gray fabrics with a black roof for the house side.
Be sure to have your window and door stand out too!


The house sits on the bottom right of the block so if you wanted you could make lots and put them together with or without sashing.
So let’s get started!

Patchwork House Easy Quilt Block Tutorial:
All seam allowances are 1/4”. Finished block size: 12”.
Cutting:
From the background fabric, cut:
-
1 strip 2 1/2” x 10 1/2”
-
1 strip 2 1/2” x 12 1/2”
-
4 squares 2” x 2” (for the window)
-
1 square 3” x 3” – then subcut diagonally into 2 triangles
-
2 strips 2 1/2” x 1 1/2”
From various light print fabrics (for the house front), cut:
-
7 squares 2 1/2” x 2 1/2”
From various dark print fabrics (for the house side), cut:
-
6 squares 2 1/2” x 2 1/2”
From the light roof fabric, cut:
-
1 strip 2 1/2” x 4 1/2”
-
1 square 3” x 3” – then subcut diagonally into 2 triangles
From the darkest fabric, cut:
-
1 square 3” x 3” (for the roof side) – then subcut diagonally into 2 triangles
-
1 strip 2 1/2” x 4 1/2” (for the door)
-
2 strips 2 1/2” x 1 1/2” (for the chimneys)
Arrange the patchwork pieces on your table or quilt design board as seen above. If any thing doesn’t look quite right, change out fabrics until you love it.


Sew the half square triangle units:
1. Take the 6 triangles cut from 3” squares (see above) and sew together to make half square triangle units for the 3rd row of the block.
2. Press the units open and trim to 2 1/2”.

Lay them back in place for the roof.


Sew the chimney pieces:
1. Sew the two dark 2 1/2” x 1 1/2” bars to the matching bars cut from background fabric.
2. Press the seams flat and lay these units back in place in the 2nd row.


Make the window:
1. Using a pencil or fabric-safe pen, draw a diagonal line across each of the 2” squares cut from background (or window) fabric. The line should be on the wrong side of the fabric if it is not solid.


2. Arrange the 2” squares on top of the patchwork squares on the side of the house as seen above. Note the direction of the drawn lines to make a square turned diagonally. Pin the smaller squares in place.
3. Sew along the line on each pair.
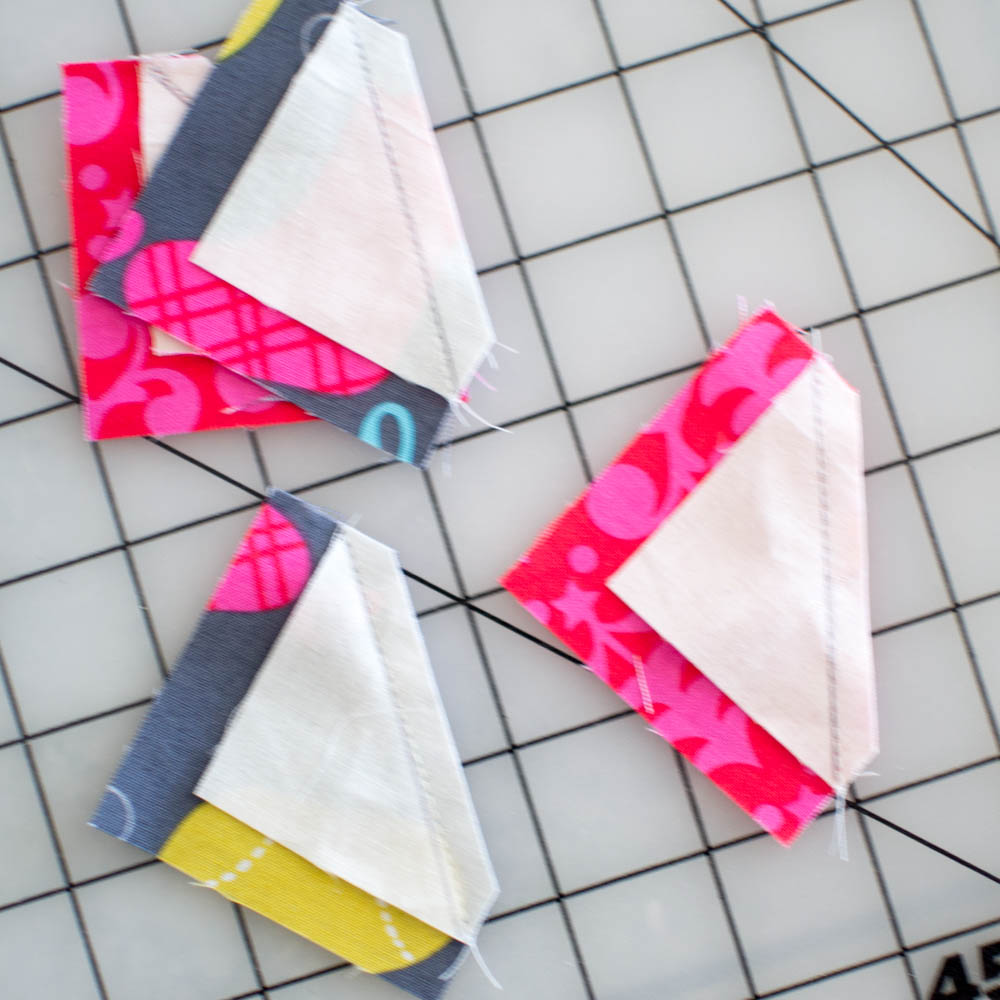

4. Trim away the corners 1/4” past the line that you stitched over. Press the units open, and put back in place on the side of the house.

Sewing the Patchwork Together:
1. Now all you are left with should be 2 1/2” squares and strips. Sew them into rows of three or five until you need to start sewing the rows together so you can add the door and the remaining two light blocks.

2. After you have all the 2 1/2” blocks and strips sewn together, add the background strips to the side and top.

Done!

Here’s my block with a 2” green border that I added so I can use my Quilted Pillow Cover tutorial to make an adorable quilted Christmas pillow. I might add some hand embroidered snowflakes and other embellishments. Why not?
In case you are catching this blog series for the first time, we’re making gorgeous quilt blocks using the classic patterns and easy photo tutorials. See lots more on my Easy Quilt Block Pinterest Board.
xoxo,

Disclosure: some of my posts contain affiliate links. If you purchase something through one of those links I may receive a small commission, so thank you for supporting SewCanShe when you shop! All of the opinions are my own and I only suggest products that I actually use. 🙂


