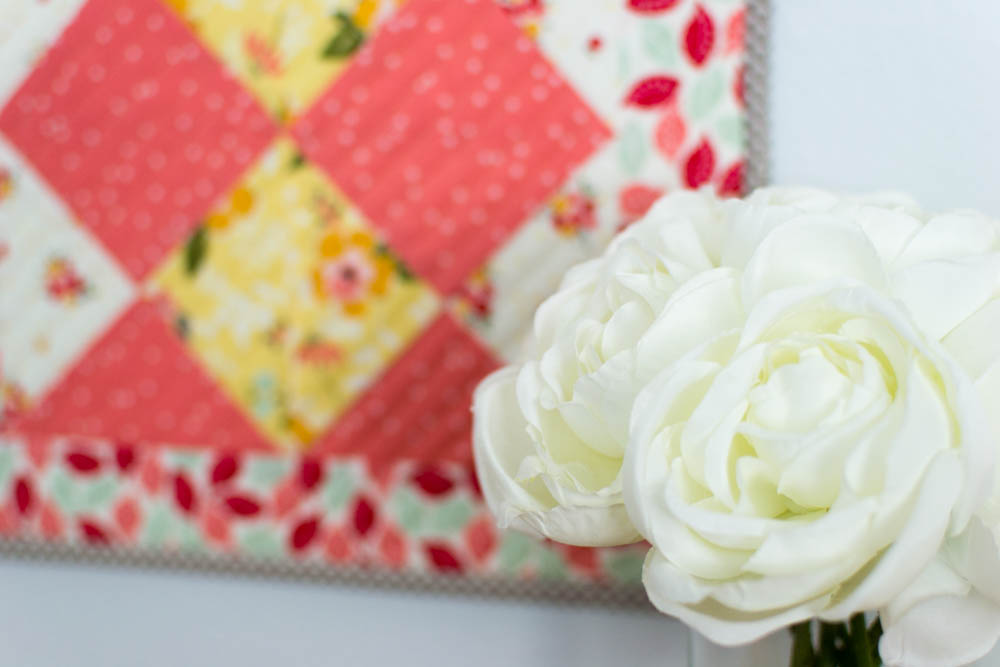
Free Mini Quilt Pattern: Quarter Square Triangle Quartet!
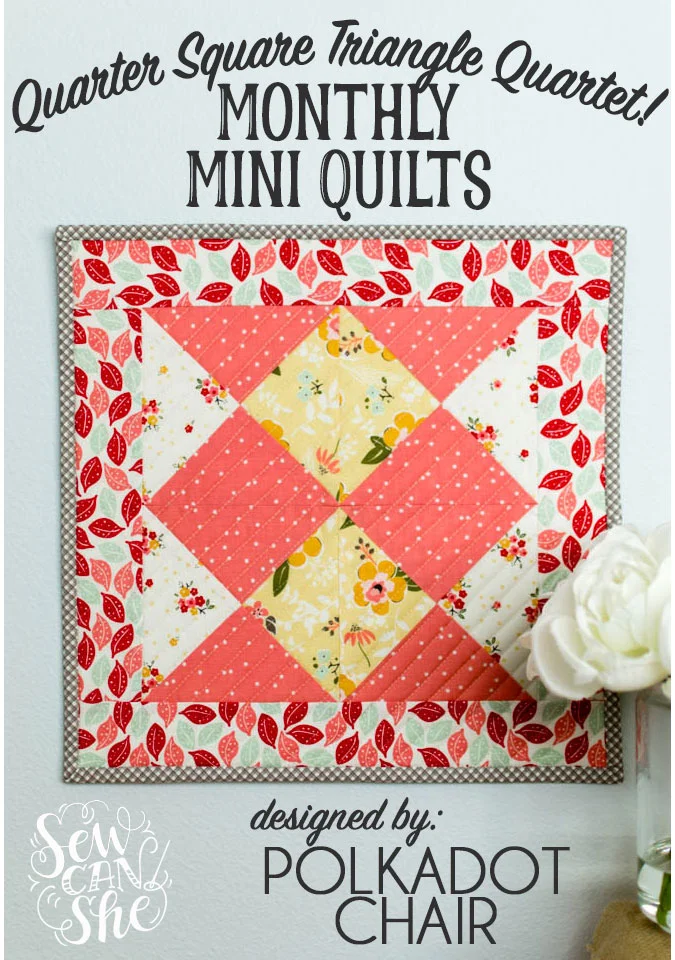
This is an adorable mini quilt designed by Melissa Mortenson of Polkadot Chair. You’re going to love how easy it is – just stitch up 4 quarter triangle units using 4 fabric squares… add a border, and then the piecing is done!
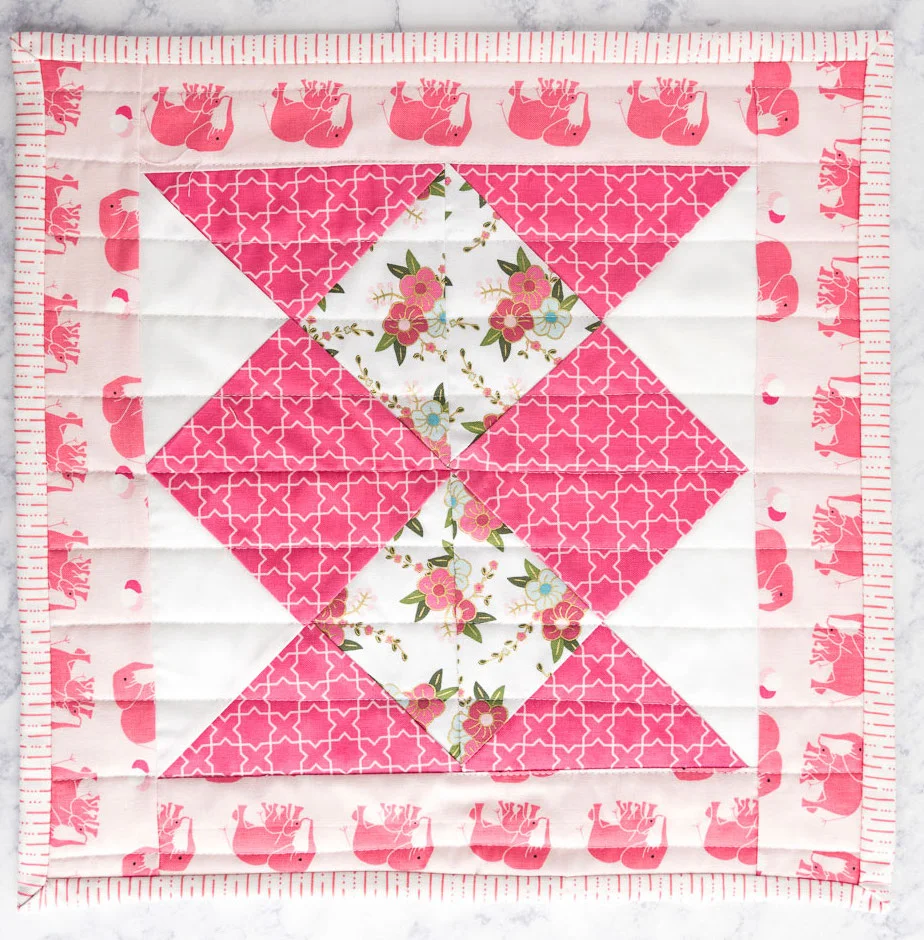
Here’s Melissa’s Quarter Square Triangle Quartet mini quilt… she used darling fabrics from her collections with Riley Blake.
Are you ready to sew some speedy quarter square triangle units and make this mini quilt??? Let’s get to it!
Free Quarter Square Triangle Quarter Mini Quilt Pattern
You will need the following pieces of fabric for making quarter square triangles:
-
1 square 6 1/2” x 6 1/2” from floral fabric
-
1 square 6 1/2” x 6 1/2” from white fabric (mine was a mostly-white floral)
-
2 squares 6 1/2” x 6 1/2” from pink fabric
For the border, you will need:
-
2 strips 2 1/2” x 10 1/2”
-
2 strips 2 1/2” x 14 1/2”
You will also need:
-
a piece of fabric for the mini quilt back that is at least 15” x 15”.
-
a batting square at least 15” x 15”
-
fabric for the binding (I used two strips 2 1/2” x 40”, and had some leftover)
-
a fabric pen or pencil
-
sewing machine, rotary cutter & ruler, etc.
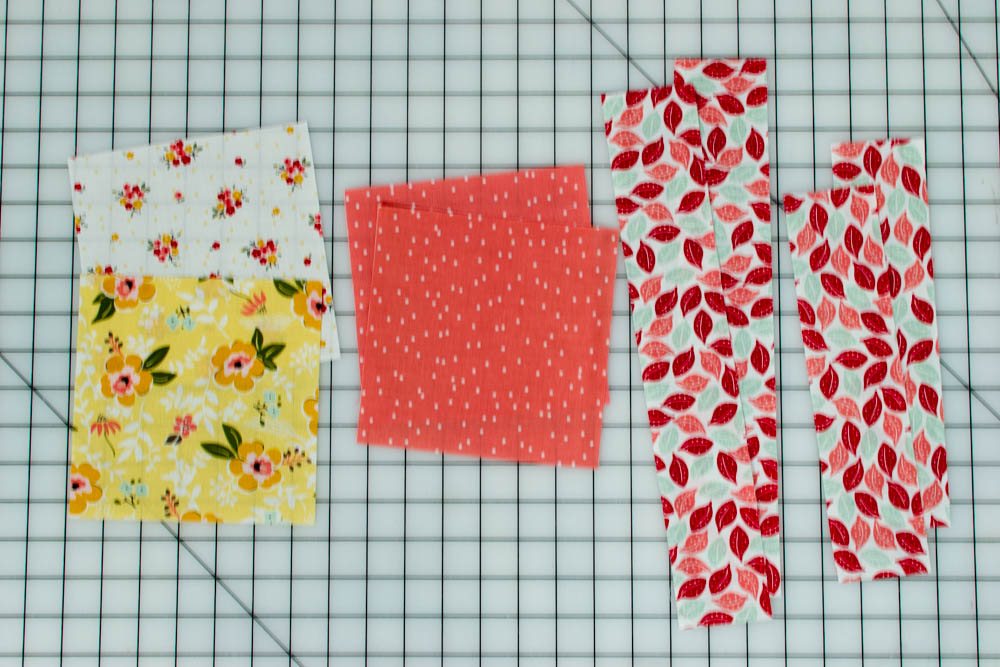
This free mini quilt pattern doesn’t take very much fabric so it’s a great way to use up scraps from a bigger project. Start by cutting the pieces listed above.
How to make easy quarter square triangles:
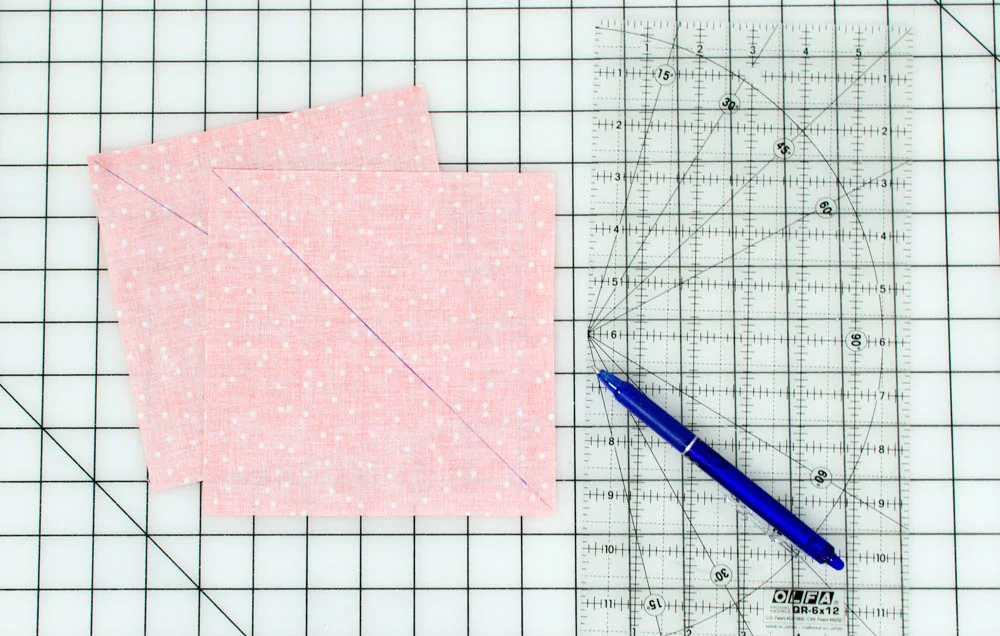
1. Draw a diagonal line across the back of the two pink squares.
Note: I used a Frixion pen because the ink disappears under the heat of my iron. But a pencil would be fine here too.
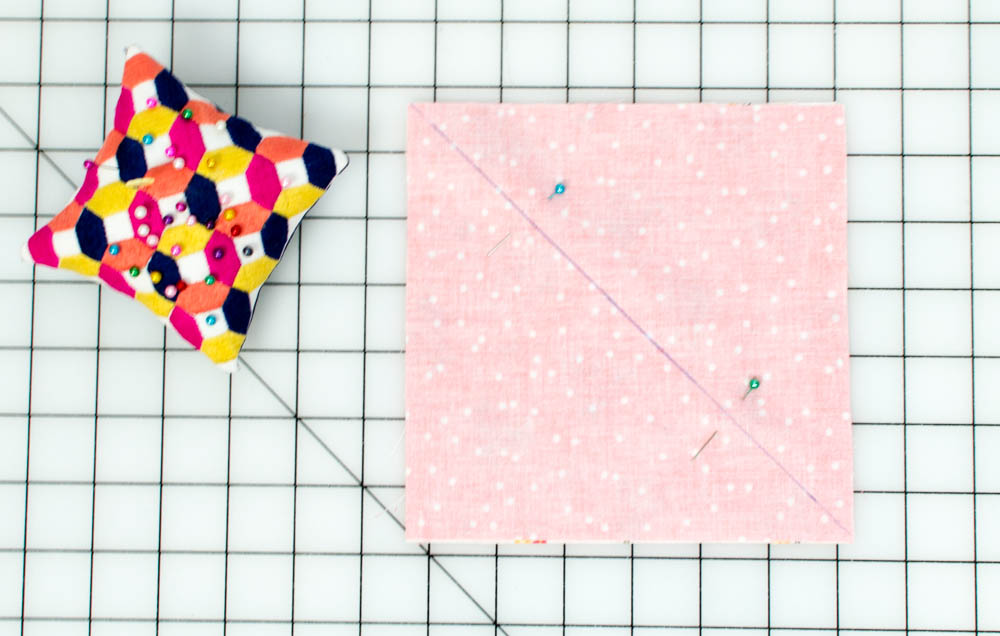
2. Pin each pink square right sides together with one of the remaining 6 1/2” x 6 1/2” squares.
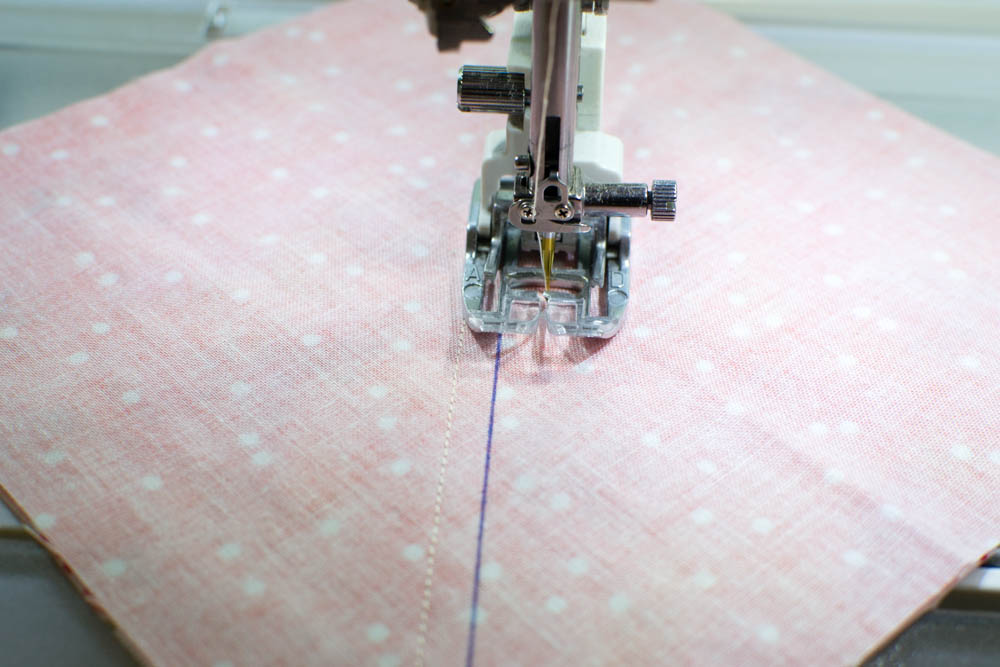
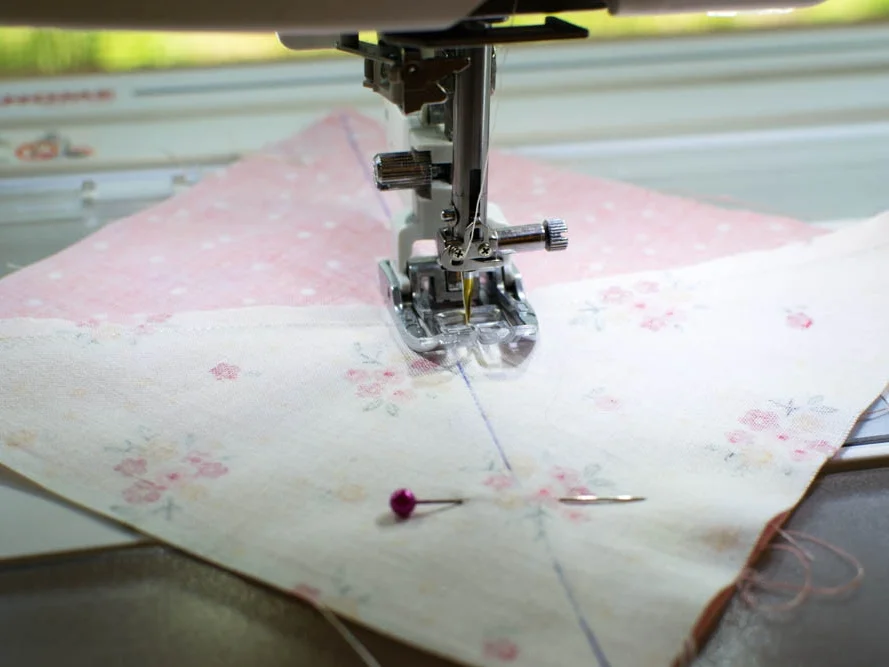
3. Sew across the squares, 1/4” on either side of the line that you drew.
Sewing Tip: Use a short stitch length (like 1.5-2) to keep the seam from coming apart when you cut it later (but not in the next step).
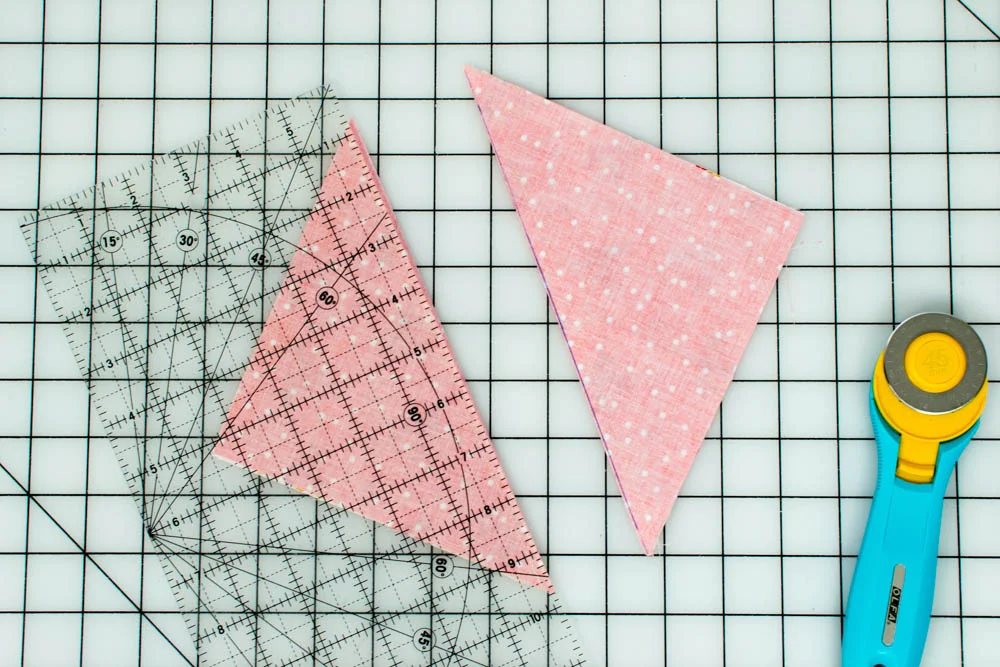
4. Cut your sewn squares into two triangles, right along the line.
5. Press the seams toward the darker fabric and repeat again to make 4 half-square triangle units. But we’re not done with them yet!
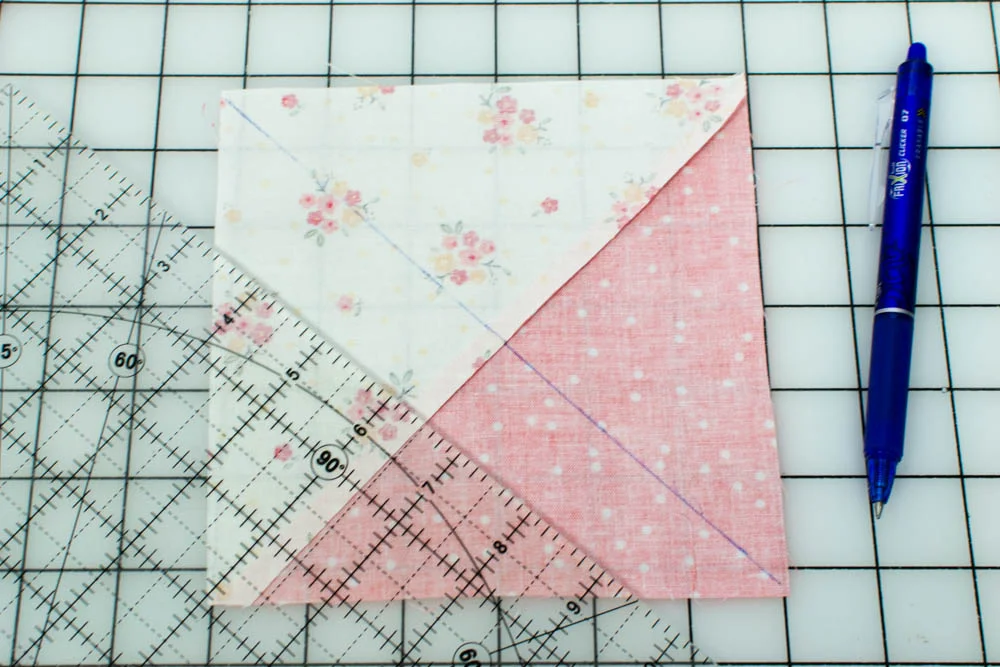
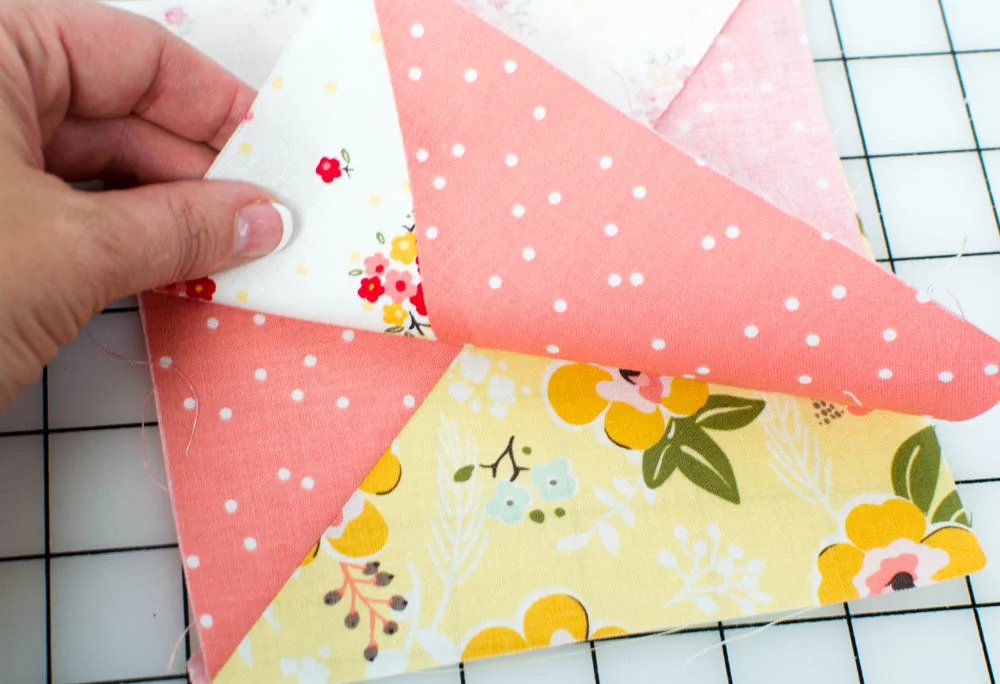
6. Draw a diagonal line across the back of both pink and white squares. Place them right sides together with the two pink and floral squares. Notice how the seams nest together and the pink fabrics are opposite each other in the photo top right. Pin the squares together..
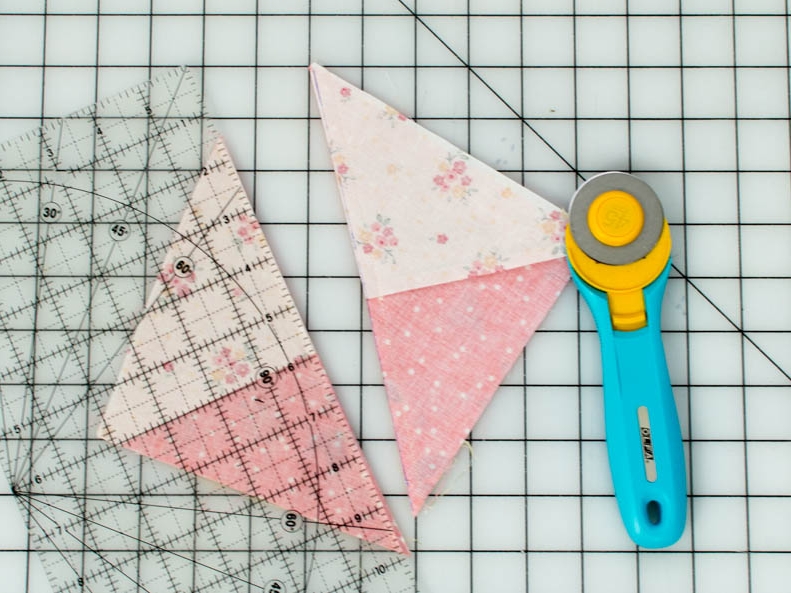
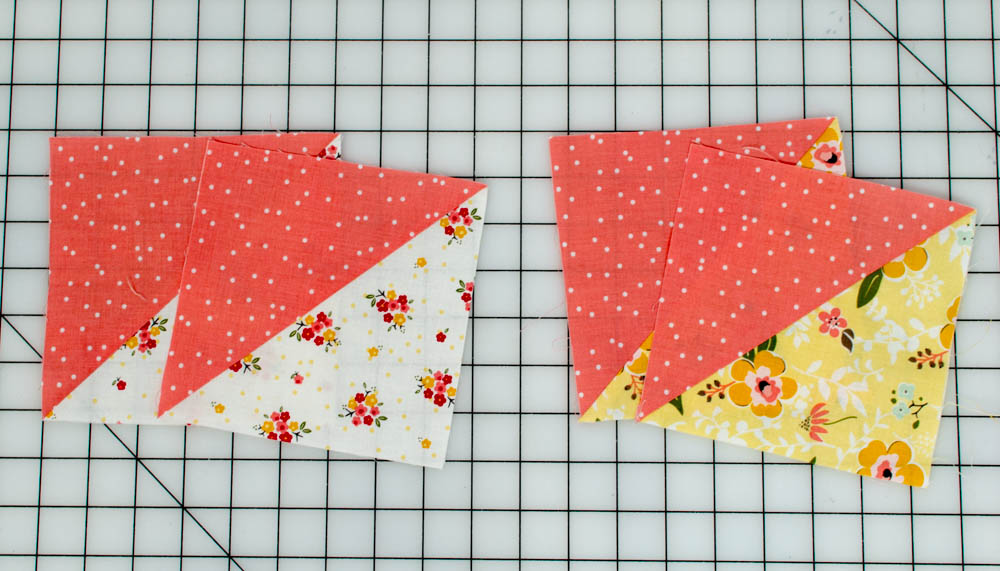
7. Sew 1/4” away from both sides of the drawn line as before, and then cut along the line. Press the seams open or to the side, as desired.

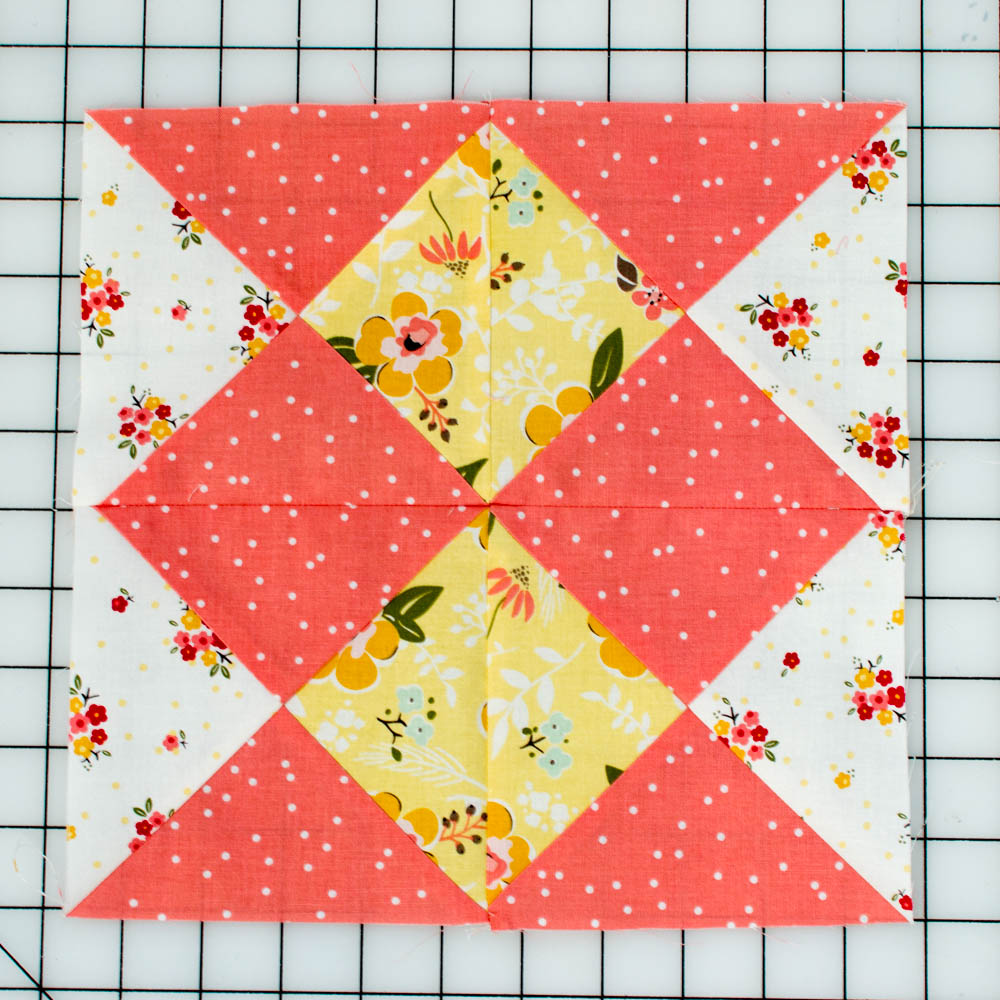
You have now made 4 fast and easy quarter square triangles!
Arrange them as seen above right with the floral triangles touching and sew together.

Sew the 2 1/2” x 10 1/2” border strips to the sides.
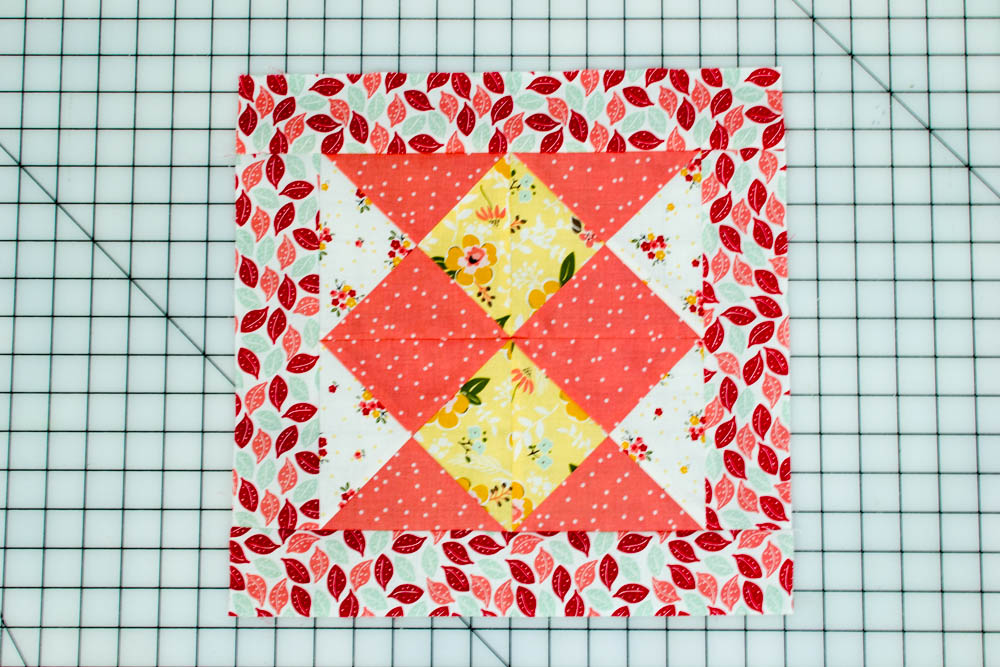
And then sew the 2 1/2” x 14 1/2” border strips to the top and bottom. Yay!
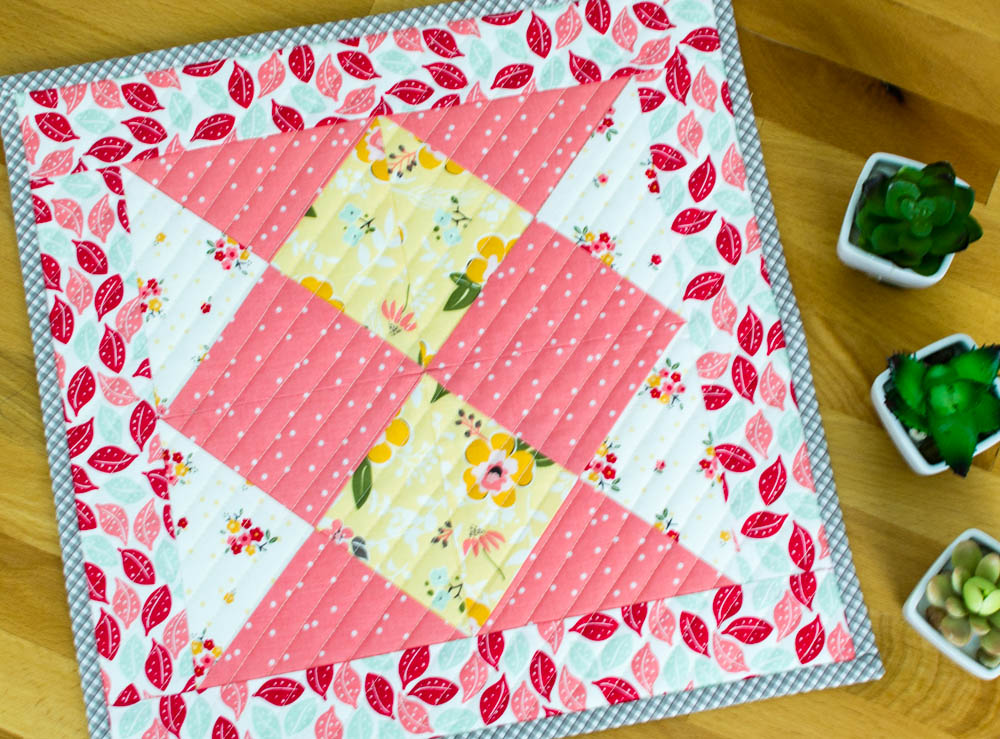
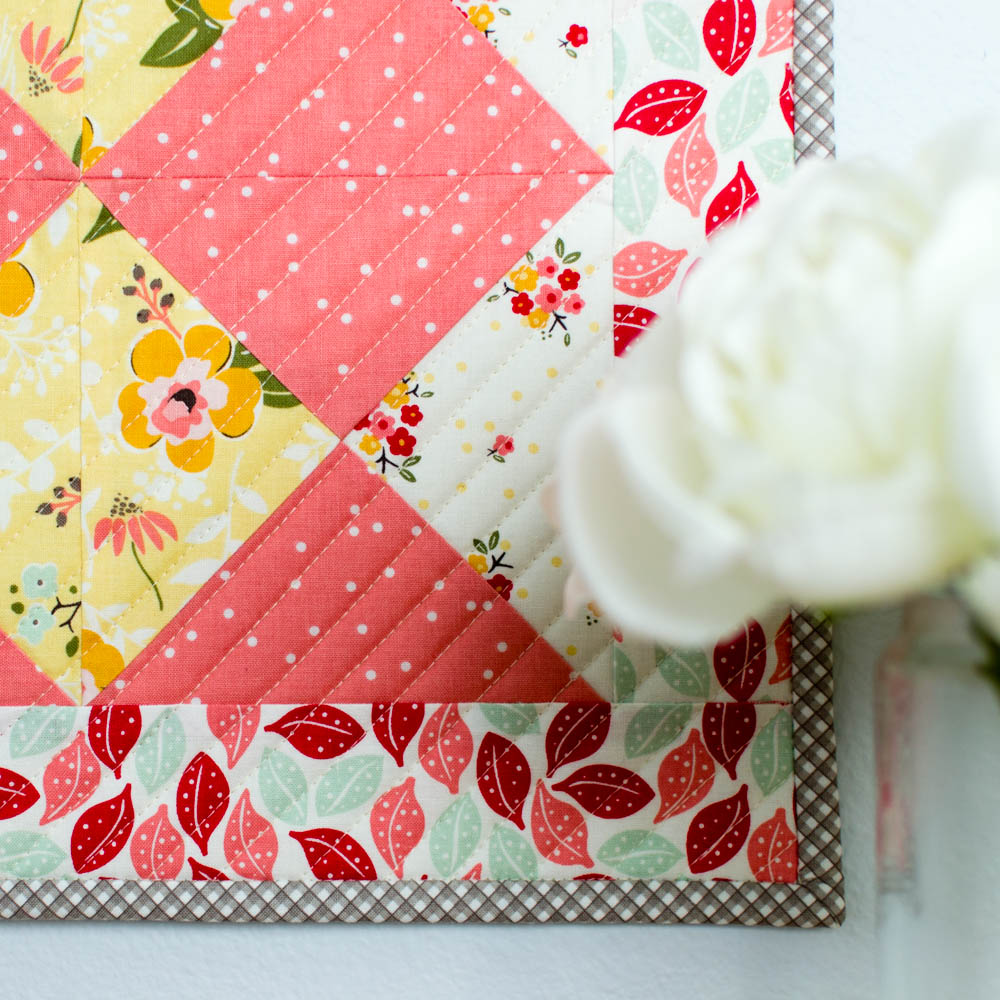
Press you mini quilt and trim to square up as necessary. Layer with your batting and backing squares and then quilt as desired. Melissa and I both quilted ours with straight line quilting (mine was diagonal).
Trim once more and bind. Here’s my great tutorial on how to bind a mini quilt.
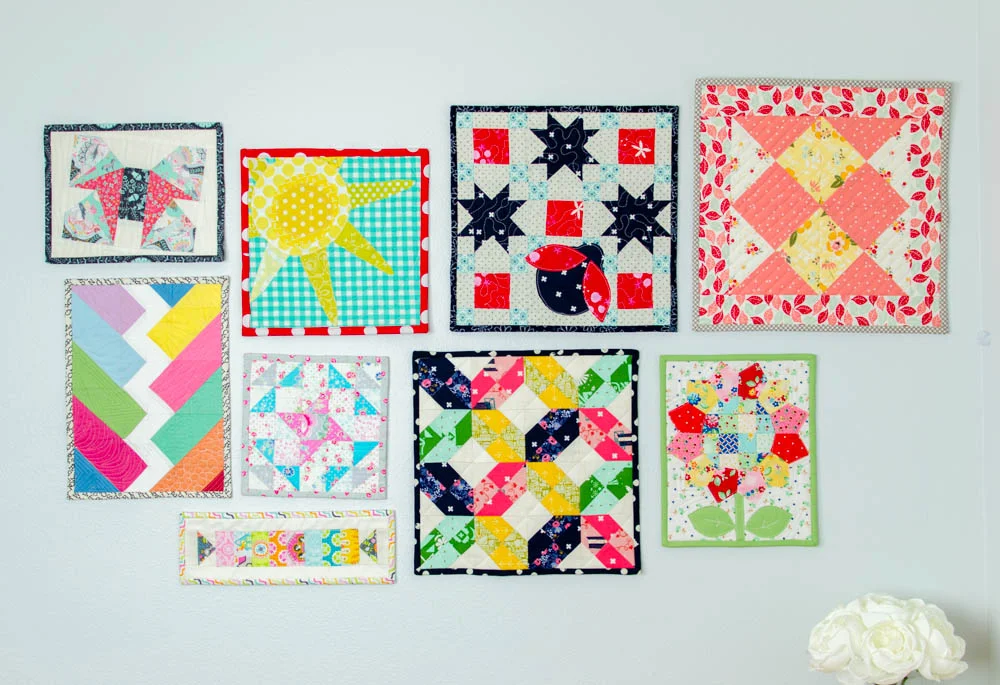
Make sure you email me a picture of your mini quilt so I can show it to everyone in an upcoming mini quilt inspiration post!
You can read all some beautiful projects using Safari Party here.
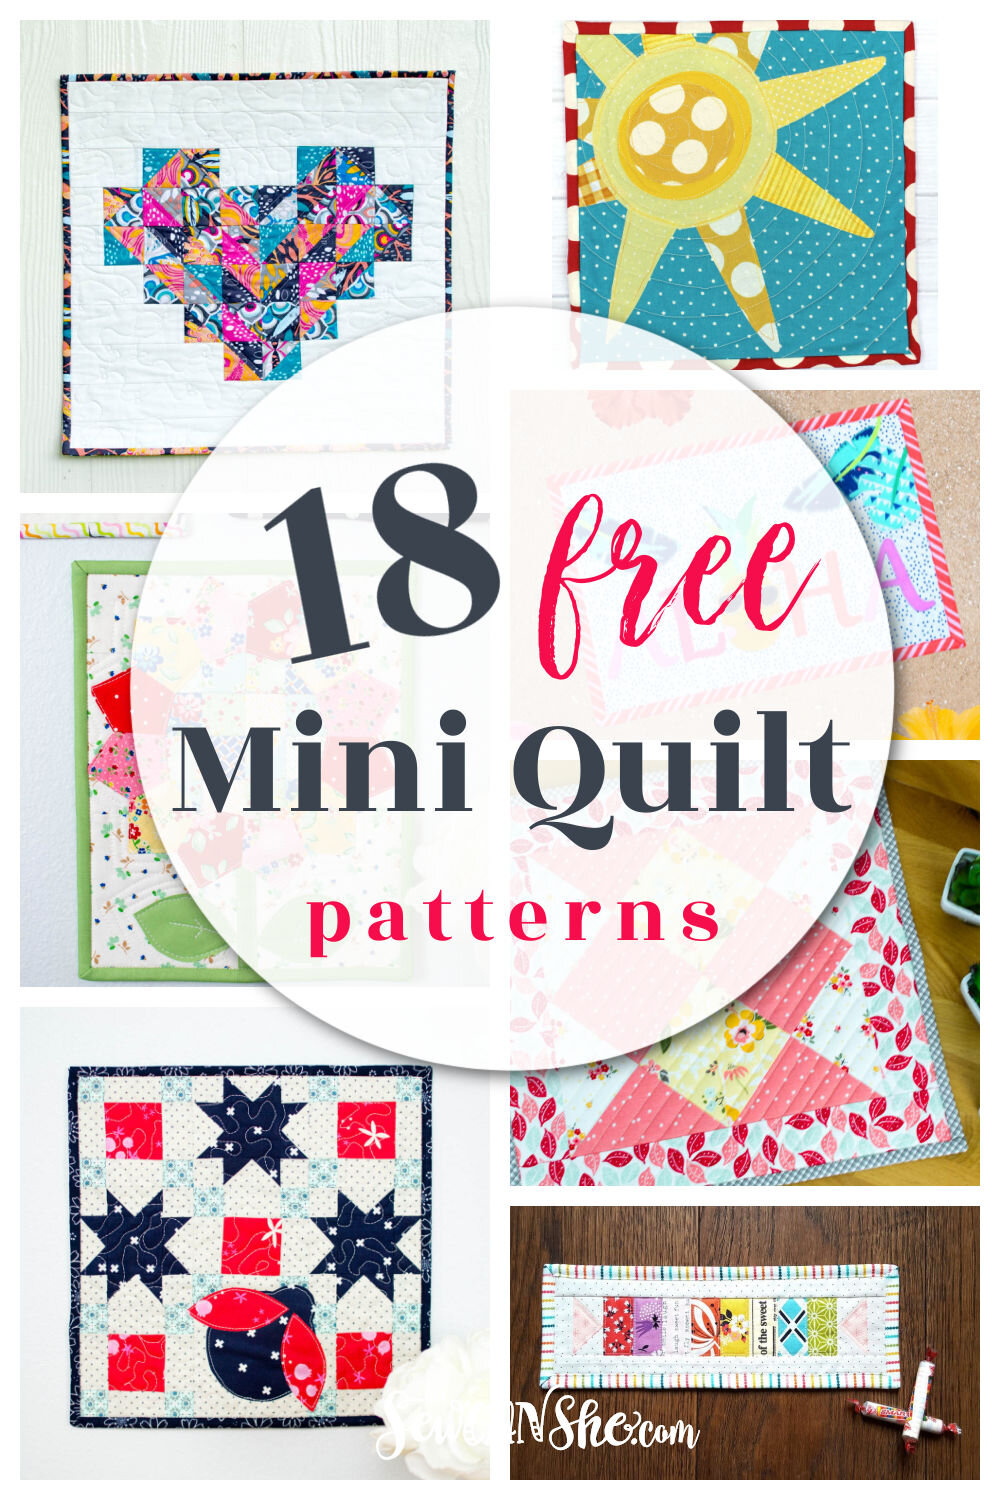
Check out all my free mini quilt patterns too!
xoxo,

Featured


Disclosure: some of my posts contain affiliate links. If you purchase something through one of those links I may receive a small commission, so thank you for supporting SewCanShe when you shop! All of the opinions are my own and I only suggest products that I actually use. 🙂