Amazing Bean Bag Chair Pattern – with Toy Storage!
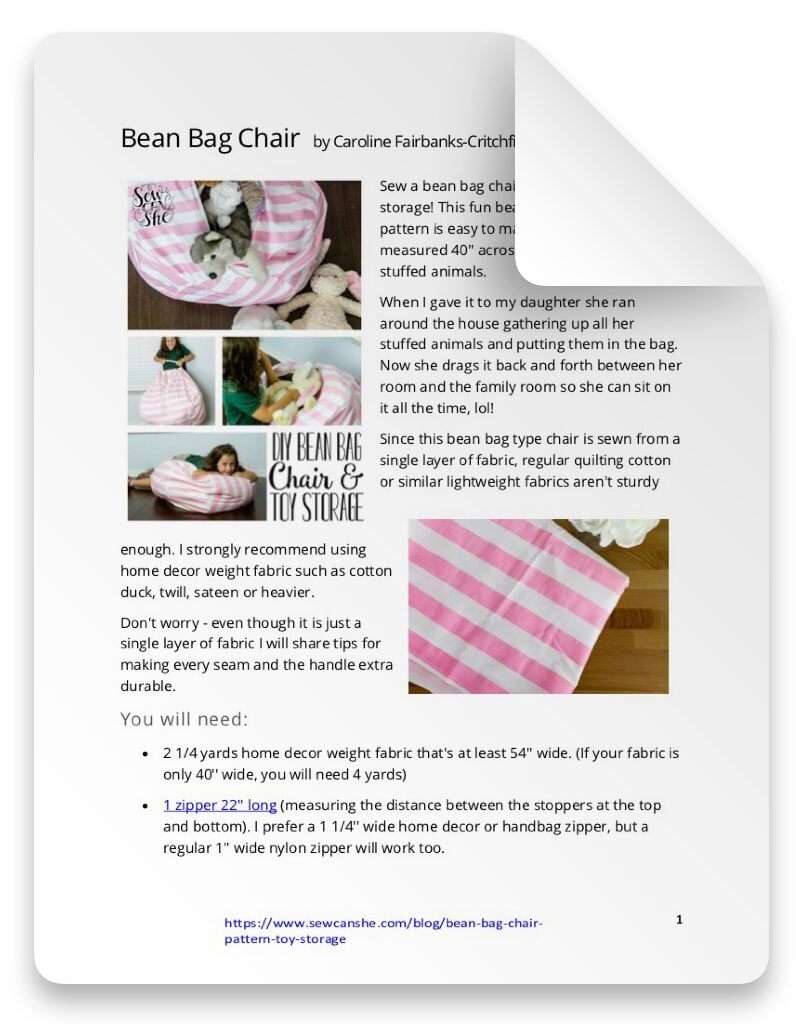
Sew a bean bag chair that doubles as toy storage! This fun bean bag chair sewing pattern is easy to make and is HUGE – I measured 40” across and it fits at least 30 stuffed animals.

When I gave it to my daughter, she ran around the house gathering up all her stuffed animals and putting them in the bag. Now she drags it back and forth between her room and the family room so she can sit on it all the time, lol!
The blog post below is totally free to read, print, and sew! Just hit CTRL +P on your computer to print. There is an optional PDF download offered at the end of the post. Join our Sewing Bee Community for access to over 300 PDF patterns (including this one), live workshops, premium video courses, and more.

I first saw a similar bean bag chair with toy storage on Amazon and I almost bought it because I thought it was genius. But I love a challenge, and I love to pick out my own fabric.

I immediately thought of fabrics from Premier Prints. They are great quality, affordable, and best of all – they are 54” wide! That means you can buy fewer yards and still get lots of fabric. I picked this adorable Stripe fabric. It will go great in Cadie’s room.
Since this bean bag type chair is sewn from a single layer of fabric, regular quilting cotton or similar lightweight fabrics aren’t sturdy enough. I strongly recommend using home decor weight fabric such as cotton duck, twill, sateen or heavier.
Don’t worry – even though it is just a single layer of fabric I will share tips for making every seam and the handle extra durable.
Bean Bag Chair Pattern with Toy Storage
Download the Pattern Templates here.
You will need:
- 2 1/4 yards home decor weight fabric that’s at least 54” wide. (If your fabric is only 40” wide, you will need 4 yards)
- 1 zipper 22” long (measuring the distance between the stoppers at the top and bottom). I prefer a 1 1/4” wide home decor or handbag zipper, but a regular 1” wide nylon zipper will work too. If you can’t find a zipper this long, then I suggest using zipper by the yard (it’s very easy to use)
- fabric marking pen or pencil
- ruler or measuring tape
- quilt basting spray (optional)

Cutting:
1. Assemble the printable pattern piece and use it to cut four main pieces on the fold. Since my fabric was so wide, I could keep the original fold in the fabric and fold it in half again (lengthwise) to cut two pieces out at once on a double fold. I changed the direction of the fabric to cut my other two pieces on the fold so that the stripes would be going in different directions like in my inspiration photo.

2. Choose one of your main pieces to be the one with a zipper down the middle. Cut it in half lengthwise. You can use the pattern piece like I did – lay the paper pattern on the fabric piece and cut along the fold line.

3. Cut two 21” squares to make the circles for the top and bottom of the bag. Fold one of the squares in half twice to make a 10 1/2” square.


4. Measure along the bottom of the folded square from the folded point toward the raw edges. Make a mark 10” from the point.


Keep the beginning end of the ruler at the folded point and move the other end up about an inch. Make another mark 10” away from the point.

Keeping the beginning end of the ruler at the folded point, continue moving the other end up about an inch at a time and making marks 10” from the corner.


5. Once you have made an arc from corner to corner with dots, cut along them making a smooth curve. Open it up and you’ll have a 20” circle! Repeat to cut another circle from the remaining 21” square of fabric.
6. Cut the following smaller pieces from the fabric scraps:
- 1 rectangle 8” x 20” (for the handle)
- 2 squares 3” x 3” (for reinforcing the handle)
- 4 rectangles 2” x 3” (for the zipper tabs)
Tip: Serge or zig-zag stitch all the edges of all of the larger pieces (not those in step 6) to prevent fraying.


Sewing the Bean Bag Zipper Panel:
1. Lay one of the 2” x 3” zipper tab pieces face up on your work table. Put the end of the zipper on top, with the stopper at the edge of the tab as shown above.
Note: If your zipper is longer than 22”, cut it off 22′ past the start of the zipper teeth. Then place the end of the zipper flush with the end of the tab piece.
2. Place a second tab piece on top of the first one and pin.


3. Stitch across the ends of the zipper tab pieces, 3/8” from the ends. Trim the end of the zipper away (removing the metal stopper so you won’t break a needle later). Then fold the zipper tab pieces together and press.

Trim away the zipper tabs to match the width of the zipper. Finish the edges of the zipper tab with a zig zag stitch if desired.
Repeat steps 1-3 above to sew a zipper tab at the top of the zipper. Place the start of the zipper teeth against the edge of the tab piece, similar (but on the opposite side of) the zipper tab pieces.

4. Place one of the half-main pieces face up on your work table. Pin the zipper face down against the straight edge.


5. Stitch the zipper to the straight edge with a 3/8” seam allowance. Use a zipper foot on your sewing machine if necessary. Sew all the way across the edge, including the zipper tabs.
Note: If you are using a regular 1” wide zipper, attach it with a 1/4” seam allowance.
6. Press the fabric edge back and topstitch 1/8” from the edge.

7. Pin the remaining zipper edge to the straight edge of the other half-main piece. Sew and topstitch as before.

It should look like this.
This blog post is getting really long! I started a Part 2 to help the pages load faster. See you there!
xoxo,

BEAN BAG TOY STORAGE CHAIR SEWING PATTERN
Purchase this pattern in PDF format! The PDF file contains all of the instructions, plus the step by step photos that have been reduced to fit the page nicely with no ads.
Download the file immediately and keep your confirmation email so you can download it again later. Unlimited downloads are available from the confirmation email. Free patterns must be downloaded within 30 days.
p.s. I’m adding this to my list of round up of Free Sewing Projects to Make You More Organized. Check it out!

Disclosure: some of my posts contain affiliate links. If you purchase something through one of those links I may receive a small commission, so thank you for supporting SewCanShe when you shop! All of the opinions are my own and I only suggest products that I actually use. 🙂