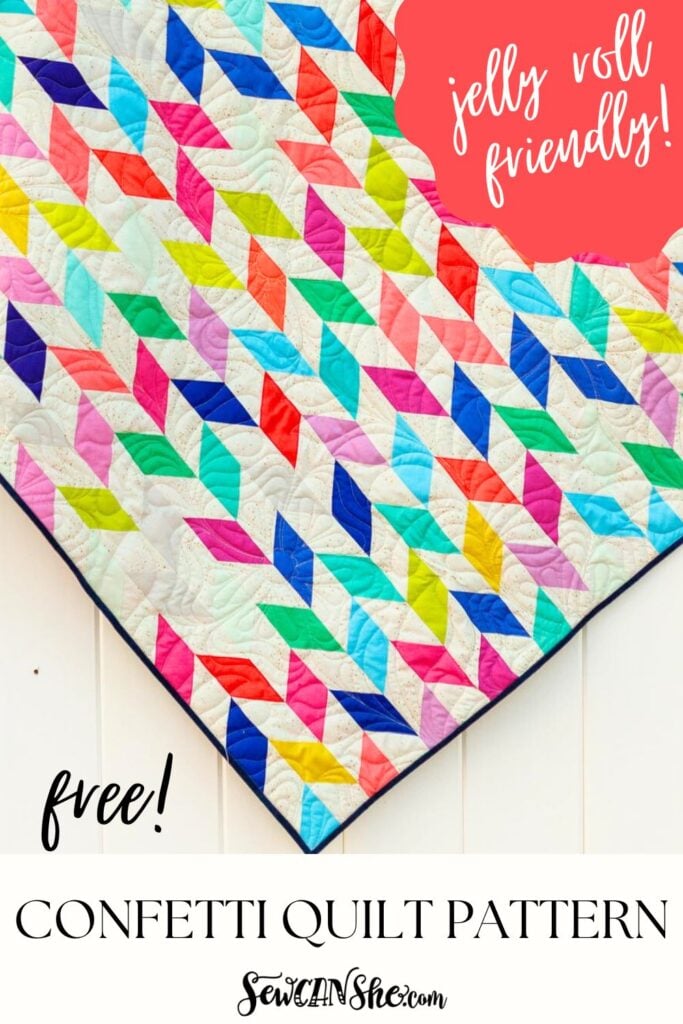
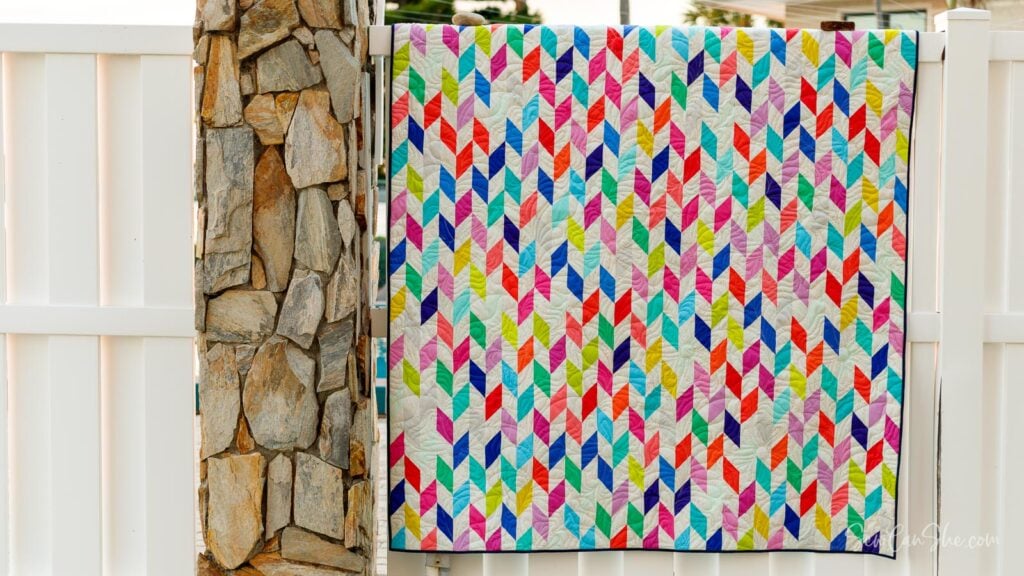
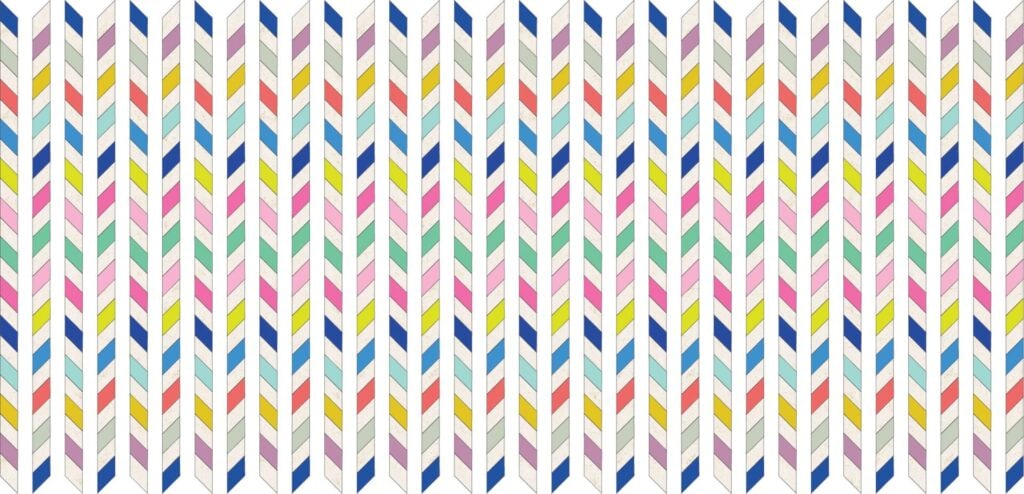
Confetti Quilt Pattern: Free Jelly Roll Quilt Pattern!
If you’ve been staring at that beautiful jelly roll in your stash and waiting for the “perfect” project to come along, the wait is officially over! I am so excited to introduce my free Confetti Quilt Pattern. This design is all about strip piecing to combine color and movement, creating a playful “sprinkle” effect across your quilt top that looks much more intricate than it actually is.
The best part? This pattern completely free and designed specifically with efficiency in mind. Let’s strip-piece those pre-cut 2.5-inch strips to get you sewing almost immediately. Grab your favorite fabric roll, and let’s turn those strips into a party!
You’ll need just one jelly roll of 40 brightly colored 2 1/2” fabric strips, plus 2 7/8 yards of light background fabric to make a throw quilt approximately 61” x 68”. For the background fabric, you could also use a second jelly roll.
The blog post below is totally free to read, print, and sew! Just hit CTRL +P on your computer to print. There is an optional PDF download offered at the end of the post. Join our Sewing Bee Community for access to over 300 PDF patterns (including this one), live workshops, premium video courses, and more.
How the Confetti Look is Achieved on a Quilt

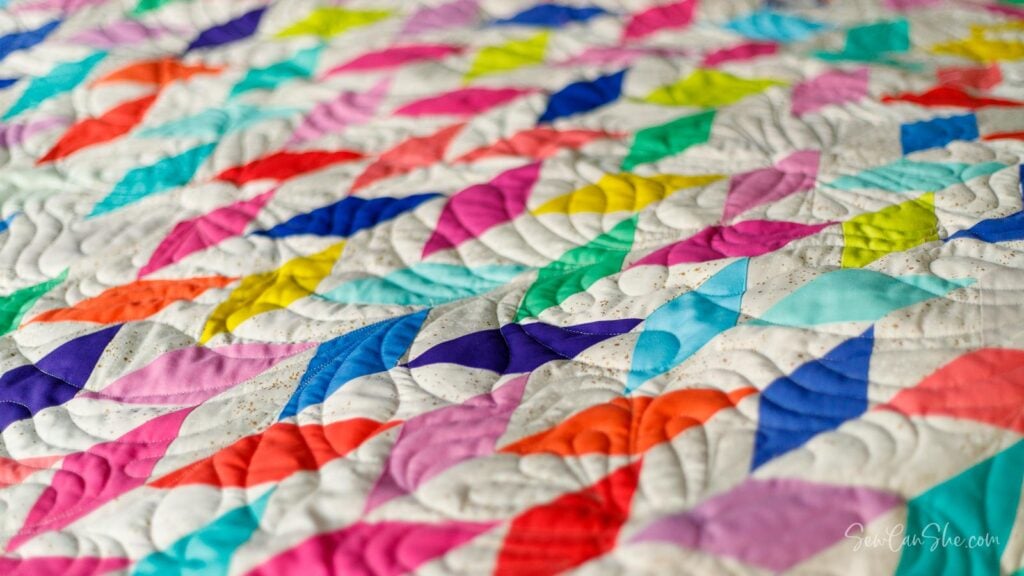
The gorgeous effect of falling confetti is achieved by strip piecing jelly roll strips with 2 1/2” wide strips of background fabric. The process entails sewing, cutting, and then sewing again. I’ll share a fun tip for achieving random placement of your fabric pieces. Even though the process is relatively simple, this might not be a particularly fast quilt to make.
The blog post below is totally free to read, print, and sew! Just hit CTRL +P on your computer to print. There is an optional PDF download offered at the end of the post. Or join our Sewing Bee Community to access over 300 PDF files in the Resource Library, live workshops, premium video courses, and more.
Sew through your fabric stash with all my free quilt patterns.
How to Choose Your Jelly Roll and Background Fabric
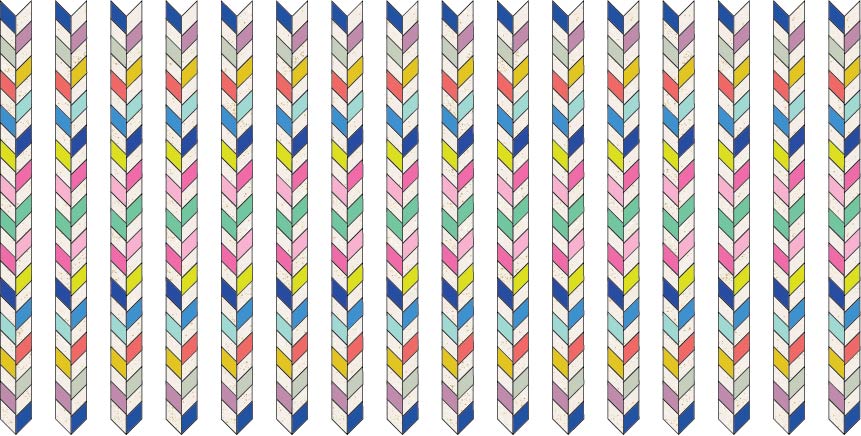
There are 32 long vertical rows in this quilt. Depending on the length of the strips in your jelly roll bundle, you may be able to make a slightly longer quilt. 44” long strips (vs. 42” long strips) will let you cut one extra piece from each strip set, so your quilt will be 61” x 72”.
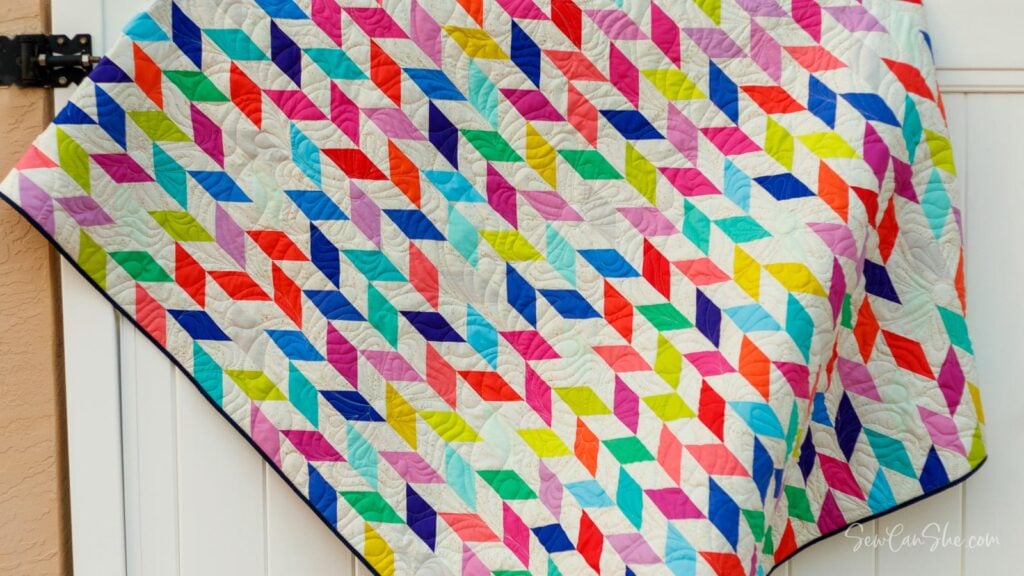
This generous throw quilt pattern is perfect for snuggling up on the couch. It would also be great for great for making a bed warmer or gifting to a neighbor or a young person going off to college.
The pre-cut jelly roll strip that I used is Tula Pink’s Designer Solids strip bundle from Free Spirit. I had it in my stash for a couple years, so it’s not widely available anymore, but there are lots of darling similar Tula Pink True Colors jelly rolls that would work just as well.
My background fabric is Ruby Star Society’s Speckled in White/Gold. I used my AccuQuilt Go! to cut 2 1/2” strips with a strip cutter die. If you want to save time and not cut background strips, you could use a second jelly roll that is a solid color.
What Cutting Ruler to Use
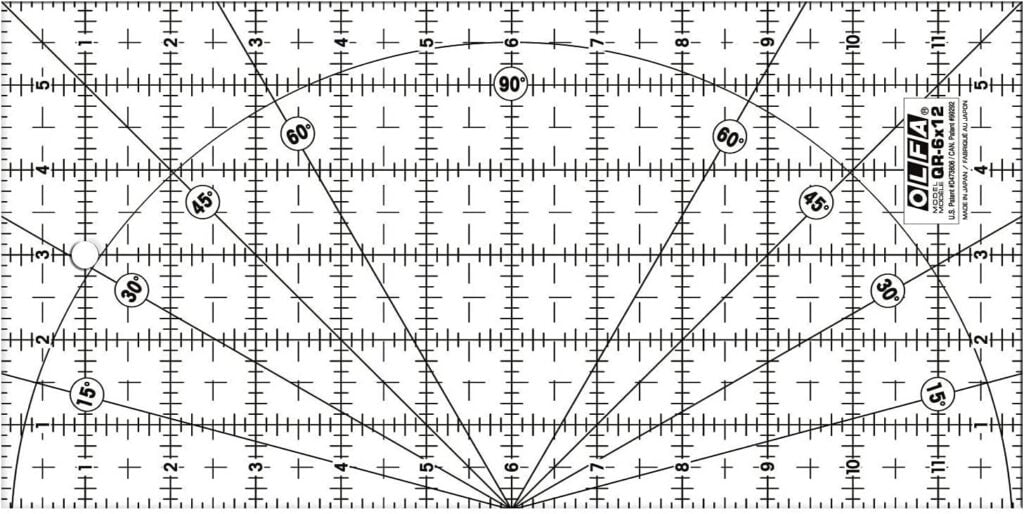
To cut your sewn strip sets, you will need a ruler with a 45 degree angle. Most 6” x 12” or 6” x 24” quilting rulers already have these lines and will work fine. If you want to buy the exact ruler that I use, its the Olfa 6” x 12” Frosted Advantage Ruler.
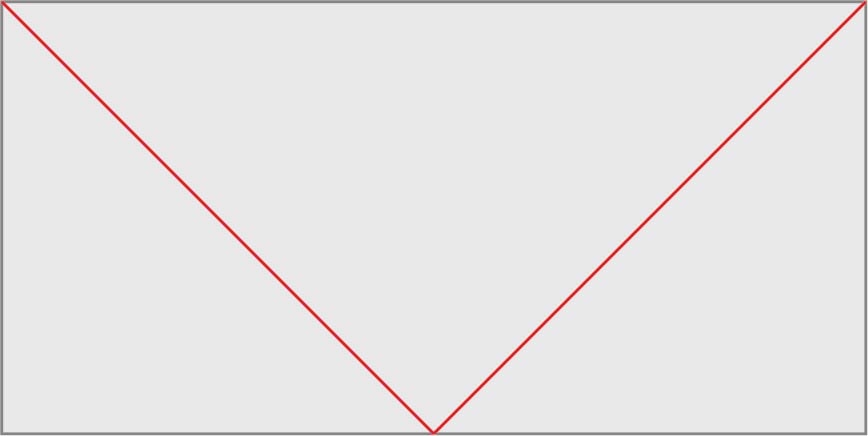
In my diagrams, I have simplified the ruler to show only the lines that you will need to use. If you are using a different ruler, the 45 degree angle line might be in a different place. That’s okay.
Batting Tips
I used fluffy wool batting (Quilter’s Dream brand) for a soft and plush quilt and to to give my quilting stitches definition. You can achieve a similar look for less with high loft polyester batting. Cotton and cotton/poly battings are wonderful too, but they do not give as much ‘loft’ or definition to your quilting stitches.
So let’s get started!
How to Sew the Confetti Jelly Roll Quilt Pattern
Finished quilt dimensions: approximately 61” x 68”
You will need:
- 40 strips of brightly colored fabric 2 1/2” x 42” (or a jelly roll strip bundle)
- 3 yards of light colored background fabric (or a second jelly roll strip bundle)
- an acrylic quilting ruler with a 45 degree angle line printed on it (I suggest the Olfa 6” x 12” Frosted Advantage Ruler)
- 1/2 – 5/8 yard binding fabric
- 4 yards backing fabric, or enough to piece together a 65” x 73” rectangle*
- a 65” x 73” piece of quilt batting*
- a rotary cutter and mat
- sewing machine
- thread (I suggest thread matching the background fabric)
* Wait until your quilt top is done to cut the backing and batting. There are many seams in this quilt. Depending on your seam allowance (no one is perfect!), your quilt may be a bit bigger or smaller.
Cutting:
From your background fabric, cut:
- 40 strips, 2 1/2” x 42”
Strip-piece all of the 2 1/2” fabric strips
Use a 1/4” seam allowance and a short stitch length such as 1.5-2. A scant 1/4” seam allowance may be used, if desired. This step may be done before cutting off the fabric selvages.

1. Place a 2 1/2” x 42” background fabric strip right sides together with a 2 1/2” x 42” print or solid colored strip. Sew along one long edge with a 1/4” seam allowance.
2. Open the strip set and press the seam toward the darker fabric.
Repeat with all of your strips to make 40 strip sets.
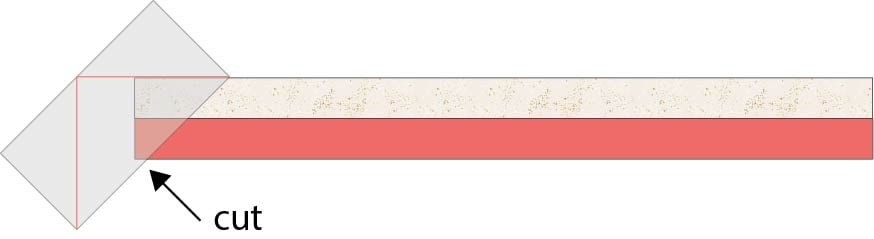
Cut the strip sets into 45 degree angle pieces
Note: Make sure to cut half of the strip sets in one direction and half in the opposite direction, as shown below.
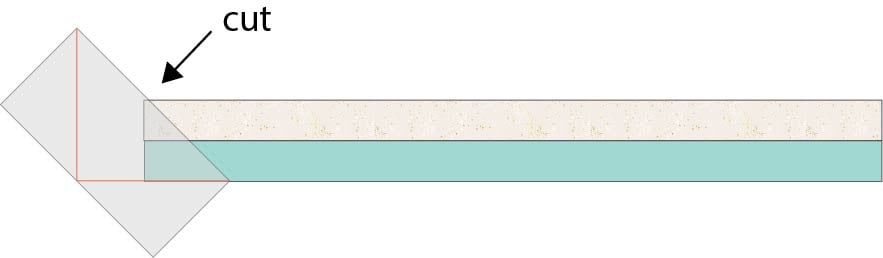
1. Place the 45 degree angle line on your acrylic ruler either at the top of your strip set or the bottom in a way that will enable you to cut off the end of the strip set. If you have not removed the fabric selvages, make sure that the selvage ends will be cut off as well. Cut.
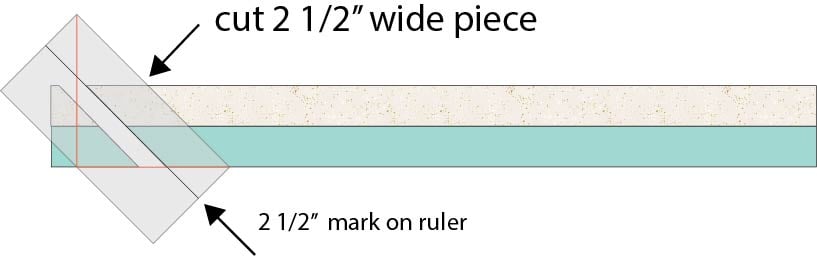
2. Move the ruler over to the right so that the 2 1/2” mark or line on your ruler is now along the cut edge. Cut to make a 2 1/2” wide piece.

3. Cut 10 pieces from the strip set.
Repeat to cut half (20) of your strip sets in this direction. Don’t worry too much if you mis-cut a few times and don’t get 200 pieces. You will only need 192. If your fabric is 44” wide and you are able to cut 11 strips, you can make quilt that is 74” long.
Set these pieces aside.
4. Now it’s time to cut pieces in the opposite direction. Place the 45 degree angle line on your acrylic ruler either at the top of your strip set or the bottom in a way that will enable you to cut off the end of the strip set with the angle in the opposite direction from the angle you were cutting before. Cut off the end.

5. Move the ruler over to the right so that the 2 1/2” mark or line on your ruler is now along the cut edge. Cut to make a 2 1/2” wide piece.

6. Cut 10 pieces from the strip set.
Repeat to cut half (20) of your strip sets in this direction. Don’t worry too much if you mis-cut a few times and don’t get 200 pieces. You will only need 192. If your fabric is 44” wide and you are able to cut 11 strips, you can make a slightly longer quilt.
Keep these pieces separate from the ones cut in the other direction.
Fun Tip for Randomizing Your Colors or Prints
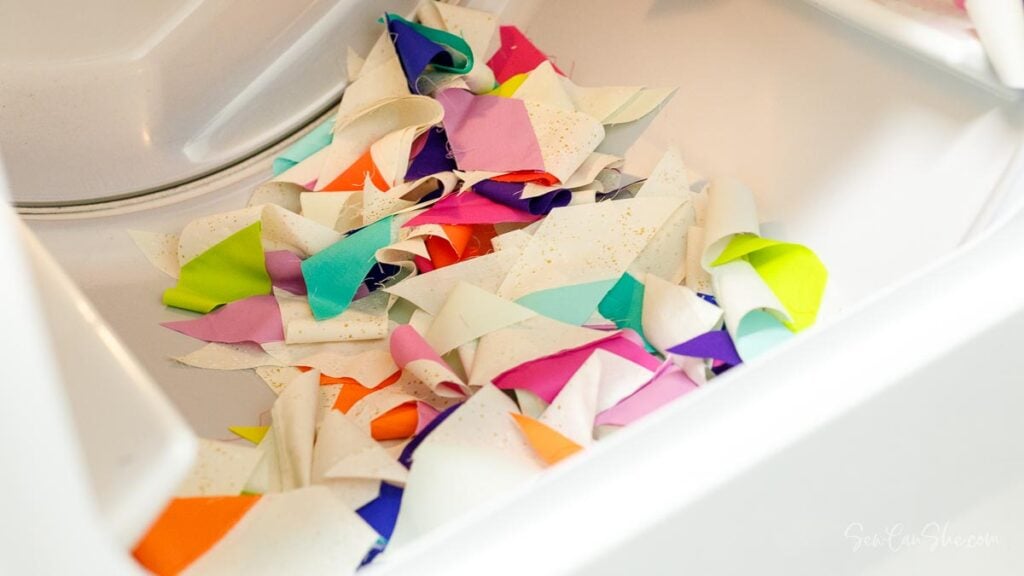
As you sew your strips together into long rows, you’ll probably want the fabrics to appear randomly scattered over the quilt top. Random can be hard to achieve on purpose, and this is a lot of pieces to mix up. While trying to do that, I discovered a fun trick! I placed half of my strips (all of the ones cut in a single direction) in the dryer and tumbled them for a while. Abra-cadabra! I had mixed up strips!
Be sure to set your dryer to the ‘fluff’ or ‘no heat’ setting so you won’t accidentally shrink the pieces. I found that it took at least 5 minutes of tumbling to get my pieces completely separated and mixed up. You still want to keep the pieces in two separate sets – one set cut in each direction.
Sew the 45 degree cut pieces together in long columns
Use a 1/4” seam allowance and a regular stitch length of 2-2.5.
Tip: Work with all of the pieces that were cut in one direction first, then move on to work with the other set that were cut in the opposite direction.
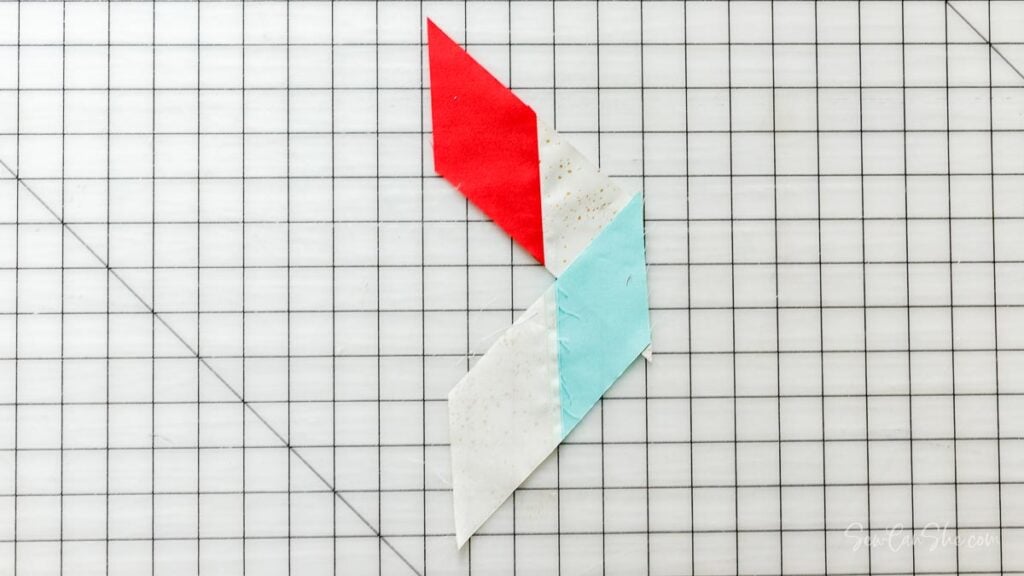
1. Place two pieces (cut the same way), right sides together as shown. Notice that the points overlap by 1/4” at the top and bottom of the seam. This will enable you to begin sewing 1/4” from the edge exactly where the fabrics come together.
Also notice that in the picture, I am about to sew a seam with the background fabric on the bottom and the darker color fabric on top. All of the pieces must be sewn the same way. So decide now if you will sew each seam with the background fabric on the top or the bottom and be consistent throughout.
Sew this seam with a 1/4” seam allowance. Press the seam toward the darker fabric.

2. Sew 12 pieces into a long column. I chose to sew my pieces in sets of two and press, then join those into sets of four, and press, etc., until I had long columns with 12 pieces. If you were able to cut 11 pieces from your strip sets, make columns of 13 pieces instead.
Make 16 columns.
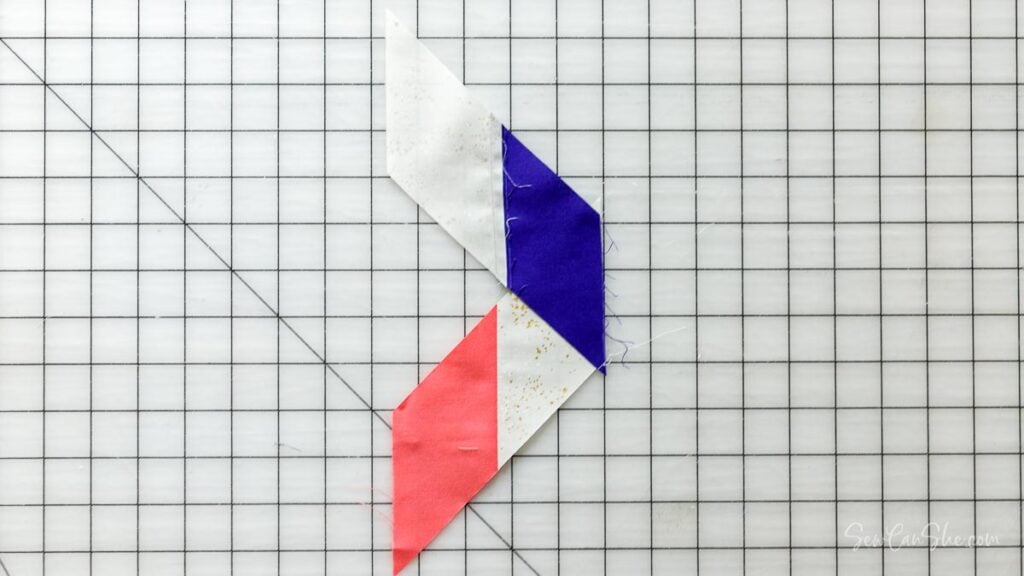
3. Now it’s time to work with the strips that were cut in the opposite direction. Place two pieces right sides together. The points should overlap by 1/4” at the top and bottom of the seam.
Remember to be consistent and sew all of the pieces together the same way, with the background fabric on the bottom (or the top).
Sew with a 1/4” seam allowance. Press the seam toward the darker fabric.

4. Sew 12 pieces into a long column. If you were able to cut 11 pieces from your strip sets, make columns of 13 pieces instead.
Make 16 columns.
Sew the Columns Together to Make Your Quilt Top
1. Arrange your 32 columns in an alternating pattern on a design wall or large bed. You may need to turn half of the columns 180 degrees so that the piece on top alternates between a background fabric piece and a print or colored fabric piece.
2. Sew the columns in sets of 2.

3. Continue sewing the columns together until they are one large piece.
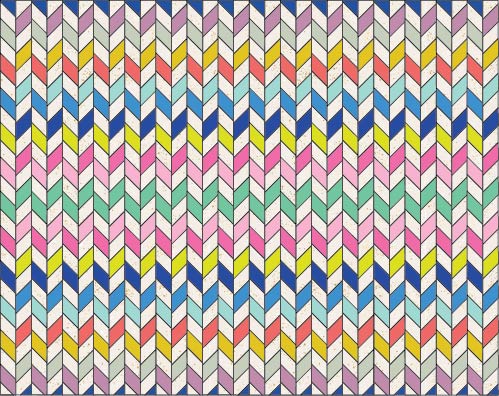
4. Use your longest ruler to help you trim away the points at the top and bottom of the quilt top.
There are a lot of bias cut edges on this quilt top, so sew all the way around the quilt top, 1/8” from the edge to prevent stretching.
Finishing the Confetti Jelly Roll Quilt

1. Cut or piece together a piece of backing fabric and prepare a piece of batting. These should be at least 4” larger than the quilt top (an extra 2” on each side for quilting on a domestic machine and at least 5” on each side for quilting on a longarm frame). Make a quilt sandwich with the backing, batting, and top.
2. Baste together with fusible batting, pins or basting spray.
3. Quilt as desired. Wavy line quilting with your walking foot would be a fun pattern on this quilt!
4. Cut 7-8 binding strips and bind using your favorite method. This is my favorite quilt binding method.
xoxo,


CONFETTI QUILT PATTERN (JELLY ROLL FRIENDLY!)
Purchase this pattern in PDF format! The PDF file contains all of the instructions, plus the step by step photos that have been reduced to fit the page nicely with no ads.
Download the file immediately and keep your confirmation email so you can download it again later. Free patterns must be downloaded within 30 days.
Disclosure: some of my posts contain affiliate links. If you purchase something through one of those links I may receive a small commission, so thank you for supporting SewCanShe when you shop! All of the opinions are my own and I only suggest products that I actually use. 🙂