How to Enlarge a Pattern Using Your iPhone and MacBook

So you want to enlarge a sewing or craft pattern from a book, but you don’t want to run to the library to use the copy machine? Use your iPhone and MacBook!
I’m writing this little tutorial after writing the Windows version of How to Enlarge a Pattern using your Smartphone and Computer – because I love my MacBook. It’s actually easier to prepare your photo right in the Apple Photo Preview than it is in Paint – yay! It takes a couple more steps to fudge a tiled print job – but it’s still totally easy. You’re gonna love this!
I must admit that I have selfish reasons for showing you how to make patterns in books bigger (or smaller).
First of all, I love to use sewing and embroidery patterns in books and I always get annoyed at the little blurb ‘enlarge by 200%’ or whatever.

Second of all, my own book Crafty Little Things to Sew was just released and guess what? Yup, the publisher reduced all the patterns and put them in the back of the book.
So while I am hoping you use these instructions to enlarge the patterns in my book – you can use them for any pattern in any book – yay!
How to Enlarge a Pattern Using your iPhone and MacBook
1. Determine the needed size of the pattern.
Measure the height of the pattern (in the book or reduced on paper) and multiply that measurement by as much as needed.
For example, if the pattern says ‘enlarge by 200%’, then multiply the starting height by 2.
If the pattern says ‘enlarge by 150%’, then multiply the starting height by 1.5.
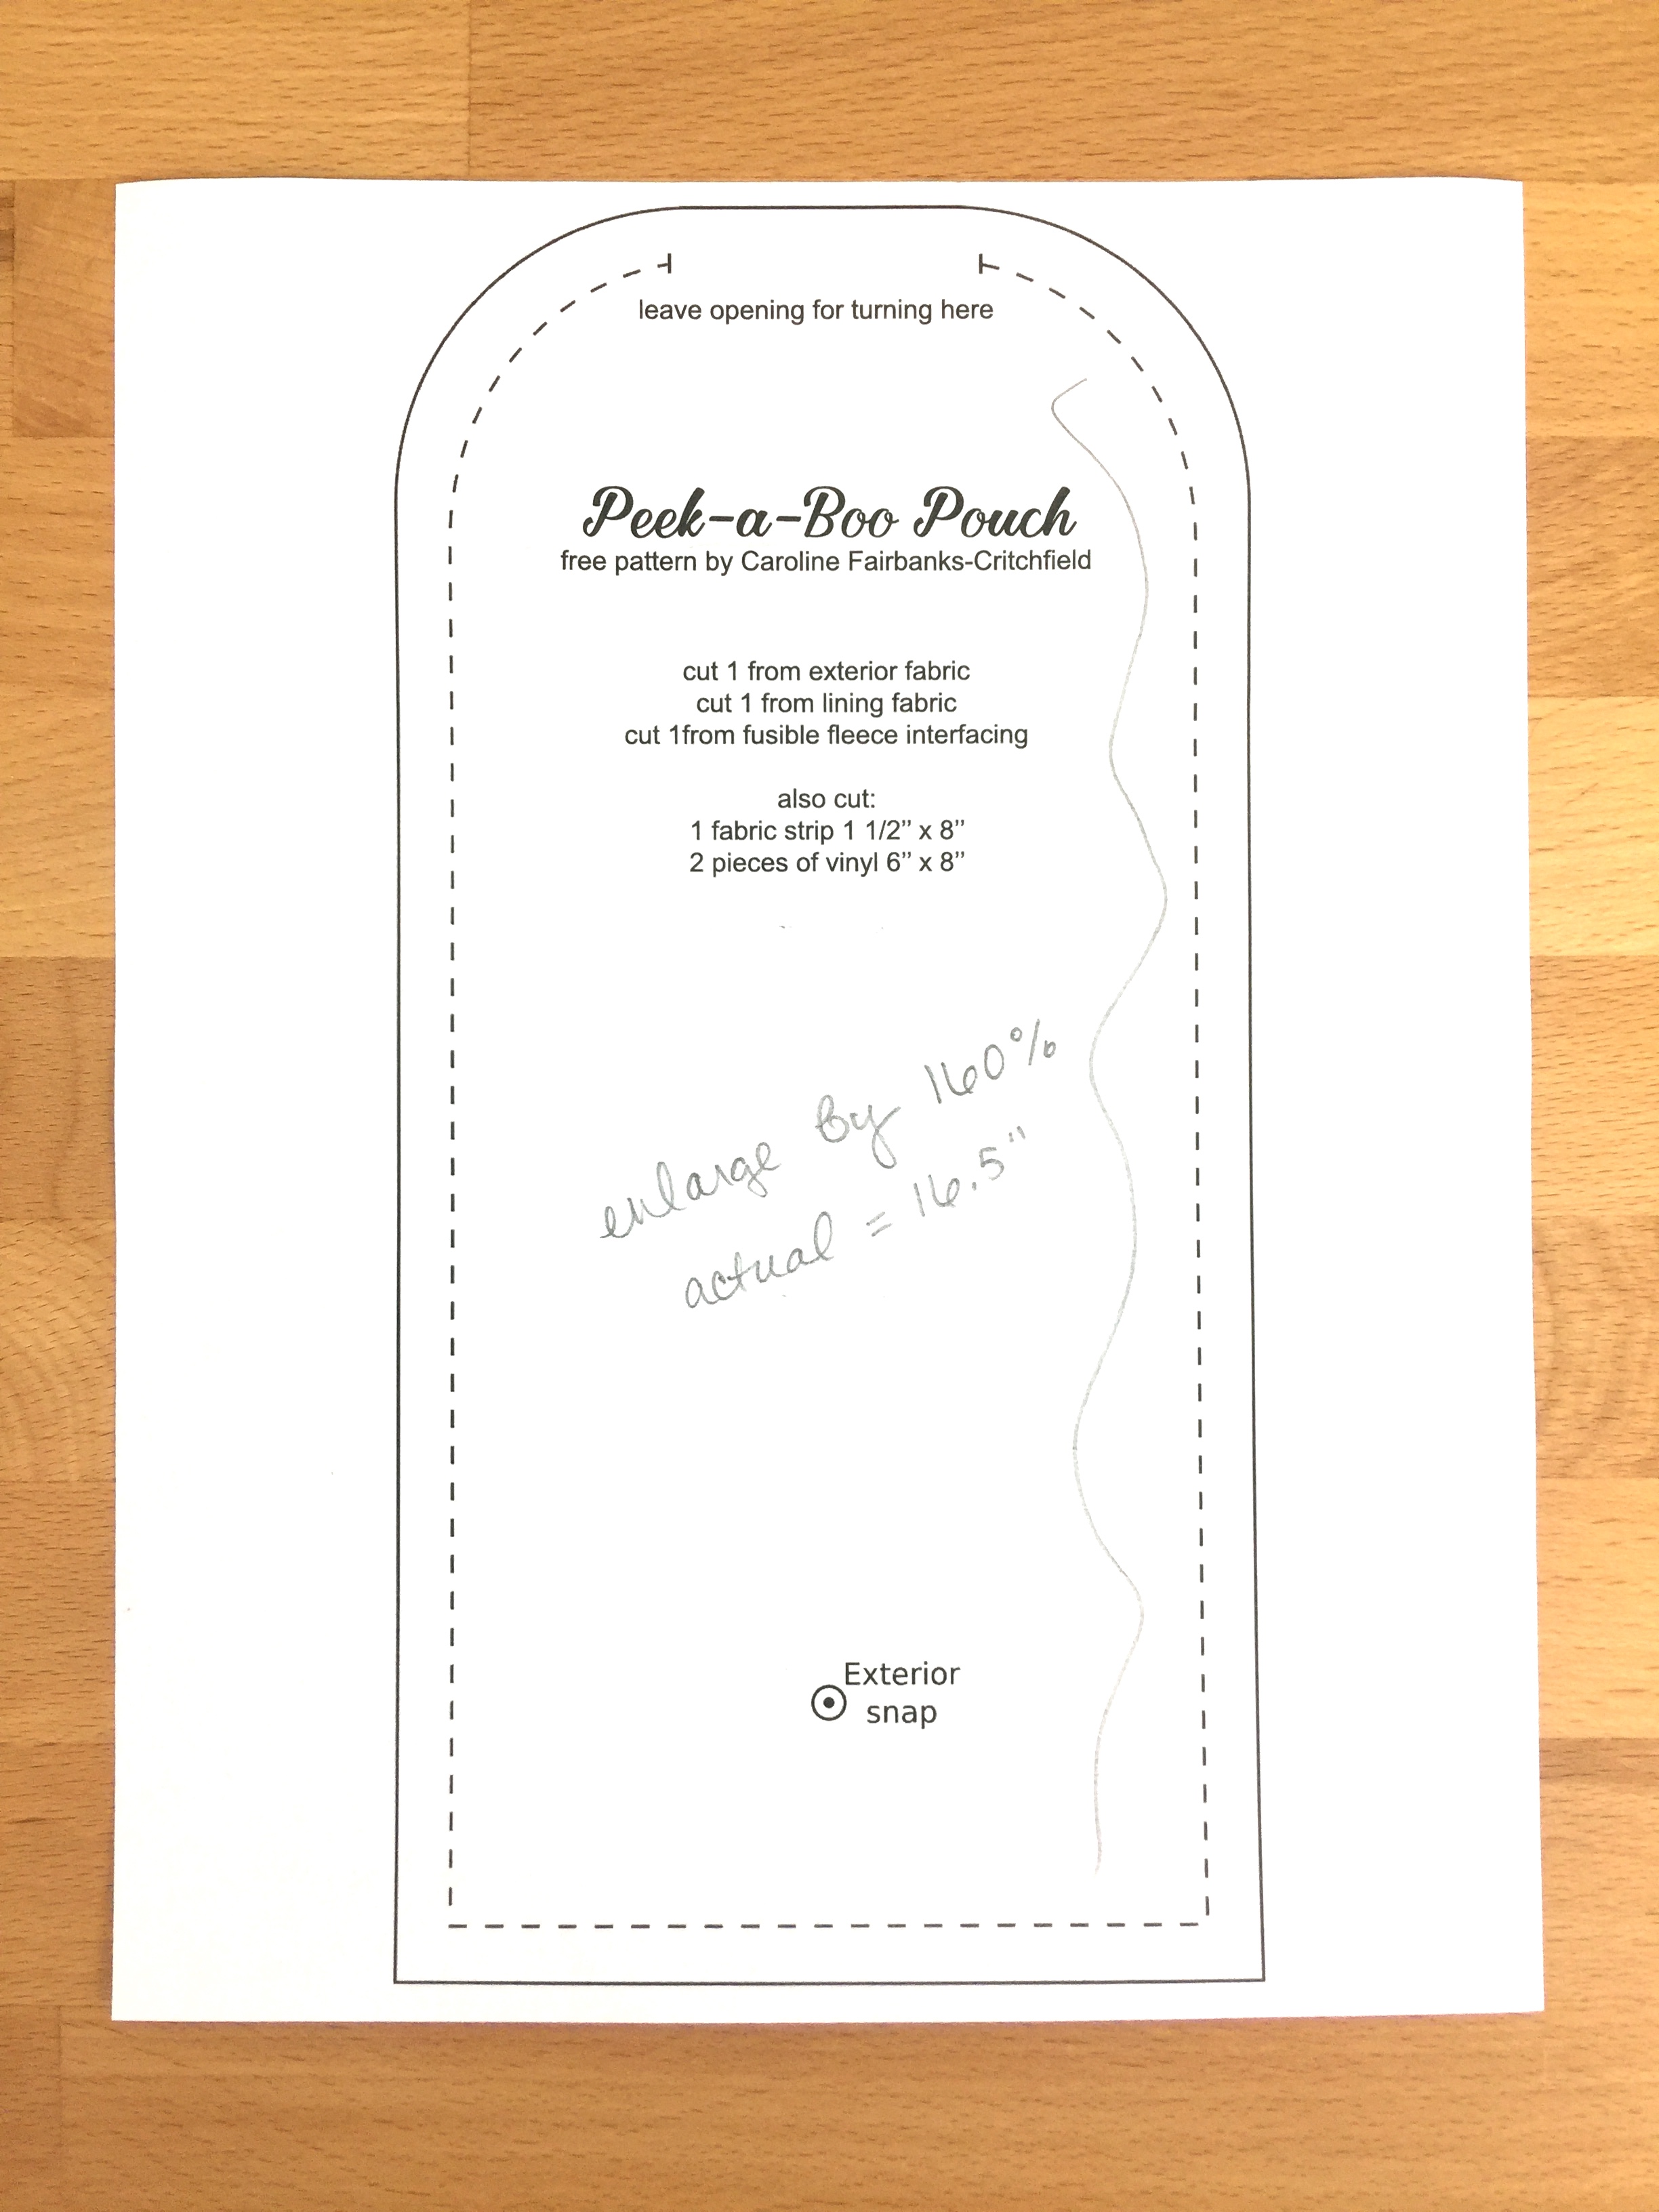
Use a pencil to write the actual (final) height that the pattern should be on the pattern for your reference. You can also draw a squiggly line like I did to help matching up the pieces later.
2. Take a picture of the pattern using your phone.
I didn’t want to break any copyright laws, so I used my Peek-a-Boo Pouch pattern that I already offer for free. Hold your phone squarely above the book (or reduced pattern) so that the entire pattern is in the photo and it is distorted as little as possible.
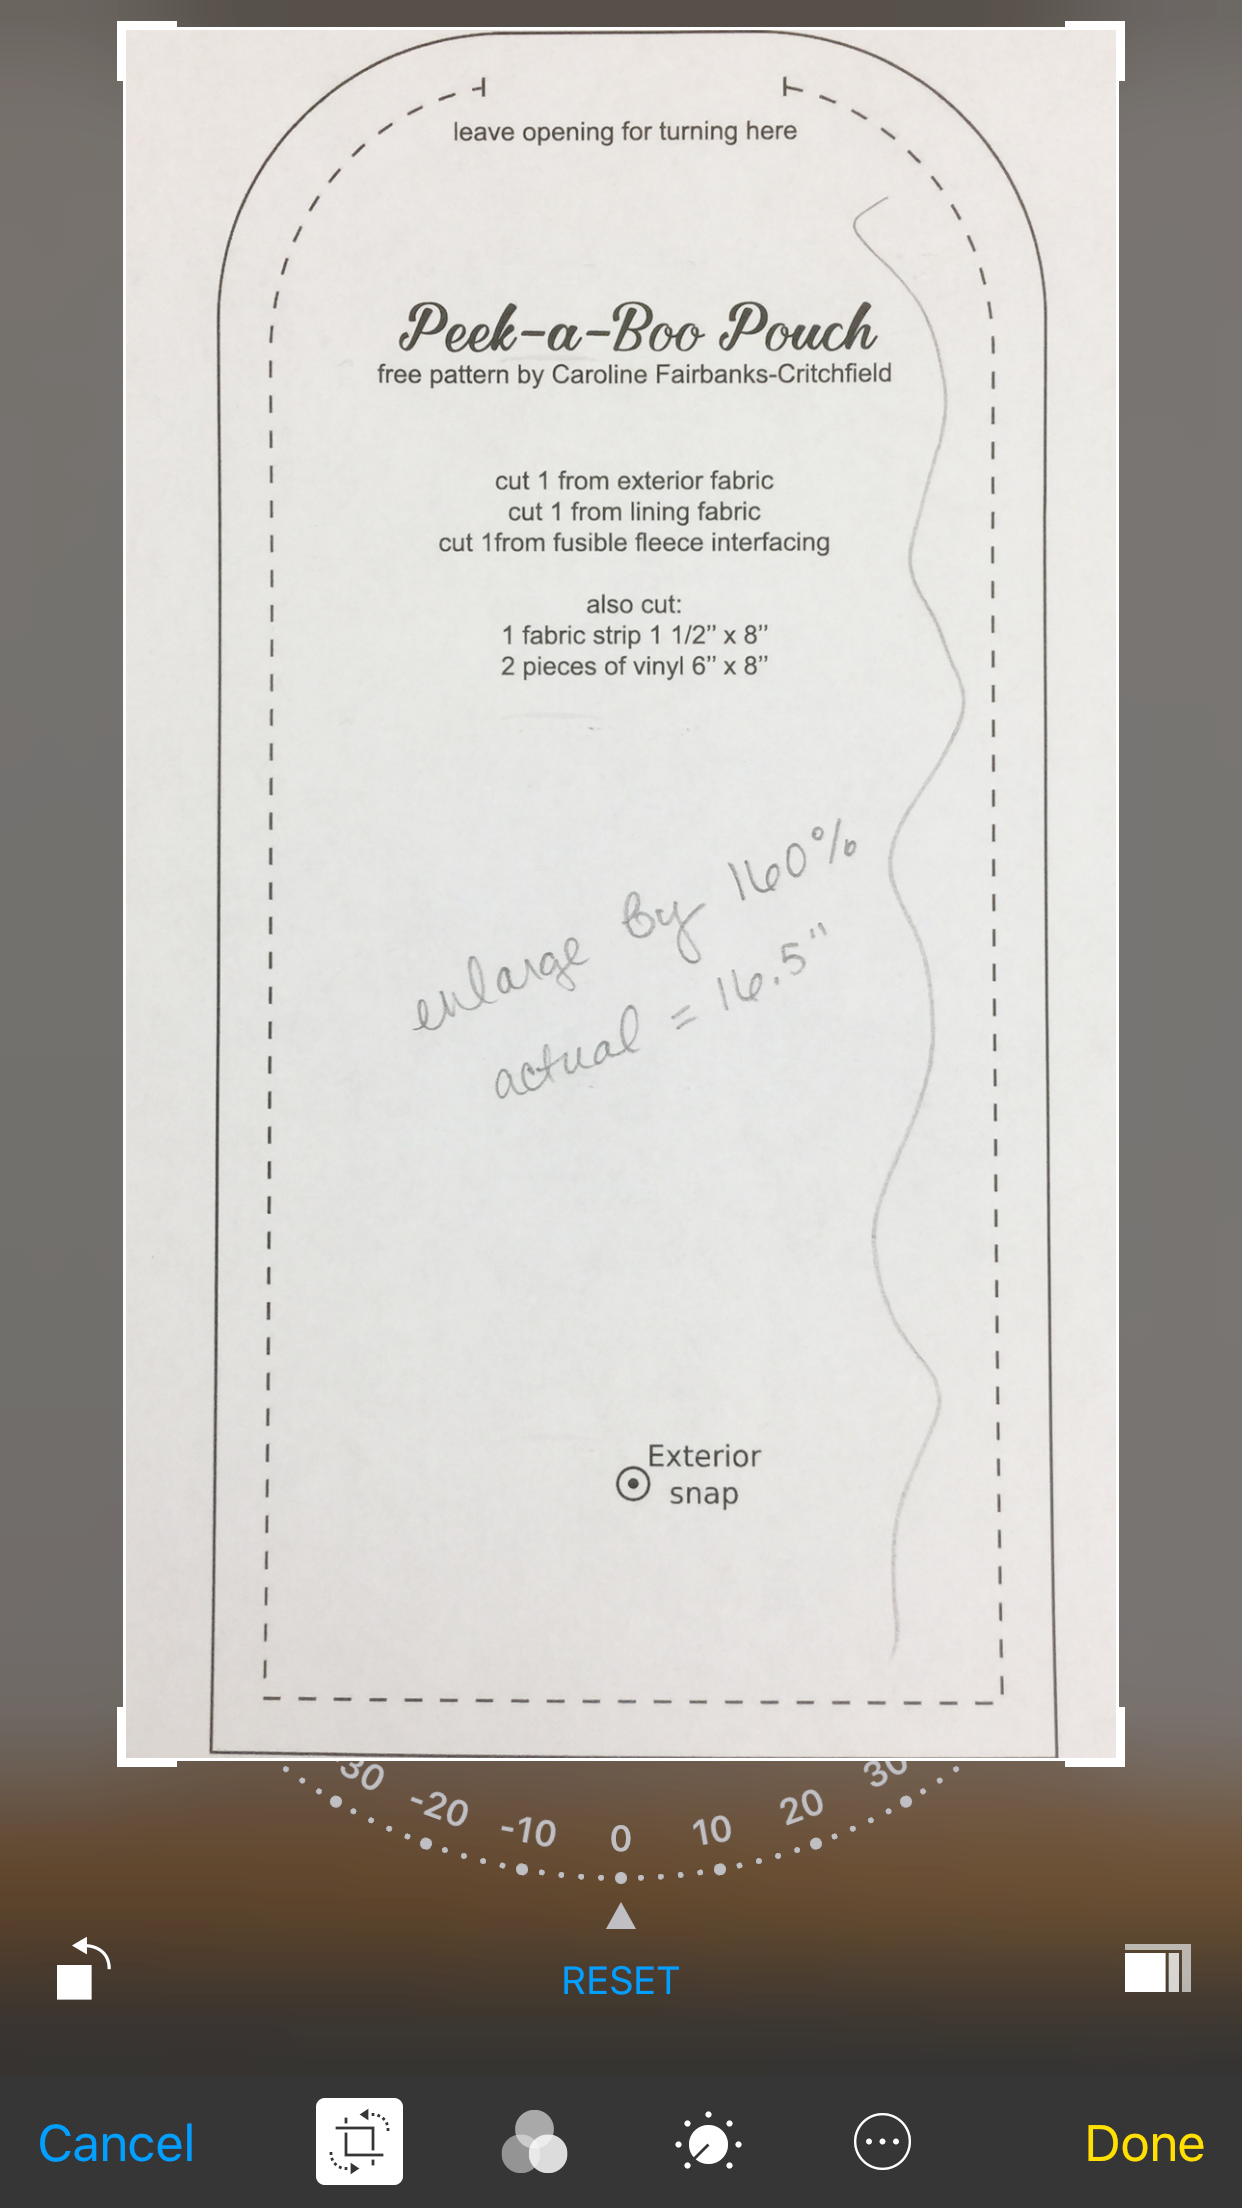
Crop the photo around the pattern piece. You can also do this in your computer’s photo editing software later. But iPhones can crop and adjust the angle of photos nicely, so it’s easy to do it from the start.
Then save and email yourself the cropped pattern as a picture.
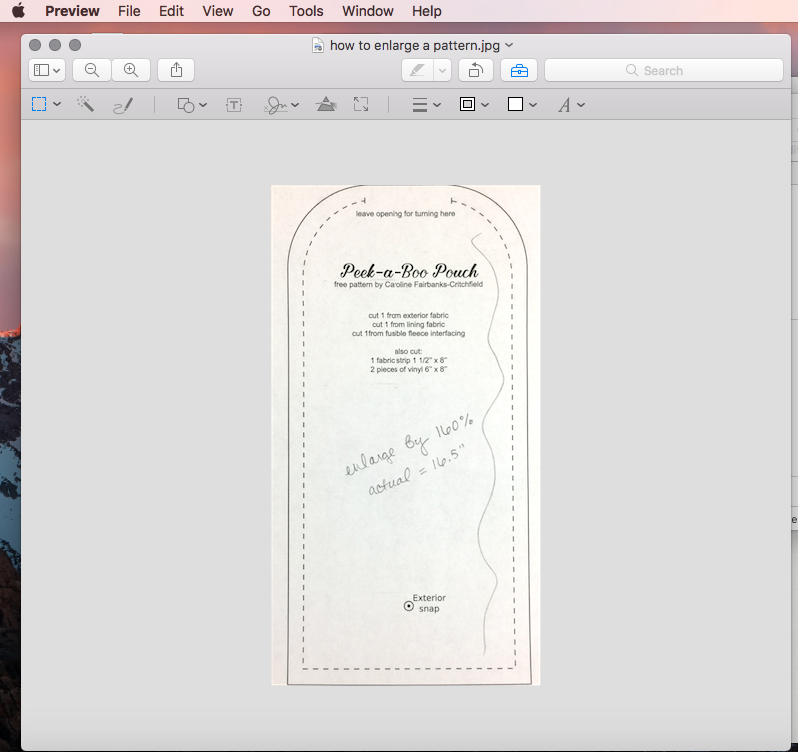
3. Open the photo in Preview.
If you haven’t cropped around the pattern yet, go ahead and crop the height and width now.
Don’t worry about any curved edges. Just crop it to the right height and width – you wrote the needed height on the pattern with a pencil, right?
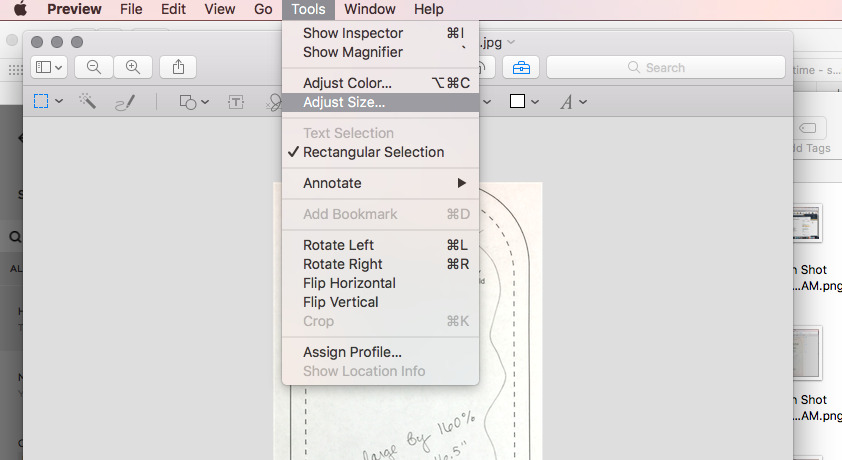
In the Preview menu bar, go to Tools>Adjust Size.
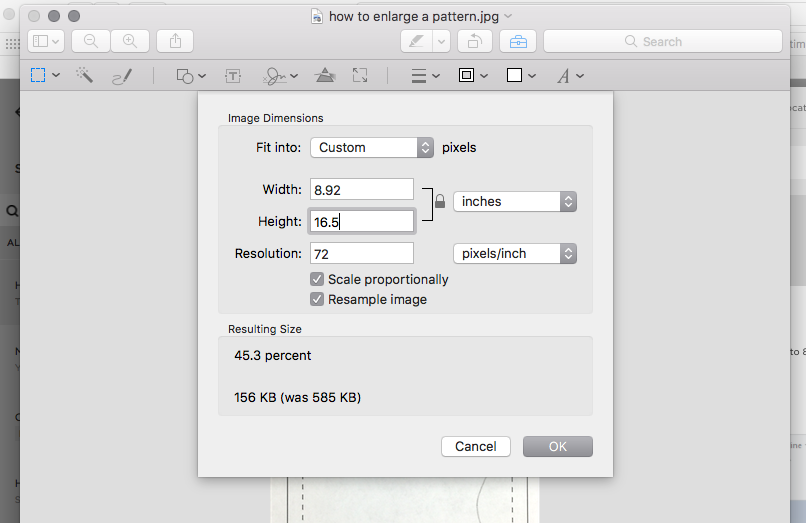
In the Image Dimensions box that comes up, set the units of measurement to ‘Inches’ and then set the height to your needed height. If you leave the ‘Scale proportionally’ box checked then the width will automatically adjust correctly.
Click OK.

Yay – it’s the right size!
Hit CMD+ or CMD- until it fits your screen. Now we need to fudge a tiled print job – it’s easy in Preview. 🙂
4. Use the crop function in Preview to print the pattern image on multiple sheets of paper
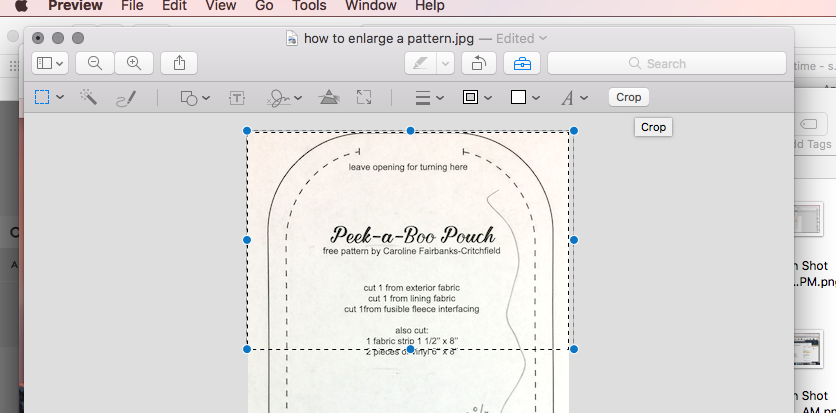
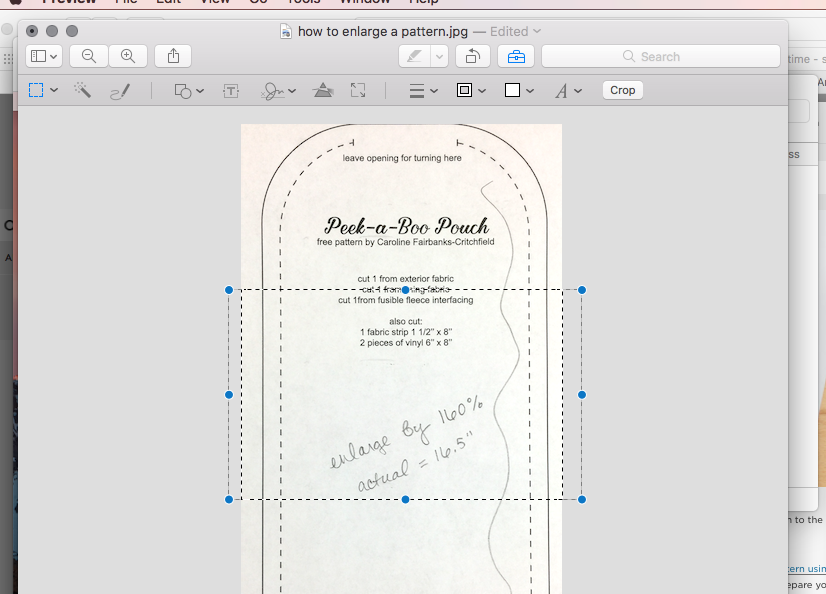
Select a portion of the pattern to print first. Make sure it will be small enough to fit on a single piece of paper. Hit Crop.
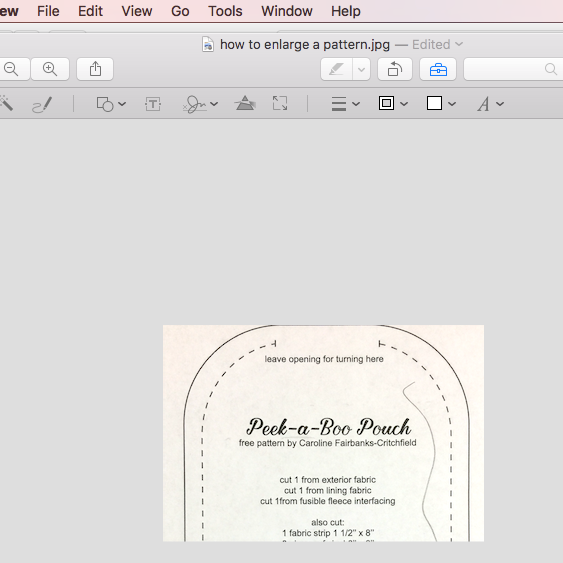
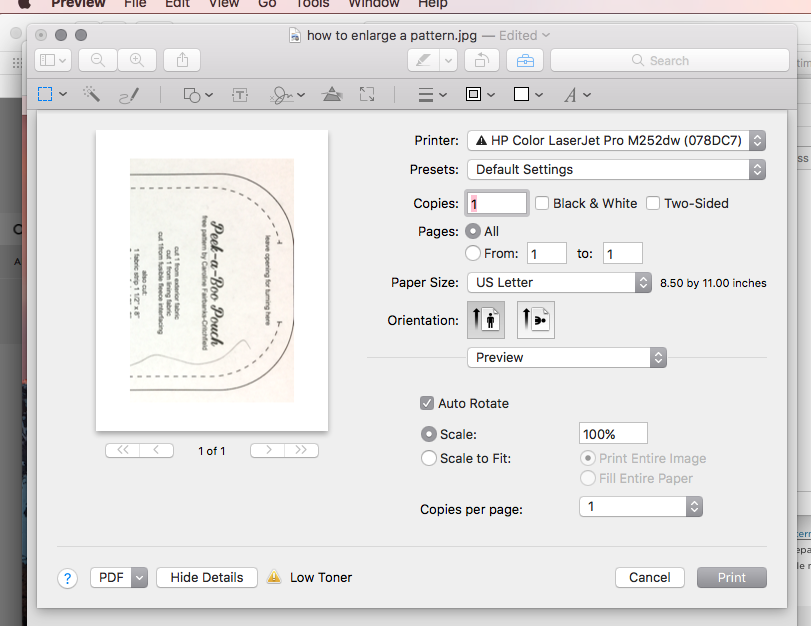
Hit CMD-P to print the cropped image. Make sure that Scale is set to 100%. If you can’t print the entire cropped image then you will have to go back and re-crop a smaller piece.
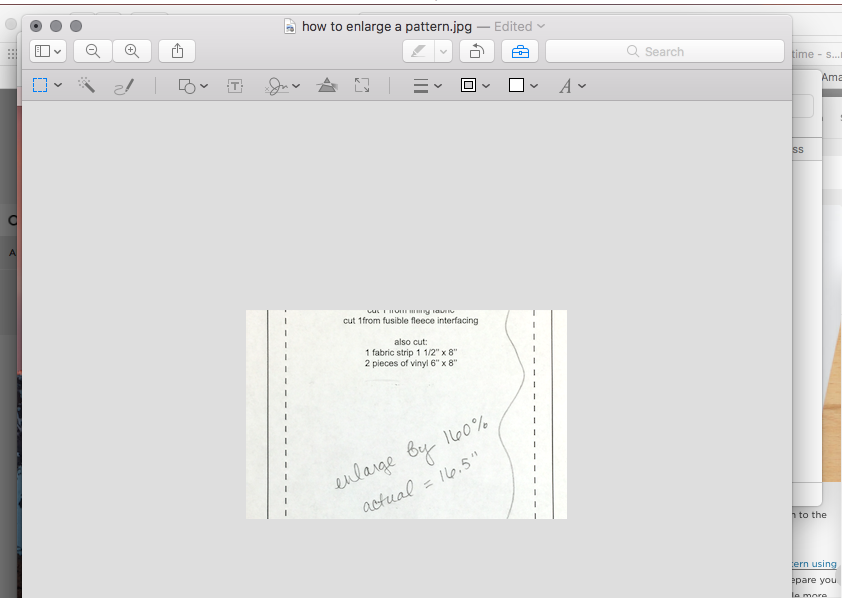
Now hit CMD-Z to undo your crop and return to the whole pattern piece that’s the correct size (don’t undo too many times!).
Crop a second rectangle that overlaps your first crop by a little bit (take the first printed image out of the printer to refer to if you need to).
Print this second cropped ’tile’ at 100% scale.
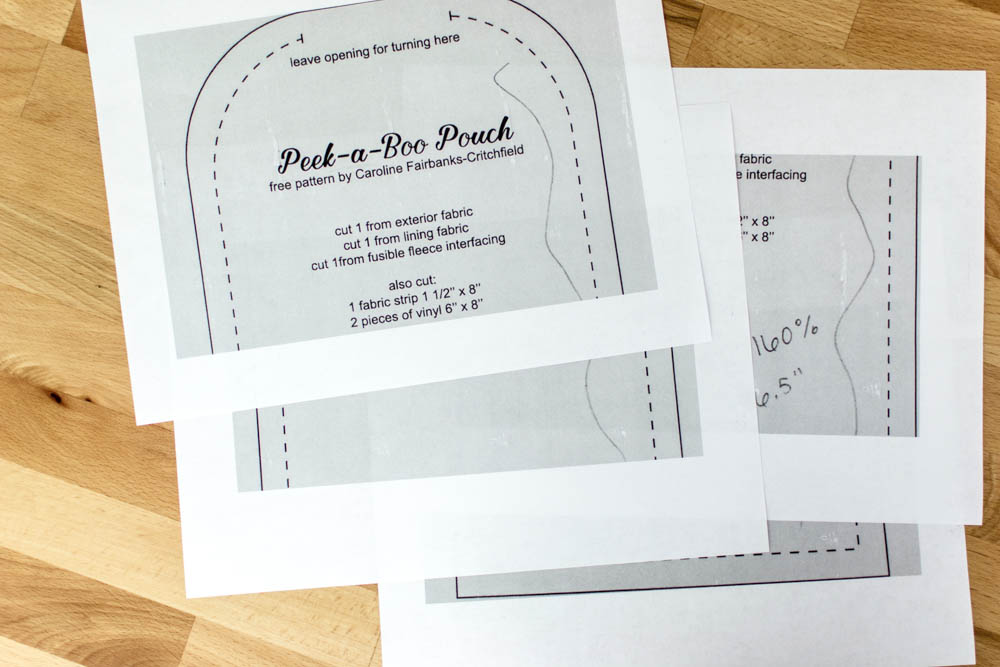
Then undo to go back and print as many cropped ’tiles’ of your pattern piece as you need.
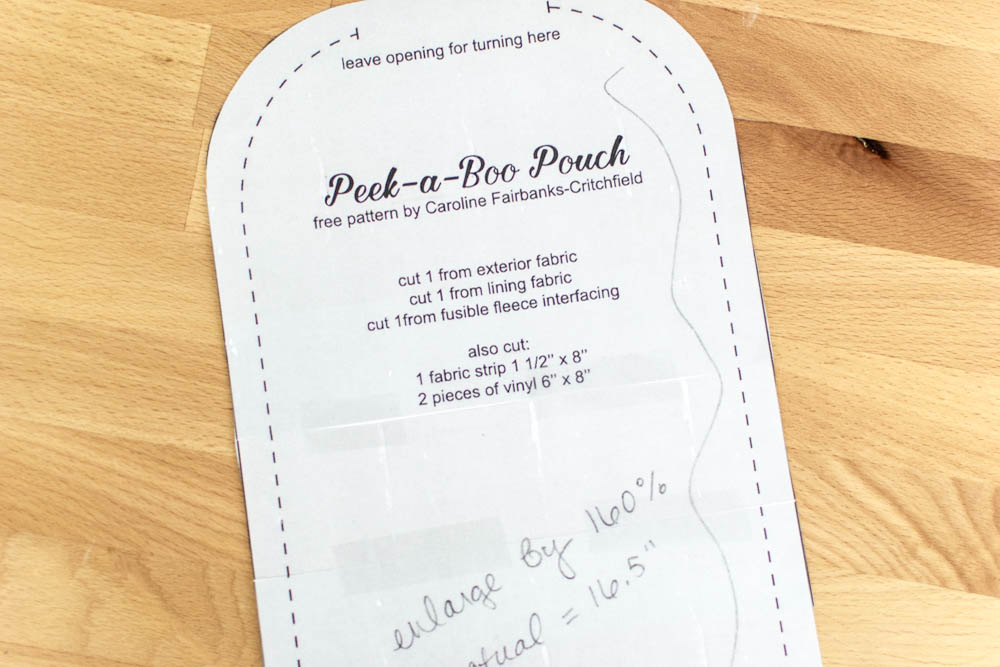
Cut your pattern out and tape it together, paying attention to the way that you ’tiled’ your images. Measure your new pattern piece to make sure it printed correctly. If not, re-trace your steps to see what went wrong.
Of course, I hope you use this technique to sew up all the patterns in my book Crafty Little Things to Sew!
xoxo,

Disclosure: some of my posts contain affiliate links. If you purchase something through one of those links I may receive a small commission, so thank you for supporting SewCanShe when you shop! All of the opinions are my own and I only suggest products that I actually use. 🙂
