How to Sew a Pillow Cover From a Quilt Block

So, you have some extra quilt blocks lying around. Maybe you made too many for a quilt or you made too few (he he – anybody here do that?). Well, those orphan quilt blocks would make amazing pillows, but don’t just sew them to a square of fabric for the back! Quilt blocks are gorgeous, so let’s make a gorgeous quilted pillow, shall we?
Oh, and throw pillows like this are the perfect way to coordinate with a baby or bed quilt that you made.
(By the way, this pillow was sewn from my Hashtag Quilt Block in adorable Talk To Me fabrics from Ink & Arrow, and it will be in their booth at Quilt Market in a couple weeks!)

This tutorial is for a quilted pillow cover that is 4” bigger than the finished quilt block. I started with a 12 1/2” block so the pillow is about 16”. There is a zipper across the back and you can add a trim around the edges like the pom-poms I used if you want.
You will need:
- one 12 1/2” quilt block (that would finish at 12”)
- two 2 1/2” x WOF strips of fabric to frame the block (mine matched the block background)
- a 17” square of backing fabric
- two 17” squares of batting
- two 17” squares of lining fabric (this won’t show)
- 1 zipper 16” or longer
- one 16” x 16” pillow form
- pom-pom or other trim (optional)
Sewing:
1/4” seam allowance allowed.
1. Sub-cut the 2 1/2” strips
of fabric into:
- 2 strips 2 1/2” x 12 1/2”
- 2 strips 2 1/2” x 16 1/2”
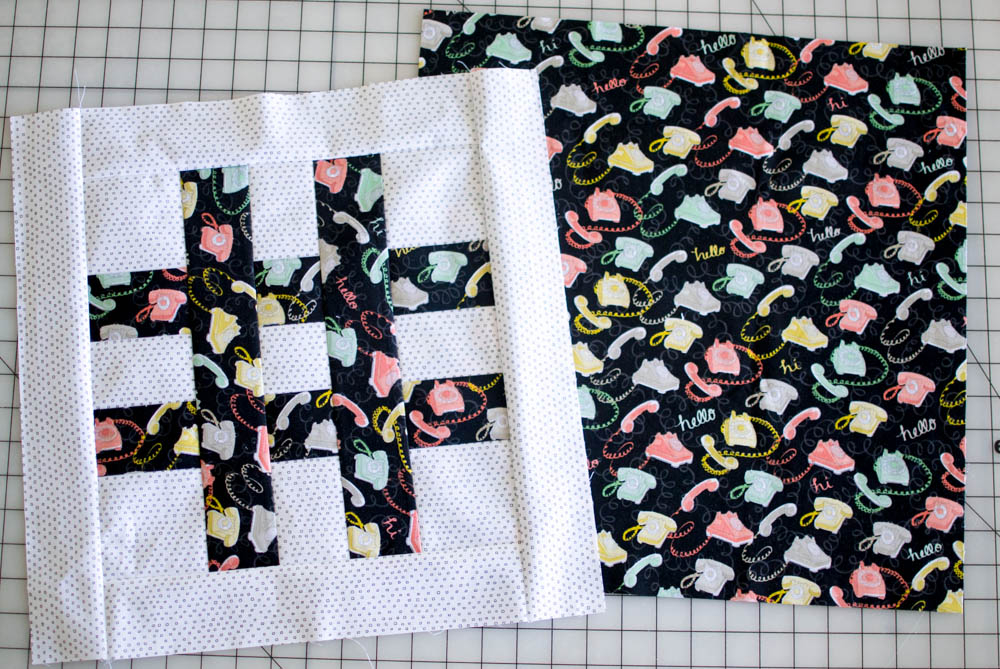
2. Sew the 2 1/2” x 12 1/2” strips to the sides of the quilt block.
3. Sew the 2 1/2” x 16 1/2” strips to the top and bottom of the quilt block.

Straight Line Quilting:
1. Layer a batting piece in between a lining fabric square and the and the pillow front (quilt block) with the wrong sides of the fabrics against the batting. Do the same with your backing fabric and the other batting and lining pieces.
2. Baste the small quilts together with basting pins or basting spray (I would normally use basting spray, but I was all out).

3. Attach a walking foot (even-feed foot) to your sewing machine if you have one. Starting in the middle, sew long straight lines of quilting down the little quilt sandwich for the pillow front.
Notes: My lines are about 1” apart. You could measure and mark your lines with a ruler to be super accurate, but I don’t mind if my lines aren’t exactly the same distance apart. I think it adds to the hand-made charm of the pillow. Jacquie Gering has two amazing Craftsy classes about straight line quilting Creative Quilting With Your Walking Foot and Next Steps With Your Walking Foot. I love them!

4. Sew straight line quilting on the little quilt sandwich for the pillow back too.
Note: I marked a few straight lines on the pillow backing piece with a ruler and some chalk – not for me to sew on, just as reference lines to help me keep my quilting lines straight. I didn’t need those on the front piece because the seams in the quilt block were enough.

5. Trim and square up your front and back pieces so they are 16 1/2” x 16 1/2”.

Insert the zipper:
1. Choose a spot somewhere on your back piece for the zipper and slice it into two pieces. I picked a spot about 1/4 of the way down between two quilting lines.
Optional: finish the edges that you just cut with a serger or a regular zig-zag stitch.

2. Pin or clip the zipper right side down against the lower backing piece. Stitch, 1/4” from the edge. Use a zipper foot if needed.

3. Fold and press the fabric back and topstitch along the fold. I used black thread here to match my fabric, not compete with the lighter thread that I used for quilting.

4. Place the remaining zipper tape right side down against the cut edge of the other piece. Pin or clip in place and stitch.

6. Press back and topstitch.
7. With the zipper slider somewhere in the middle, trim away any extra zipper tape.

Finish the pillow:
1. If you are not using any trim, pin the pillow front and back pieces right sides together.


If you do want trim of some kind, baste it to the edges of one of the pillow sides now. My pom poms made it difficult to pin my front and back together, so I used clips.

2. With the zipper about 1/2 way open, stitch all the way around the pillow. Clip the corners and finish the edges, if desired.

3. Insert the pillow form and zip it up. Done!
Happy quilting!

Disclosure: some of my posts contain affiliate links. If you purchase something through one of those links I may receive a small commission, so thank you for supporting SewCanShe when you shop! All of the opinions are my own and I only suggest products that I actually use. 🙂