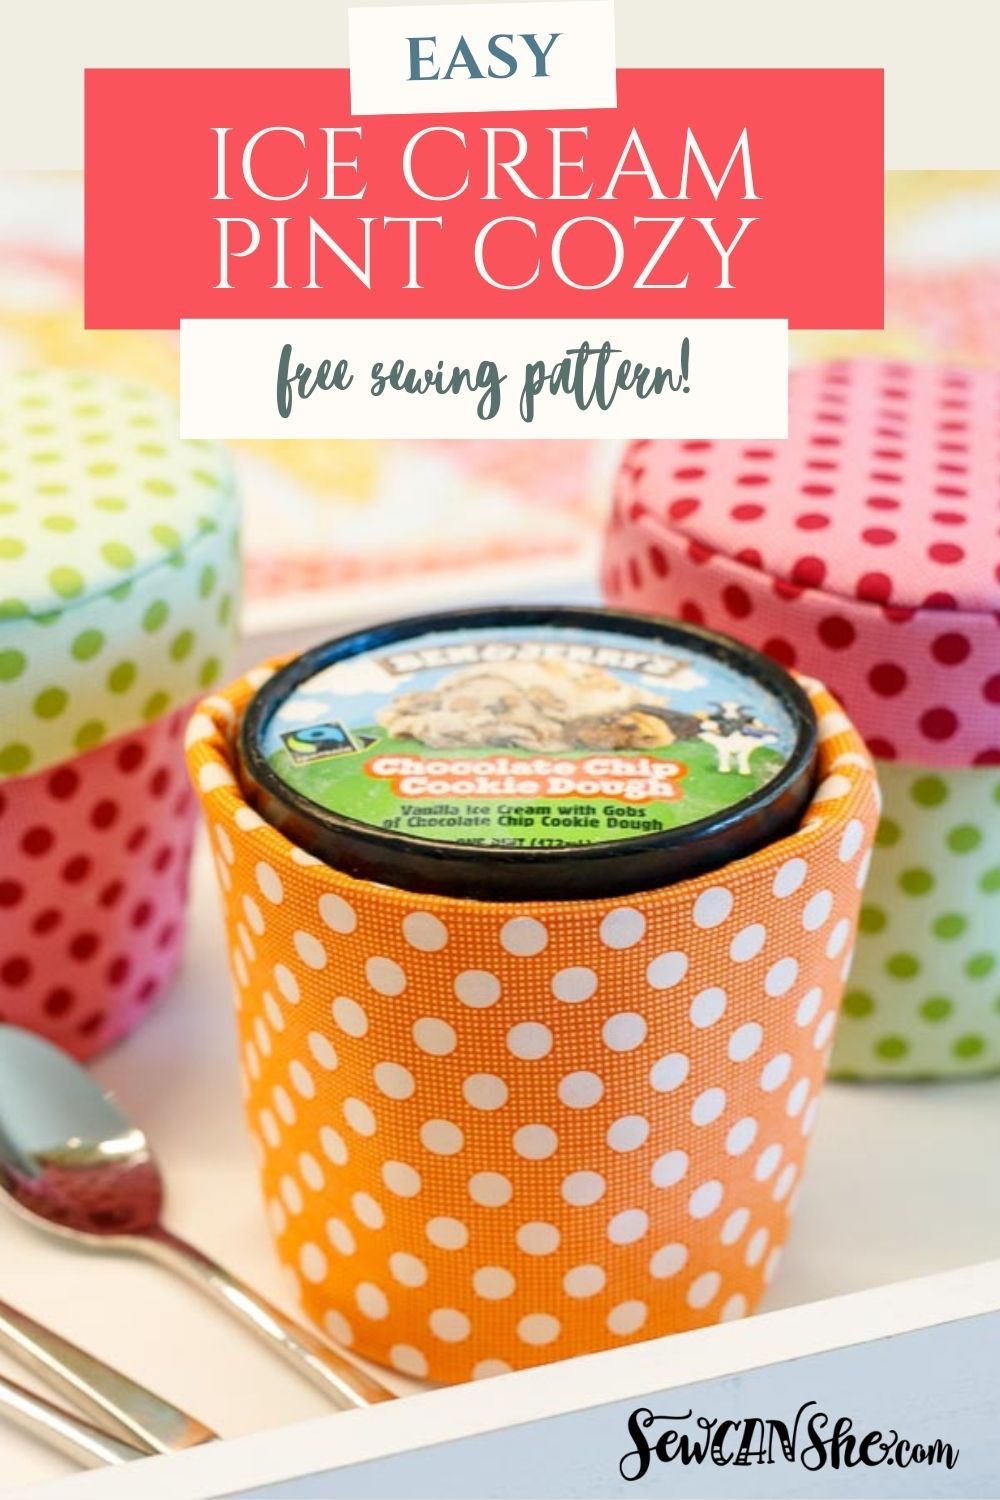
Ice Cream Pint Cozy: Free Sewing Pattern with an Optional Lid
Stop letting your hands go numb while you dive into your favorite pint of Ben & Jerry’s! Whether it’s a late-night Netflix binge or a hot summer afternoon, holding a freezing ice cream carton can be surprisingly uncomfortable.
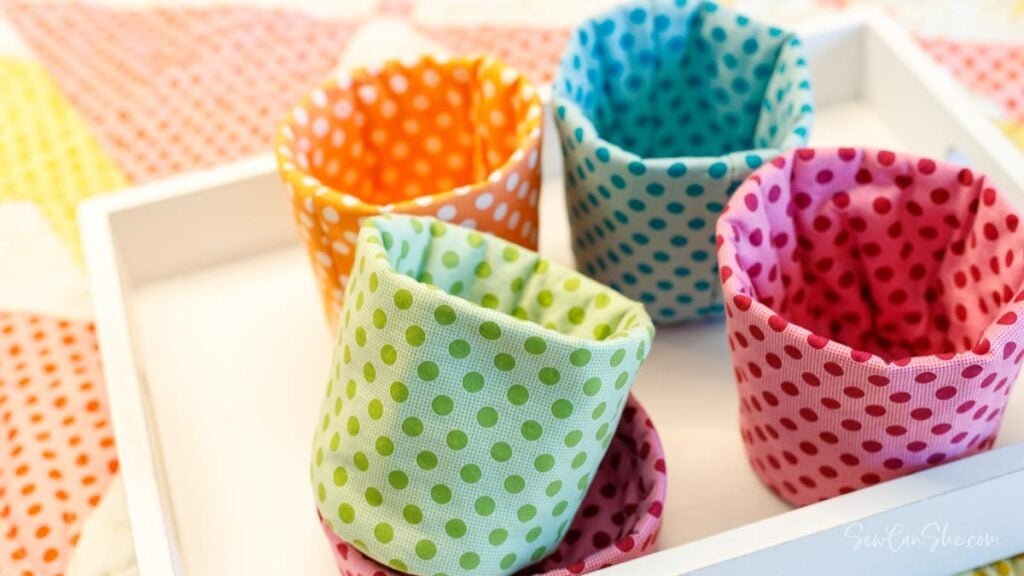
This Ice Cream Pint Cozy is the ultimate scrap-busting solution to that “chilly hand” dilemma. It’s designed to hug a standard pint perfectly, creating a comfortable barrier that keeps your fingers toasty while you enjoy every spoonful.
The secret to this project’s success is the insulated batting, which works double-duty to keep your ice cream at the perfect consistency for longer while reflecting your hand’s heat away from the carton.
The blog post below is totally free to read, print, and sew! Just hit CTRL +P on your computer to print. There is an optional PDF download offered at the end of the post. Join our Sewing Bee Community for access to over 300 PDF patterns (including this one), live workshops, premium video courses, and more.

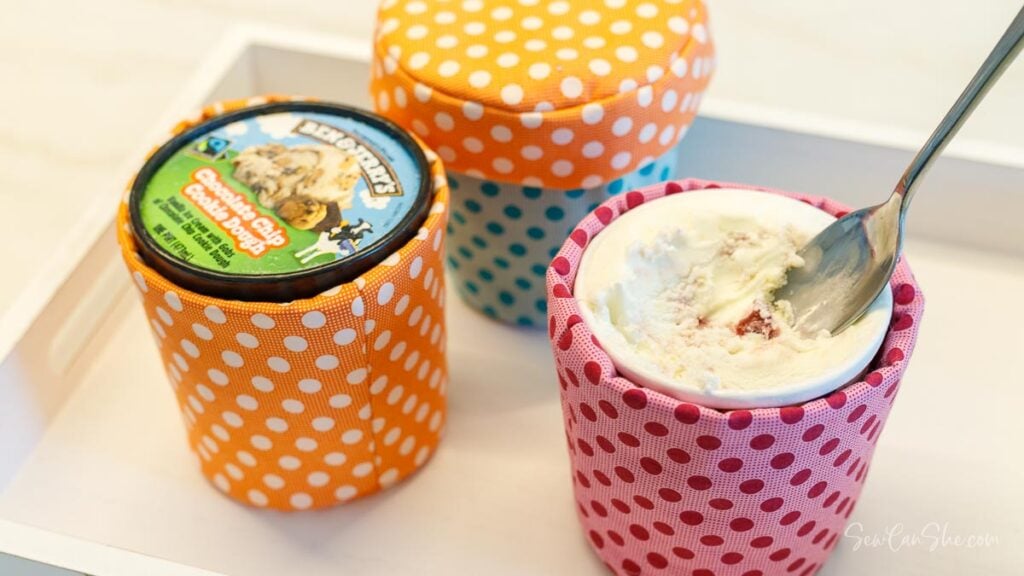
For those who don’t finish the whole pint in one sitting (it happens!), I’ve even included instructions for an optional matching lid. This keeps the entire carton insulated in case you can’t put it away immediately or you have a long drive ahead of you. In any case, it’s super cute!
Homemade ice cream pint cozies are a wonderful beginner sewing project because:
- Only a few supplies are needed and not a lot of fabric – one cozy and the lid can be made from a fat quarter.
- Downloadable and printable pattern templates are provided below.
- You’ll learn how to sew a circle using wonderclips (it’s easier than you think)!
This adorable ice cream cozy would make a great gift too – just include a pint of the recipient’s favorite flavor of ice cream.
Ice Cream Pint Cozy Dimensions
This free pattern includes cutting templates for making the pint cozy plus the rimmed lid. I tested it with several different ice cream pint containers. One brand tried to pass 14 oz off as a pint (even though we all know that a pint is 16 oz), but the cup still fit.
My ice cream container cozy is a soft fabric cup that is approximately 4” tall, 3 1/2” wide at the bottom, and 4 1/2” wide at the top. The lid is approximately 4 3/4” wide and 1 1/2” tall. It fits snugly on the cup when there is a pint of ice cream inside.

Tips for choosing materials for your ice cream pint cozies:
Fabric
I love using quilting cotton because of how easy it is to sew and all the beautiful colors and prints available. As I mentioned before, this sewing project is happily fat quarter friendly! You can make one cup and one lid with a single fat quarter and a bit leftover. I used fat quarters of Tilda’s Medium Dots fabric.
Batting
There is a double layer of batting on all sides of the cozy pattern, including the lid. I designed it to be sewn with Insulbrite insulated batting from the Warm company, but there are lots of similar products on the market. I attached the batting to the fabric with spray basting glue. Links to the specific products I used are also included in the materials list.
If insulation to keep your ice cream cold is not very important to you, you could use cotton batting or fusible fleece instead. These would give a very similar look to the project, but without emphasis on keeping the item inside cold.
thread
Polyester thread is my first choice for this project. It’s durable and will glide smoothly through all the layers, including a couple layers of very thin metallic fabric in the batting.
So let’s get started sewing Ice Cream Pint Cozies!
To make one Ice Cream Pint Cozy, you will need:
- 1/4 yard of fabric – a fat quarter works too
- 1/4 yard of 45” wide insulated batting (such as Insulbrite from the Warm company)
- polyester thread
- spray basting glue (such as Odif 505 or SpraynBond Basting Spray)
- a fabric marking pen (such as these water erasable sewing marking pens)
- sewing pins and wonderclips (wonderclips make sewing circles a breeze!)
- cutting tools: scissors, rotary cutter, acrylic ruler, and cutting mat
- the downloadable pattern templates available below:
Be sure to print the templates at 100% – do not enlarge or reduce the size. There is a 1” square on the first page so you can check. There are 3 templates included. The lid rim is cut from measurements.
Cutting Out the Cozy:
Cutting instructions are for a single ice cream cozy. Optional lid instructions are provided separately.
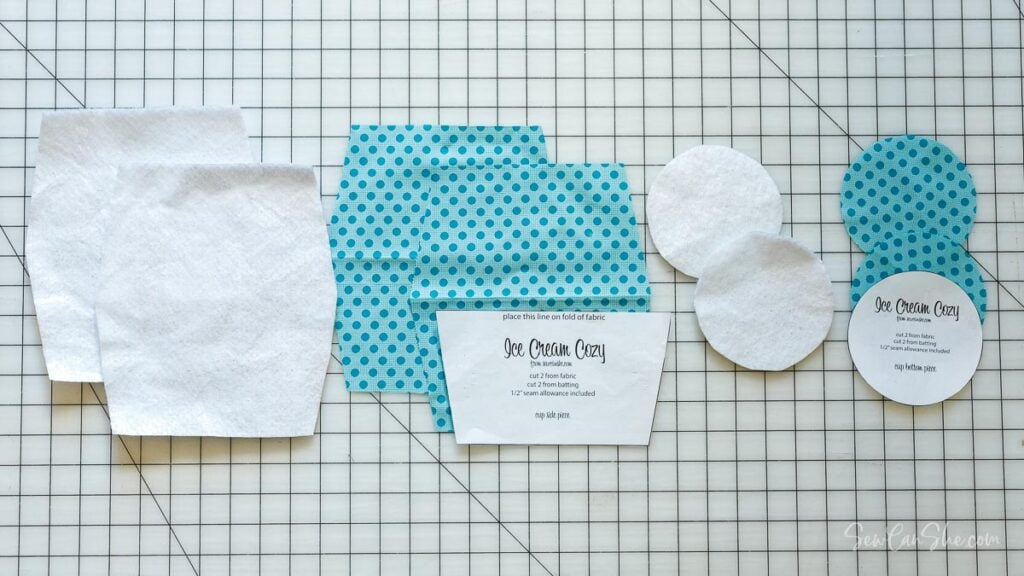
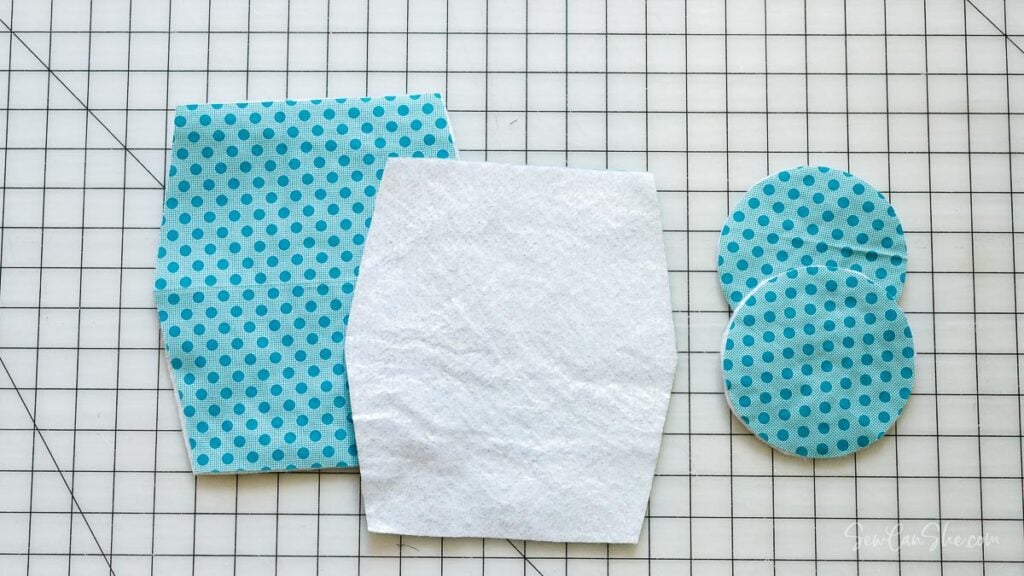
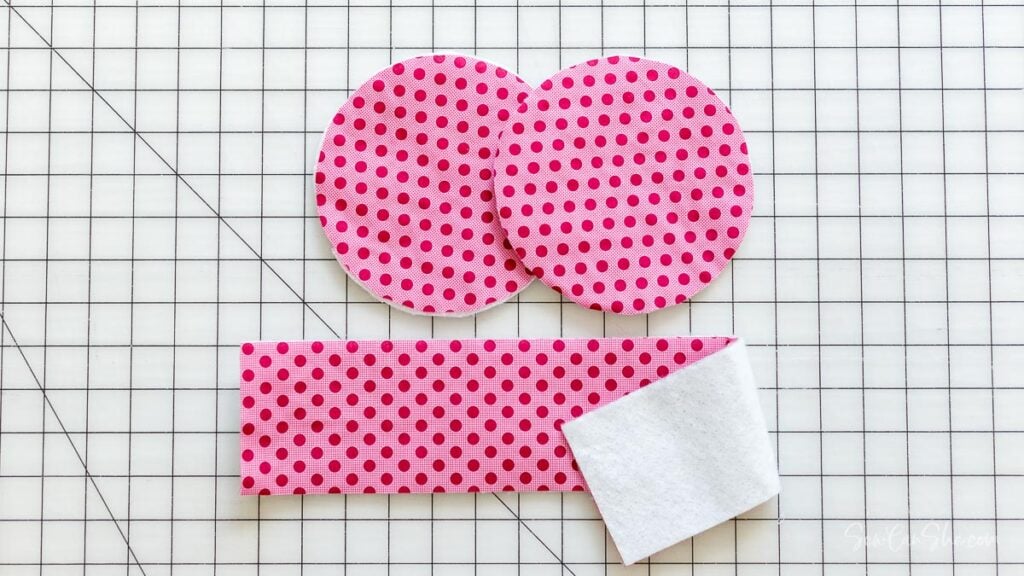
1. From cotton fabric, cut
- 2 from the side piece template (cut on the fold)
- 2 from the cup bottom piece template
2. From insulated batting, cut:
- 2 from the side piece template (cut on the fold)
- 2 from the cup bottom piece template
Cutting Out the Optional Lid:
1. From cotton fabric, cut
- 1 strip 3 1/2” x 15 3/4”
- 2 from the optional lid piece template
2. From insulated batting, cut:
- 1 strip 3 1/2” x 15 3/4”
- 2 from the optional lid piece template
Sewing Instructions
Instructions for the cup are first, then instructions for the optional lid.
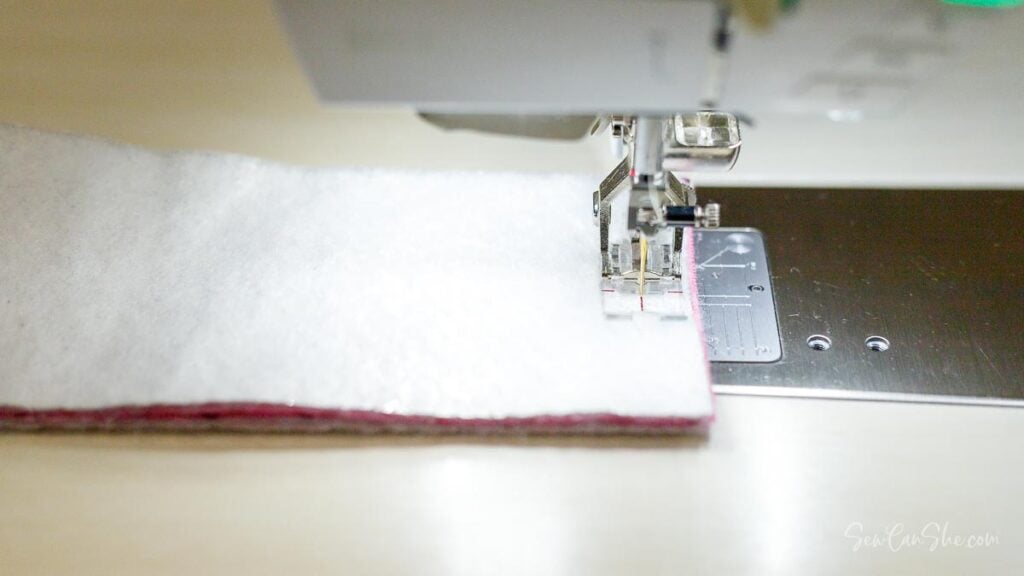
Attach the Insulated Batting Pieces to the Fabric Pieces
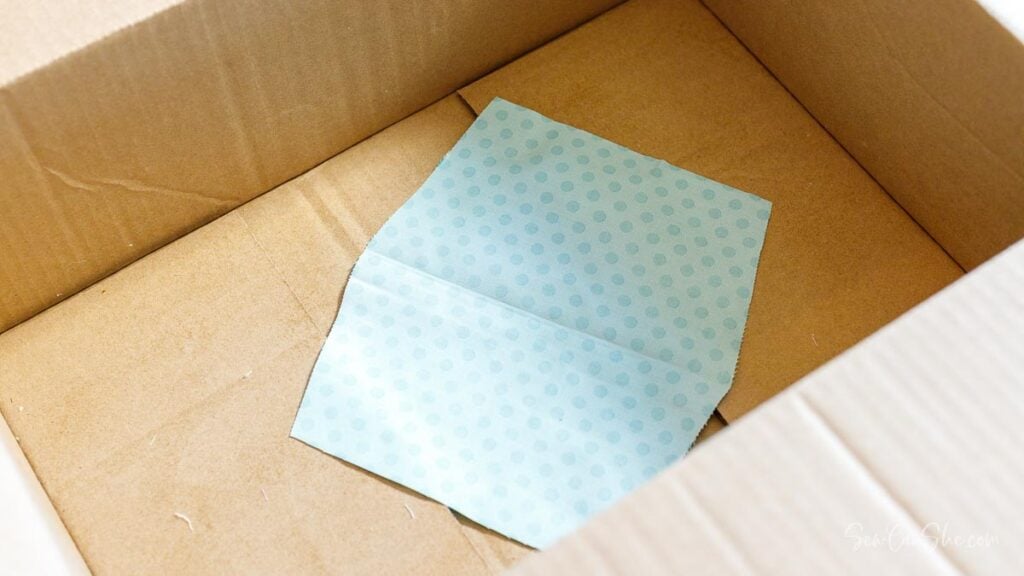
Tip: I keep an old Amazon box handy for all my spray glue projects. It helps to keep the mess contained.
1. Spray the wrong side of all of the fabric pieces with 505 or SpraynBond. Smooth each one over a matching piece of insulated batting.
2. Repeat for all 4 pieces.
Tips:
- It doesn’t matter which side of the insulated batting that you use. They both work the same.
- If you don’t have spray basting glue, you can place the pieces together and baste 1/4” from edges with a long basting stitch.
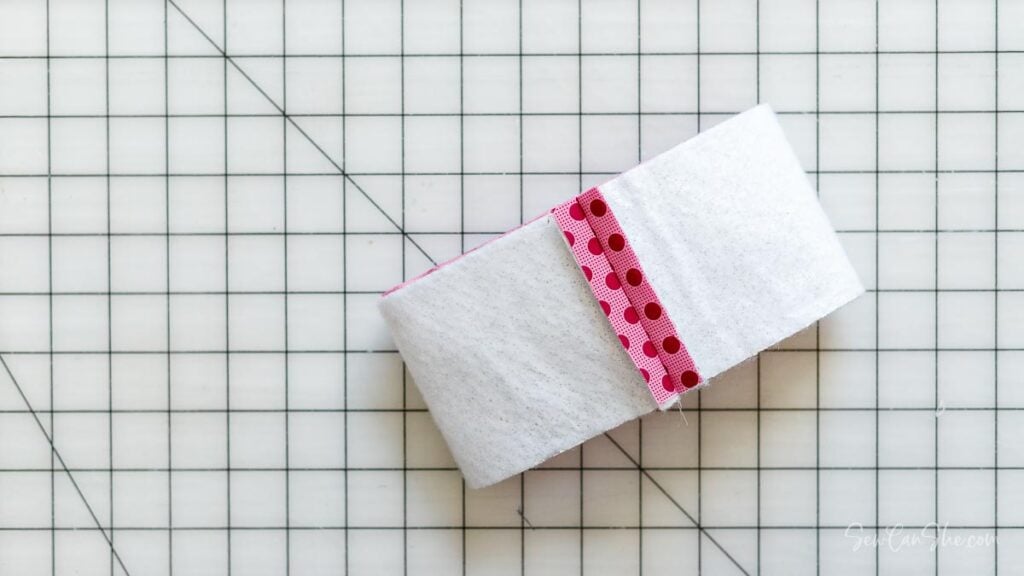
Sew the Side Pieces Together
Use a 1/2” seam allowance.
1. Place the two cup side pieces right sides together and pin along the side edges.

2. Use the fabric marking pen to make two marks along one side: one mark that is 1” above the bottom edge and one mark that is 1” below the ‘point’ in the middle of the piece. The distance between the marks should be about 2 1/2”. This will help you leave an opening for turning.

3. Sew the pieces together along the side edges only using a 1/2” seam allowance.
Do not sew between the two marks that you made – this will leave an opening for turning later. Be sure to backstitch everywhere you start and stop sewing.
4. Press the seams open.
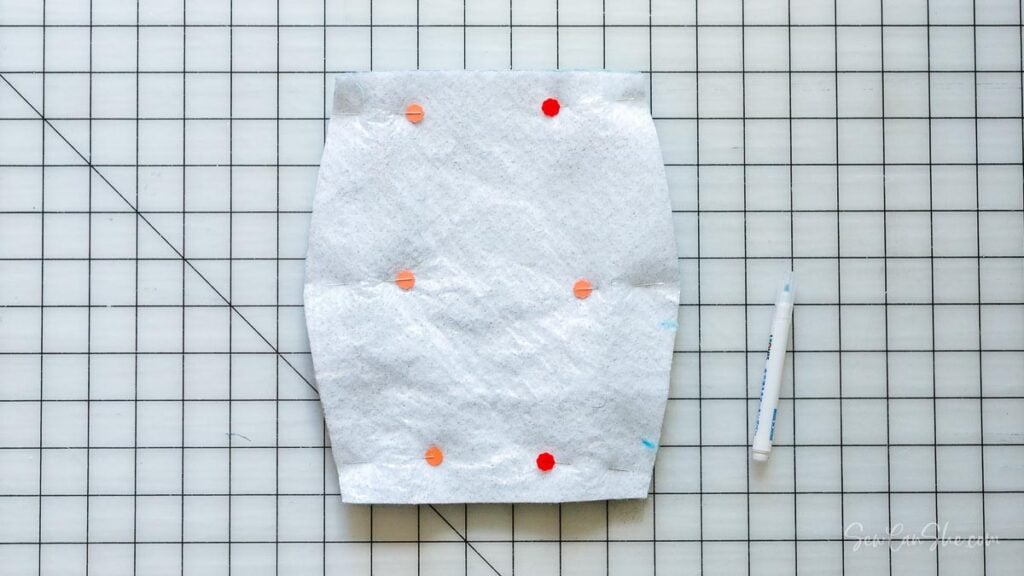
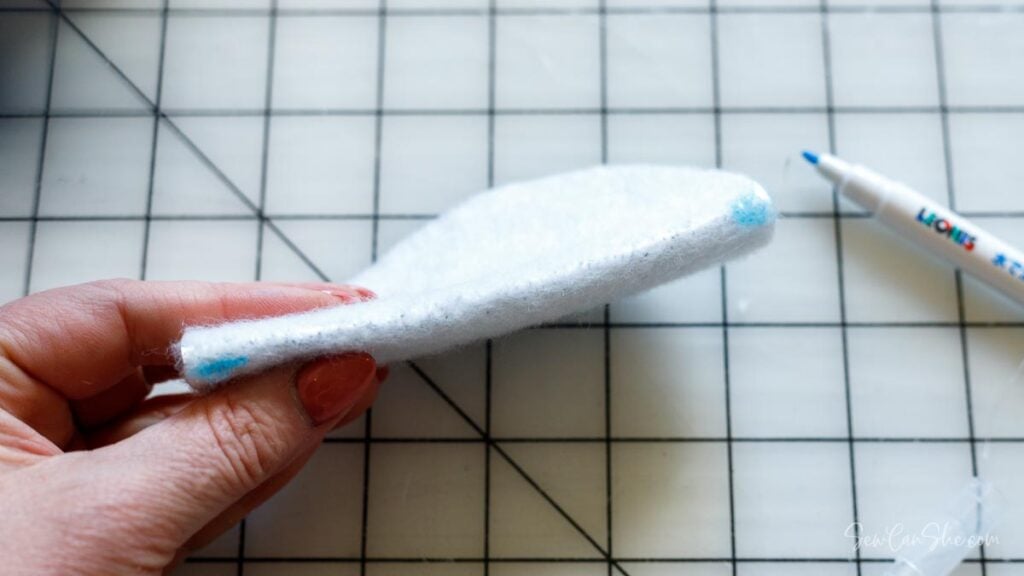
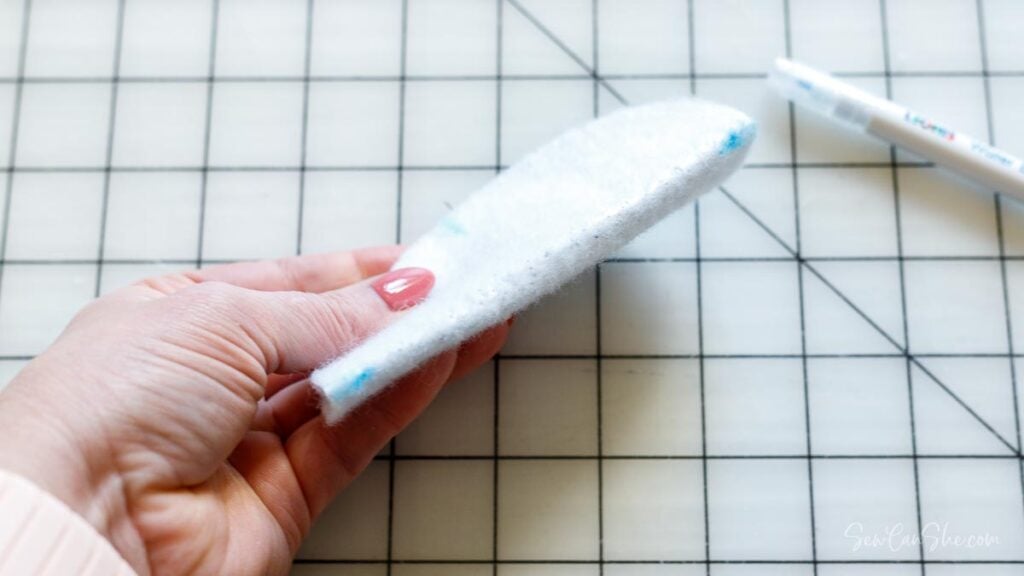
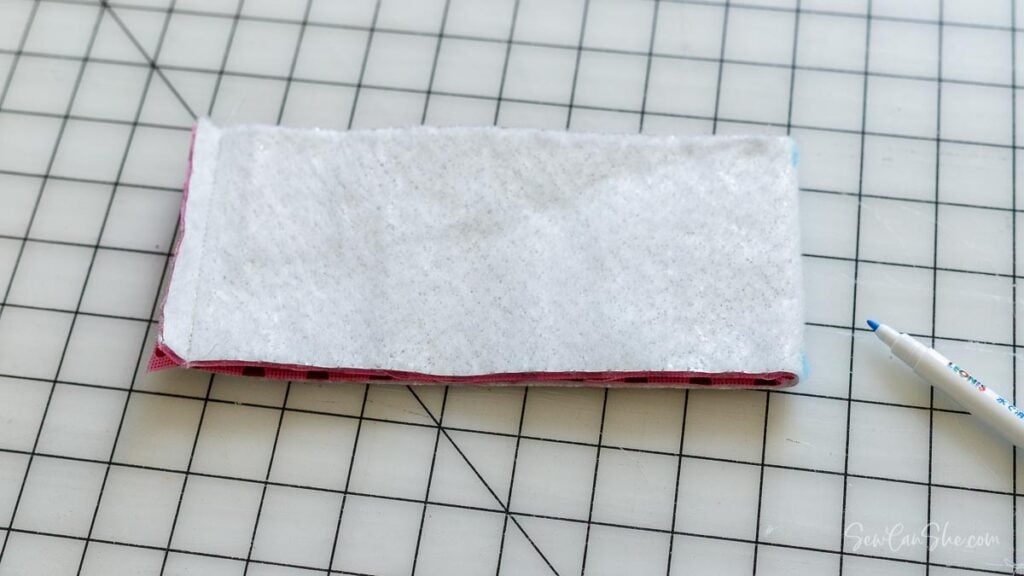
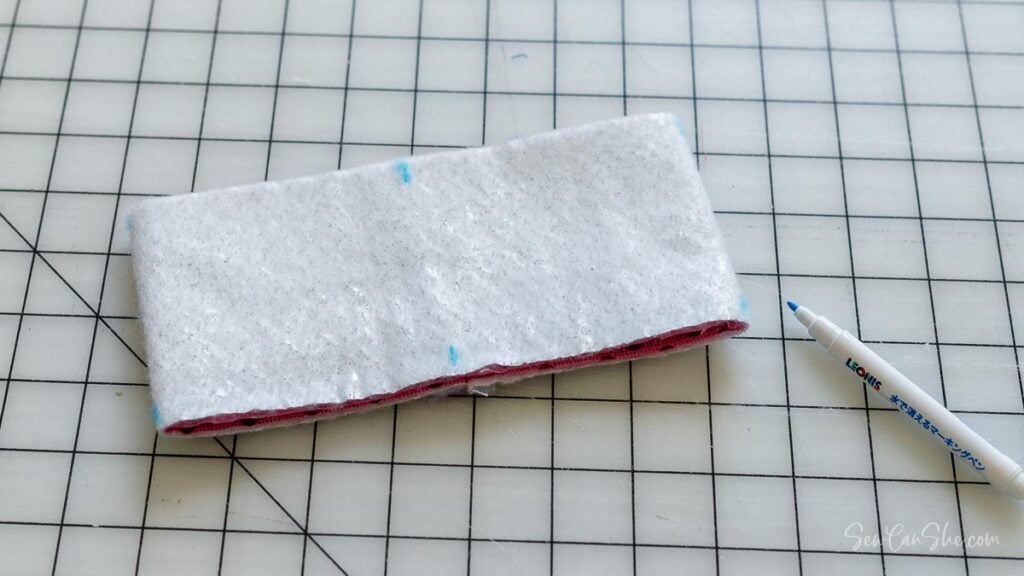
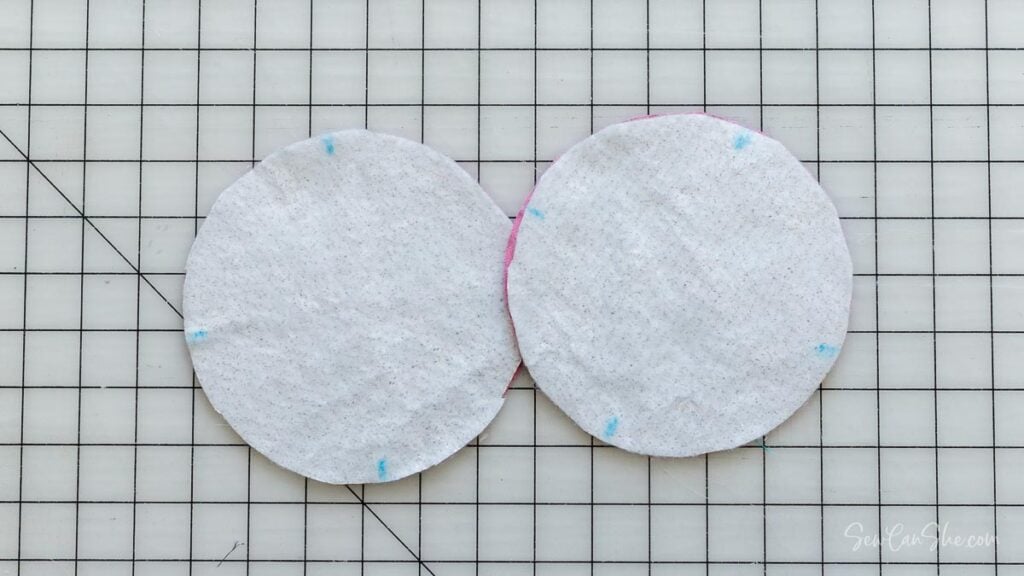
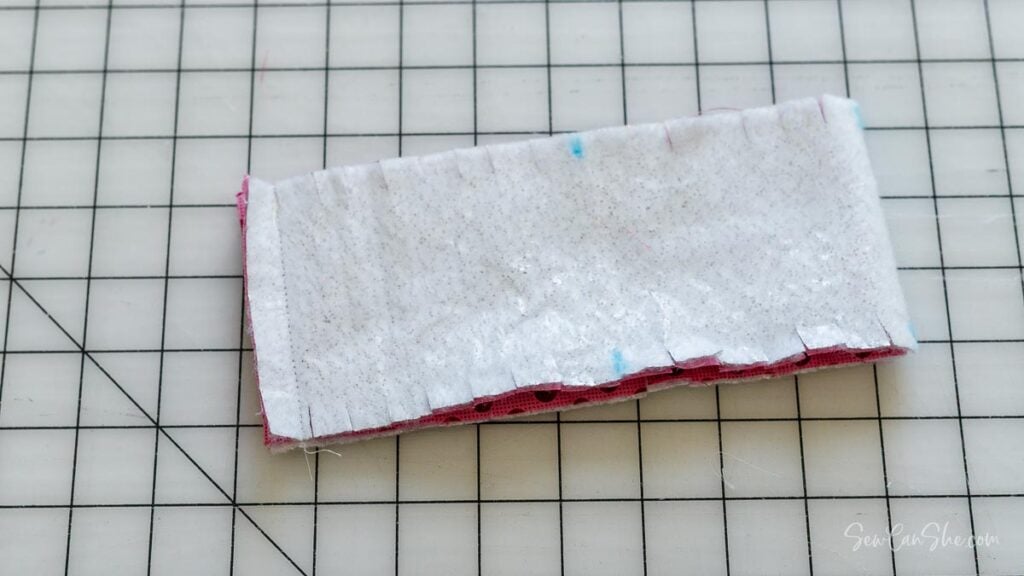
Mark Each Piece in Quarters and Snip the Straight Edges
1. To mark the the side piece in quarters, flatten the piece with the seams together. Then use the fabric marking pen to mark the fold on each side.
Repeat on both ends.
2. To mark the round cup bottom pieces in quarters, fold each one in half like a taco. Then mark the ends at the fold.
Re-fold it again with the marks you just made now matching. Mark the ends of the fold again.
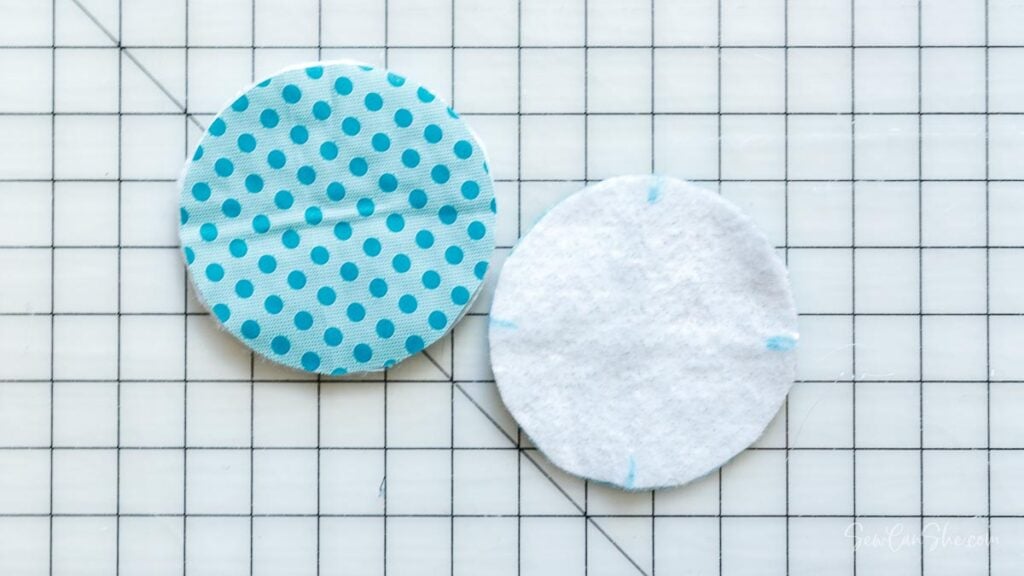
3. Repeat for both pieces.
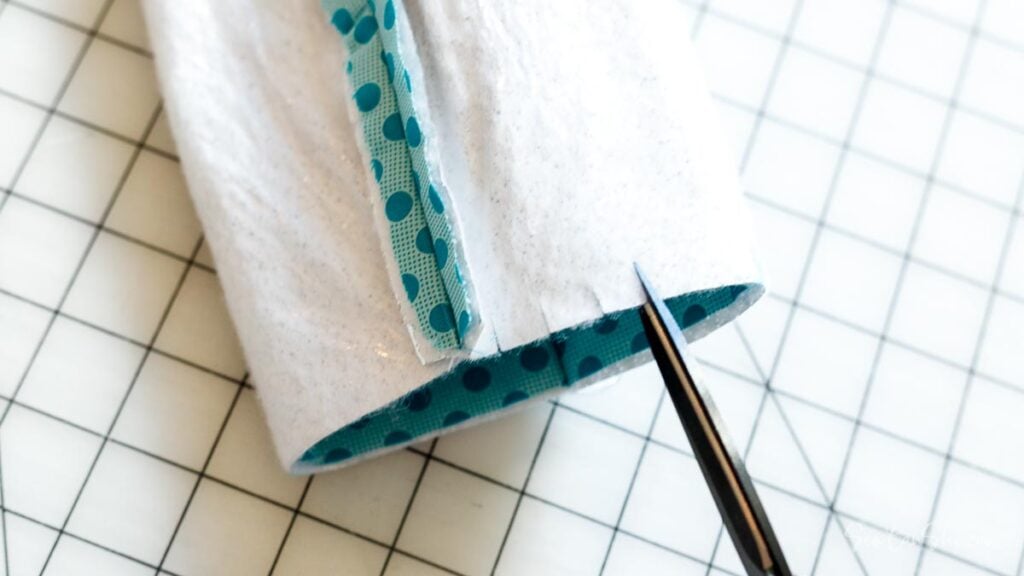
4. Use sharp scissors to make 3/8” snips into the seam allowance along the straight edges of the side piece (both ends). The the snips should be about 1/2” apart. This will help you sew the straight edges to the circles.
Sew the Ice Cream Cozy Together
Use a 1/2” seam allowance.
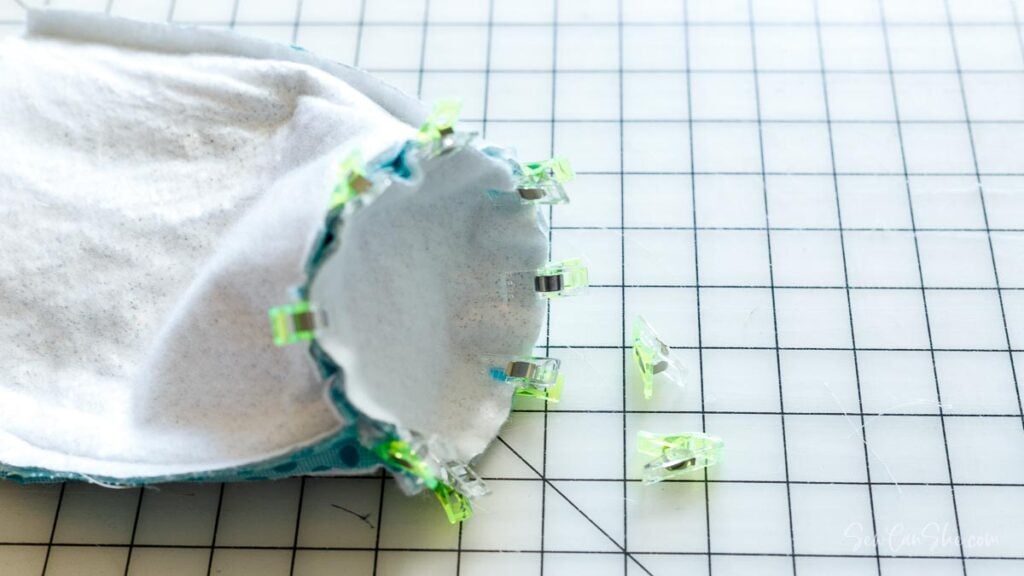
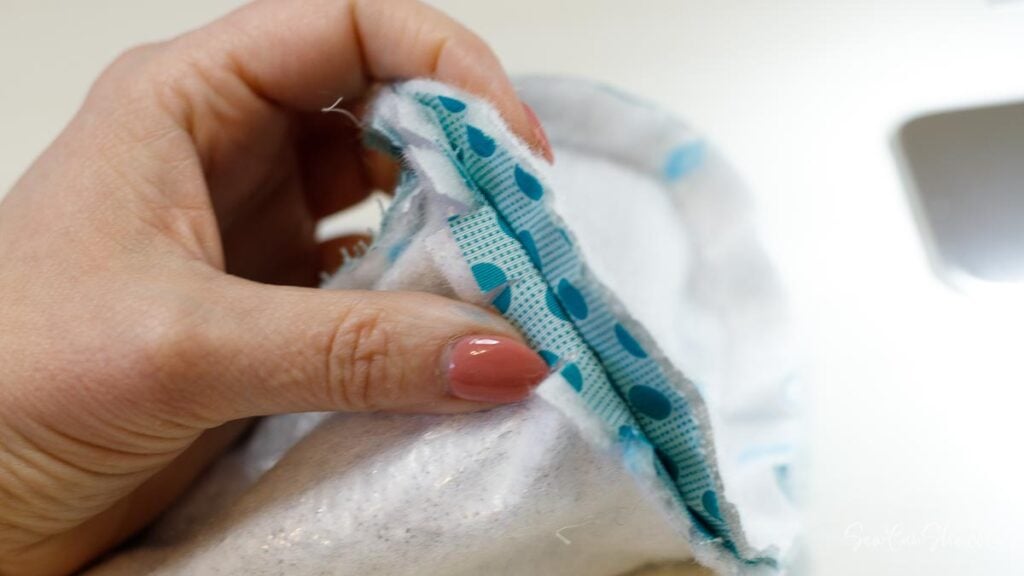
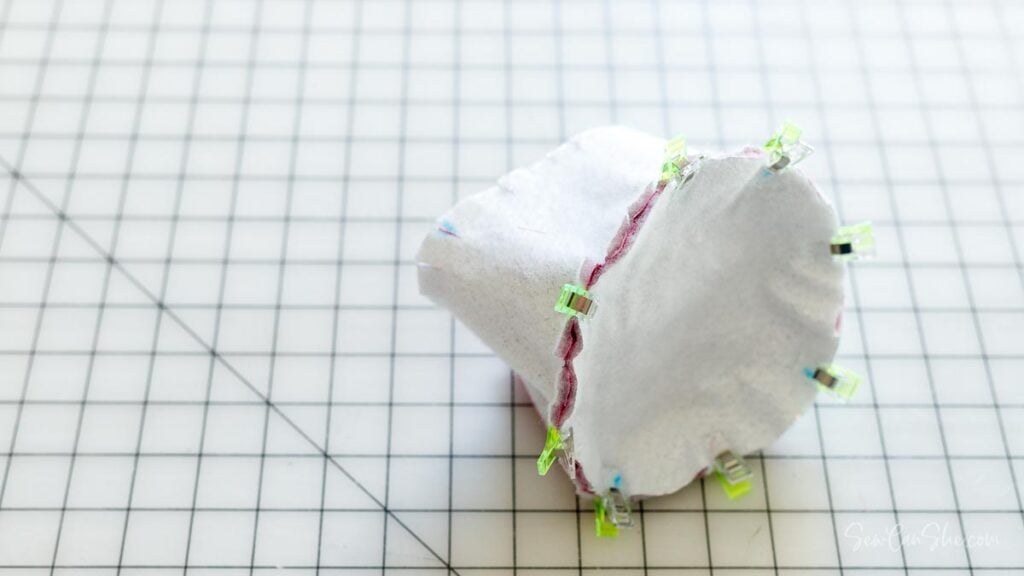
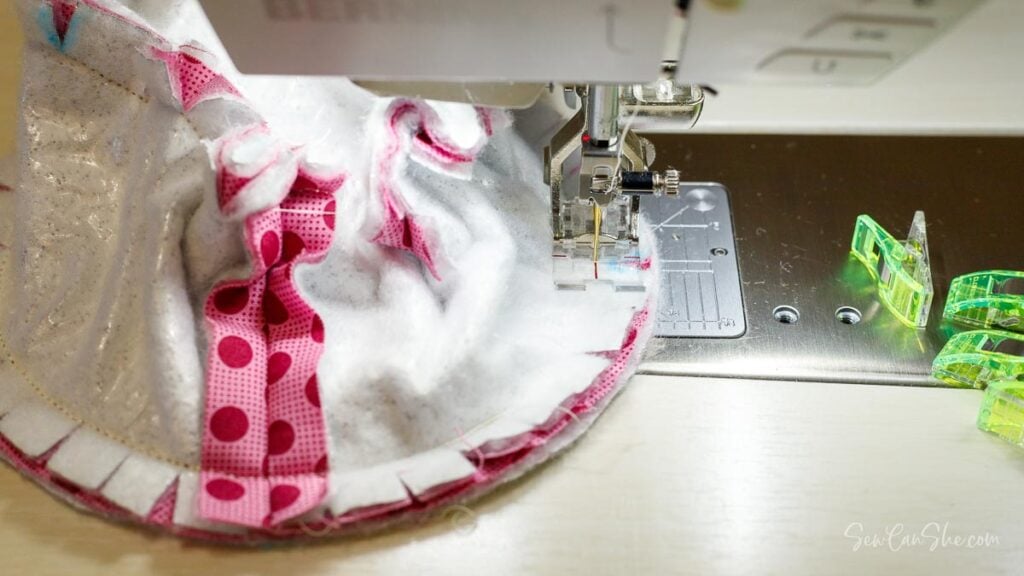
1. Use wonderclips to clip one of the circle pieces to one of the openings on the side piece. Match each quarter mark and place a clip there. Then work your way around lining up the raw edges and placing clips in between each of the quarter marks. Use at least 8 clips.
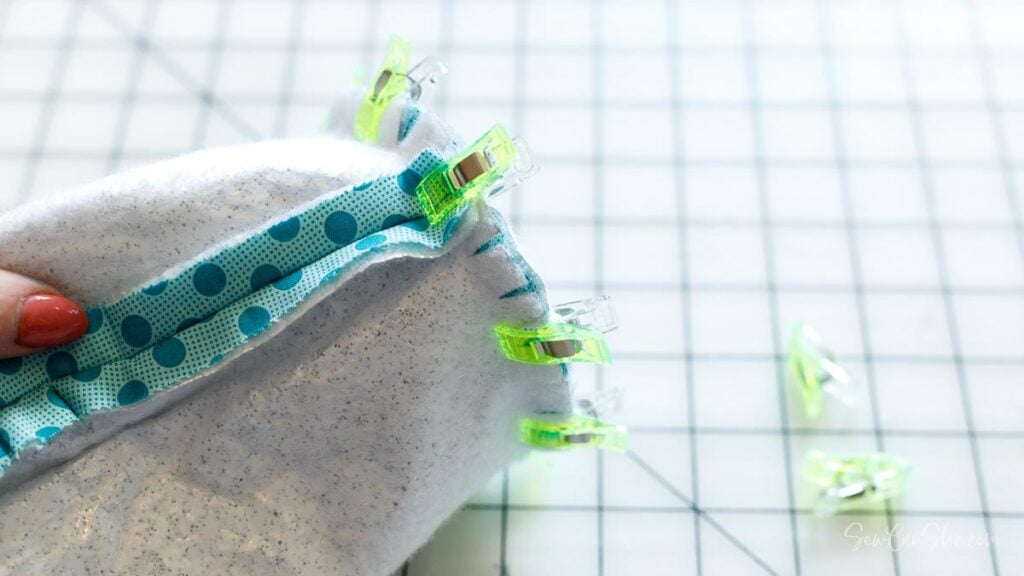
The top of the clips should be showing on the side piece. That’s because you will be sewing with the circle against the bed of your sewing machine.
Fun fact: The distance around the side piece matches the circle at the seam allowance – 1/2” away from the edge of the circle. That’s why we needed to cut snips into the straight edge. The material will open at the snips because the outer circumference of the circle is wider than the actual seam that is 1/2” to the left.
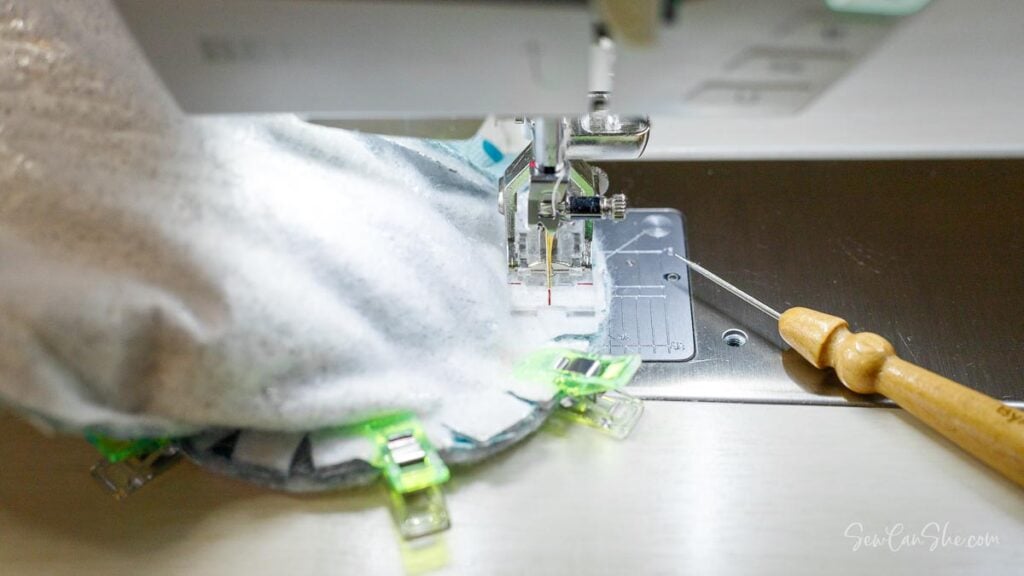
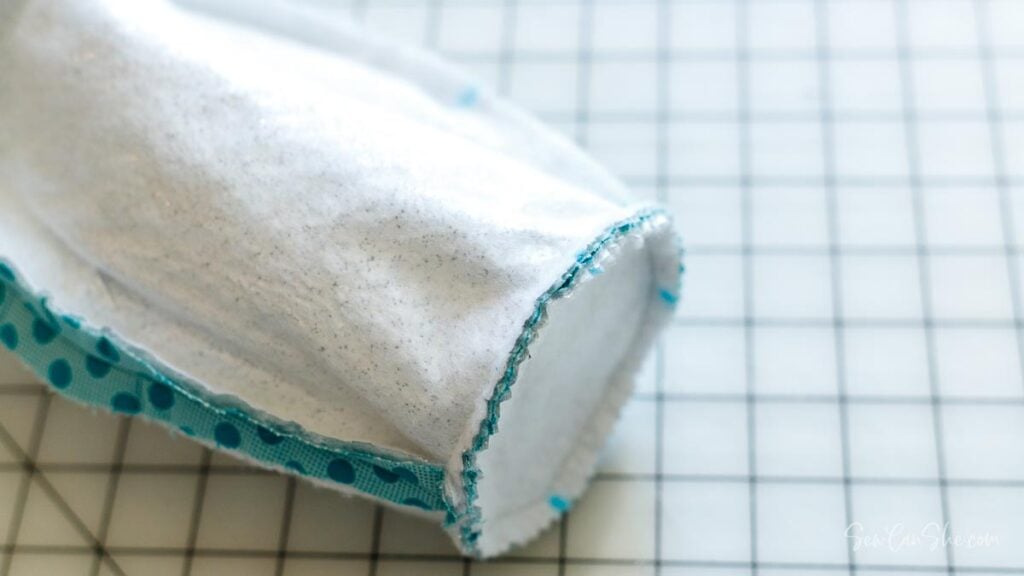
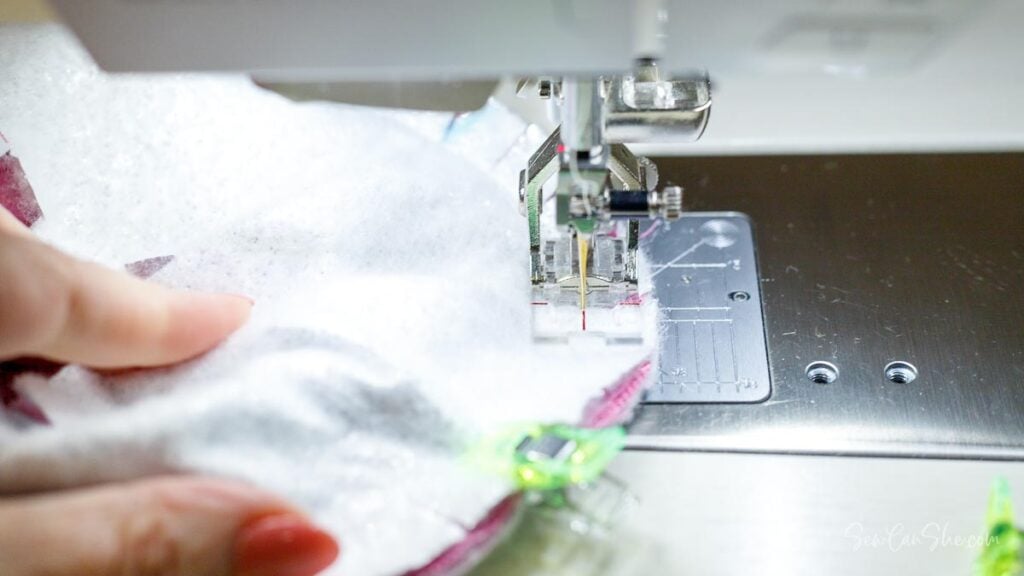
2. Sew all the way around the end of the side piece with a 1/2” seam allowance. You will be sewing just inside the snips. Go slowly and make sure that the raw edges line up as you go and you are sewing a smooth curve.
Using a sewing stiletto might help. This sewing stiletto from ByAnnie is my favorite.
Check the seam to make sure that none of those fabric ‘tabs’ made by cutting snips got caught in the seam. If so, unpick and fix them because it will show on the outside of the cozy.
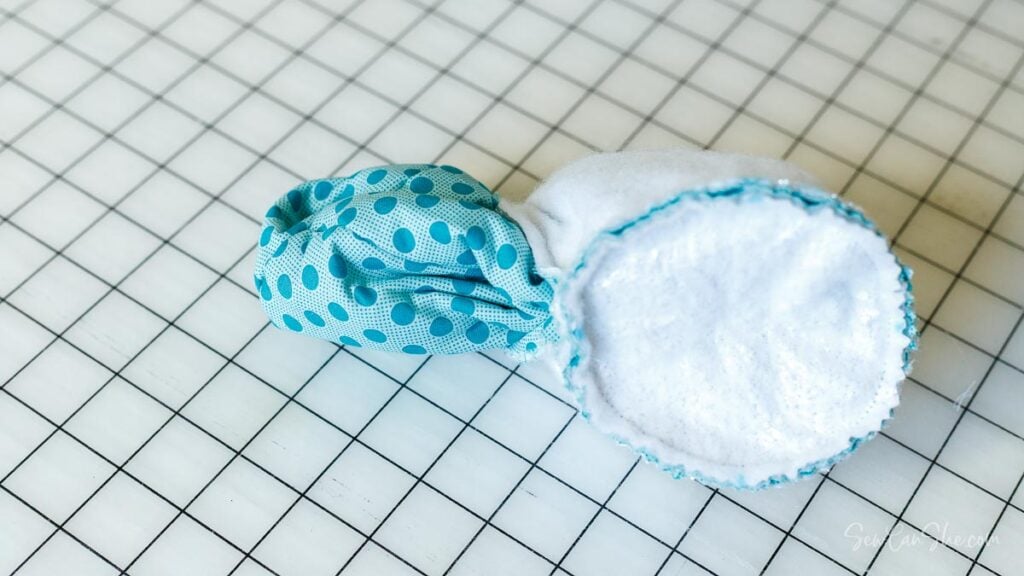
3. Repeat Steps 1-2 to sew the remaining circle piece to the other end of the cozy side piece.
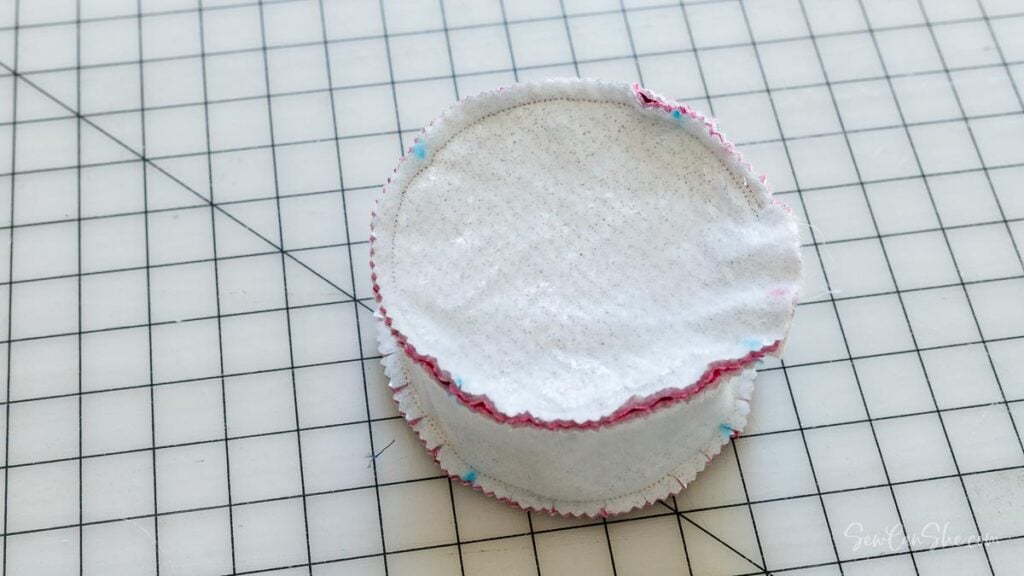
4. Trim the seams at the ends to 1/4”.
Using pinking shears to trim the raw edges is ideal because you can trim a bit closer without worrying about fraying. My favorite pinking shears are from Kai.
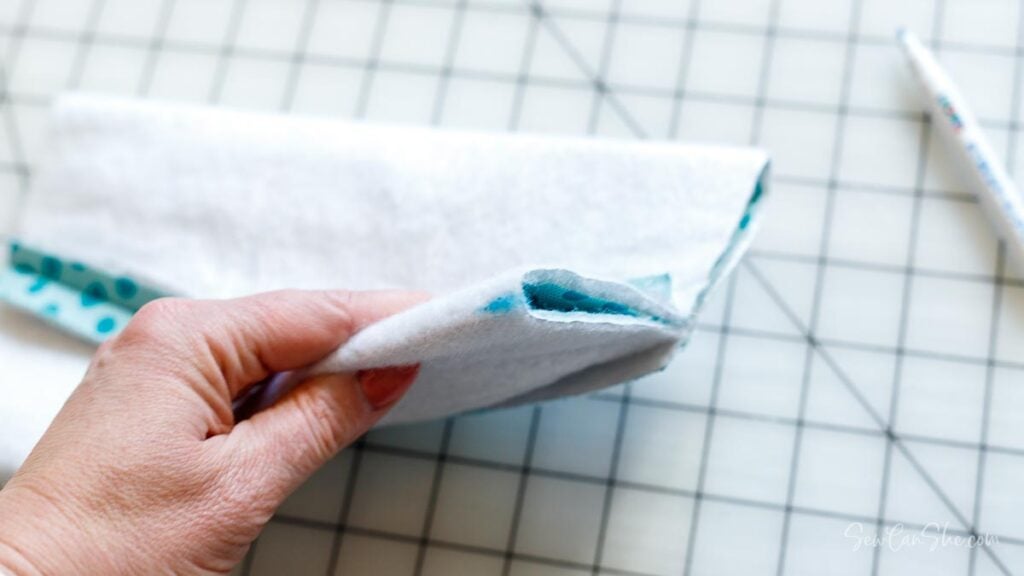
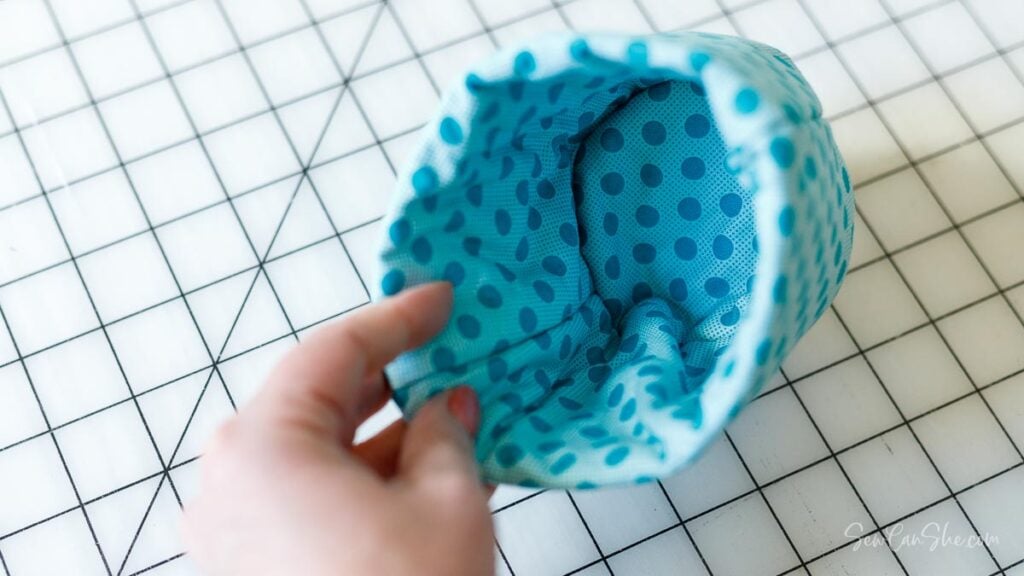
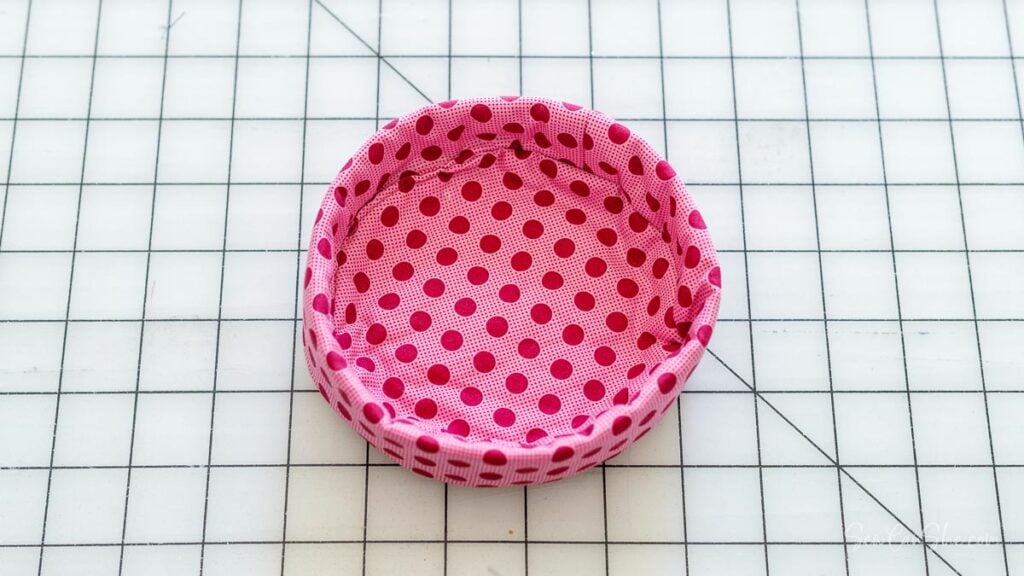
5. Carefully turn the ice cream pint cozy right side out through the opening. Use your fingers to push out the ends completely.
Turn the raw edges at the opening to the inside by 1/2” and press.
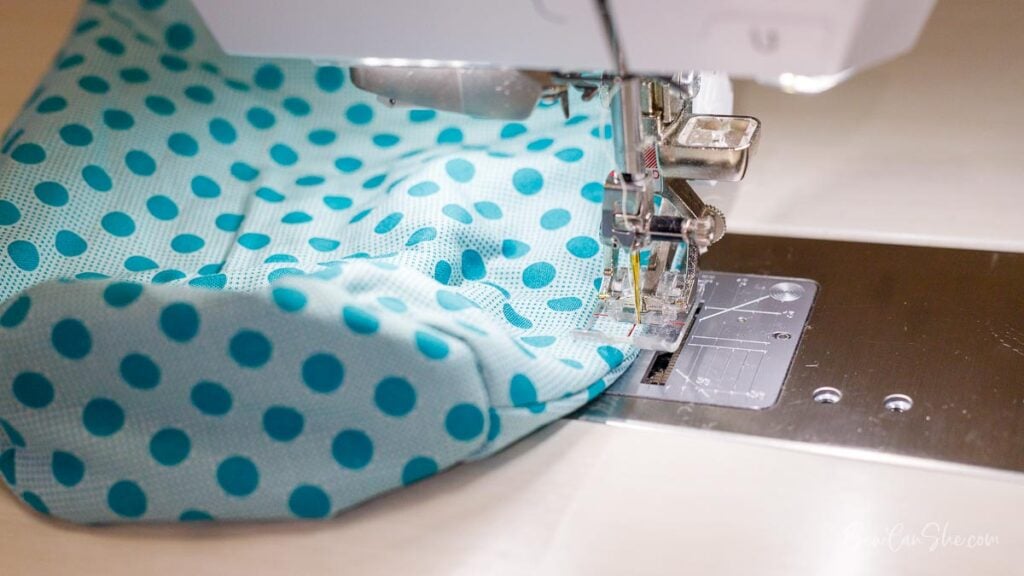
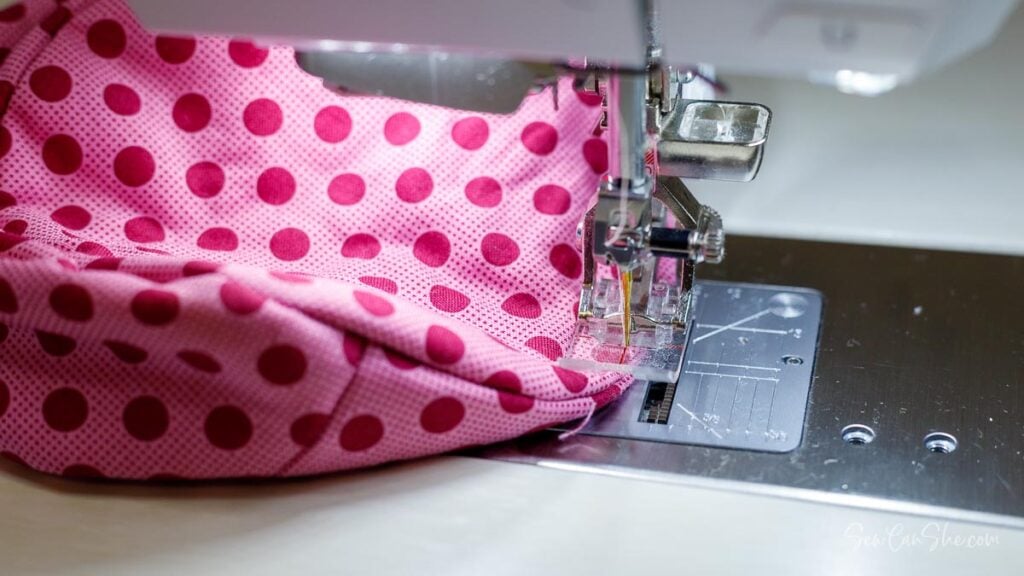
6. Sew the opening closed. You can do this by hand or by machine, sewing close to the edge.
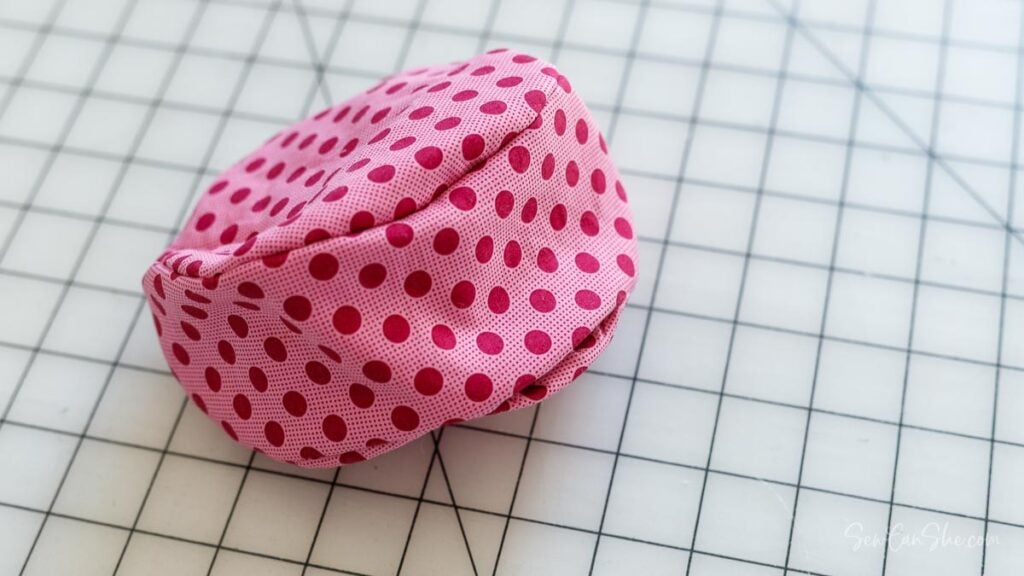
7. Push the inner half of the cozy (the side with the opening sewn shut) to the inside. Use your fingers to smooth the two bottom pieces together and make the sides straight and smooth.
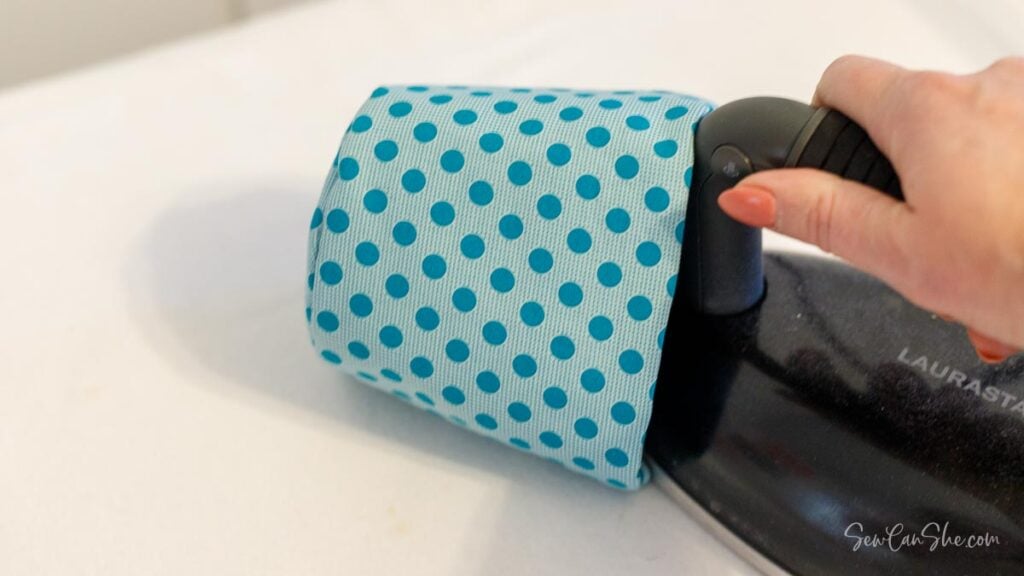
Once the cozy is arranged with 1/2 of the material on the inside, press the sides to make them nice and flat.
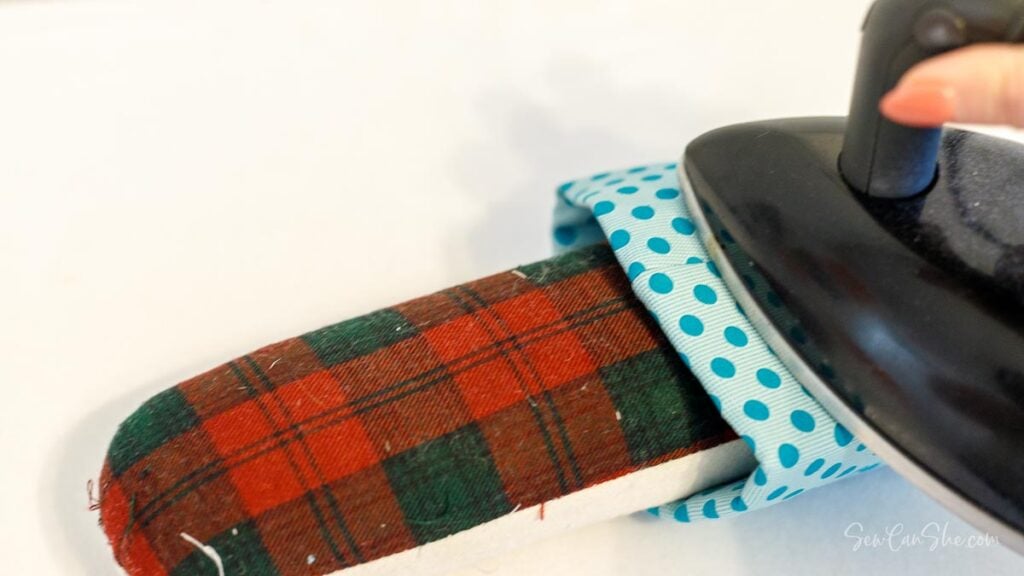
A long narrow tailor’s ham can help with pressing the outside of the cozy.
Now it’s time to make the lid!

Sewing Instructions for an Optional Ice Cream Cozy Lid
Cutting instructions for the lid are found just below the cutting instructions for the cozy.
Attach the Insulated Batting Pieces to the Fabric Pieces
1. Spray the wrong side of all of the fabric pieces with 505 or SpraynBond. Smooth each one over a matching piece of insulated batting. Repeat for all 3 pieces.
Sew the Lid Rim
Use a 1/2” seam allowance.
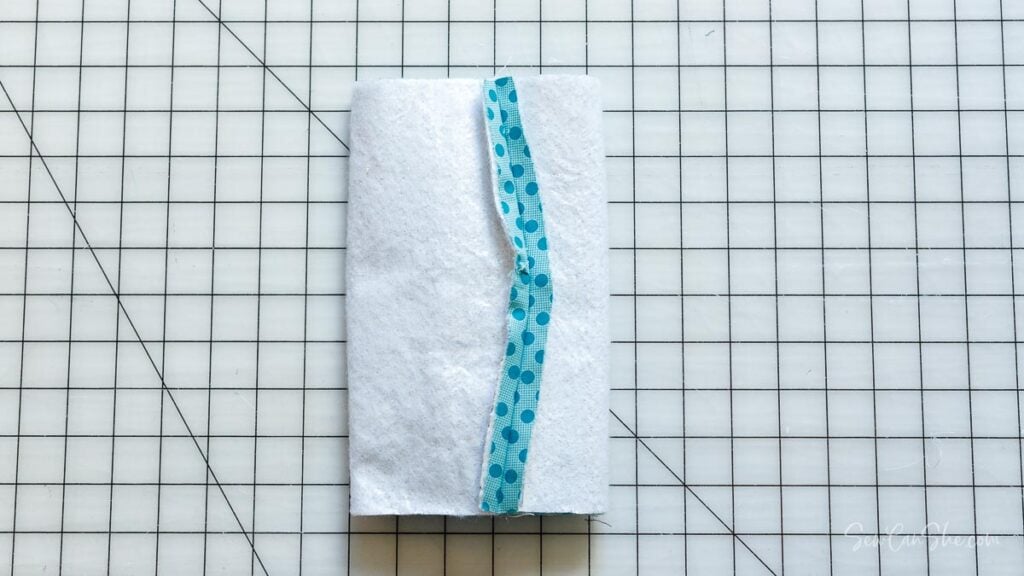
1. Fold the 3 1/2” x 15 3/4” lid rim piece in half, right sides together. Sew the short ends with a 1/2” seam allowance. Be sure to backstitch at the start and end.
2. Press the seam open.
Mark Each Piece in Quarters and Snip the Straight Edges
1. To mark the the rim piece in quarters, flatten the piece with the seams on one end. Then use the fabric marking pen to mark the fold at both raw edges (top and bottom).
2. Refold the rim piece so that the marks you just made are matching the seam. Mark the side folds at the top and bottom. You should now have 3 marks on each raw edge (plus the seam), which marks the piece in quarters.
3. Fold the lid circles in half the same way that you did the bottom of the cozy to mark these pieces in quarters as well.
4. Use sharp scissors to make 3/8” snips into the seam allowance along the straight edges of the lid rim piece (both sides). The the snips should be about 1/2” apart. This will help you sew the straight edges to the circles, as before.
Sew the Lid Together
Use a 1/2” seam allowance.
1. Use wonderclips to clip one of the circle pieces to one of the openings on the rim piece. Match each quarter mark and place a clip there. Then work your way around lining up the raw edges and placing clips in between each of the quarter marks. Use at least 8 clips.

The top of the clips should be showing on the rim piece. That’s because you will be sewing with the circle against the bed of your sewing machine.
2. Sew all the way around with a 1/2” seam allowance. Go slowly and make sure that the raw edges line up as you go and you are sewing a smooth curve.
Check the seam to make sure that none of those fabric ‘tabs’ made by cutting snips got caught in the seam. If so, unpick and fix them because it will show on the outside of the cozy lid.
3. Repeat Steps 1-2 to sew the remaining circle piece to the other side of the lid rim piece. This time, stop sewing before you reach your starting point so that you leave a 2 1/2” opening for turning. Be sure to backstitch at the start and end of your seam.
4. Trim the seams to 1/4”. Trimming with pinking shears is suggested.
5. Carefully turn the cozy lid right side out through the opening. Use your fingers to push the seams out.
Turn the raw edges at the opening to the inside by 1/2” and press.
6. Sew the opening closed. You can do this by hand or by machine, sewing close to the edge.
7. Push the inner half of the lid (the side with the opening sewn shut) to the inside. Use your fingers to smooth the two circle pieces together and make the sides straight and smooth.
Once the lid is arranged with the two circles sticking together, press the sides to make them nice and flat.
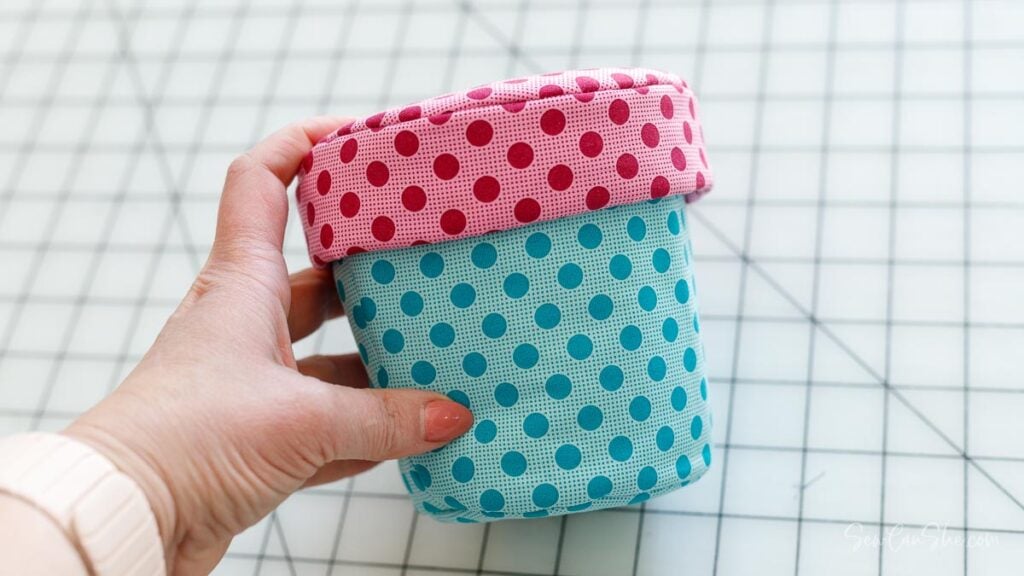
The lid will fit best when there is a pint of ice cream inside. It is designed to fit a little bit snug so it won’t fall off.
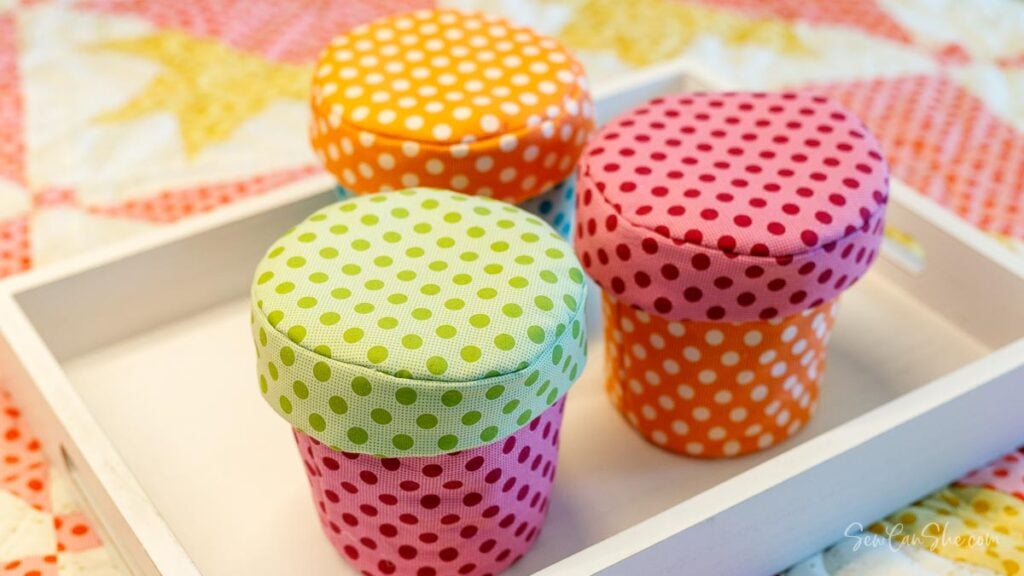
These easy ice cream cozies are so fast and fun to make – you will need to make lots more because all your friends will want one!
As always, I love to see what you make with my tutorials. Please post a picture to Instagram and tag me @sewcanshe or #sewcanshe so I can see!
Are you looking for more food related sewing projects? Check out:
- Fast and fun microwavable bowl cozies
- My easy casserole carrier pattern
- Stay-put dish towels
- 2 Ways to Sew Cloth Napkins
Or see all 55 Free Kitchen Sewing Patterns.
Happy sewing,

ICE CREAM PINT COZY SEWING PATTERN WITH AN OPTIONAL LID
Purchase this pattern in PDF format! The PDF file contains all of the instructions, plus the step by step photos that have been reduced to fit the page nicely with no ads.
Download the file immediately and keep your confirmation email so you can download it again later. Free patterns must be downloaded within 30 days.
Disclosure: some of my posts contain affiliate links. If you purchase something through one of those links I may receive a small commission, so thank you for supporting SewCanShe when you shop! All of the opinions are my own and I only suggest products that I actually use. 🙂